NOTICE: Certain links on this post may earn a commission for Western Hunter Magazine from Amazon or our other affiliate partners when you make a purchase. Thank you for your support.
A Beginners Guide to Reloading
I’ll be the first to admit that getting started in reloading can seem a little daunting if you’ve never done it or been around it. Try not to be discouraged if you haven’t got a full grasp on how it works or if you don’t know exactly what you need. It’s easier than it seems and there are a couple of ways to get you into the game.
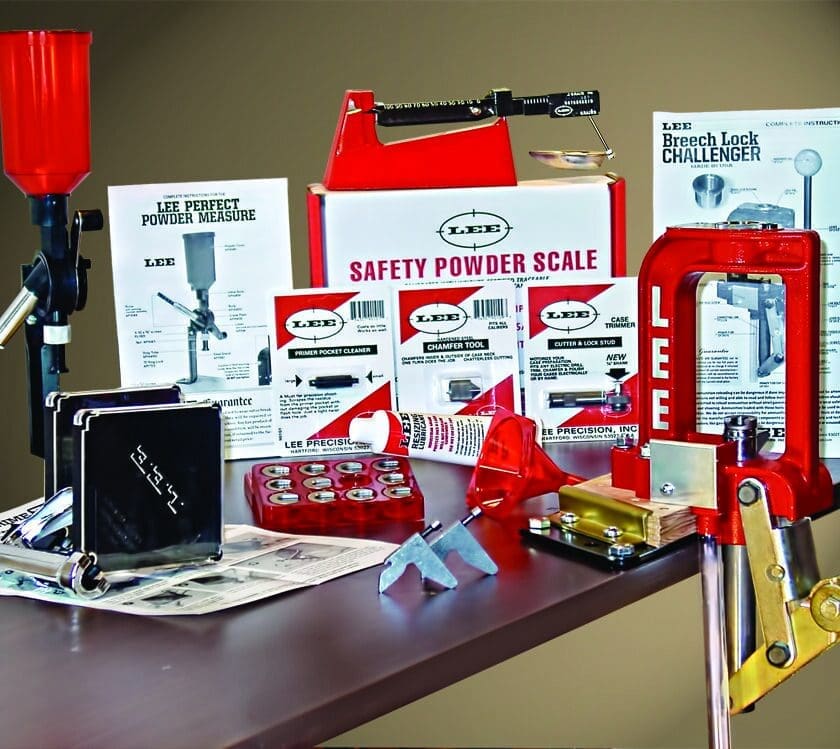
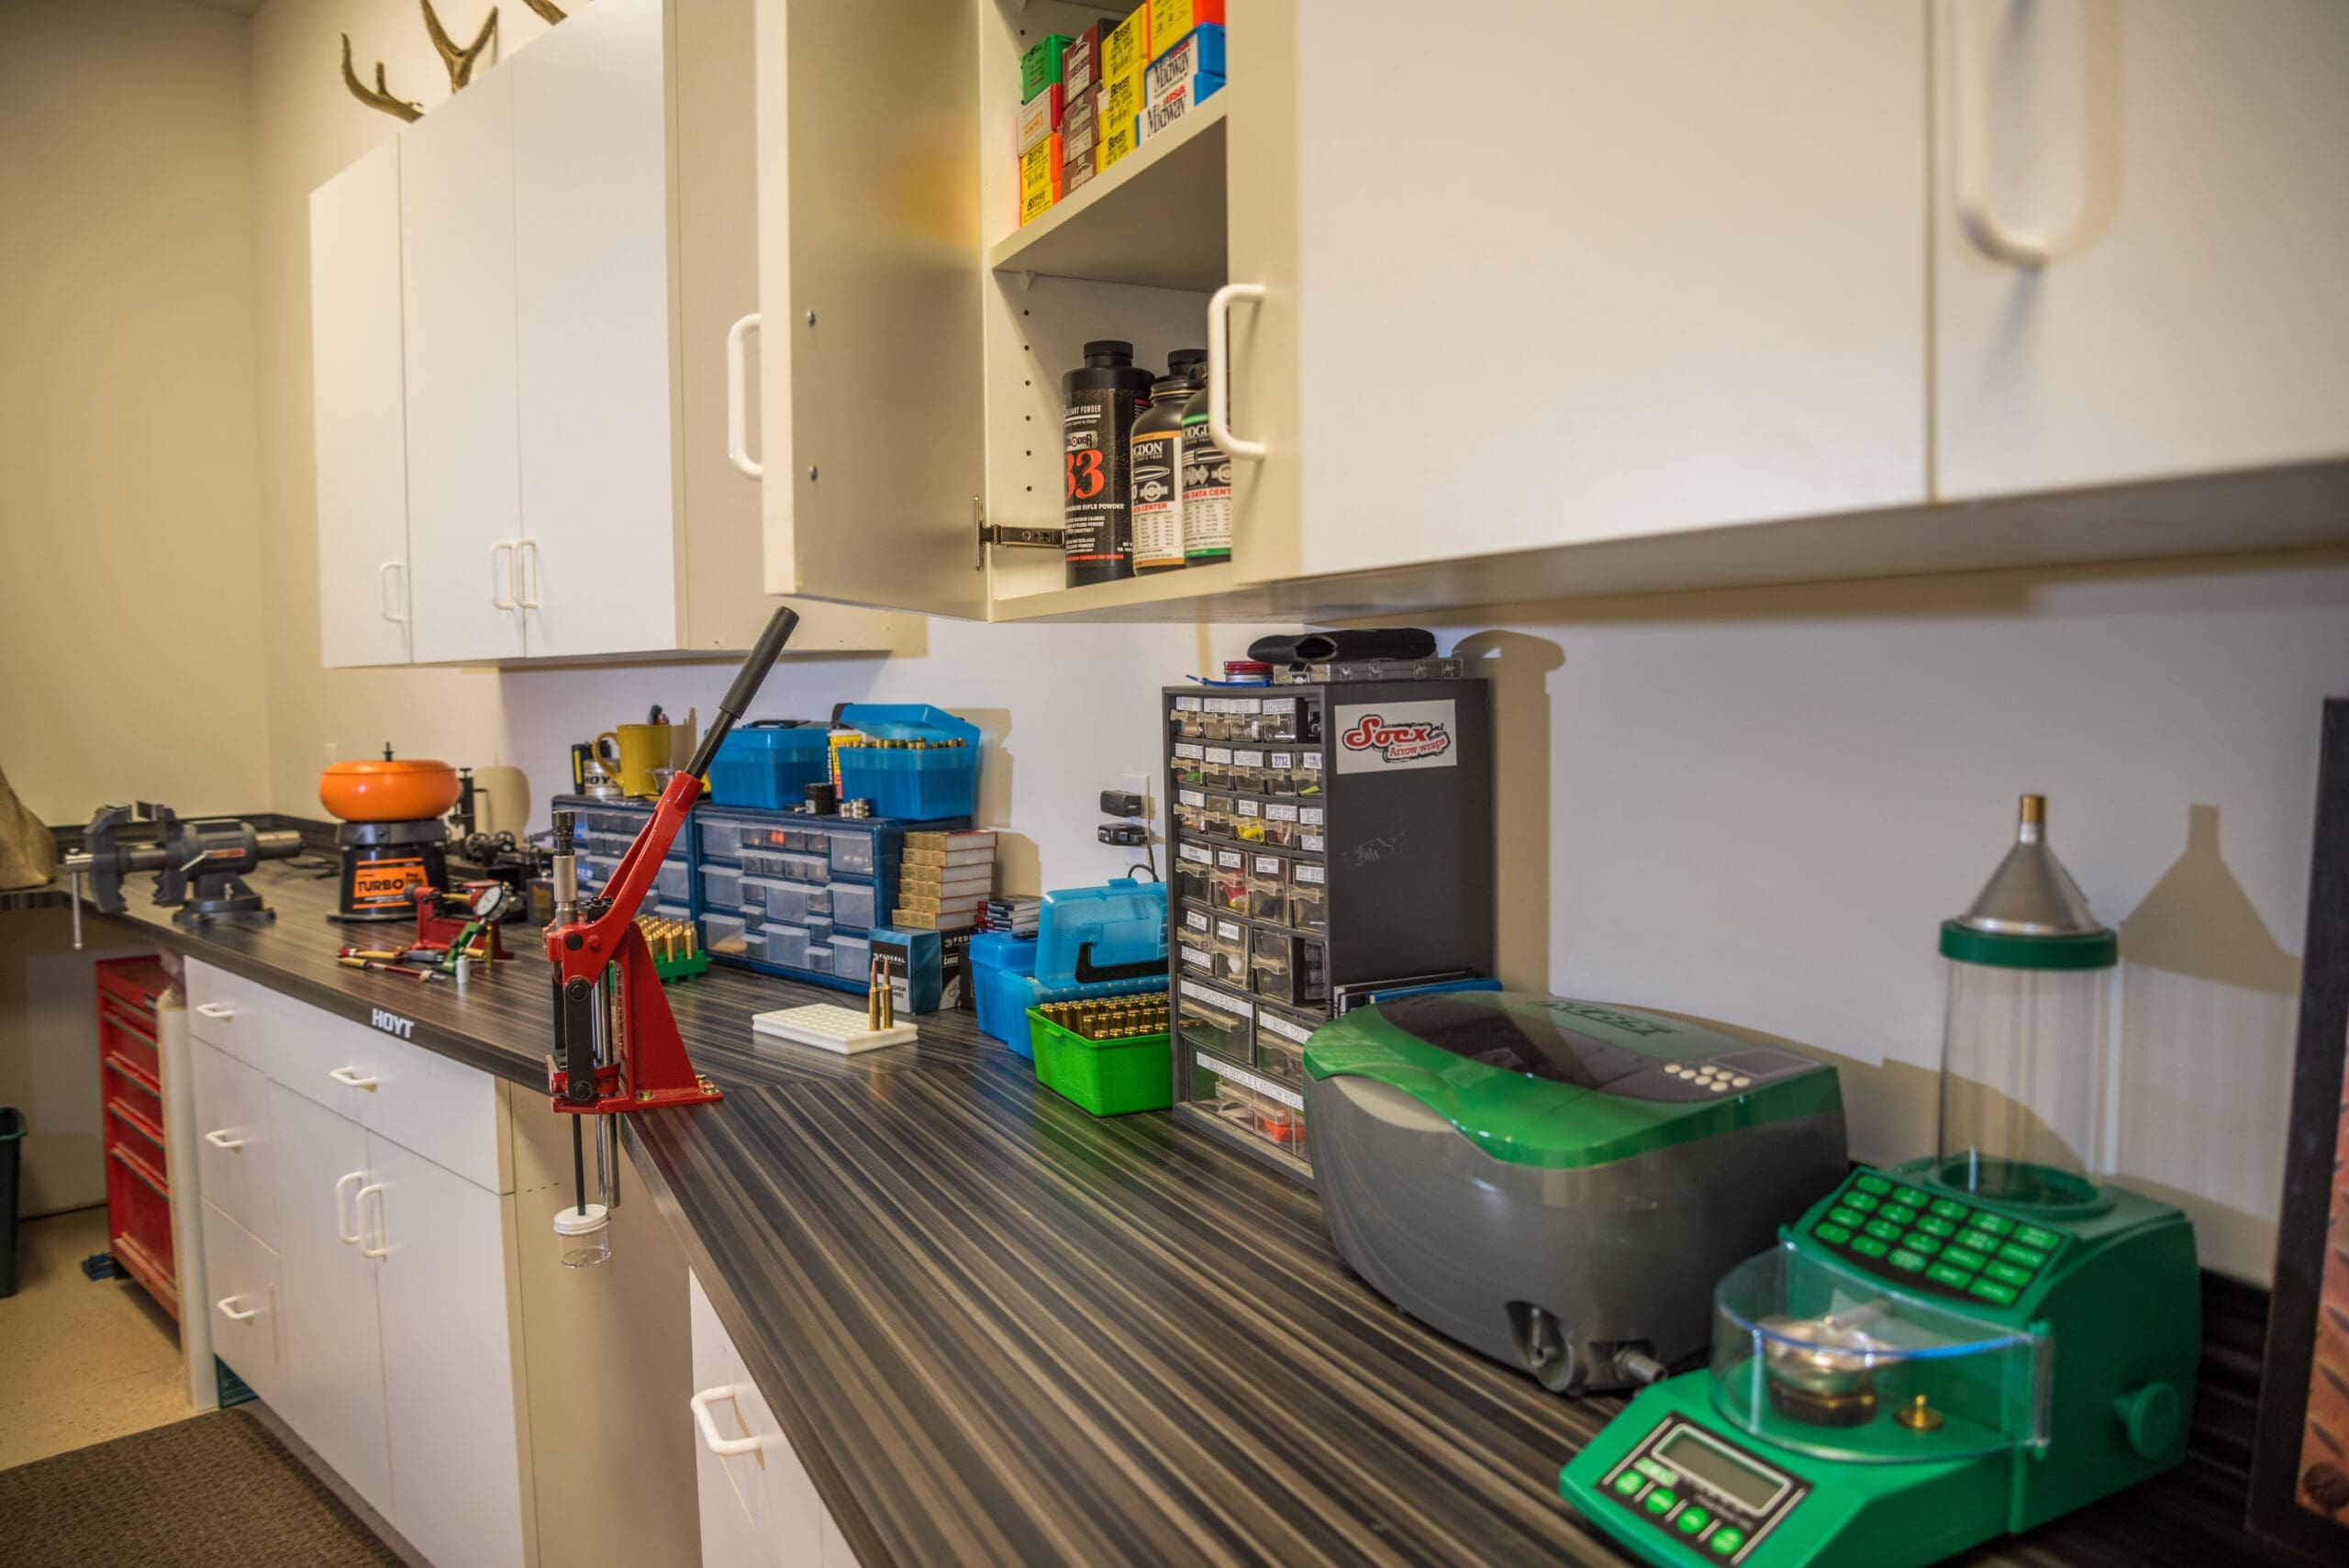
At first glance, a well-equipped loading bench looks like a high-tech laboratory, but the experiments are a lot more fun! The quickest & easiest way to get started is to jump in head-first and just buy a reloading kit from RCBS, Lee, Hornady, or Lyman. The kits will provide most of the essentials with the exception of the dies and shell holders because those are caliber specific. Once you’ve got your dies and the components the instructions should have you cranking out ammo instead of making return trips to the reloading store for those little things you forgot to get or didn’t even know you needed. The drawback to kits is that you don’t get to handpick each and every tool and there’s a good chance you’ll out-grow your kit components at some point. Lee’s Challenger Breech Lock Reloading kit is a pretty remarkable value that comes with everything you need to get started except a set of dies for under $150!
If you don’t think the kit route is right for you, then you’ve got a lot more homework and research to do. Be sure to subscribe to Western Hunter because I discuss a number of reloading topics like Reloading for Better Accuracy, and How to Better Test and Evaluate After Reloading that will help you produce custom, high-precision ammunition for your hunting rifle. Here’s a basic overview of items that a well-equipped reloading bench might include.
Reloading Manual
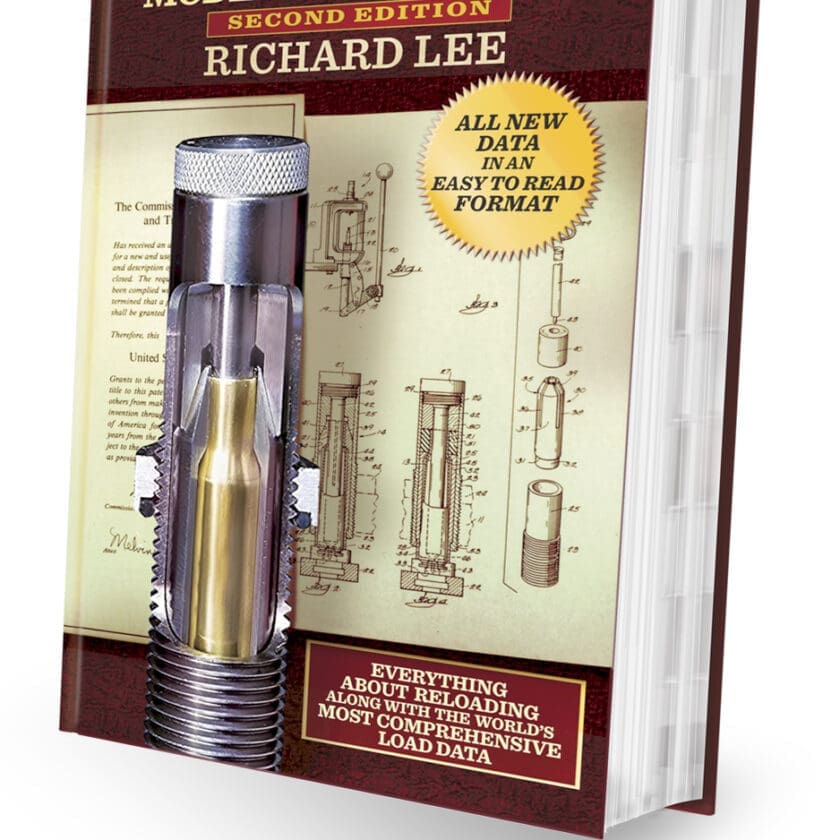
Pick up a reloading manual and familiarize yourself with the basics. Lee, Berger, Hornady, Lyman, and Nosler all publish good reloading guides. A manual is your first data source for starting loads and most of these books provide some basic reloading instruction along with the load recipes. You can also get reliable load data from a number of internet resources. For newer powders and calibers, the manufacturer websites often provide the most current load information. I always cross-reference the powder manufacturer’s website and compare their loads with published loads from at least one more source. Alliant, Hodgdon, IMR, Winchester, Vihtavuori, & Norma distribute most of the smokeless powders you would use for common big-game cartridges. Some of the bullet manufacturers like Nosler also provide data online. Caliber specific, mini reloading manuals called Loadbooks can also be purchased from MidwayUSA for many common cartridges. These books compile load data from several sources into a single reference for a given caliber so they provide a broad cross-section of data that you wouldn’t get with a single manual.
Reloading Tools
Reloading Press
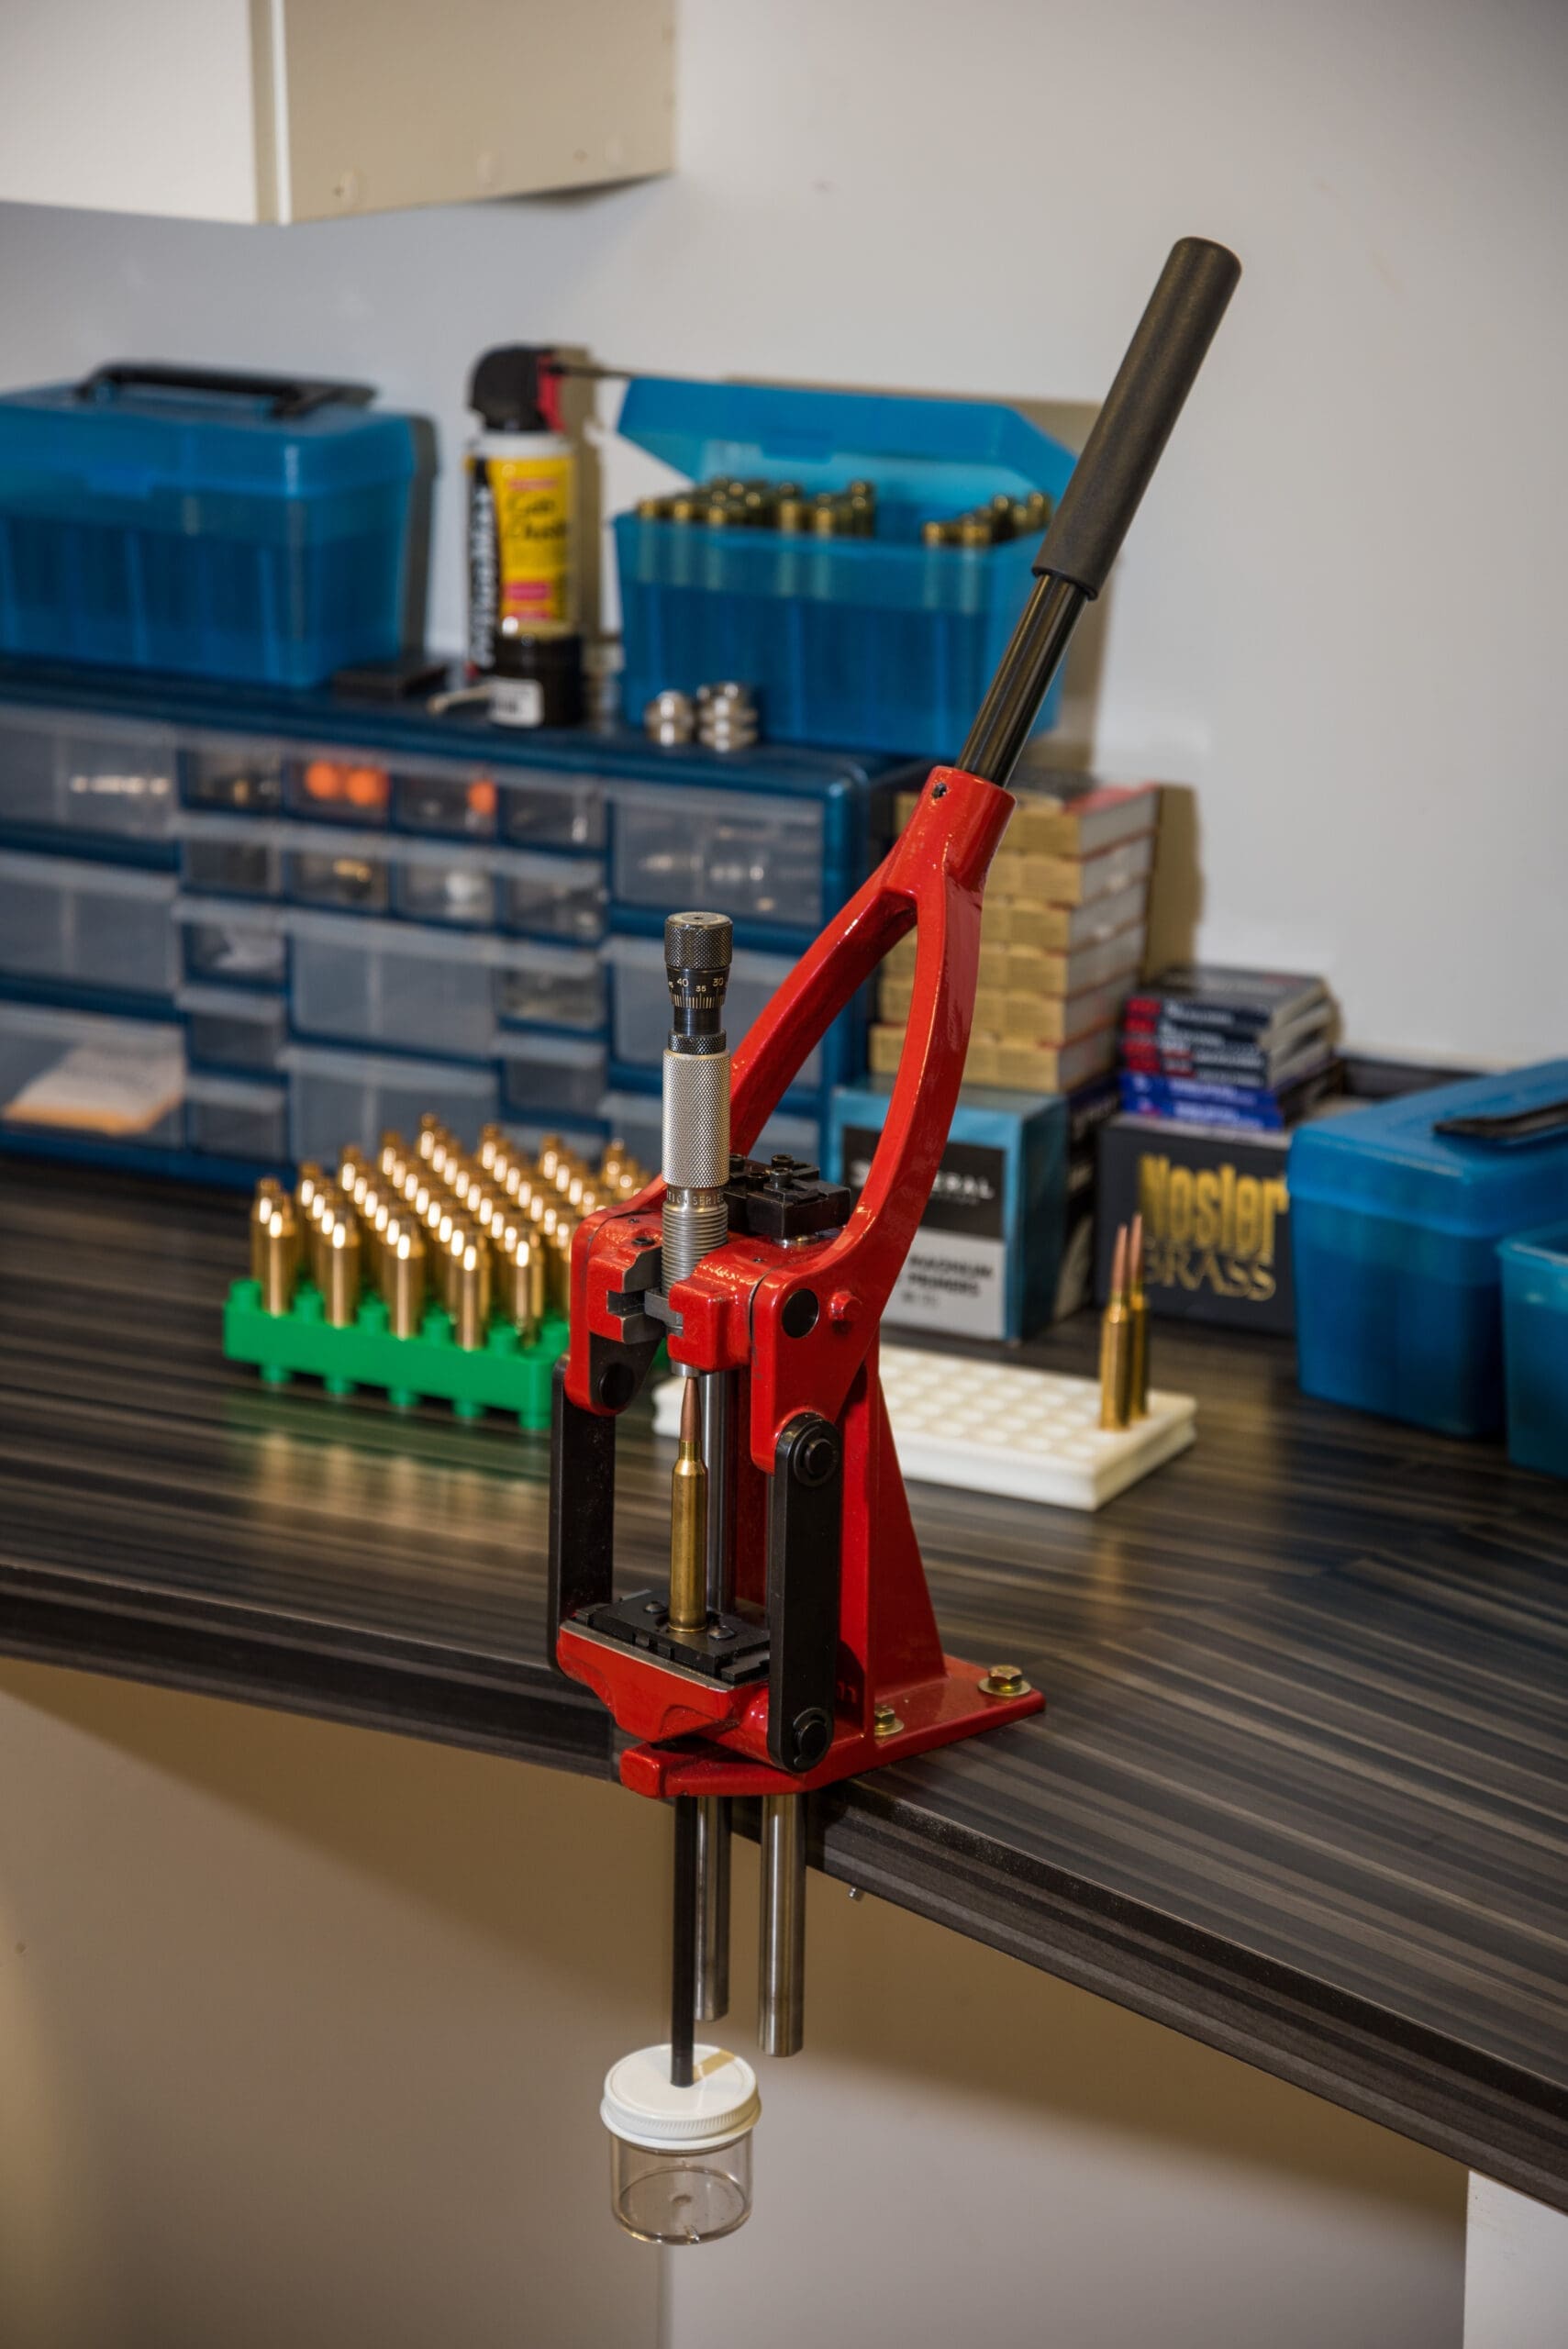
For novices and precision reloaders, I recommend a single stage press to keep things simple and more precise. Select a good sturdy press with a cast iron frame and an opening sized sufficiently to load the largest cartridge you plan to shoot/load (don’t forget your buddies). The structural engineer in me prefers the O-shaped presses. The RCBS Rock Chucker is probably one of the best-selling presses of all time, the Redding Boss & Big Boss II are highly regarded, and even the value Lee presses will produce precision ammo. I personally use a Forster Co-Ax single stage press. It’s a unique design that is highly regarded by precision shooters for producing concentric ammo with minimal runout.
Based on its glowing reviews, I picked up a Forster Co-Ax press in spite of its non-O-shaped design. It’s been cranking out excellent results.
If you’re a pistol shooter or high volume shooter of any kind, then upgrading to a turret or progressive press is a good option that will save you a lot of time once you learn the ropes.
Reloading Dies
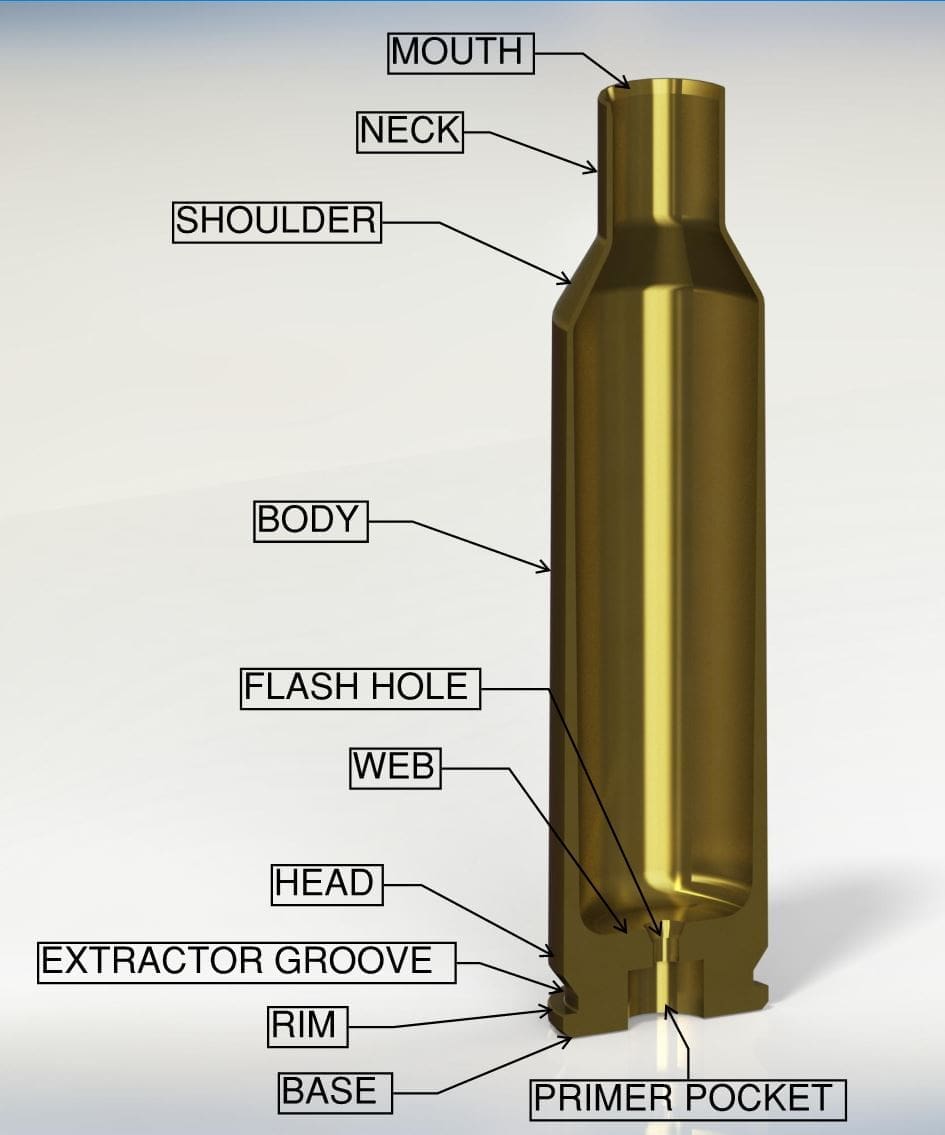
You will always have at least two dies, a sizing die, and a seating die. The typical, full-length sizing die performs multiple sizing functions at once, but it can also be separated out into a more specific single function dies for more flexibility and finer sizing control.
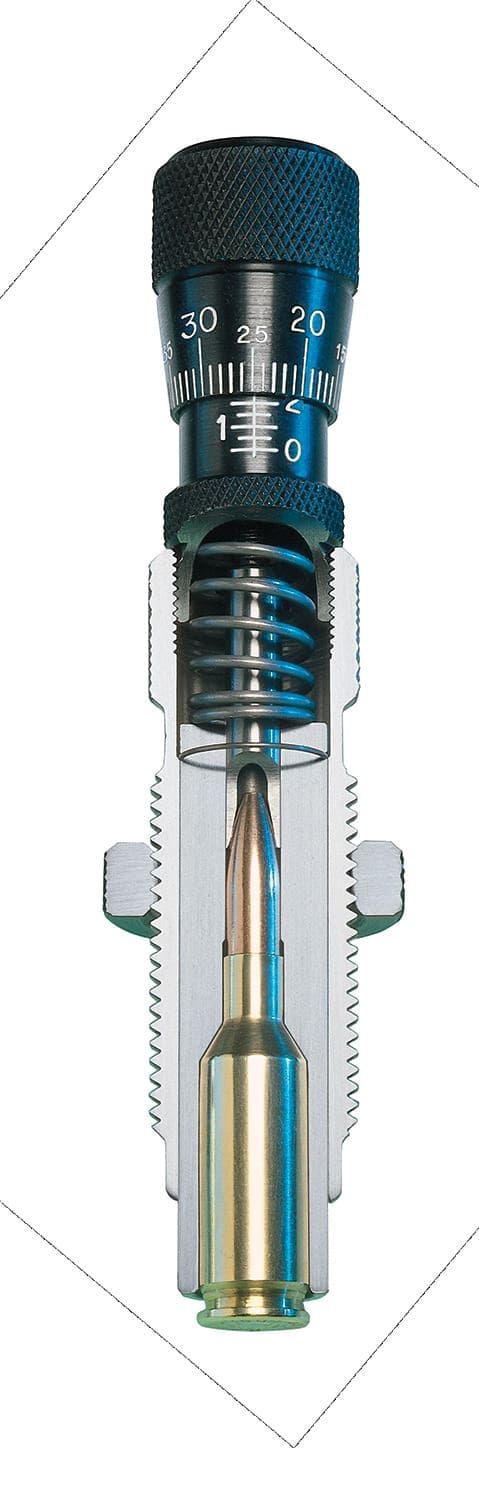
A standard sizing die consists of an inner diameter shaped like your rifle chamber, only slightly smaller. A decapping (de-priming) rod with a neck sizing button threaded about halfway down its length is suspended in the center of the hollow die chamber.
As the die accepts the cartridge, the decapping rod and sizing button pass through the case neck without touching until just before the spent primer is contacted and pushed out. As the primer is pushed out, the cartridge neck and body diameters get squeezed down slightly by the chamber-shape of the die. At the end of the die’s stroke, the case shoulder is also bumped or set-back a few thousandths to ensure the cartridge will chamber & head-space properly.
After the die is bottomed out and the case neck and body are sized down, the case is then pulled back out of the die which pulls the sizing button back through the newly compressed case-neck. As it passes through, the sizing button expands the neck back up to the appropriate dimension to hold a new bullet.
Die sets can range wildly in cost from $30 to $300 or more. Competition style die sets with single function bushing dies & micrometer adjustable seating dies are the most expensive variety, but they can be worth it depending on your accuracy goals. I recommend buying dies in sets because that generally saves some money and ensures you have matched components designed to work together.
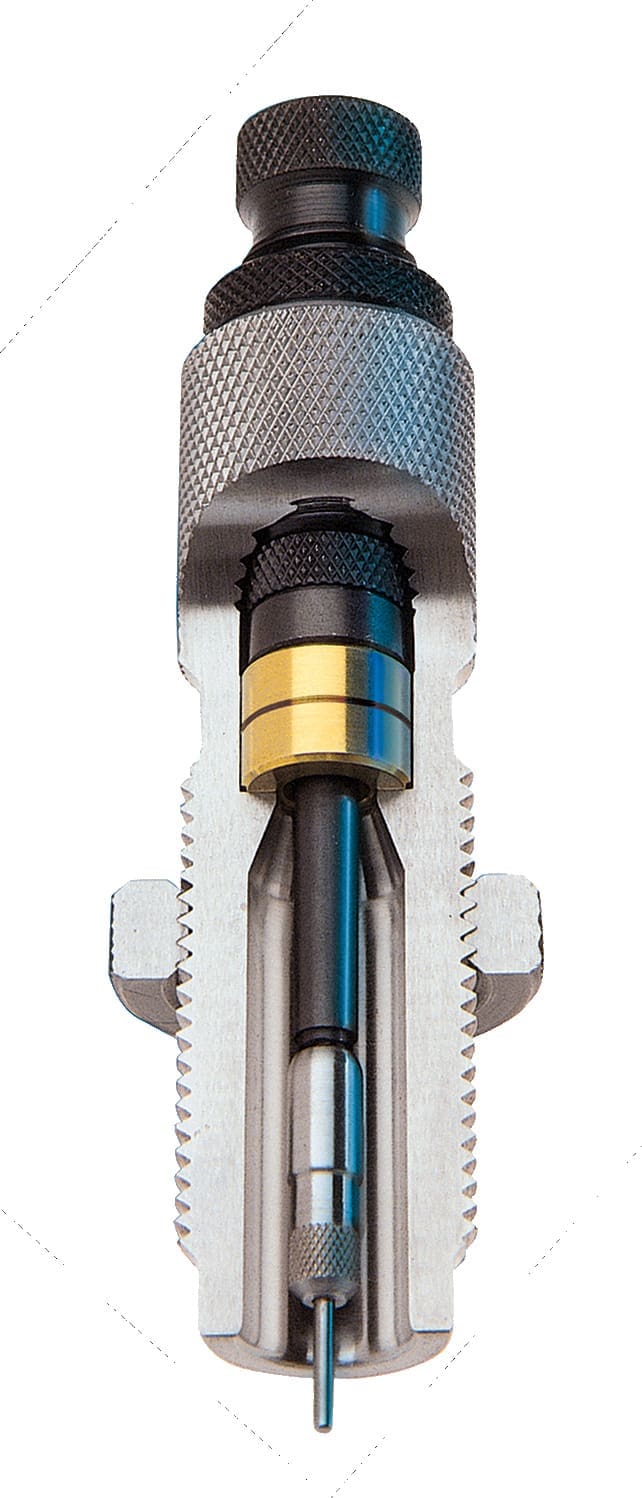
Dies with interchangeable neck bushings or die sets with a separate neck-only sizing die offer better control of the neck diameter. Neck-only sizing dies to allow the shooter to size the neck without sizing the body or bumping the shoulder so the fire-formed cartridge still fits the chamber perfectly. These are a favorite of bench rest shooters.
After a few firings, cases that have been neck sized only will need to be fully resized or they will not chamber properly. Neck-only sizing is only appropriate for bolt action rifles and single shots because autoloaders and lever guns require more clearance to function properly.
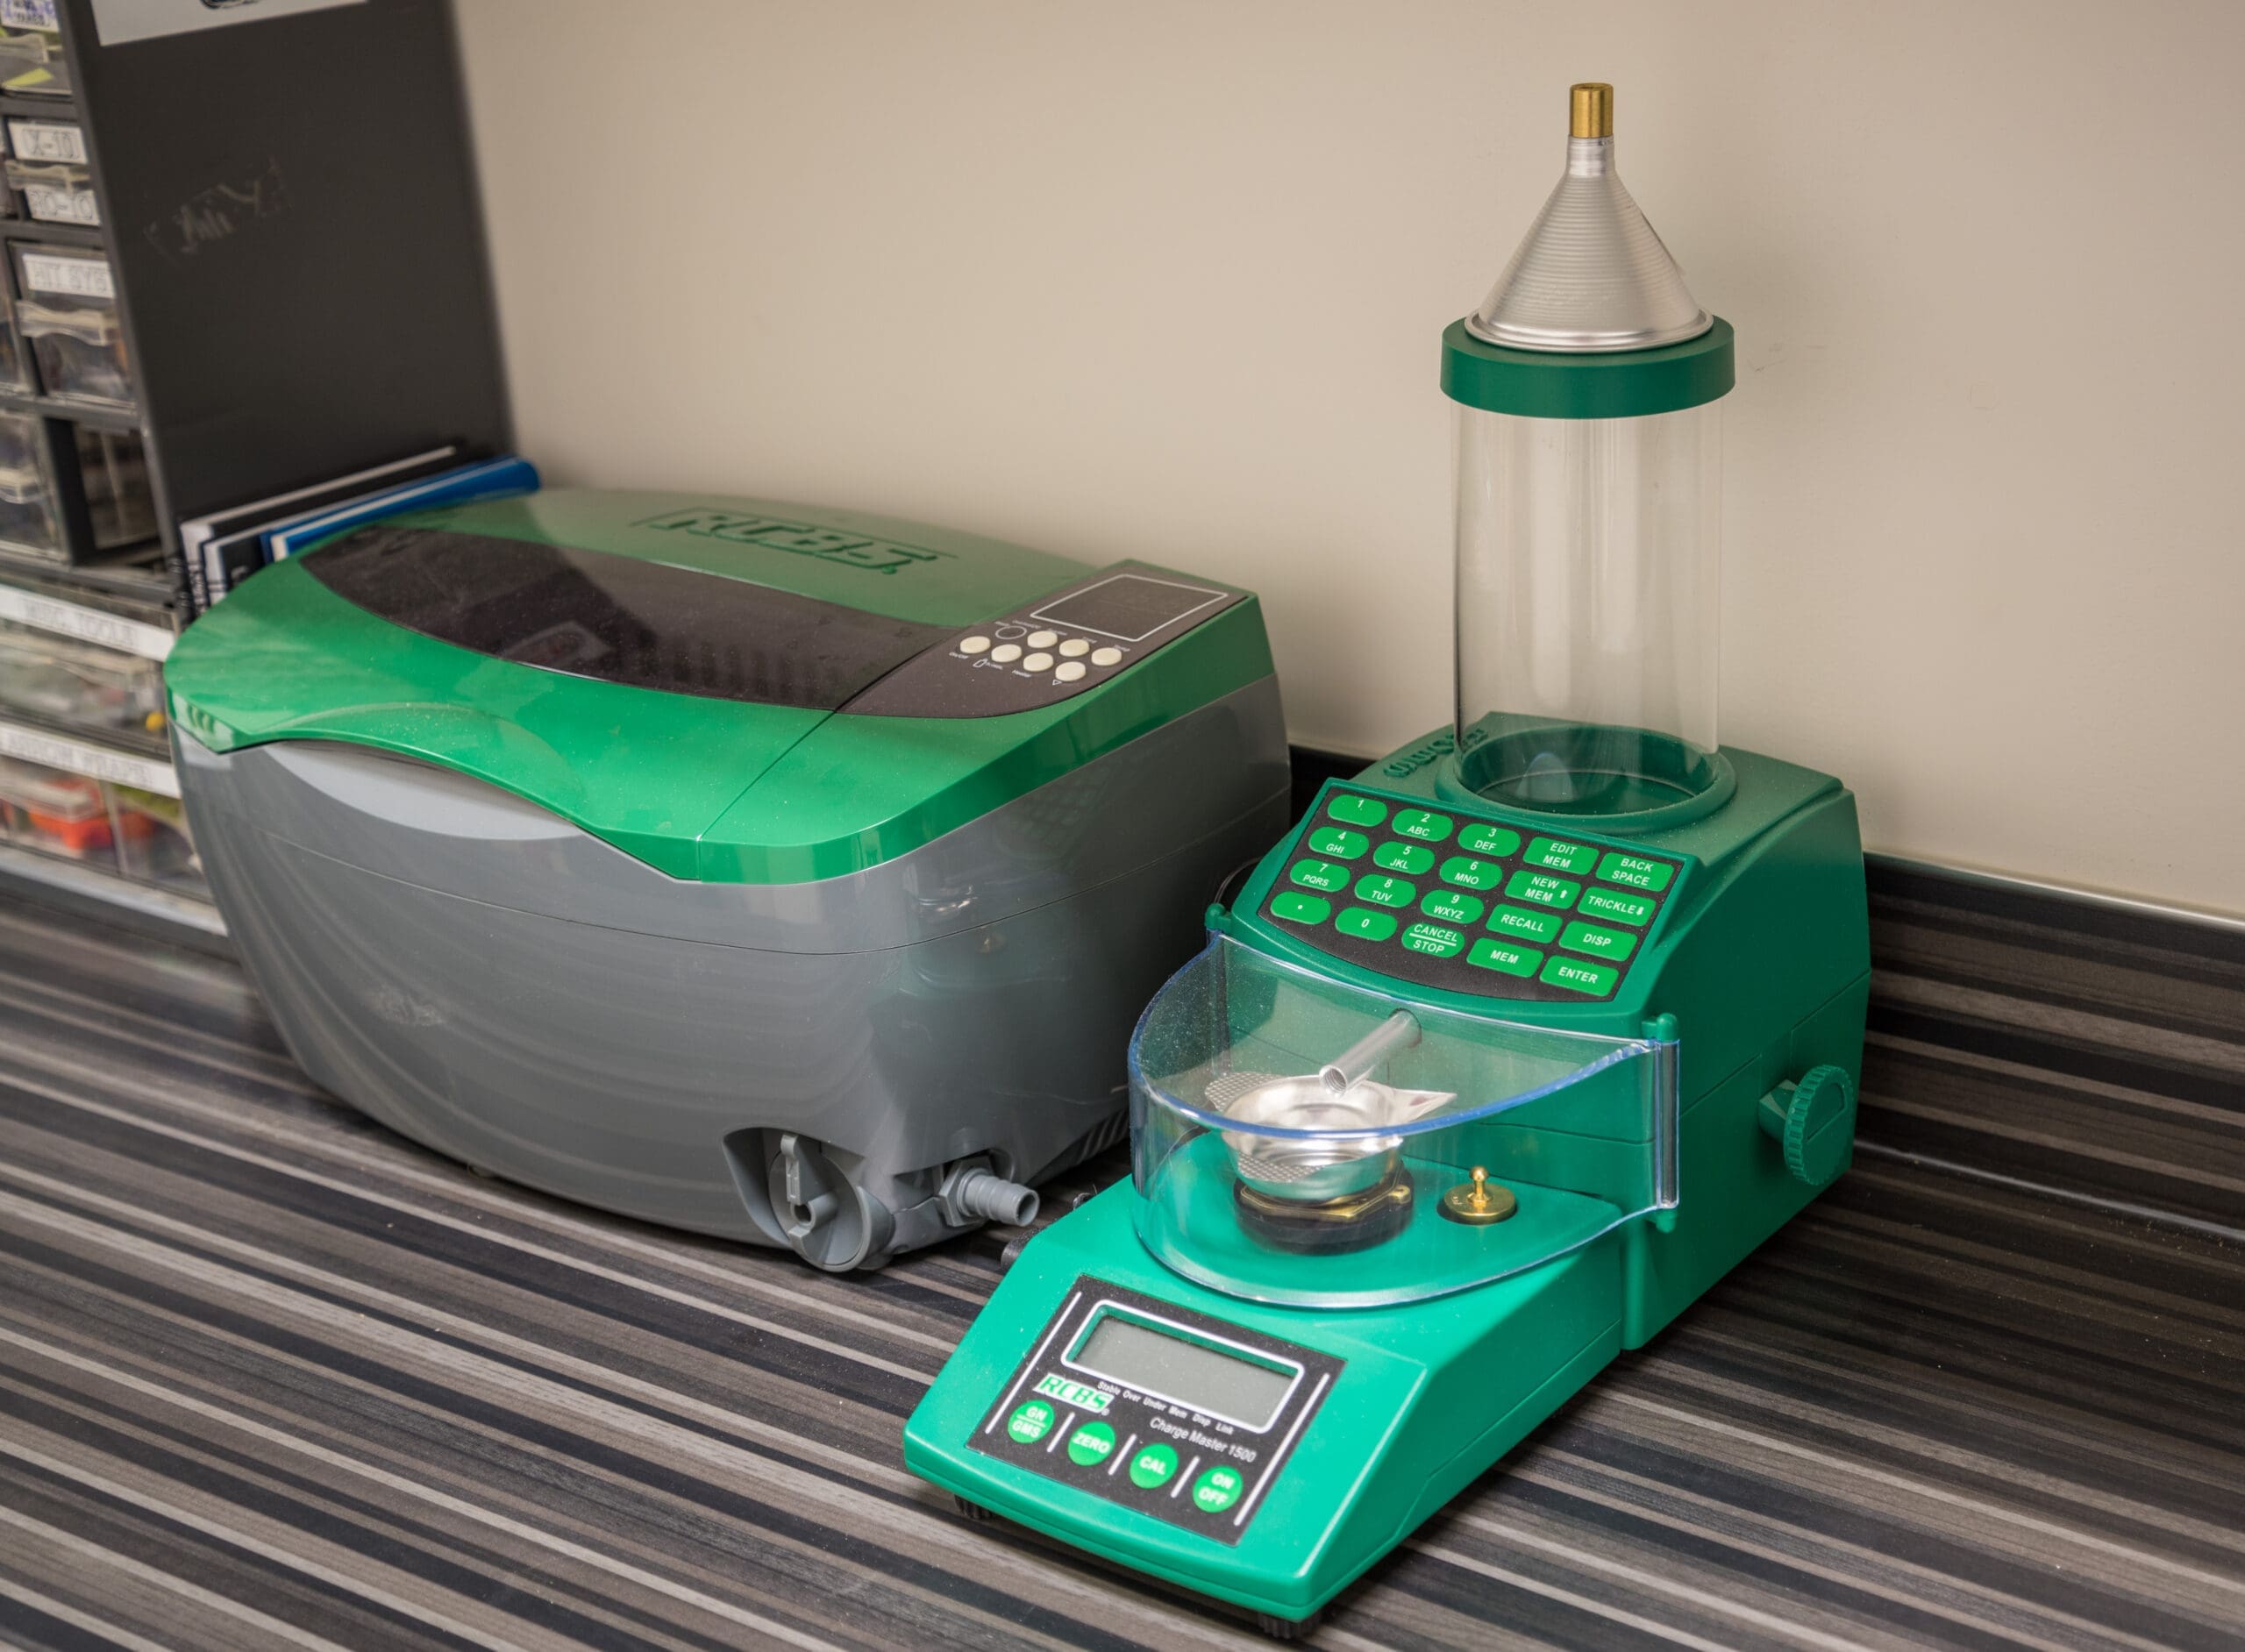
Powder Scale
You’ll need some type of a scale to weigh powder charges on. There are balance beam scales and electronic scales available as well as automated powder dispensing scales that will dispense weighed powder charges for you like the RCBS ChargeMaster 1500. The electronic powder dispensers are expensive, but they can sure cut down on the amount of time it takes to trickle out accurate charges. You’ll also need a caliber specific funnel to get the powder from the pan into your case neck. If you don’t utilize an electronic dispenser, a powder measure can be used to ͞throw͟ fairly accurate charges, and a powder trickler will allow you to trickle powder in the remaining small increments onto the scale to hit your desired weight.
The RCBS ChargeMaster 1500 combo automates the charge weighing process and maintains +/- 0.1-grain accuracy. At nearly $300 it’s a luxury item, but it greatly simplifies an otherwise tedious task.
Priming Tool
For precision reloaders and long-range shooters, I recommend using a handheld priming tool. You just can’t replace the feel aspect of properly seating a primer with an auto-priming press attachment. RCBS, Lee, and Lyman make good, value-minded priming tools, while Sinclair, K&M, and 21st Century make precision billet hand priming tools that generally cost 2 – 4 times more.
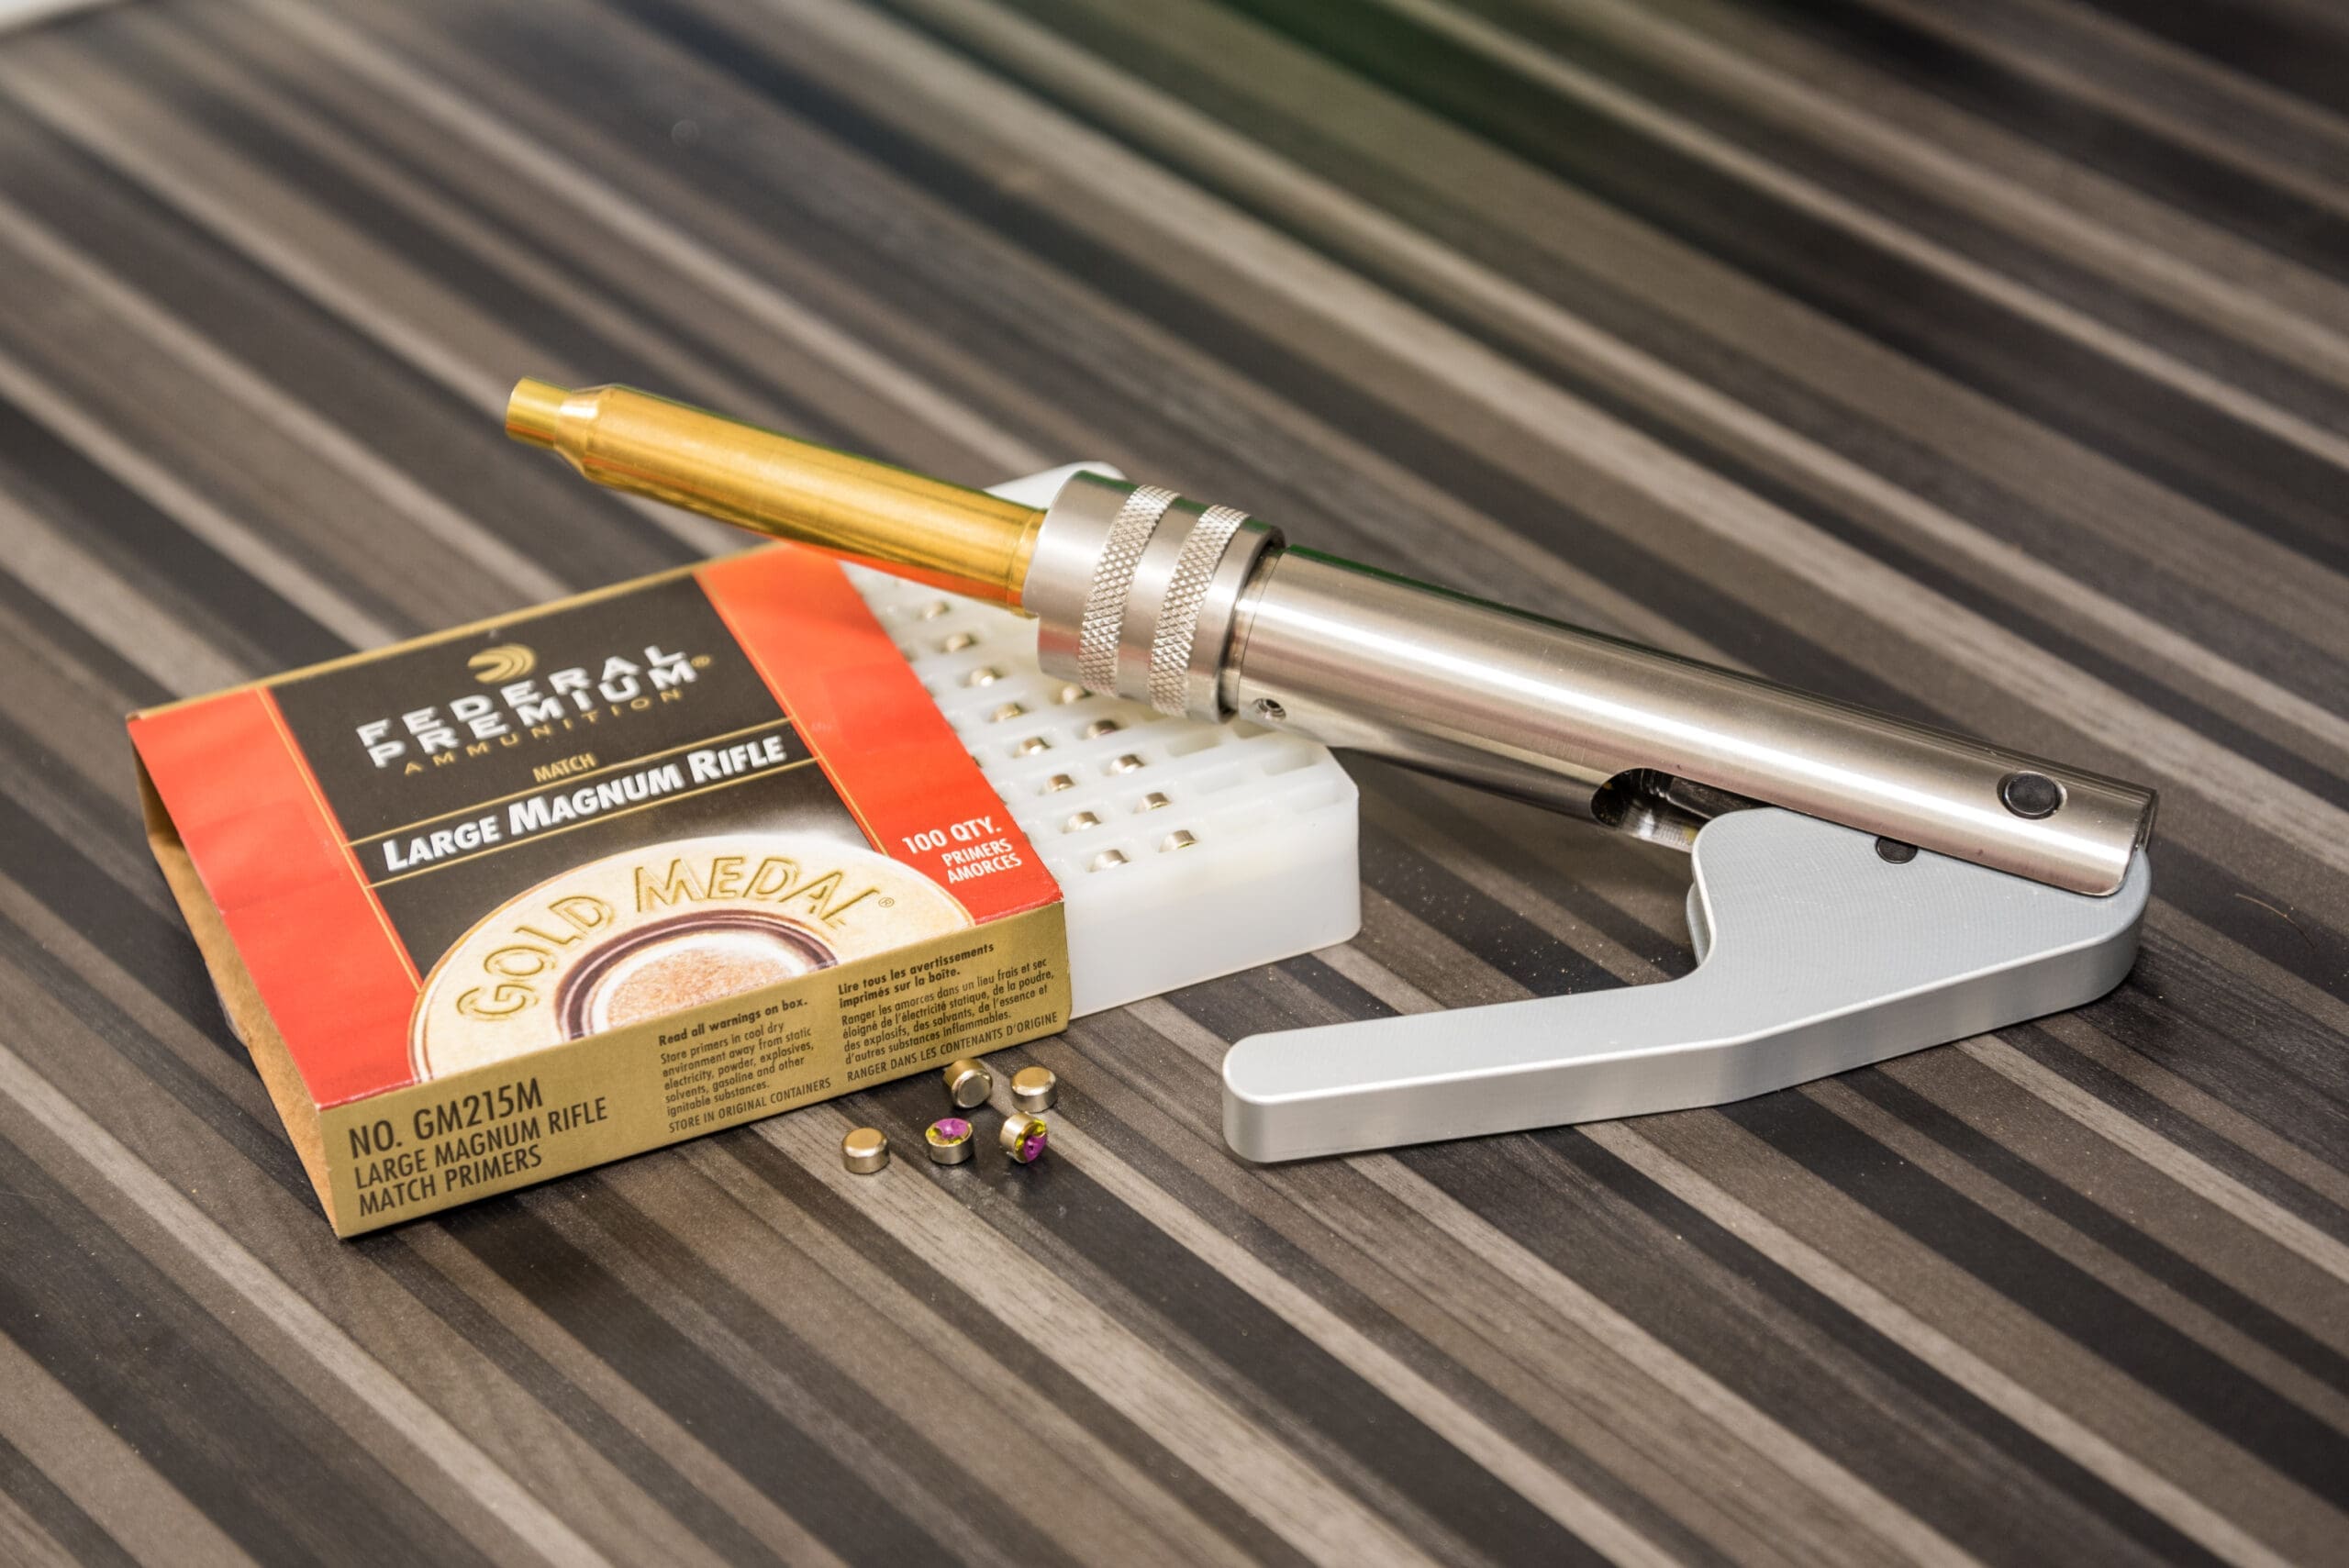
The feedback provided through the lever of a handheld priming tool is an important aspect for consistent primer seating.
Measuring Tools
A decent set of dial or electronic calipers is essential to measure brass at various stages of the reloading process. Other tools like Hornady’s headspace and bullet comparator tools that attach to the caliper will allow you to accurately measure the length of your loaded rounds and properly gage shoulder bump & headspace using your caliper. Neck wall gages and concentricity gages can give you an idea of the consistency of your brass and the quality of your loaded rounds.
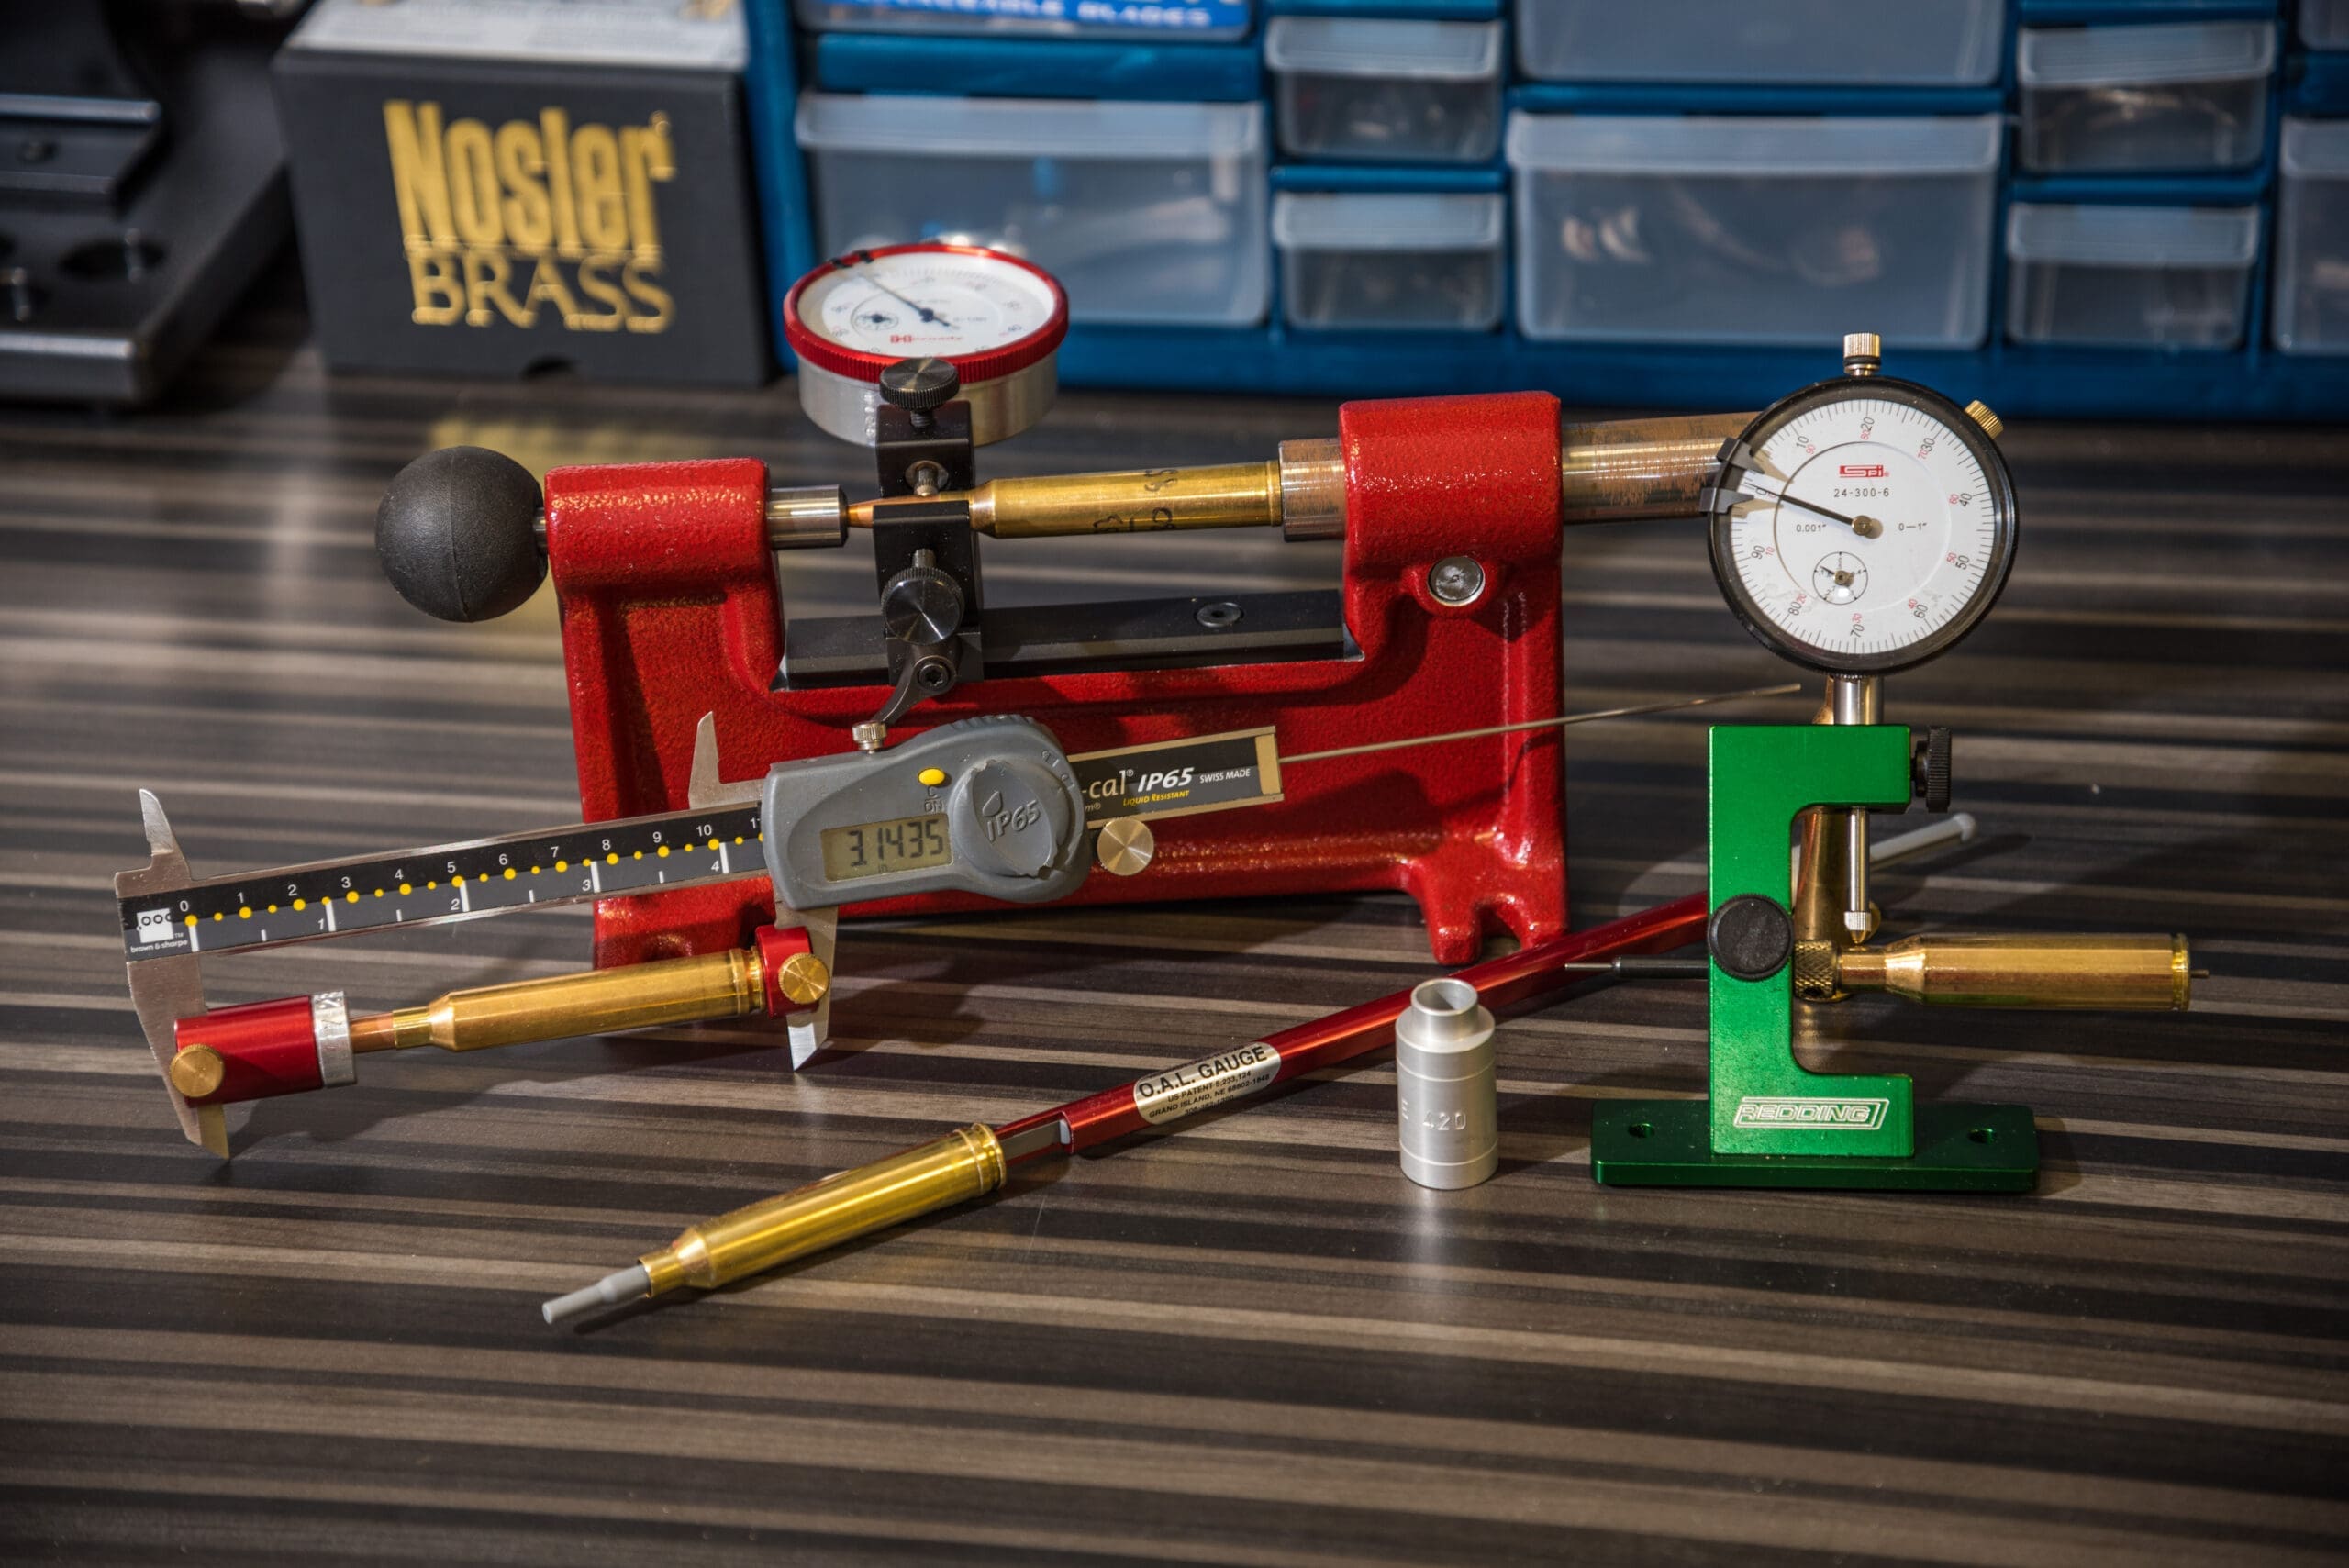
There are a lot of dimensions to keep track of when you are ͞blueprinting your cartridges. A high-quality caliper is a good initial investment that will pair perfectly with an assortment of measuring tools from Hornady’s Lock & Load collection to help you adjust your dies perfectly.
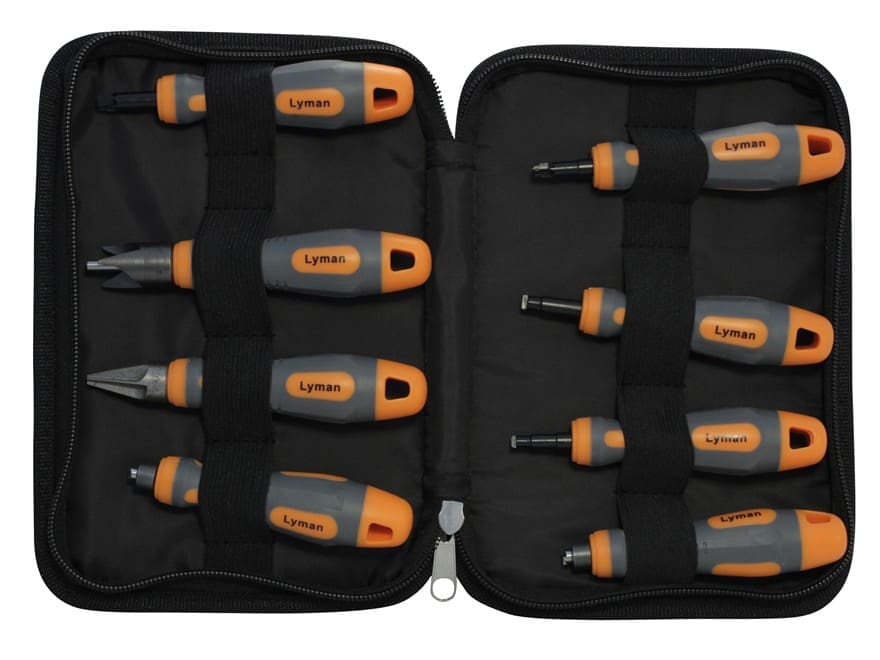
Case Prep Tools
These are the hand tools you’ll use to chamfer and de-burr the case mouth, clean the neck, clean the residue from the primer pockets, and de-burr the flash-hole. Lyman sells a nice set of case-prep tools in a convenient case to keep them organized.
Lyman’s case prep toolkit has everything you need and comes in a convenient case.
Case Lube
Before sizing your cases, you have to lube them with a reloading specific case lube. Don’t try to use anything else or you’ll stick a case in your die. My favorite is Imperial die wax. You can use Imperial dry lube to lube the inside of the case neck, but always use wax or other wet lube like Hornady’s One-Shot aerosol spray lube for the outside of the case.
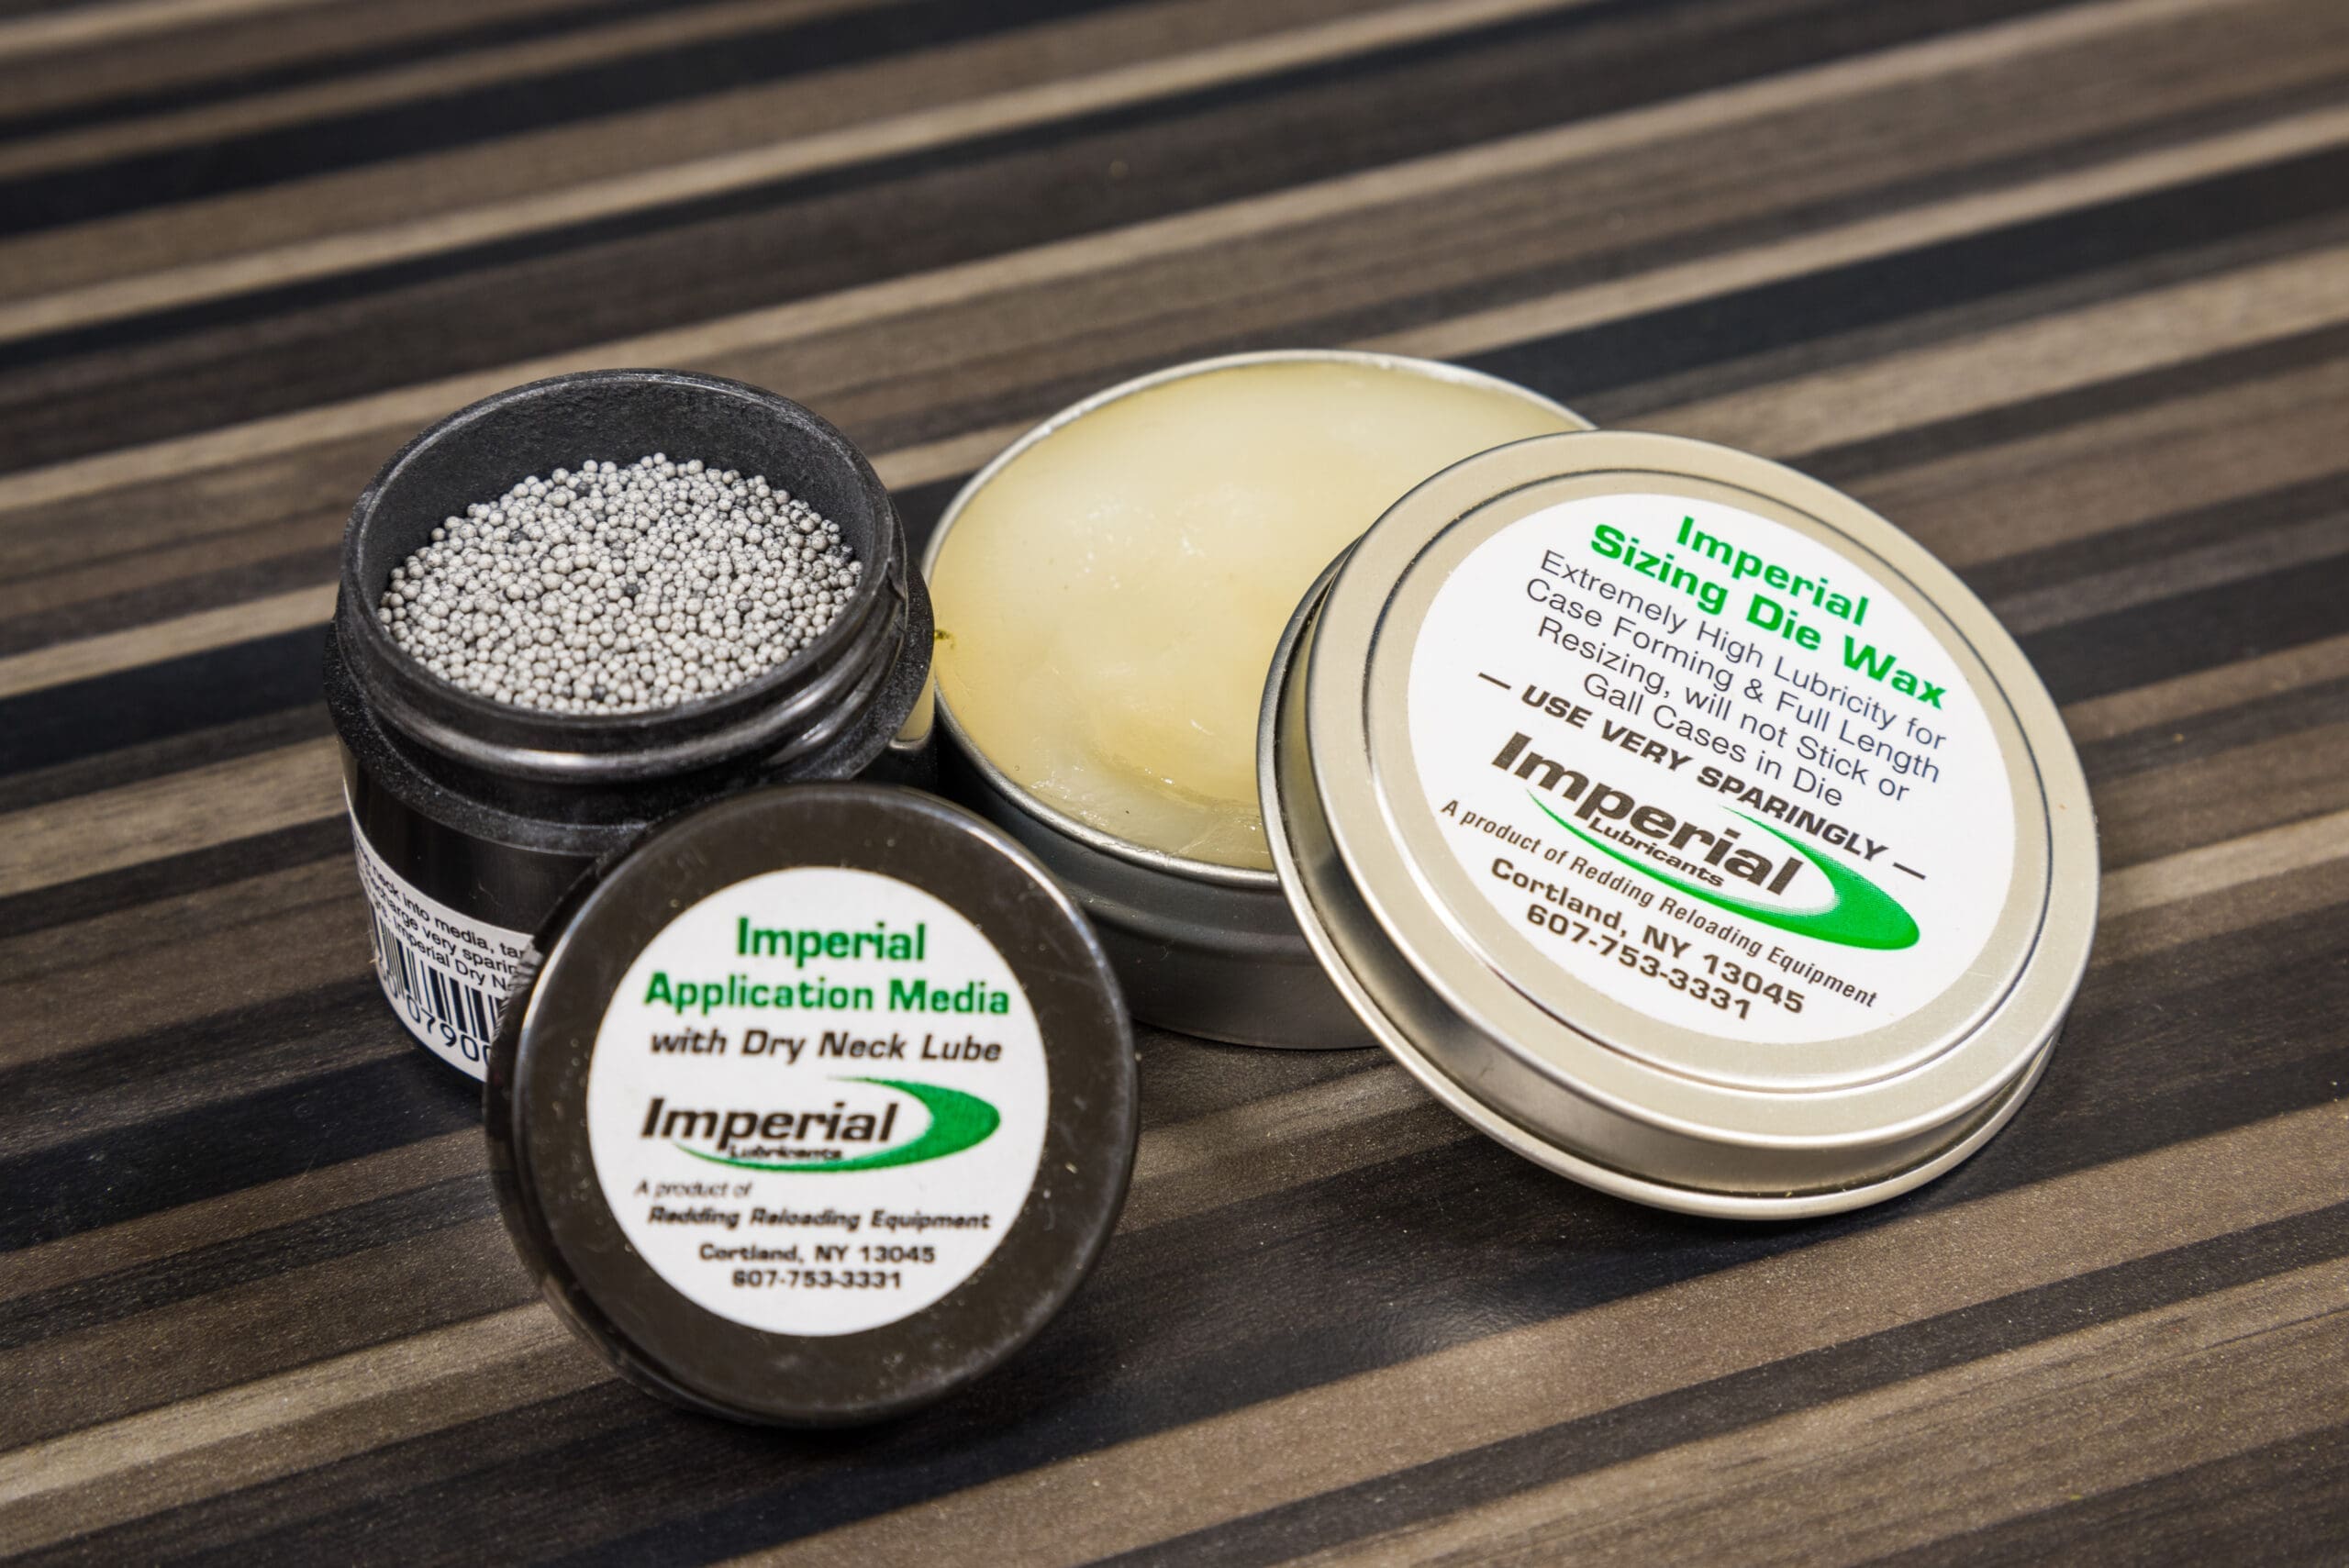
They say there are two types of reloaders, those that have stuck a case in their dies and those that will. Use Imperial Die wax and you at least increase your chances of staying out of the have stuck category for longer.
Reloading trays and Ammo Boxes
You’ll need a reloading tray to keep cases upright as you process them. Inexpensive universal trays are available from RCBS that will accept a number of different cartridge base dimensions. Once you get the cartridges loaded you’ll want to label them and store them in a nice plastic ammo box. I like the 100 and 50 round cases best, but the 20 round plastic cases travel better to save space. Purchase several extra ammo boxes so you can keep different loads organized when you are testing or if you want to load different bullets for different purposes.
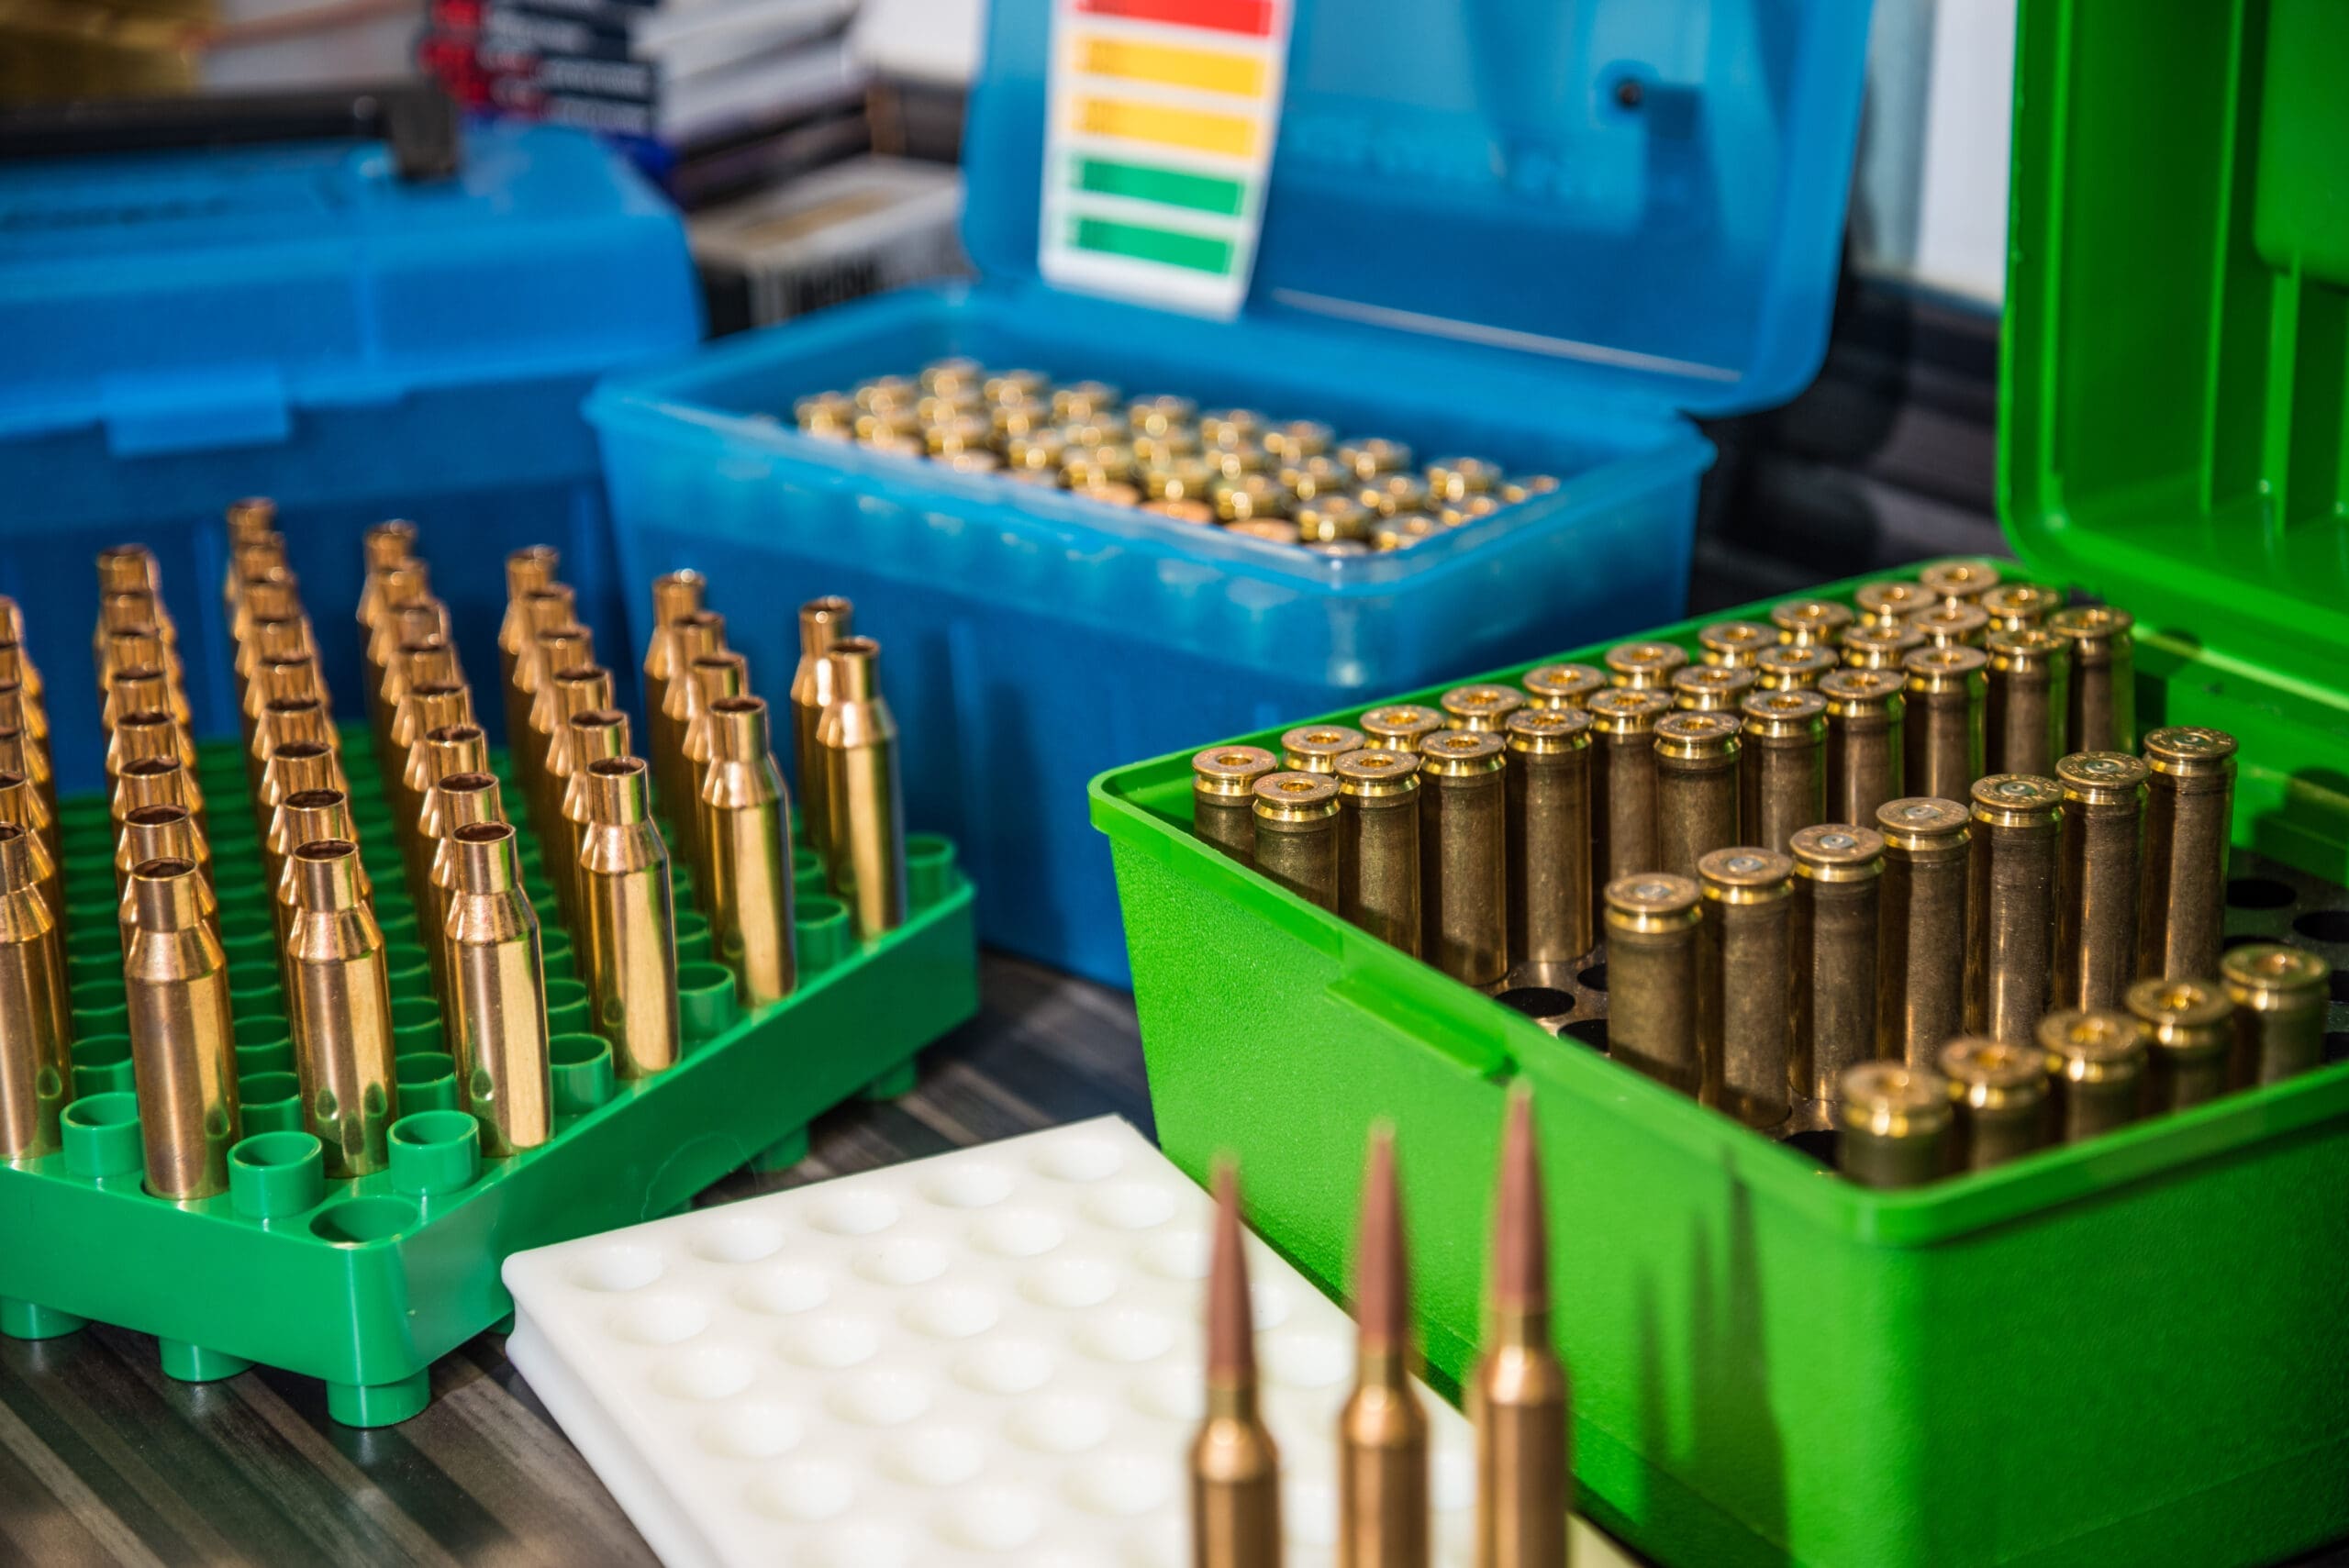
Reloading trays help keep your cases upright when they’re full of powder and ammo boxes help protect and organize your brass and finished cartridges.
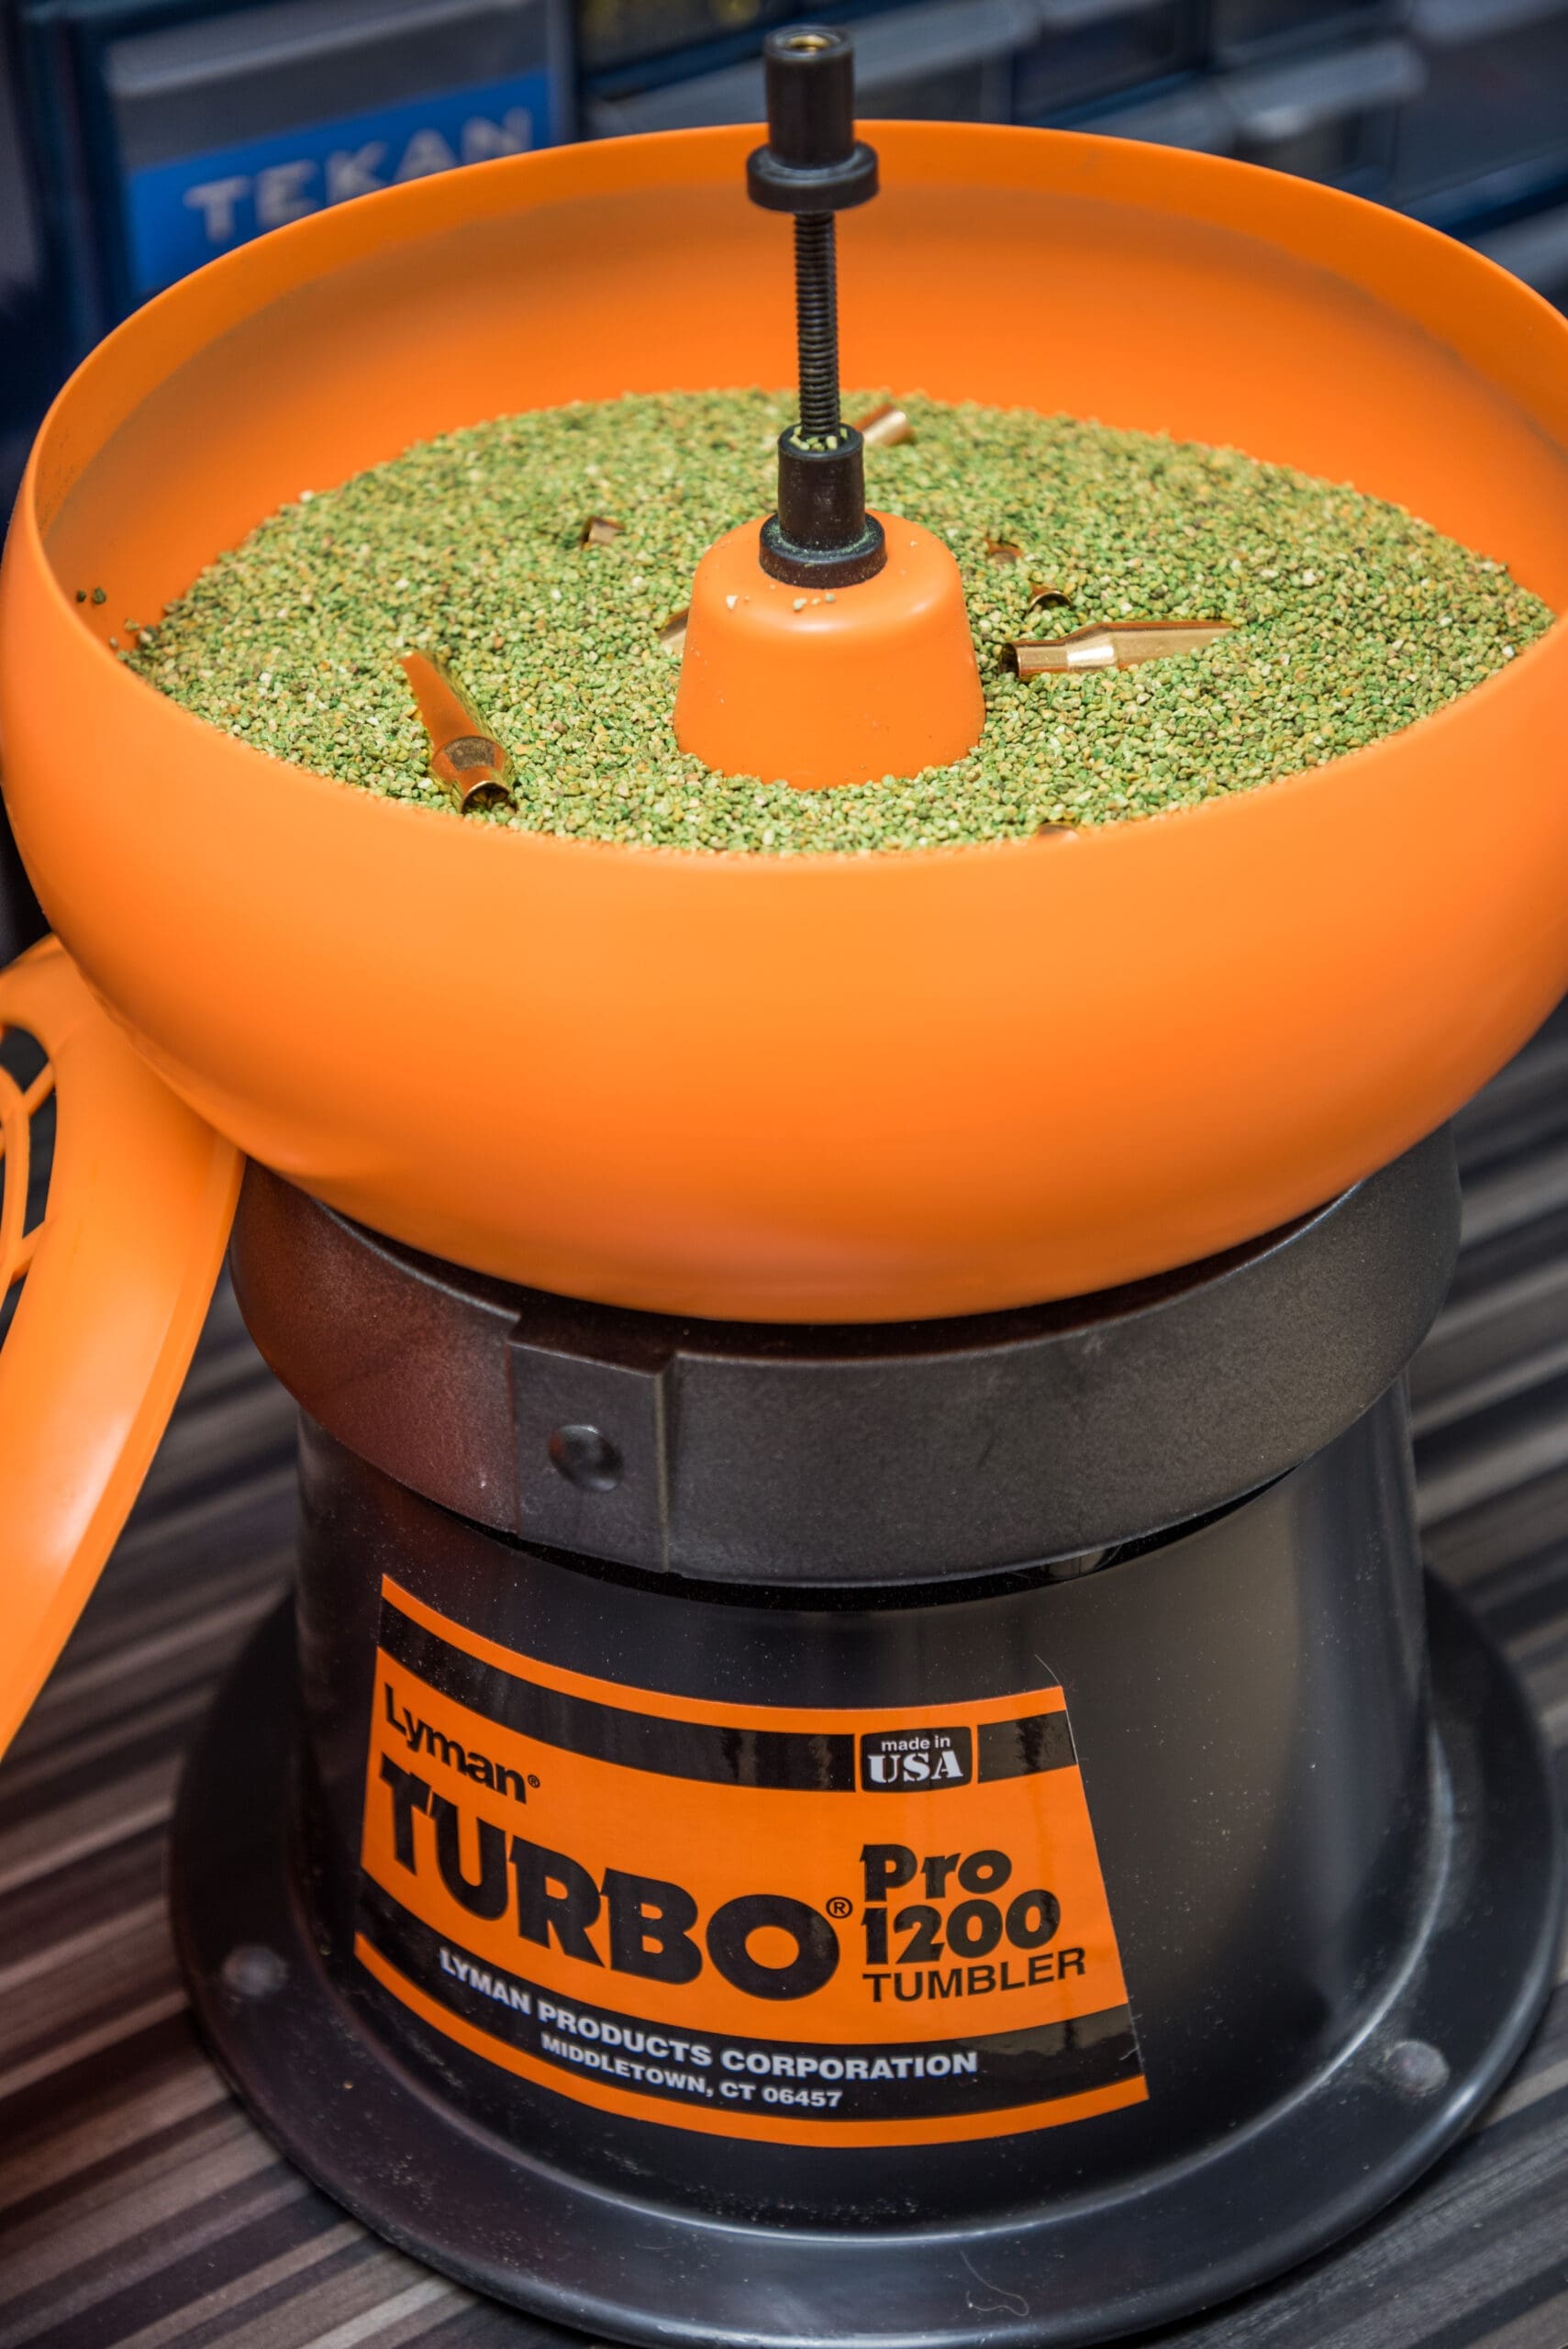
Tumbler
A vibratory or rotary tumbler will shine up your brass cases inside and out and make them look new. I like to tumble my brass before sizing to help remove firing residues and dirt that make a case more likely to stick before I run them through the hardened steel sizing dies. I don’t think a tumbler is a necessary item, but shiny cases look better and will size smoother. Basic tumblers are fairly inexpensive. Corn cob tumbling media produces good results for me.
I own an inexpensive Lyman tumbler and it shines up my cases just fine. More expensive models produce similar results a little faster and have larger capacities.
Ultrasonic Case Cleaner
The secret to getting this one past your wife is to tell her you got it to clean her jewelry! These do a nice job of removing hard-to-clean primer pockets and powder residue from inside the cases. They also do a good job of washing off case lubes. I like to run my cases through an ultrasonic hot bath after they’re sized and prepped. It’s the last step before I load them. Again, this is not a must-have, but after you’ve spent enough time cleaning primer pockets with the little wire brush primer pocket cleaner, you’ll be more than happy to drop $100 on one of these handy units. I’ve used the RCBS unit with good results.
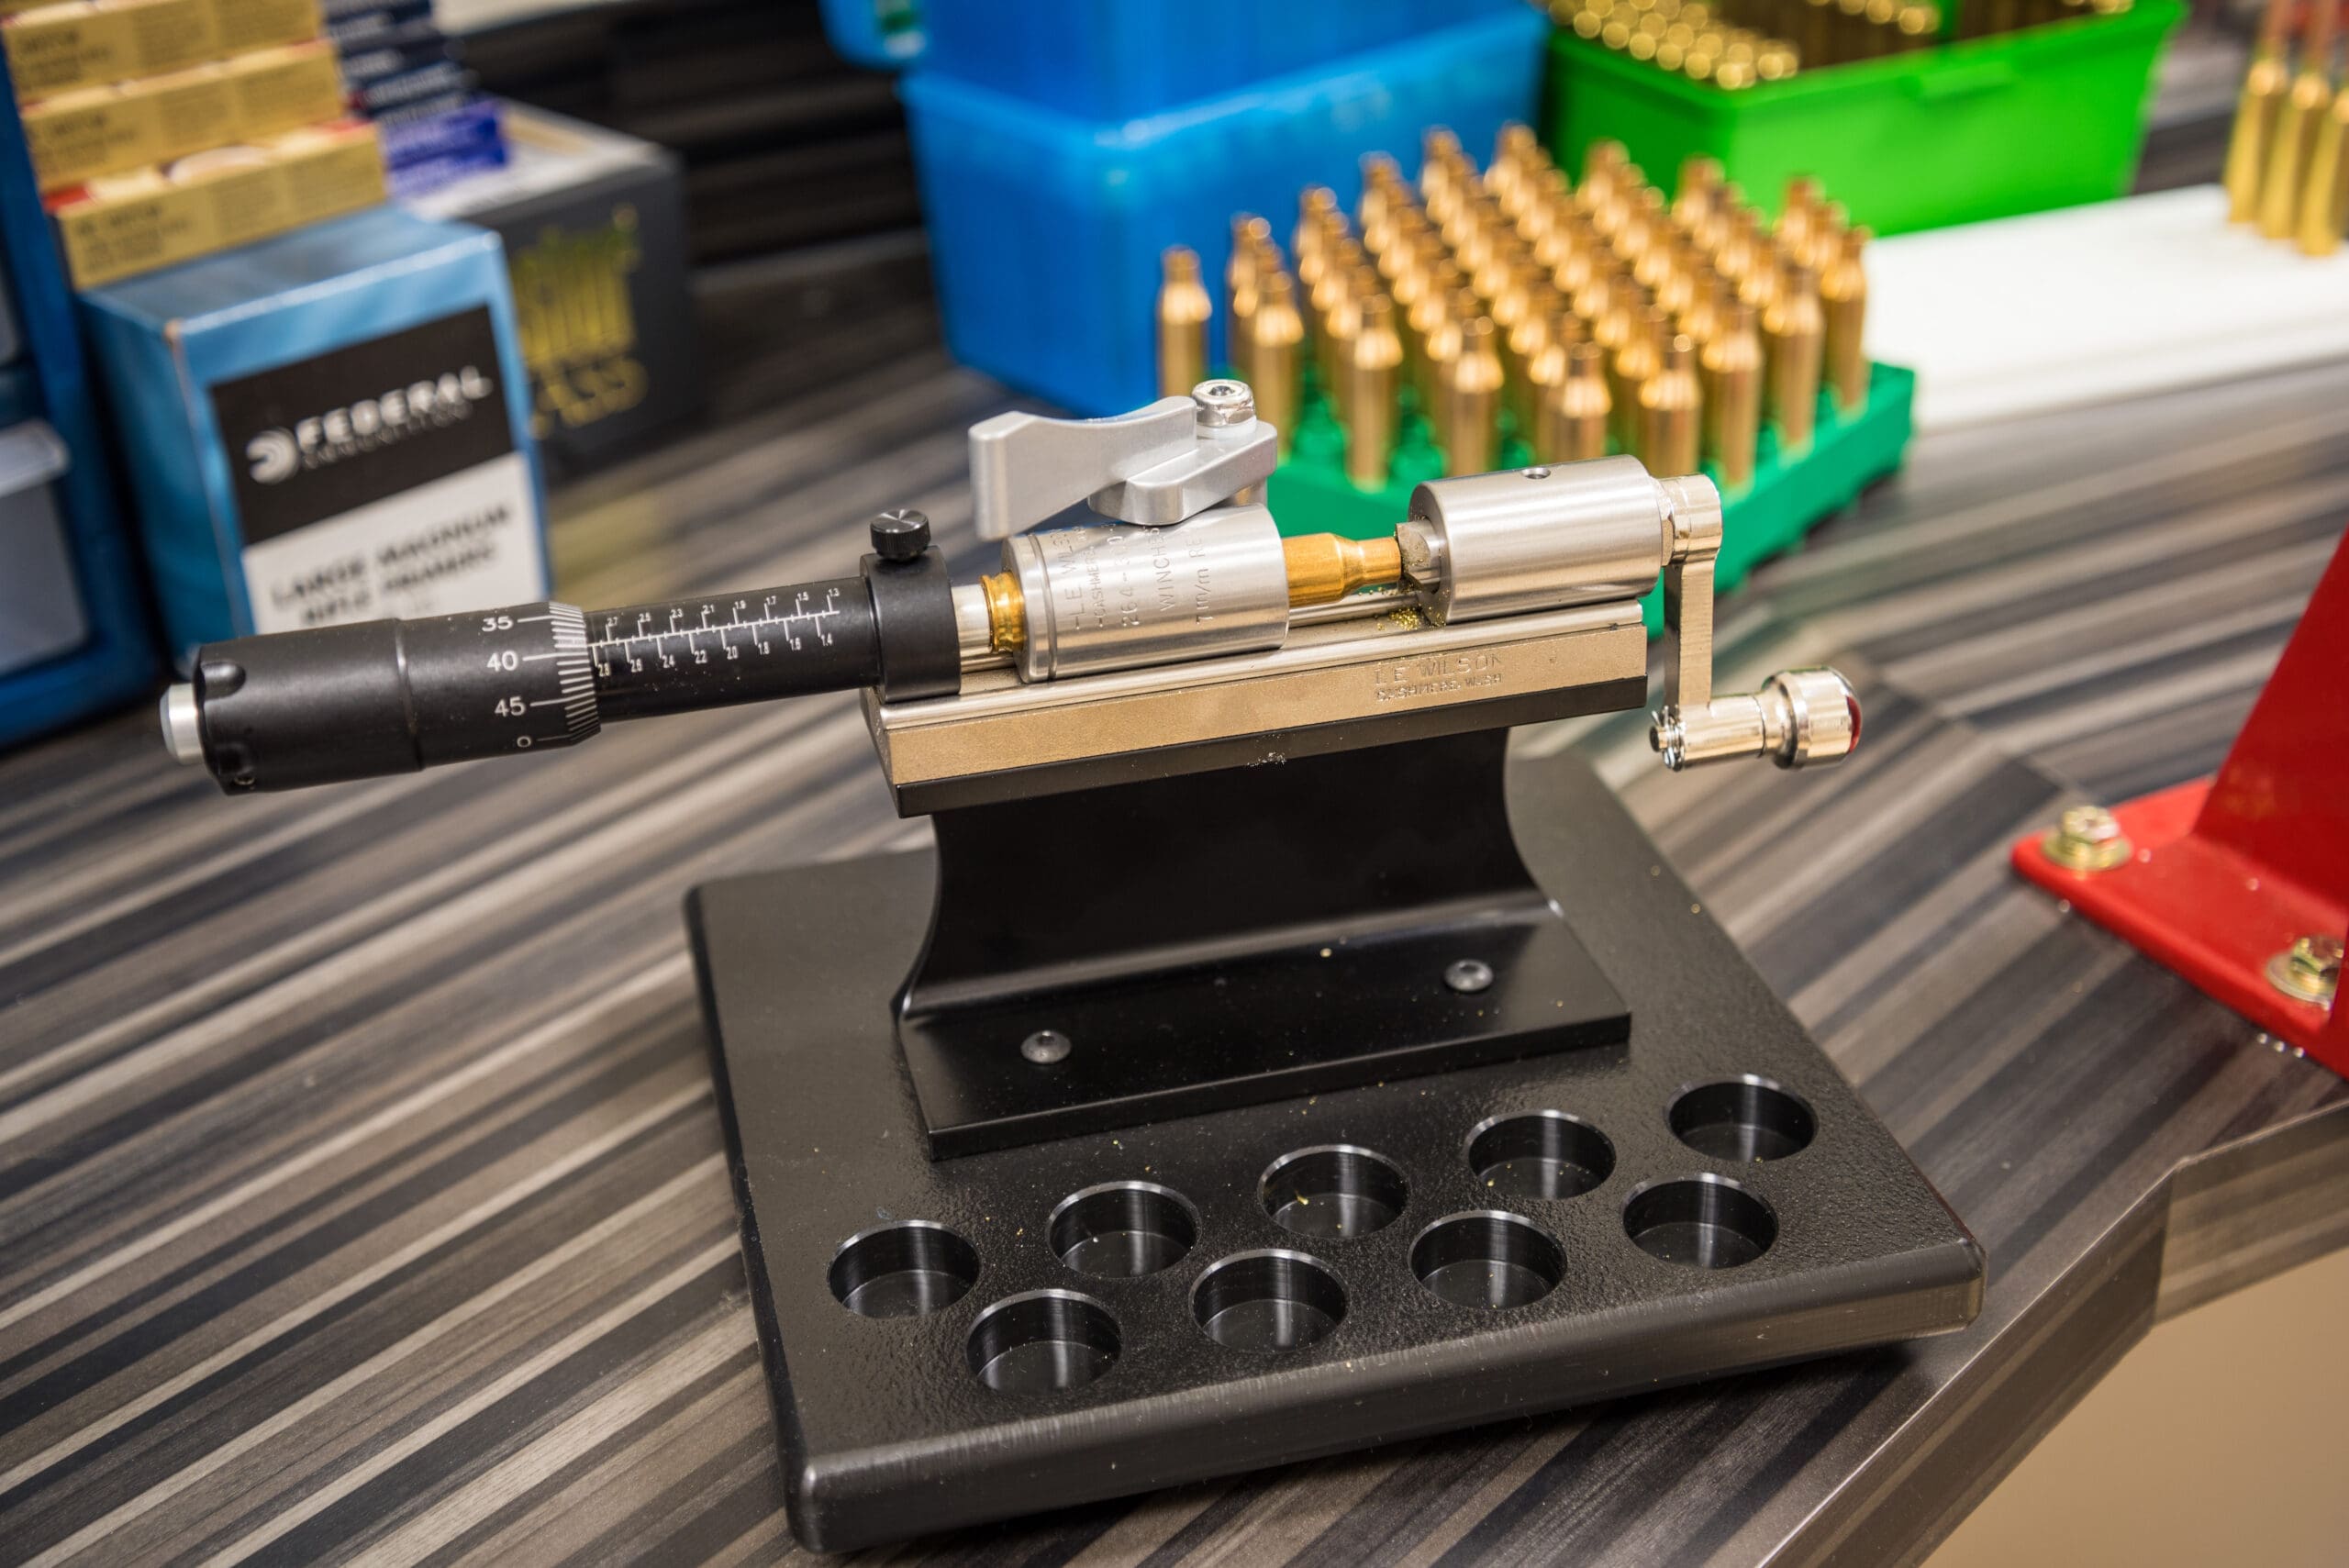
Case trimmer
Every time your cases are fired and resized, they will grow a little bit longer. Eventually, the brass will need to be trimmed or it will interfere with the end of the chamber. Keeping brass trimmed to a consistent length improves accuracy and also eliminates safety issues if the cases get too long and the neck bottoms out at the end of the chamber. Probably not an item you need until you have a few loadings on your cases, but measure your cases and ensure they are shorter than the maximum allowable length for your cartridge. Better yet, measure your actual chamber length and trim all of your cases equally, cutting them at least .010" short of the chamber’s dimension.
The Sinclair/L.E. Wilson Ultimate Case Trimmer with Micrometer attachment costs more than some reloading kits and is the Cadillac of case trimmers.
Log Book
If you are going to succeed as a reloader, you must keep meticulous notes both at the reloading bench and at the rifle range. Use a fine-point sharpie to label each batch of test loads so every shot you take will be a useful data point for testing. The better your notes are, the easier it will be to interpret your results and make good decisions based on exactly how the rifle & ammunition perform at the range.
Reloading Components
Brass
You need quality ingredients to bake a great cookie and brass is the most important and the most expensive component at nearly $3 per case for larger magnums. The good news is that your cases should last you many, many loadings before giving up on you. If you can load them 10 times, then that $2.85 Lapua .338 mag case only costs you 28 cents per loading, which is more in-line with the cost of the powder charge you dump into it. I recommend purchasing high-quality brass if precision is your game. Lapua and Norma are well renowned for producing the best of the best, but Oregon based Nosler is also offering high-quality, ready to load brass that I’ve personally had excellent results with. Winchester, Remington, and other domestics also make quality brass, but you might need to spend a little more time uniforming and prepping it to get it to shoot as well as the high dollar stuff. The brass and all the work you put into it lays the foundation of your ammunition’s accuracy. It’s like the blueprinted block of a high-performance engine.
Bullets
A lot of factors go into selecting a bullet. First, consider what you are hunting & select a bullet heavy enough to do the job and then some. Most manufacturers of hunting bullets provide recommendations for the type of game their bullets are intended to take. If you are a long-range shooter, select a bullet with a high ballistic coefficient and make sure your barrel’s twist rate will stabilize it under all anticipated conditions. Do your homework and read some reviews. Make sure the bullet is capable of very good accuracy and has performed well on the type of game you’re going after. Finally, be prepared to test a couple to see which your rifle prefers. This is the business end of the cartridge so don’t skimp here to save money and likewise don’t shoot a bullet unsuitable for game just because it shoots well. An animal that is solidly hit and lost with an unsuitable target bullet is far worse than one cleanly missed with a hunting design.
Quality components produce high-quality ammunition. If you reload for a couple of different calibers your cabinet may soon start looking like a reloading store shelf.
Powder
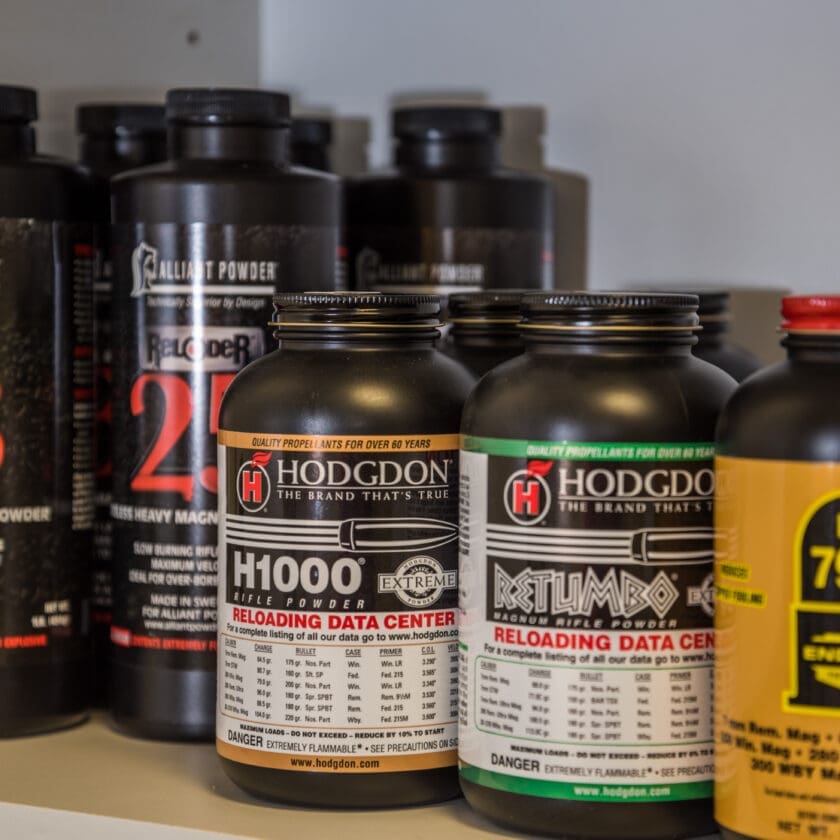
Check your load data for powders that are shown consistently for the bullet weight you intend to shoot. Often the powders that show up on every chart are known top-performers. Next, try to select a temperature insensitive, double based powder. These powders minimize changes in burn-rate relative to temperature fluctuations. This is critical for making sure your loads will shoot consistently under all hunting conditions and also for making sure that velocity fluctuation due to temperature does not cause you to miss at longer ranges. Hodgdon Extreme Powders, IMR Induron powders, and Alliant’s temperature stable Reloader powders are some of the best choices. Do some internet homework and see which are working best for guys shooting your caliber and bullet weight. If you have a custom rifle, definitely talk to the gunsmith and see what he recommends. This is often a good way to narrow your choices down to one or two powders to test with a known track-record of accuracy.
Primer
Most guys tend to think that match or bench rest primers are a little more consistent than standard. For the extra $5 - $10 per 1000, I usually go ahead and buy match grade. Changing primers doesn’t typically cause big changes in 100 – 300-yard groups, but changing primers can sometimes reduce velocity spread and therefore tighten up long-range vertical groups.
Conclusion
As you can see there’s a LOT involved in reloading! The best advice I can give you is simply, get started now and don’t be afraid to take the kit route to get your feet wet. Regardless of which route you take; you can always sell or hand-down items you out-grow so it’s hard to go wrong. You can’t replace the experience, knowledge, performance, peace of mind, and pride you’ll have when you take full control over your rifle’s accuracy and ammunition supply.