NOTICE: Certain links on this post may earn a commission for Western Hunter Magazine from Amazon or our other affiliate partners when you make a purchase. Thank you for your support.
9 Easy Steps for DIY Antler Mount
As you gear up for this year’s hunt, you’re often reminded of past success, whether it’s an antler mount in the house, a skull on the wall, a picture, or a rack lying around. It’s these memories why we bring the antlers home, adorn our houses with them, and display them for others to see.
Antler mounts are a great way to display some of your favorite animals without spending a lot of money or taking up the space of a shoulder mount. It’s fairly easy to make a professional and unique antler mount and it can be easier than boiling a skull for a European mount. Sure, there are kits you can buy, but often they don’t look as nice or as custom.
The off-season is a great time to pull out a few of those old antlers or last year’s trophy and make a unique antler mount to show them off. It’s pretty simple and can look professional. As a hunter, I enjoy the whole process, from butchering to cooking my game meat to making the display for my antlers.
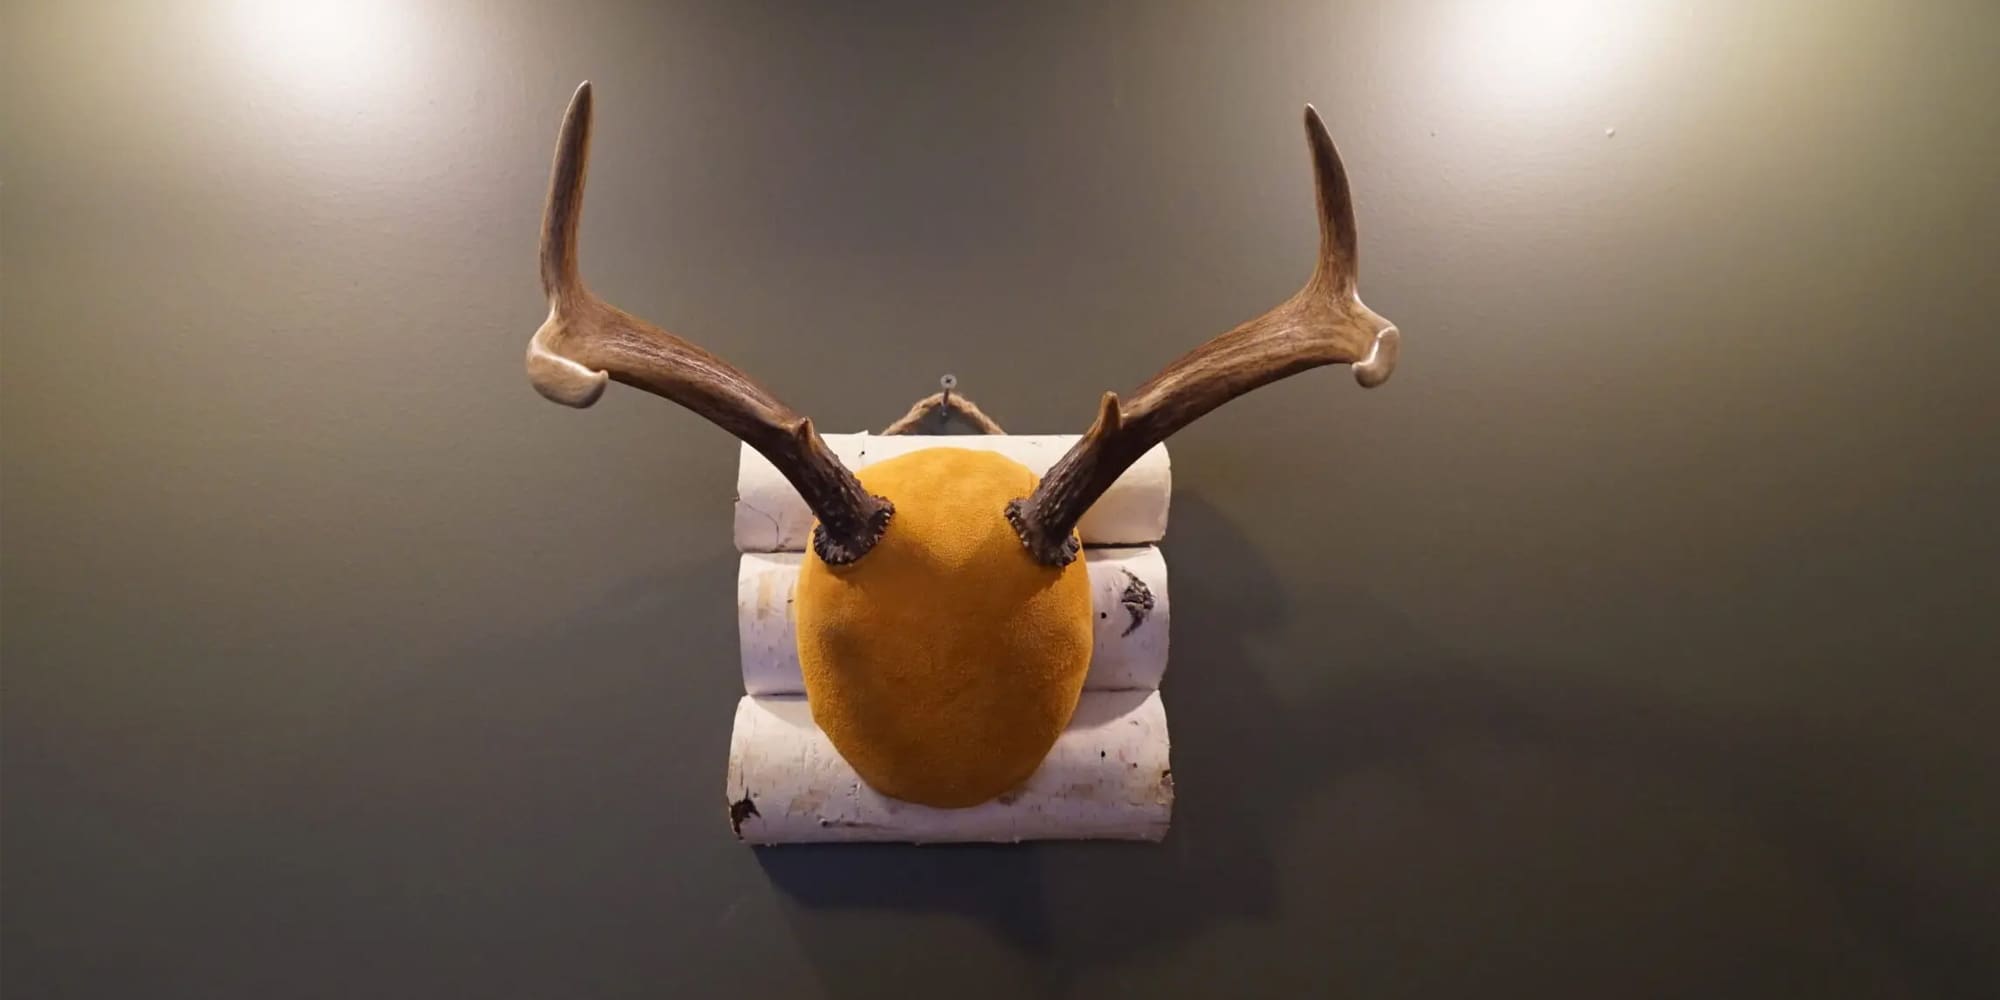
For this article, I mounted two animals to show a few different options. One is a Sitka blacktail I took on Kodiak Island two years ago. The other is an antelope my dad took on a hunt with me a while back. Neither of these animals are the biggest in the world, but they were both taken on fun and memorable hunts, and as souvenirs of those hunts, they’re worthy of display.
Tools/Supplies
To start the antler mount, first, gather up the needed supplies.
Tools: You’ll need a drill, a screwdriver, a staple gun, and a knife. Also, grab a saw of some kind.
Supplies: Board: ¼” thick board (½” for elk antlers) about 2’x2’ is more than enough (hobby board sold at Home Depot works well), ½” thick upholstery cushion, can of spray foam, pen, 2x4 or 2x2 board, screws, a plaque or wood to make a plaque to which the antlers can be mounted.
There are three parts to the antler mount: the antlers/horns, the cap that covers the skull portions, and the plaque in the back.
Step 1: Prep the Skull
The first step is to cut the skull plate off the skull. This may have been done in the field, but if not, there are two ways that work well. The first is to cut straight down behind the eyes and then straight back through the skullcap. The next is to cut straight down in front and behind the horn or antler. This is the method you should use for antelope, as you will be able to mount them more straight up and natural-looking. It looks a little better if the antlers or horns are mounted on the plaque how they would be on the animal.
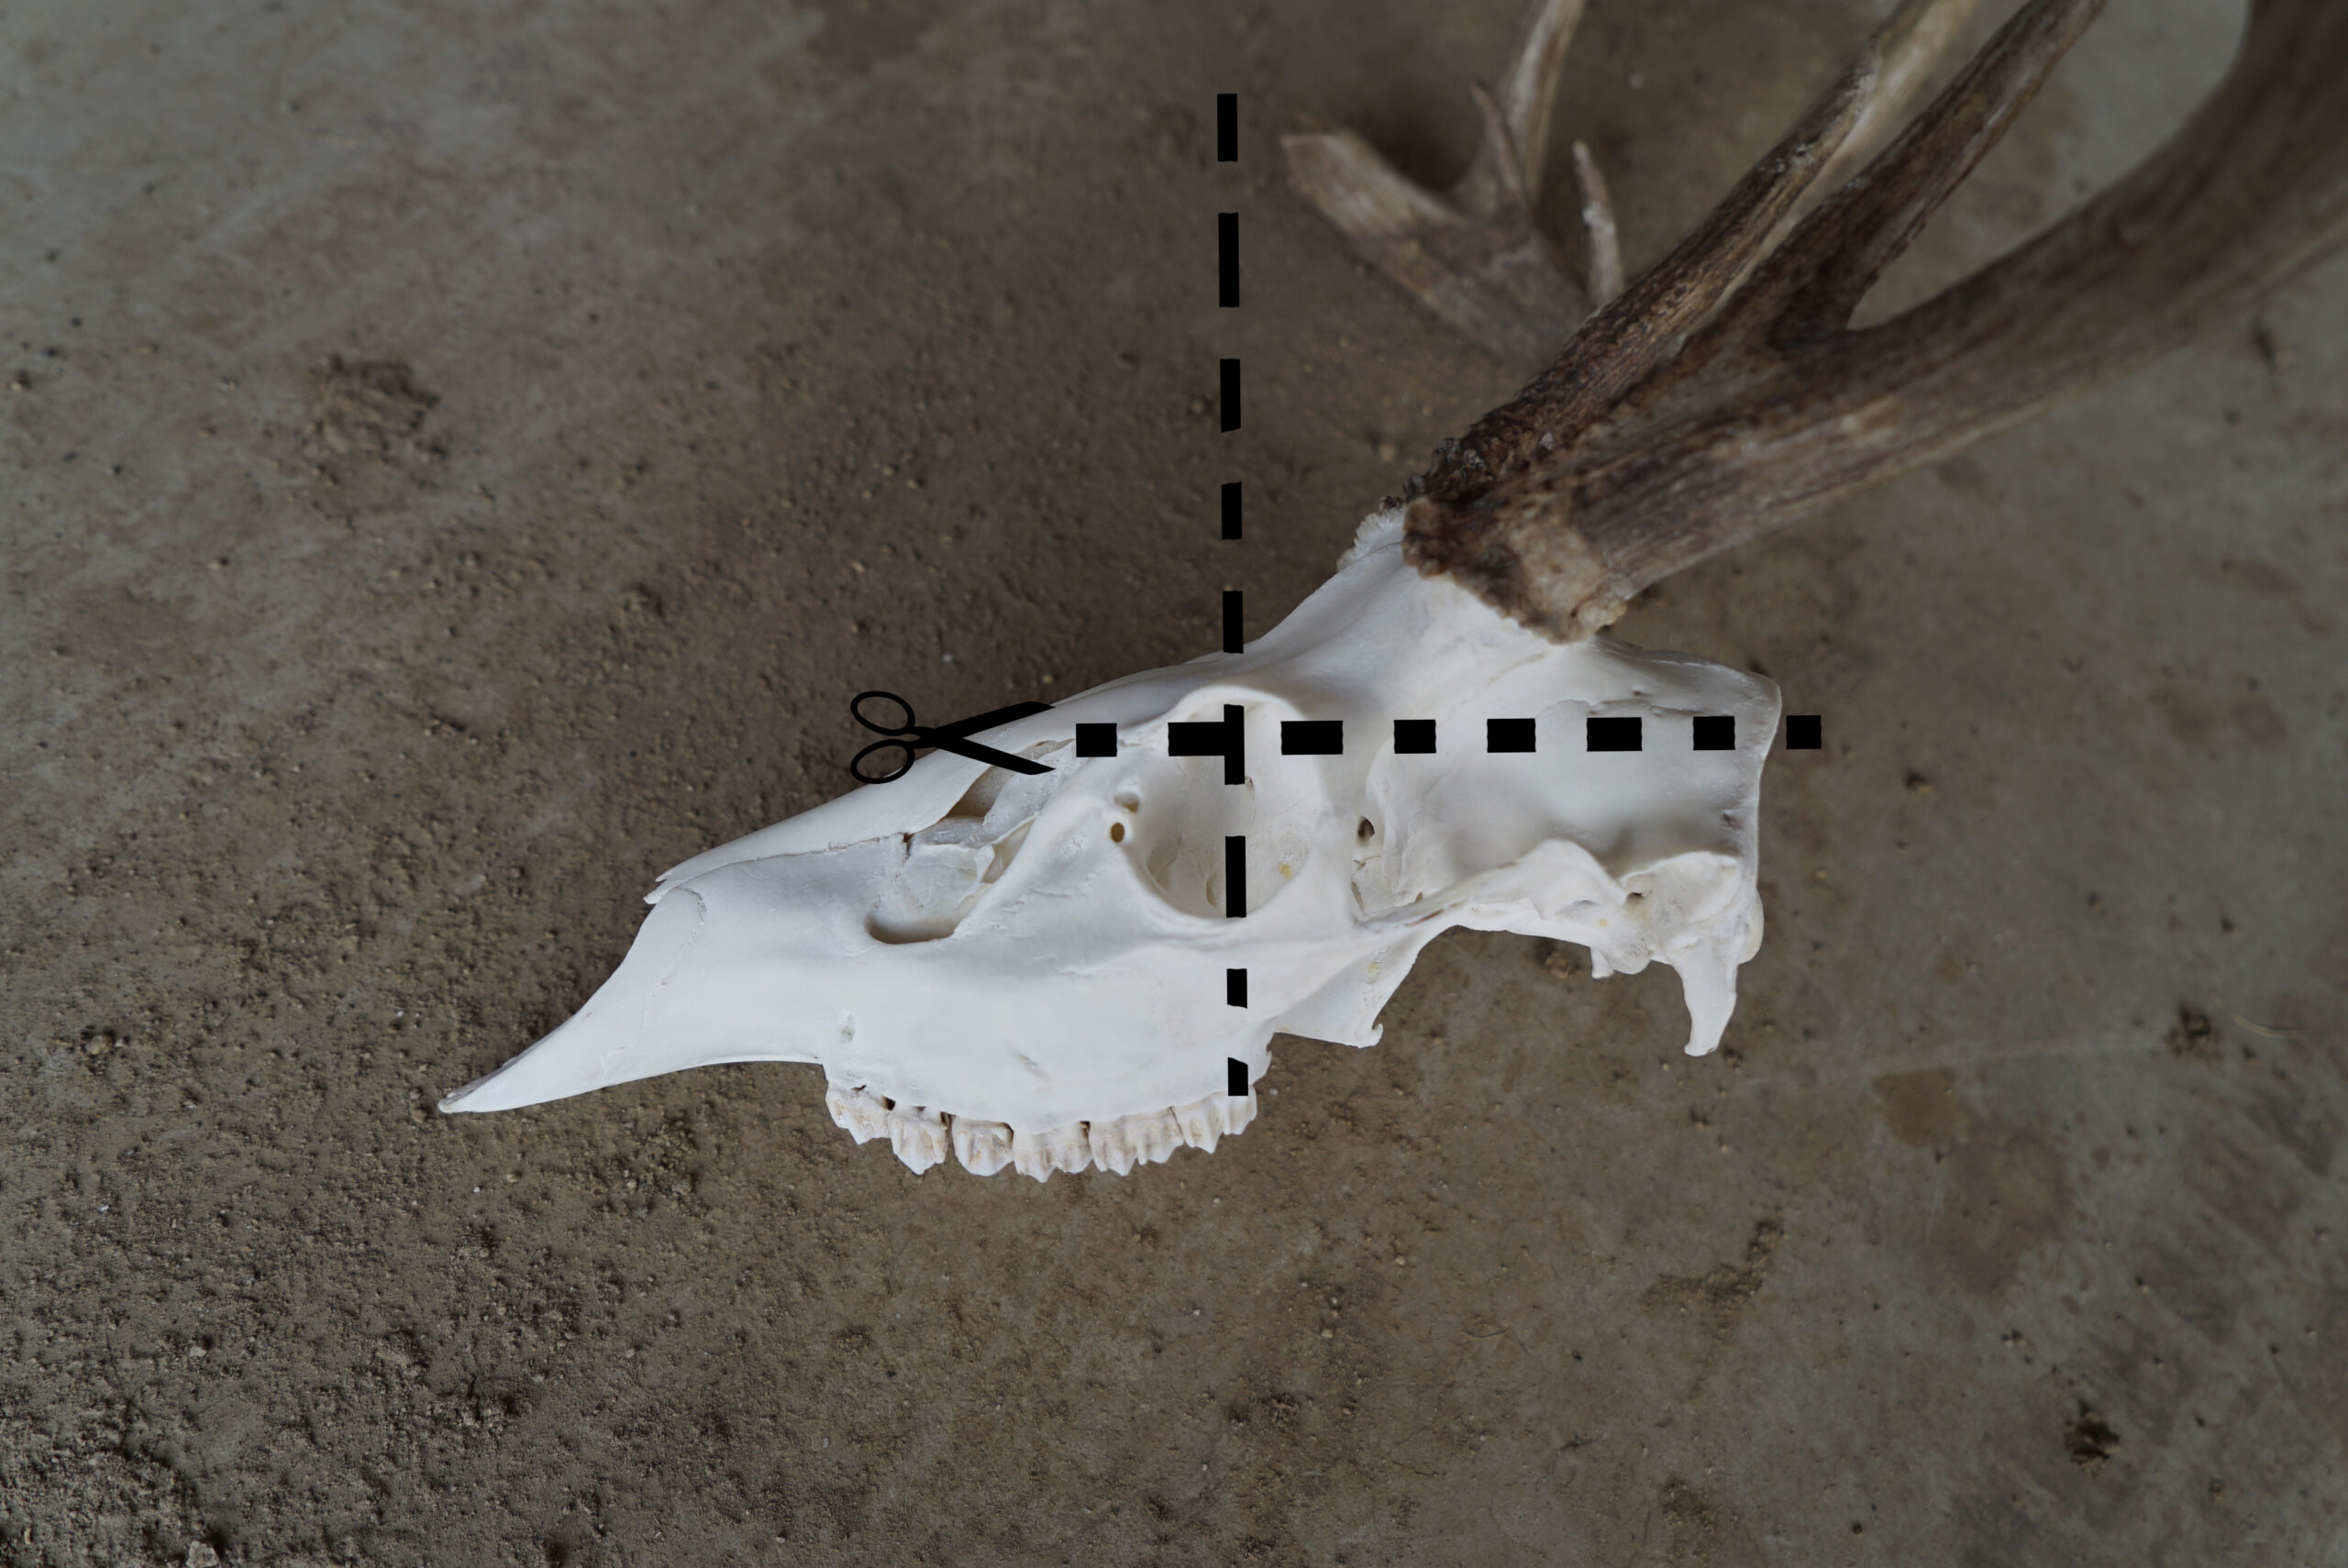
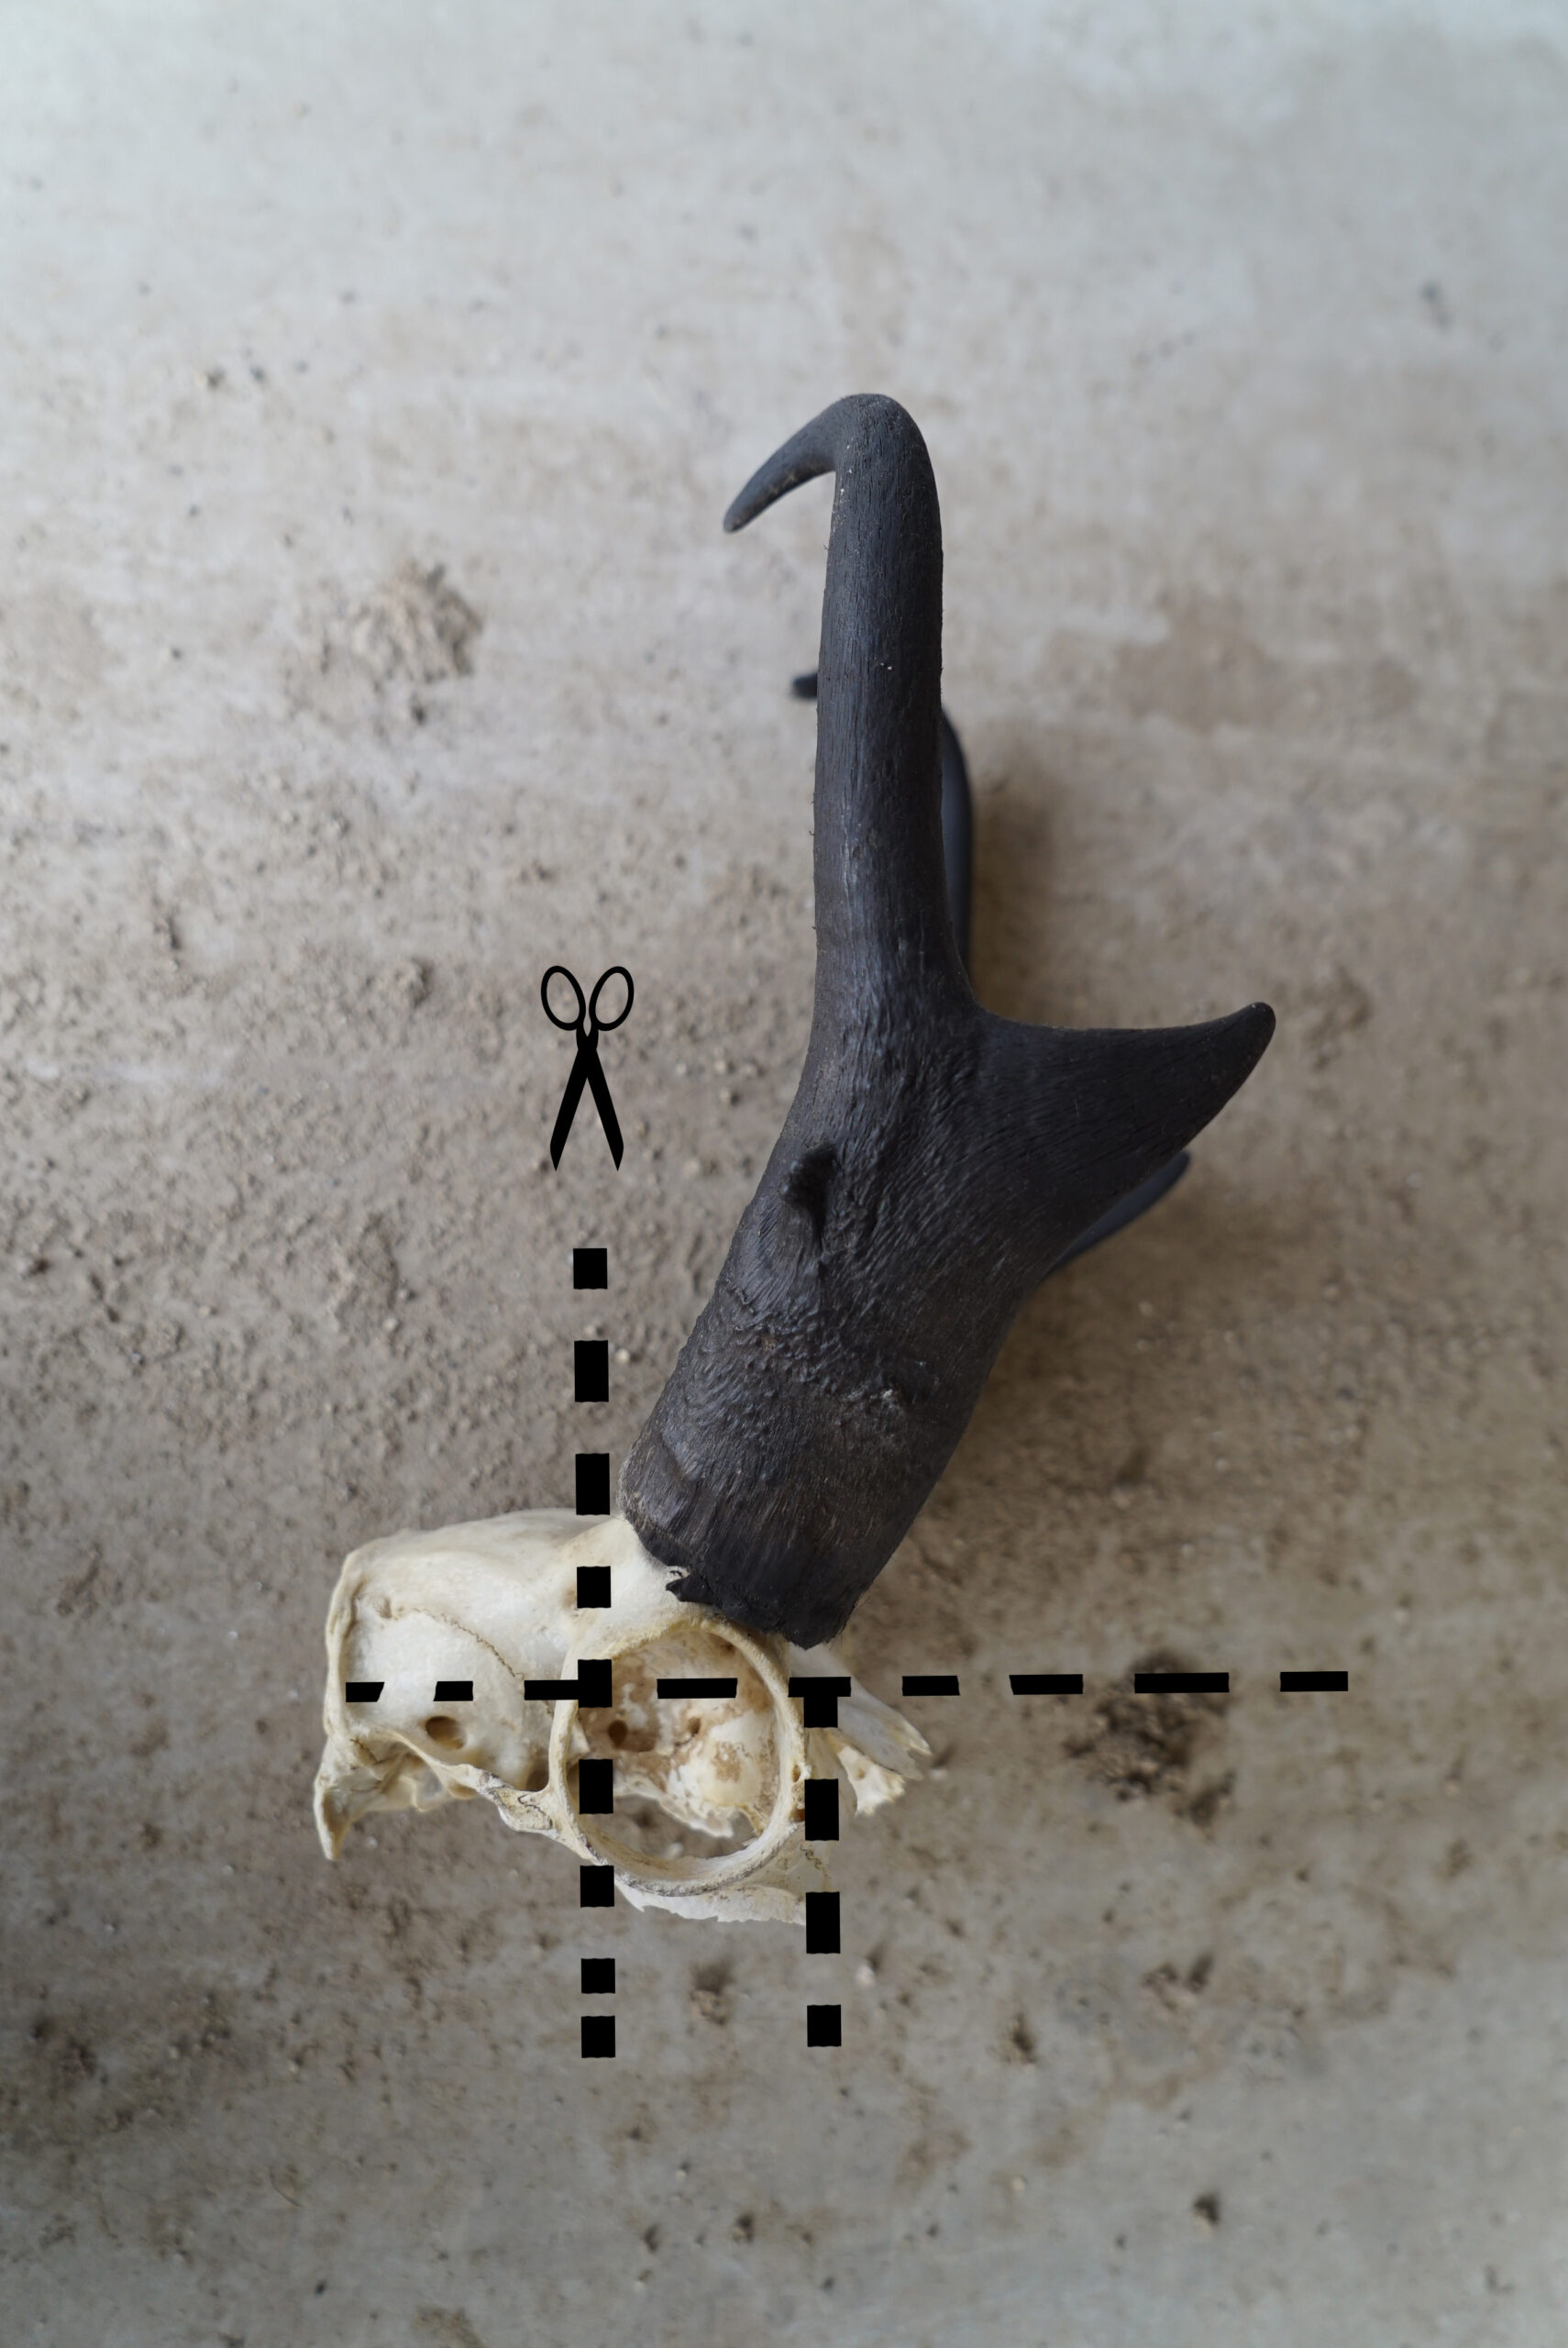
If the skull plate isn’t clean, the best way to clean it is to give it a quick boil to make sure all the meat and tissue is removed.
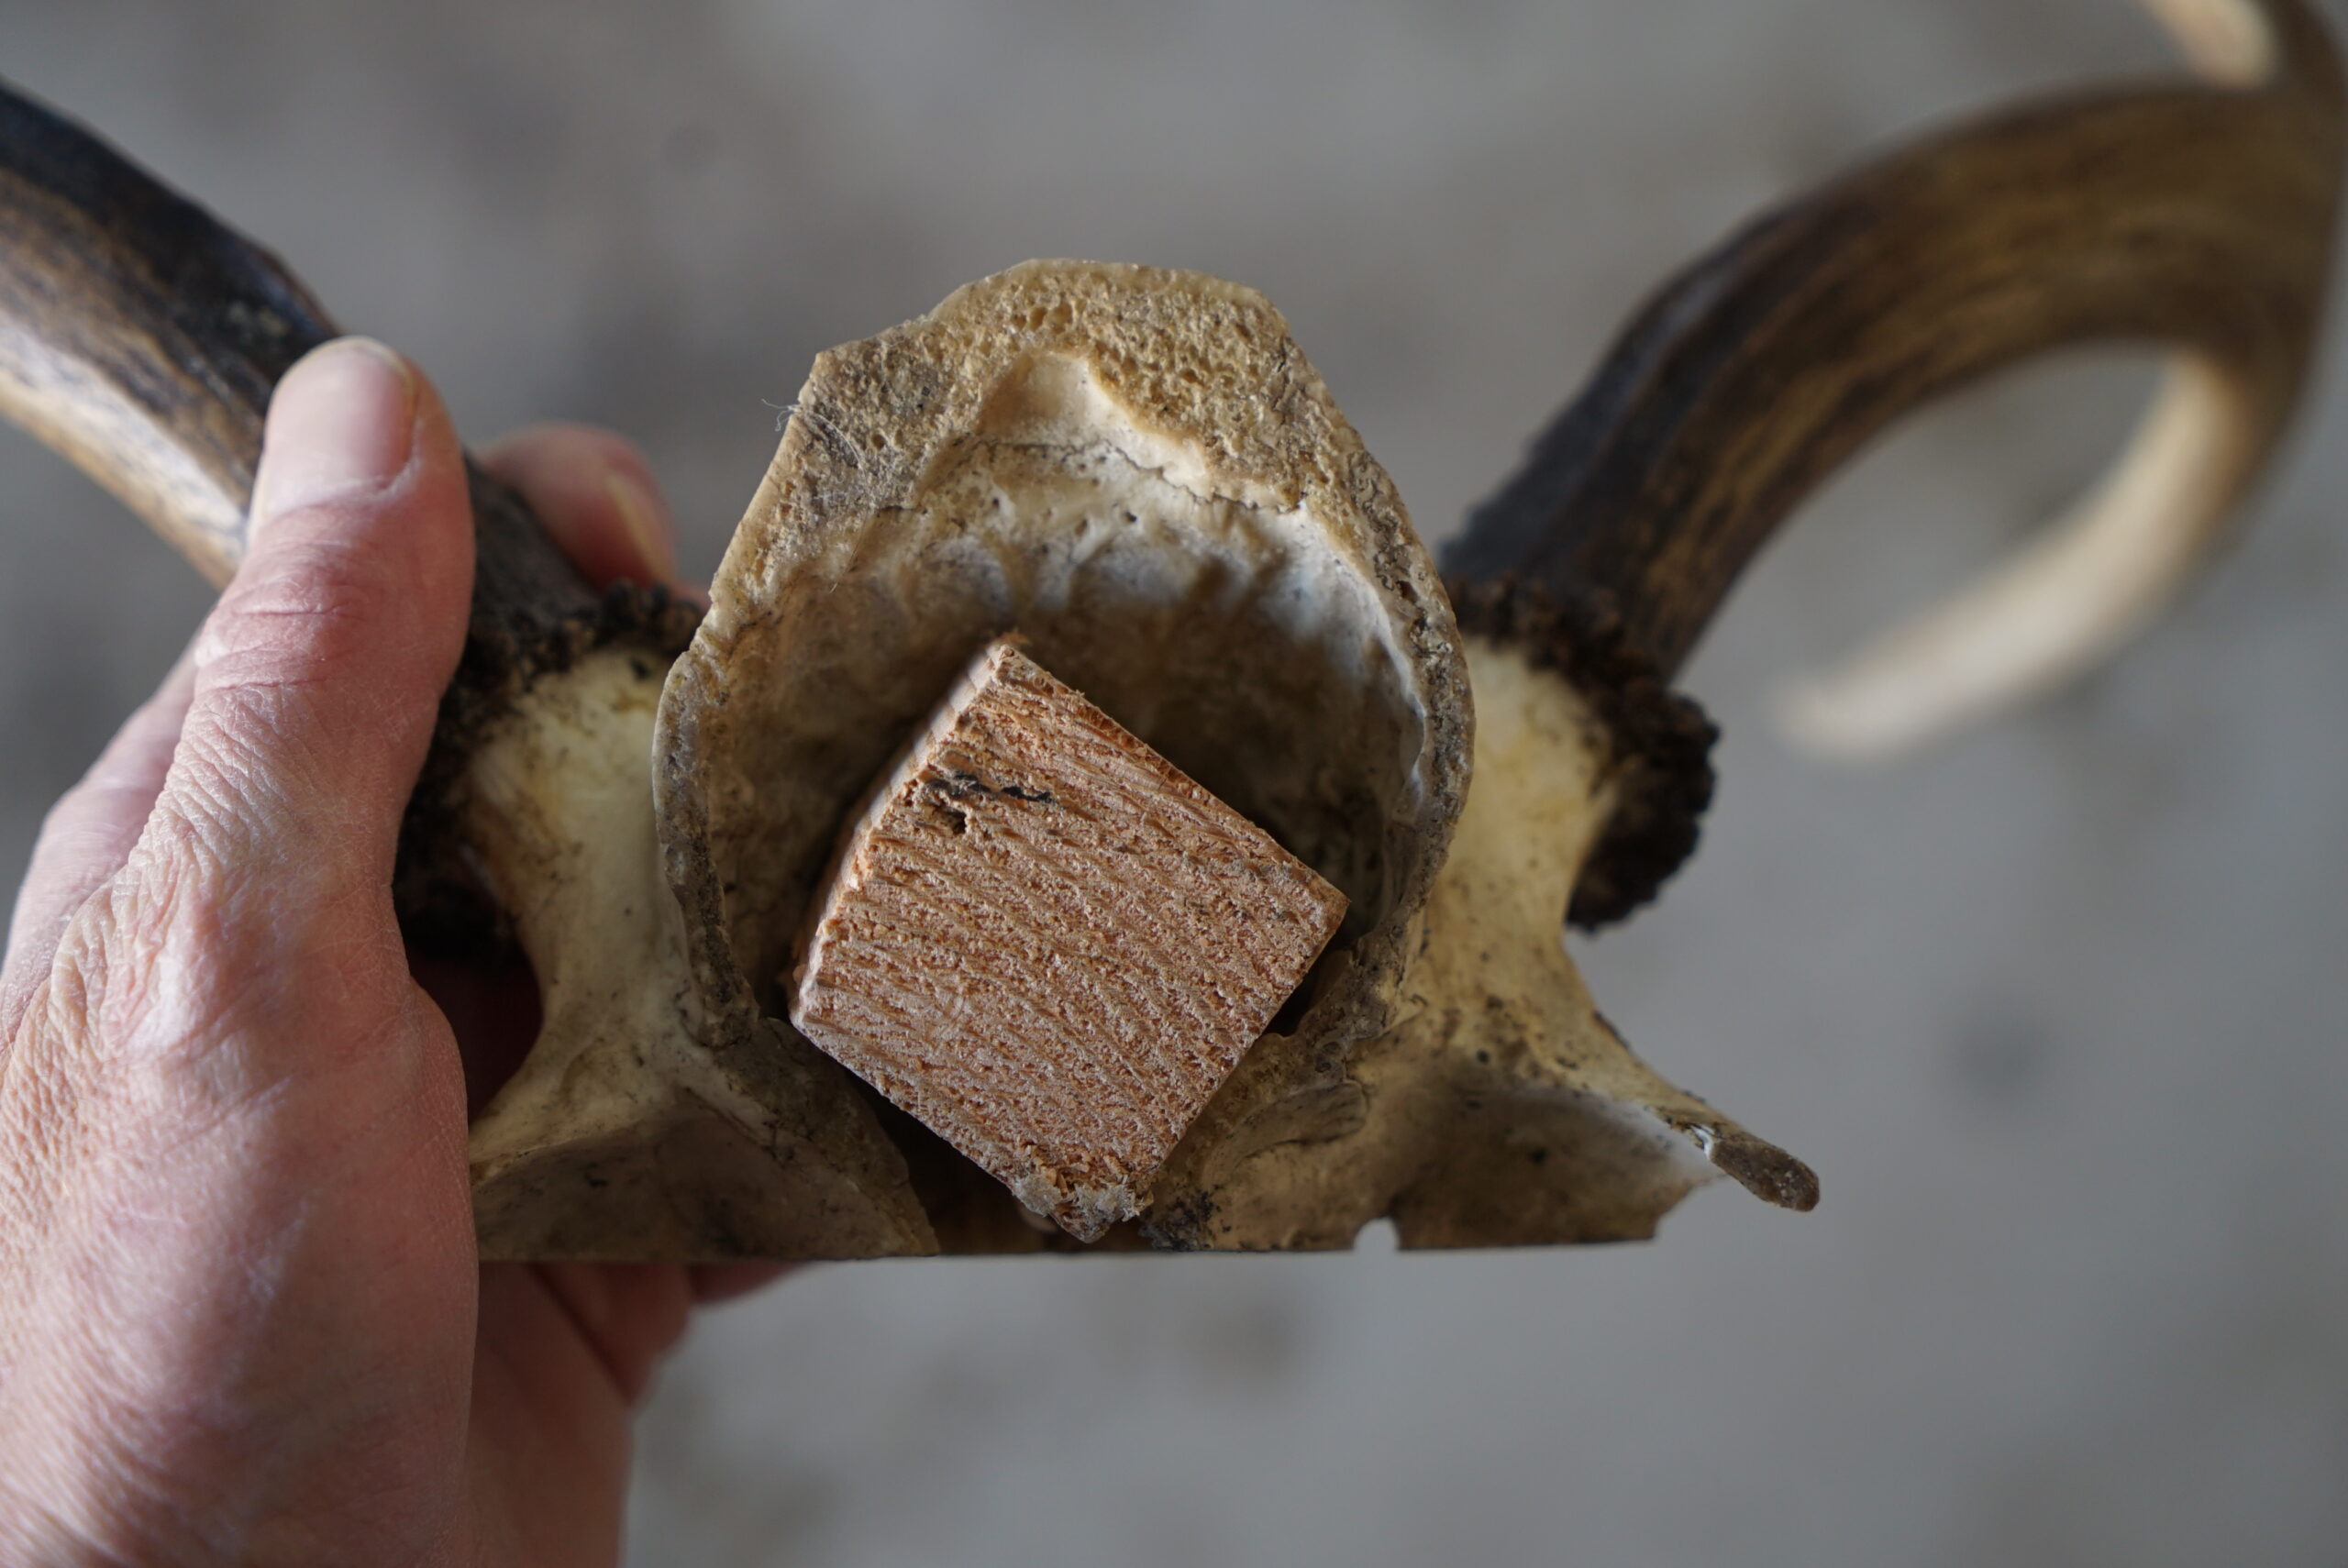
Step 2: Affix the Skull to the Attachment Board
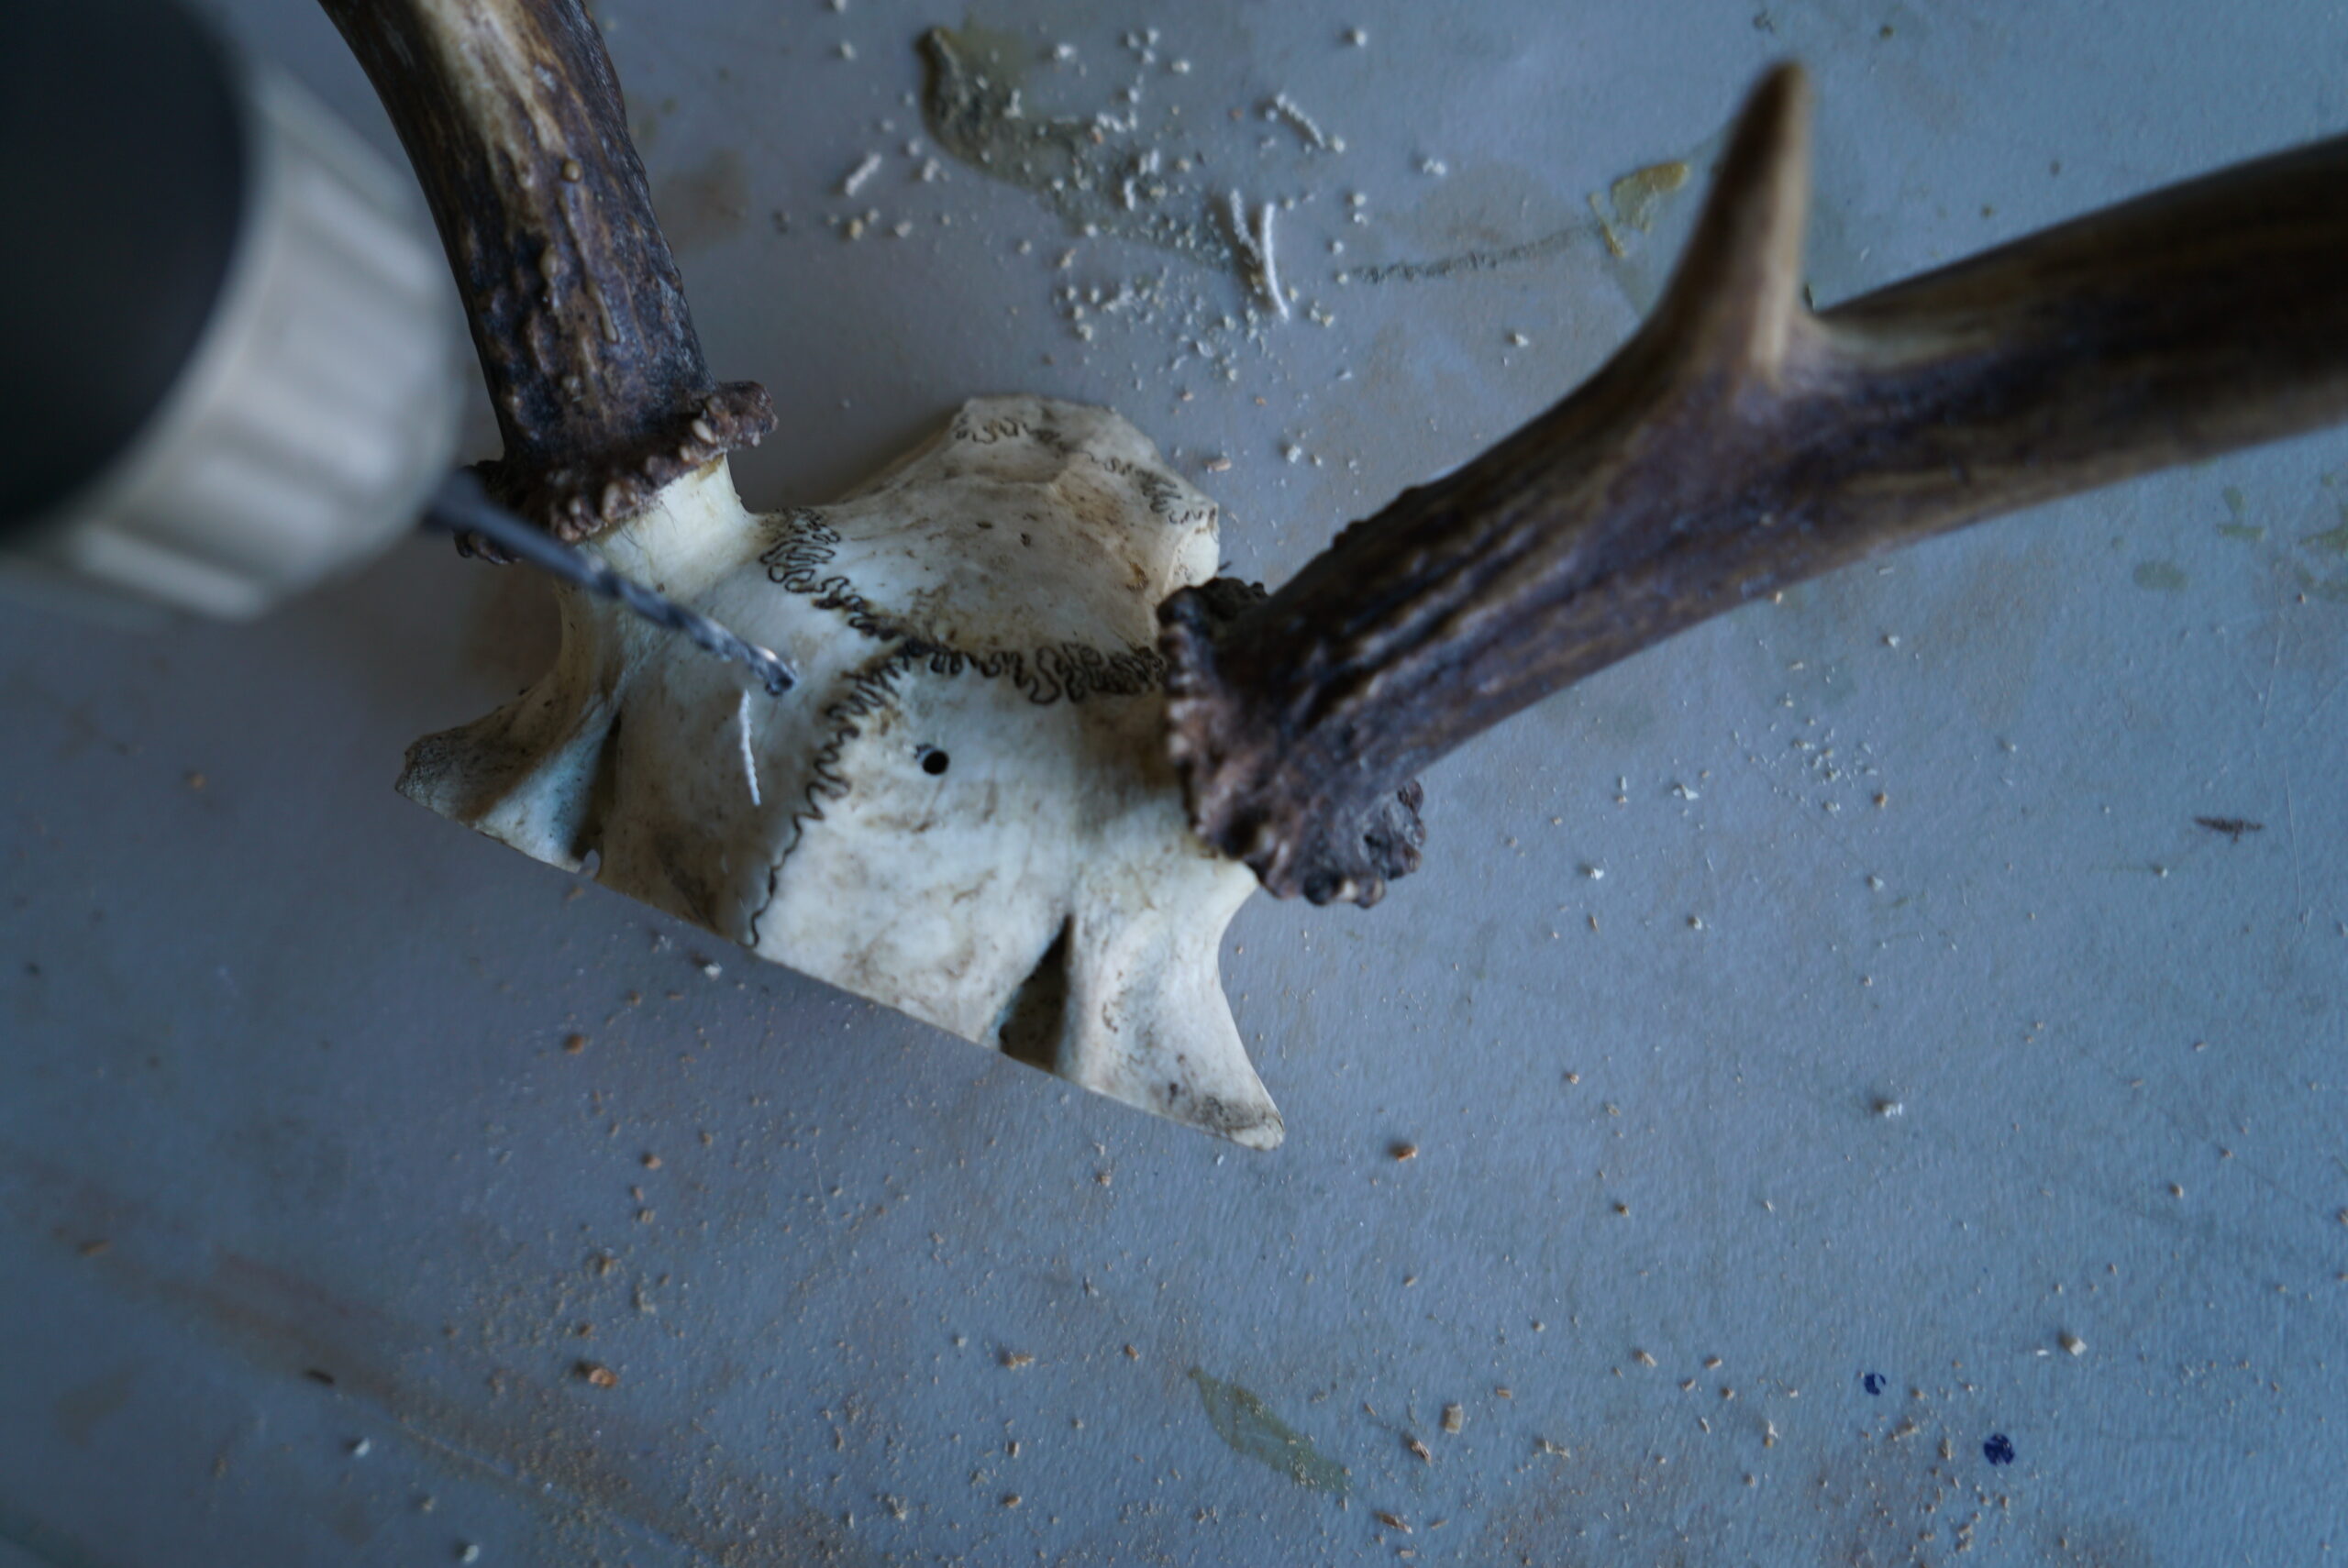
Next, cut a piece of wood from your 2x4 or 2x2 board to screw the antlers to. To measure the right size, put the piece of wood against the skull and then mark both sides and cut it.
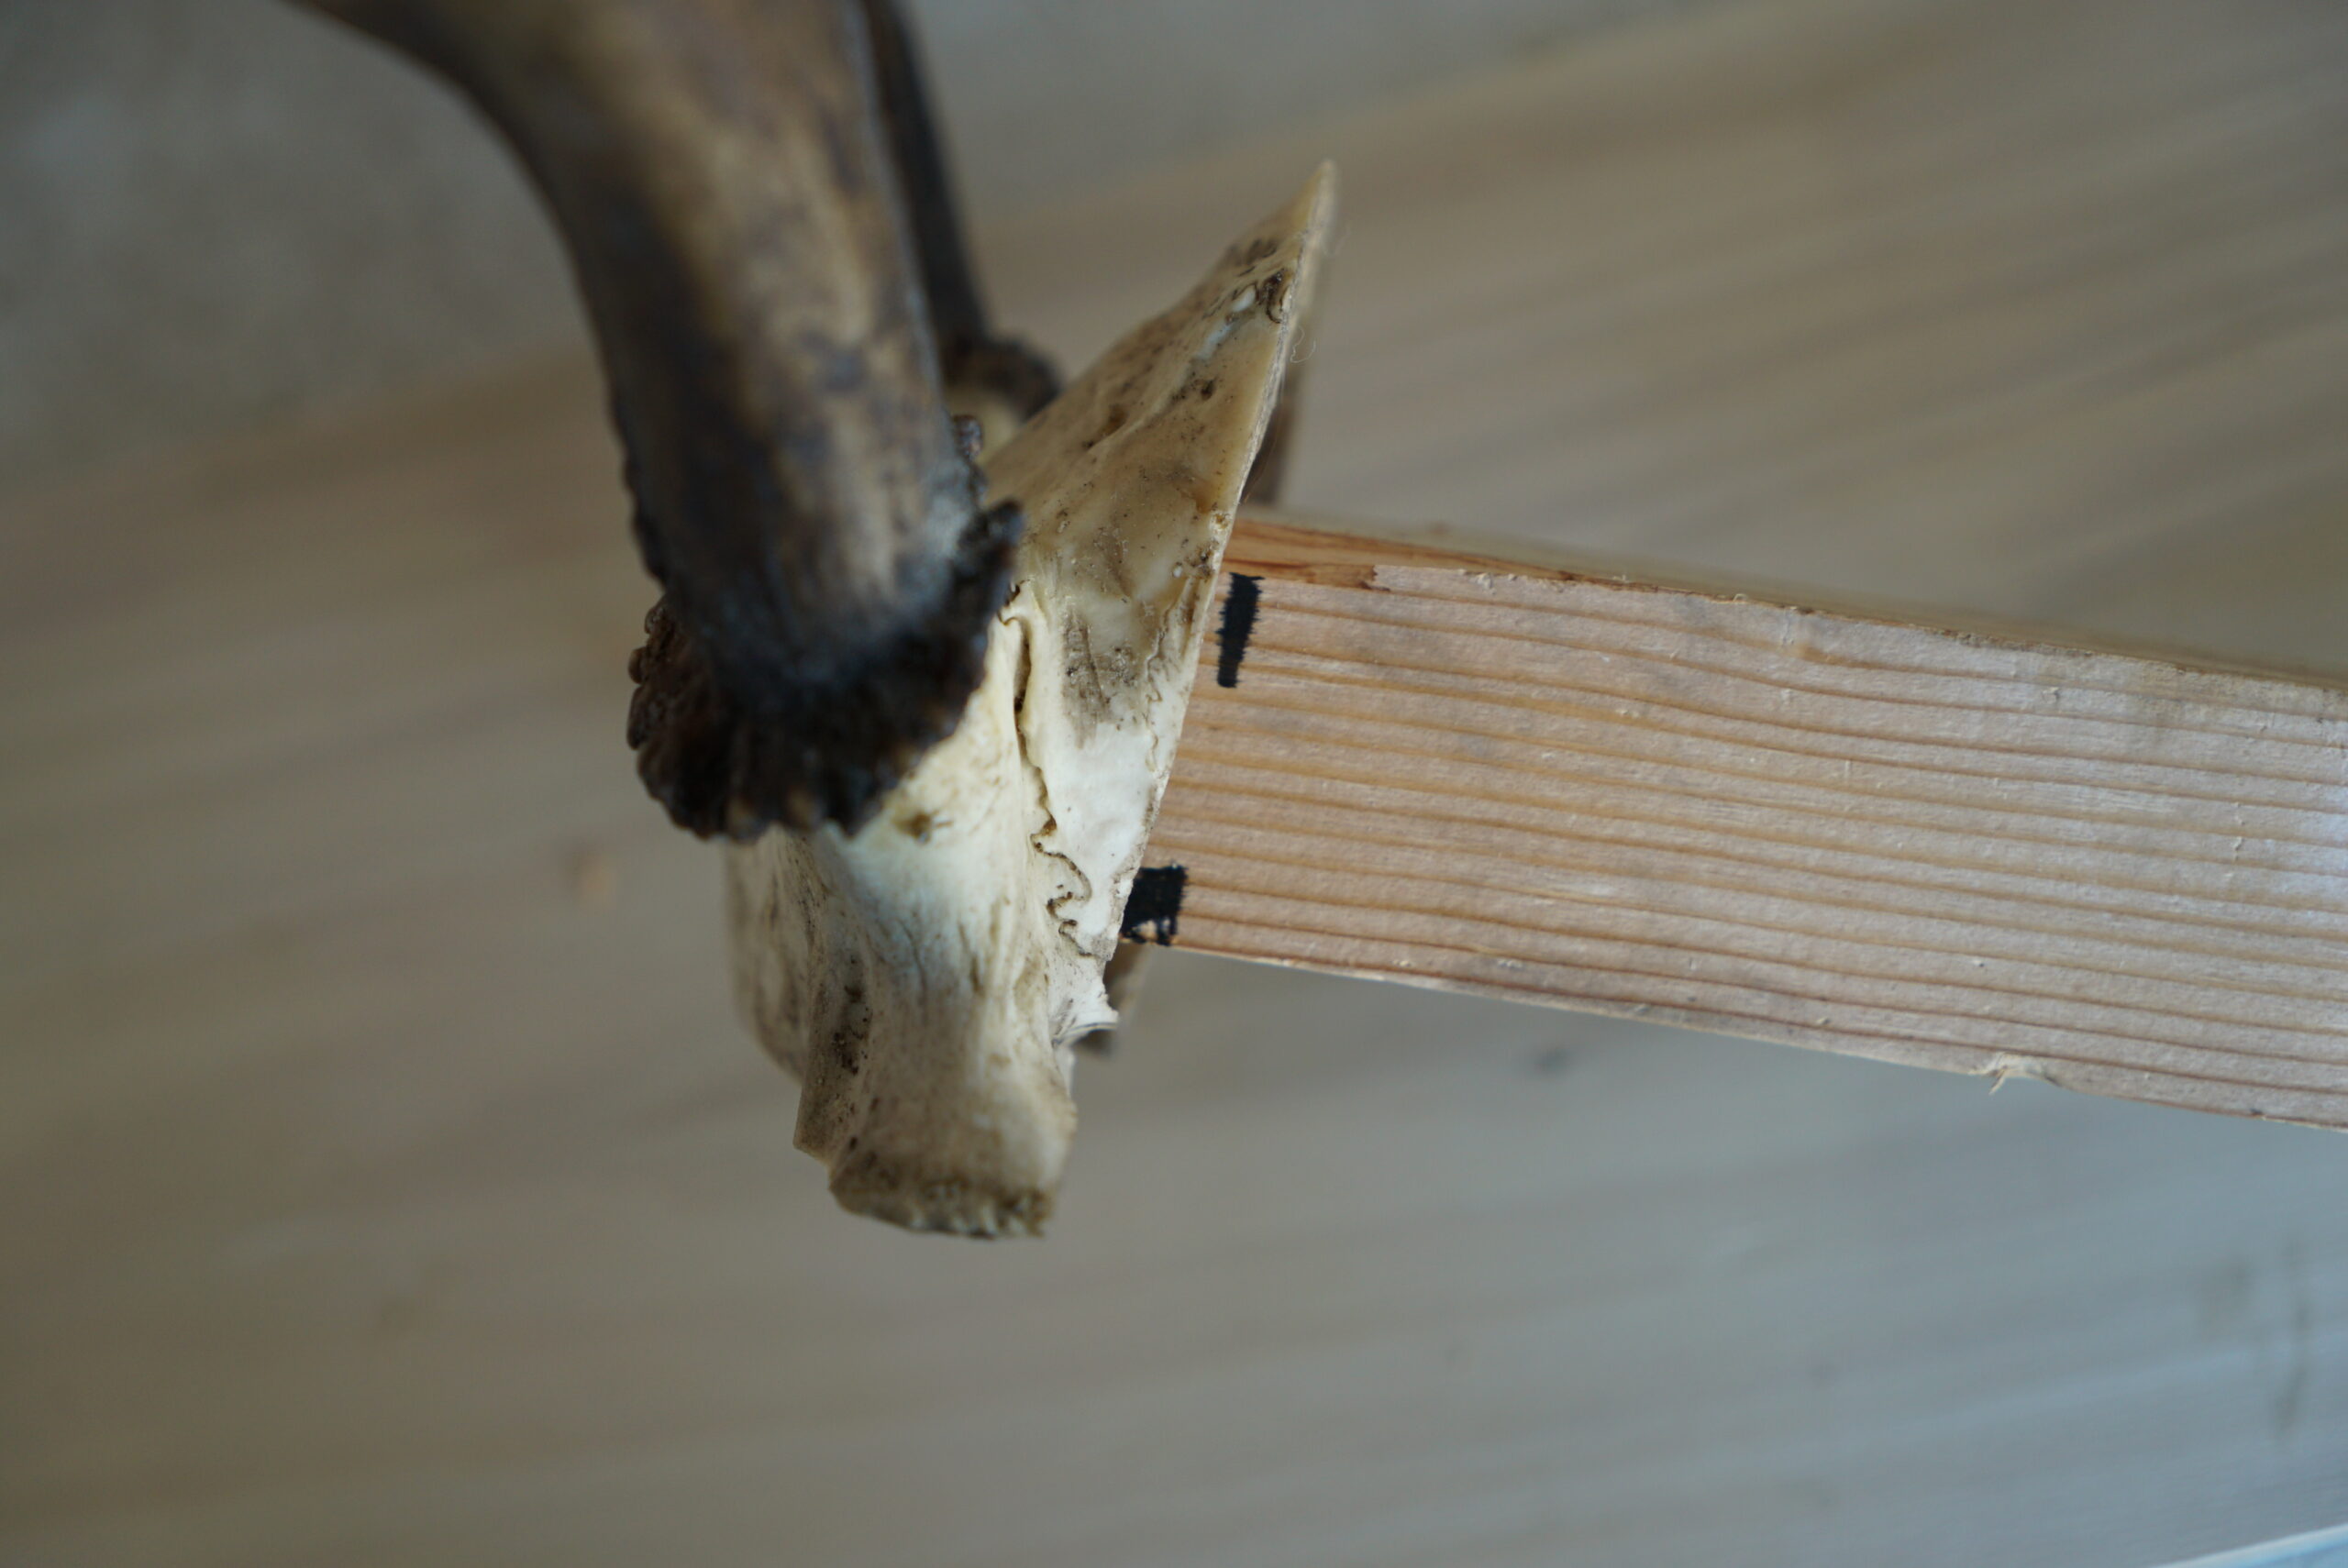
Once you have a piece of wood that will fit in the back of the skull, predrill holes into the skull and use two screws to attach it. It’s extremely important to predrill pilot holes to prevent the skull from cracking. Use a screwdriver to secure the antlers to the wood. This allows you to tighten one side or the other and balance it out if need be. You can sand a side of the block as well to get it as level as possible.
For antelope or skulls cut similar, cut a piece of 2x4 off at a 45-degree angle. This allows you to mount the antlers so they will face up in a natural position.
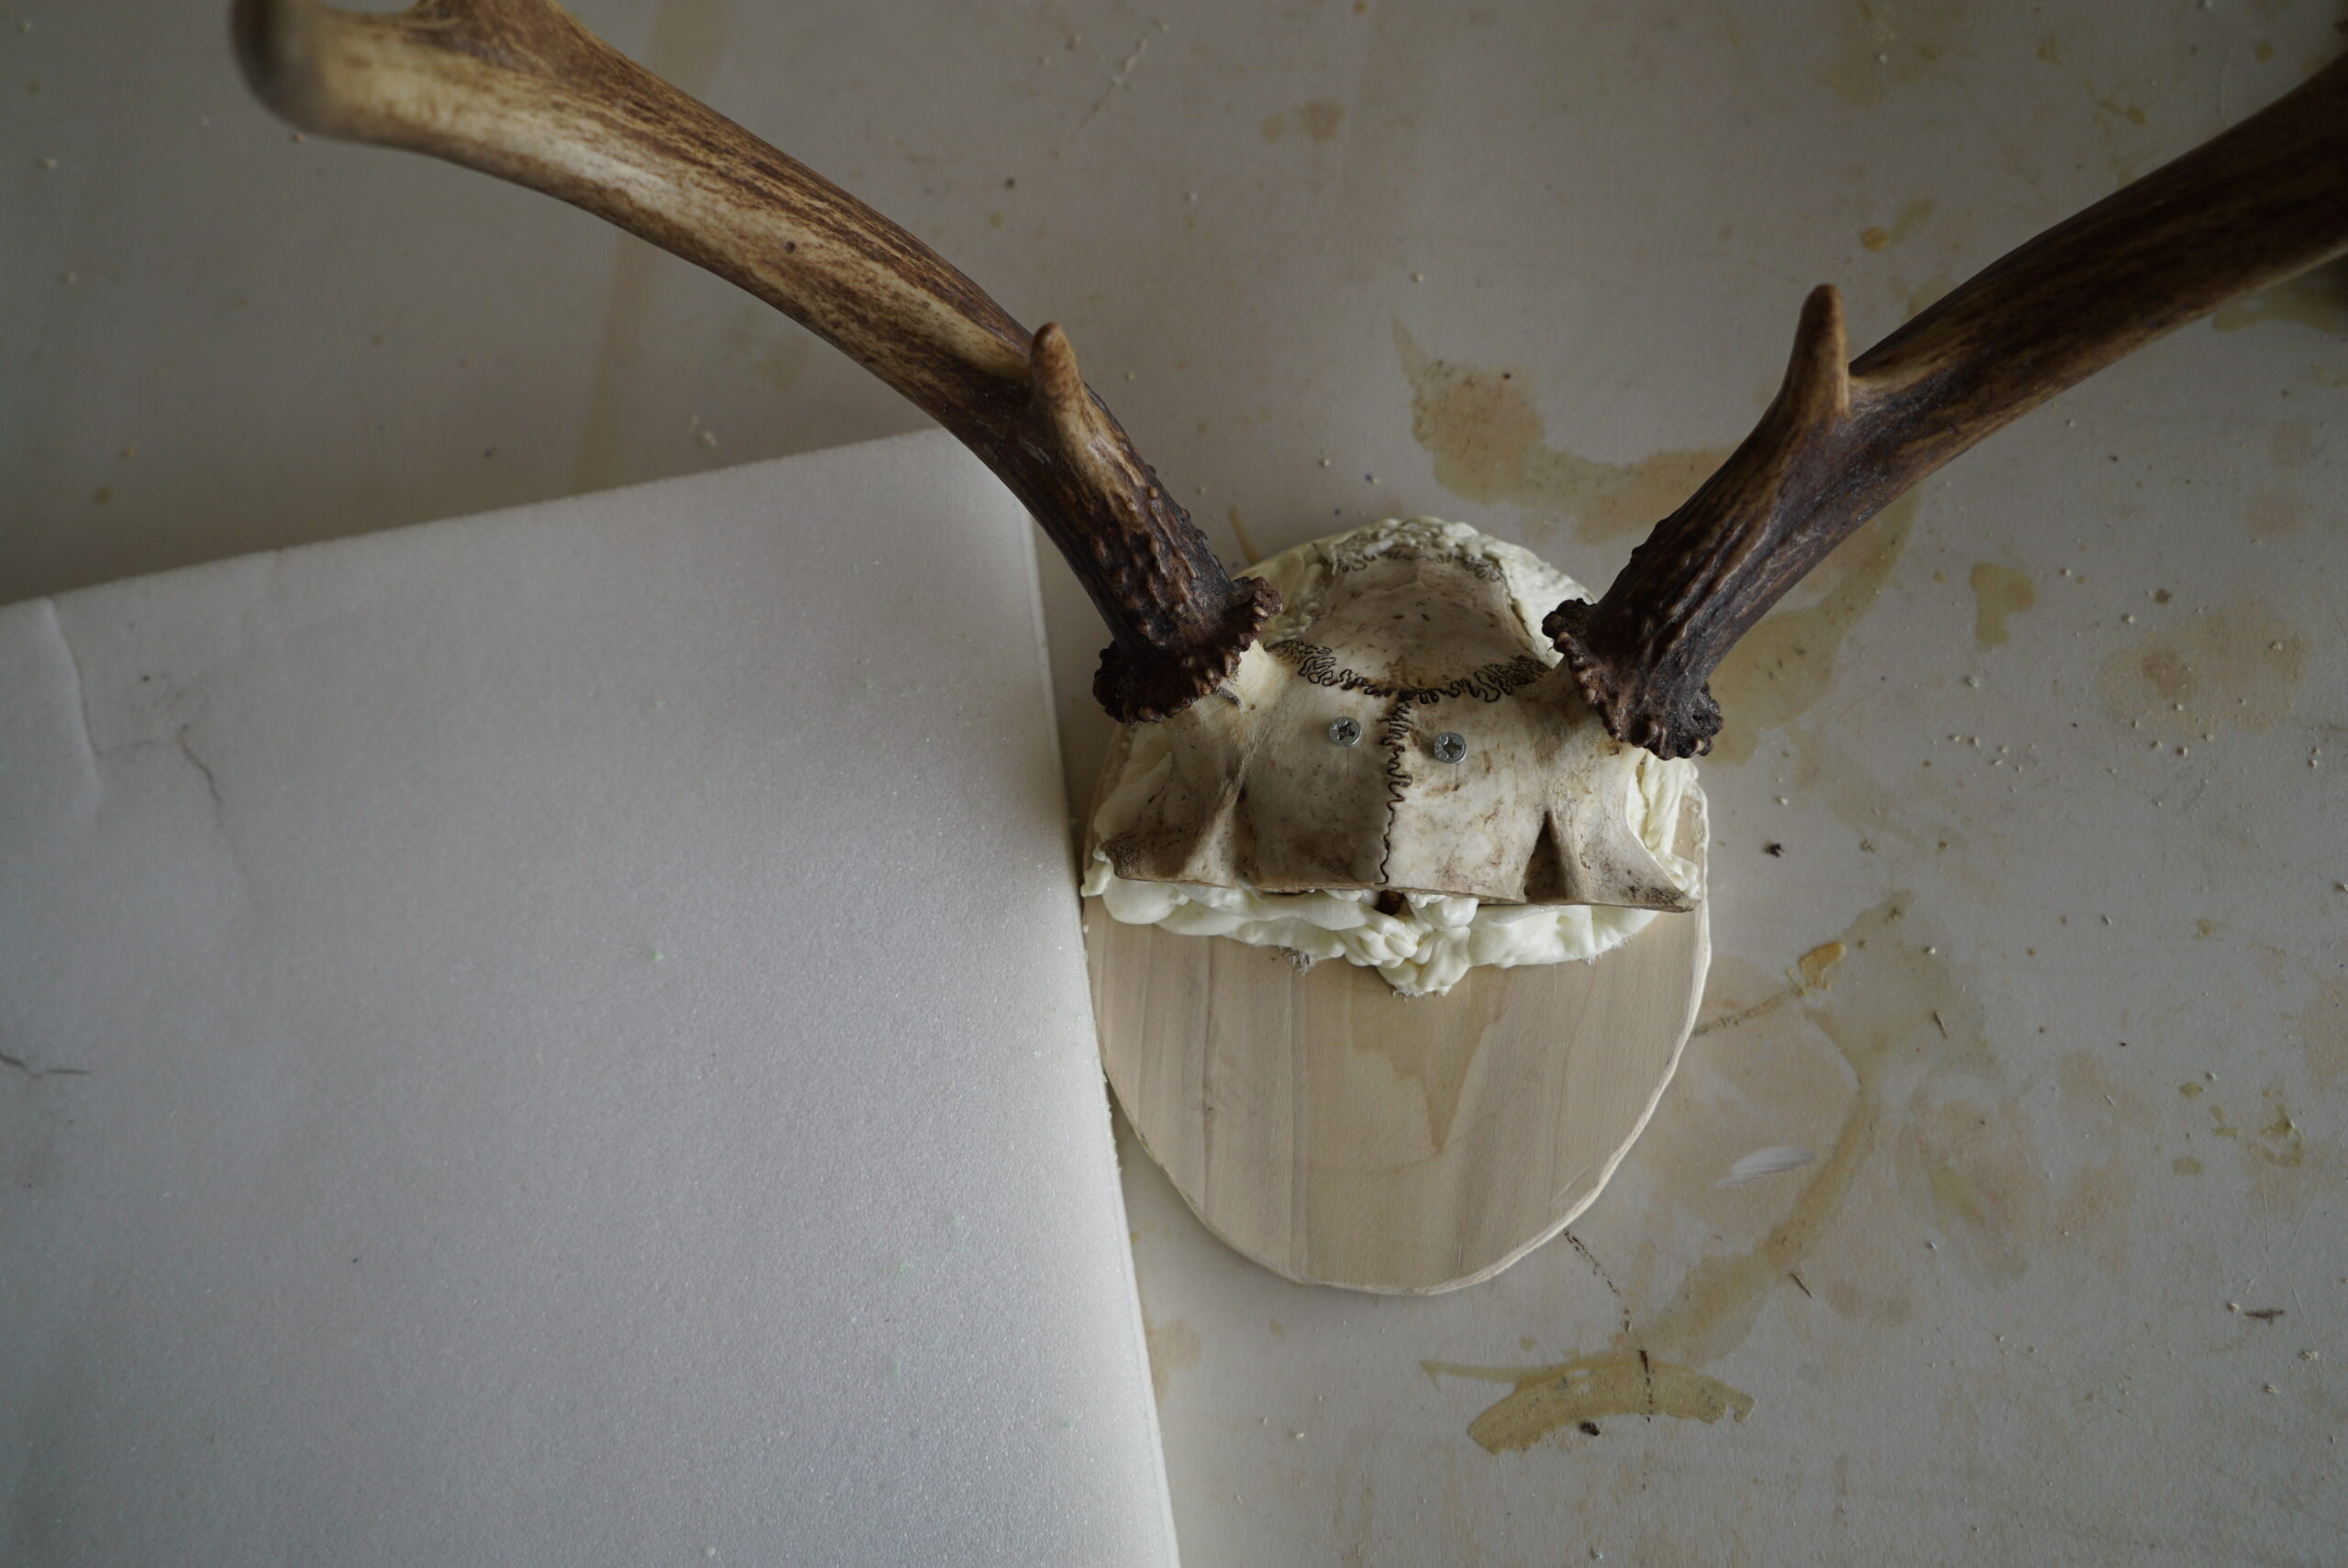
Step 3: Create the Cap Base
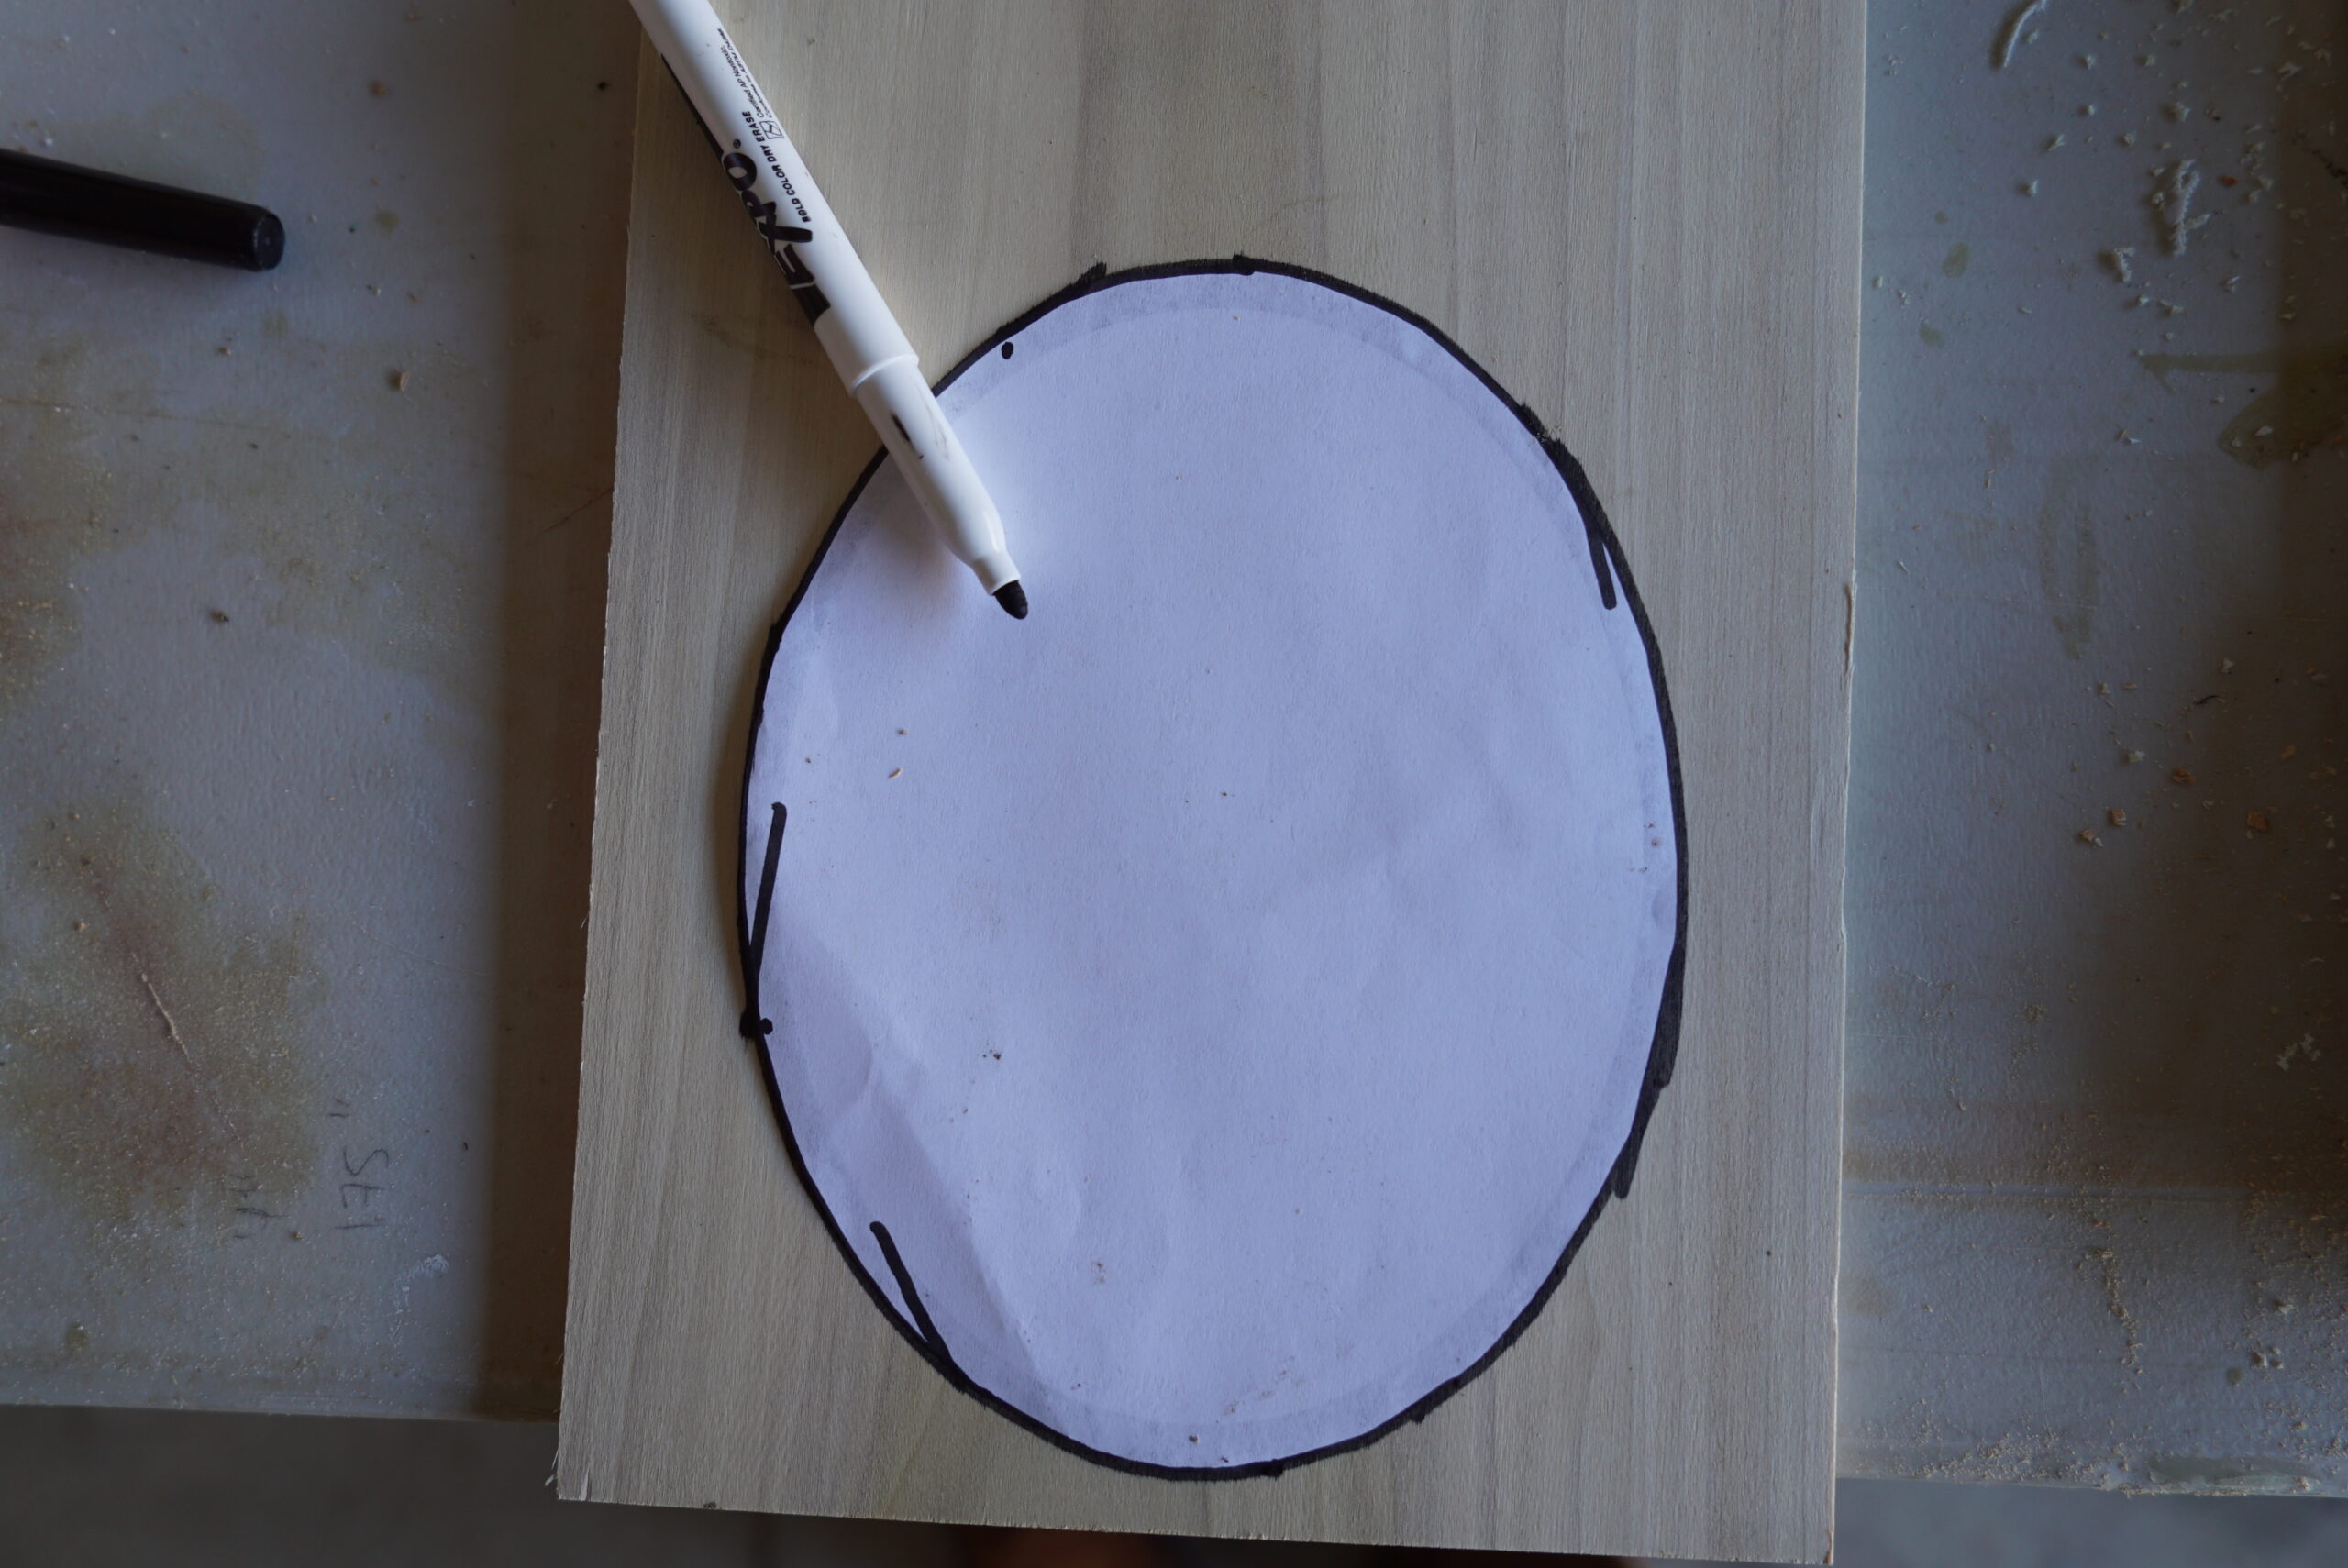
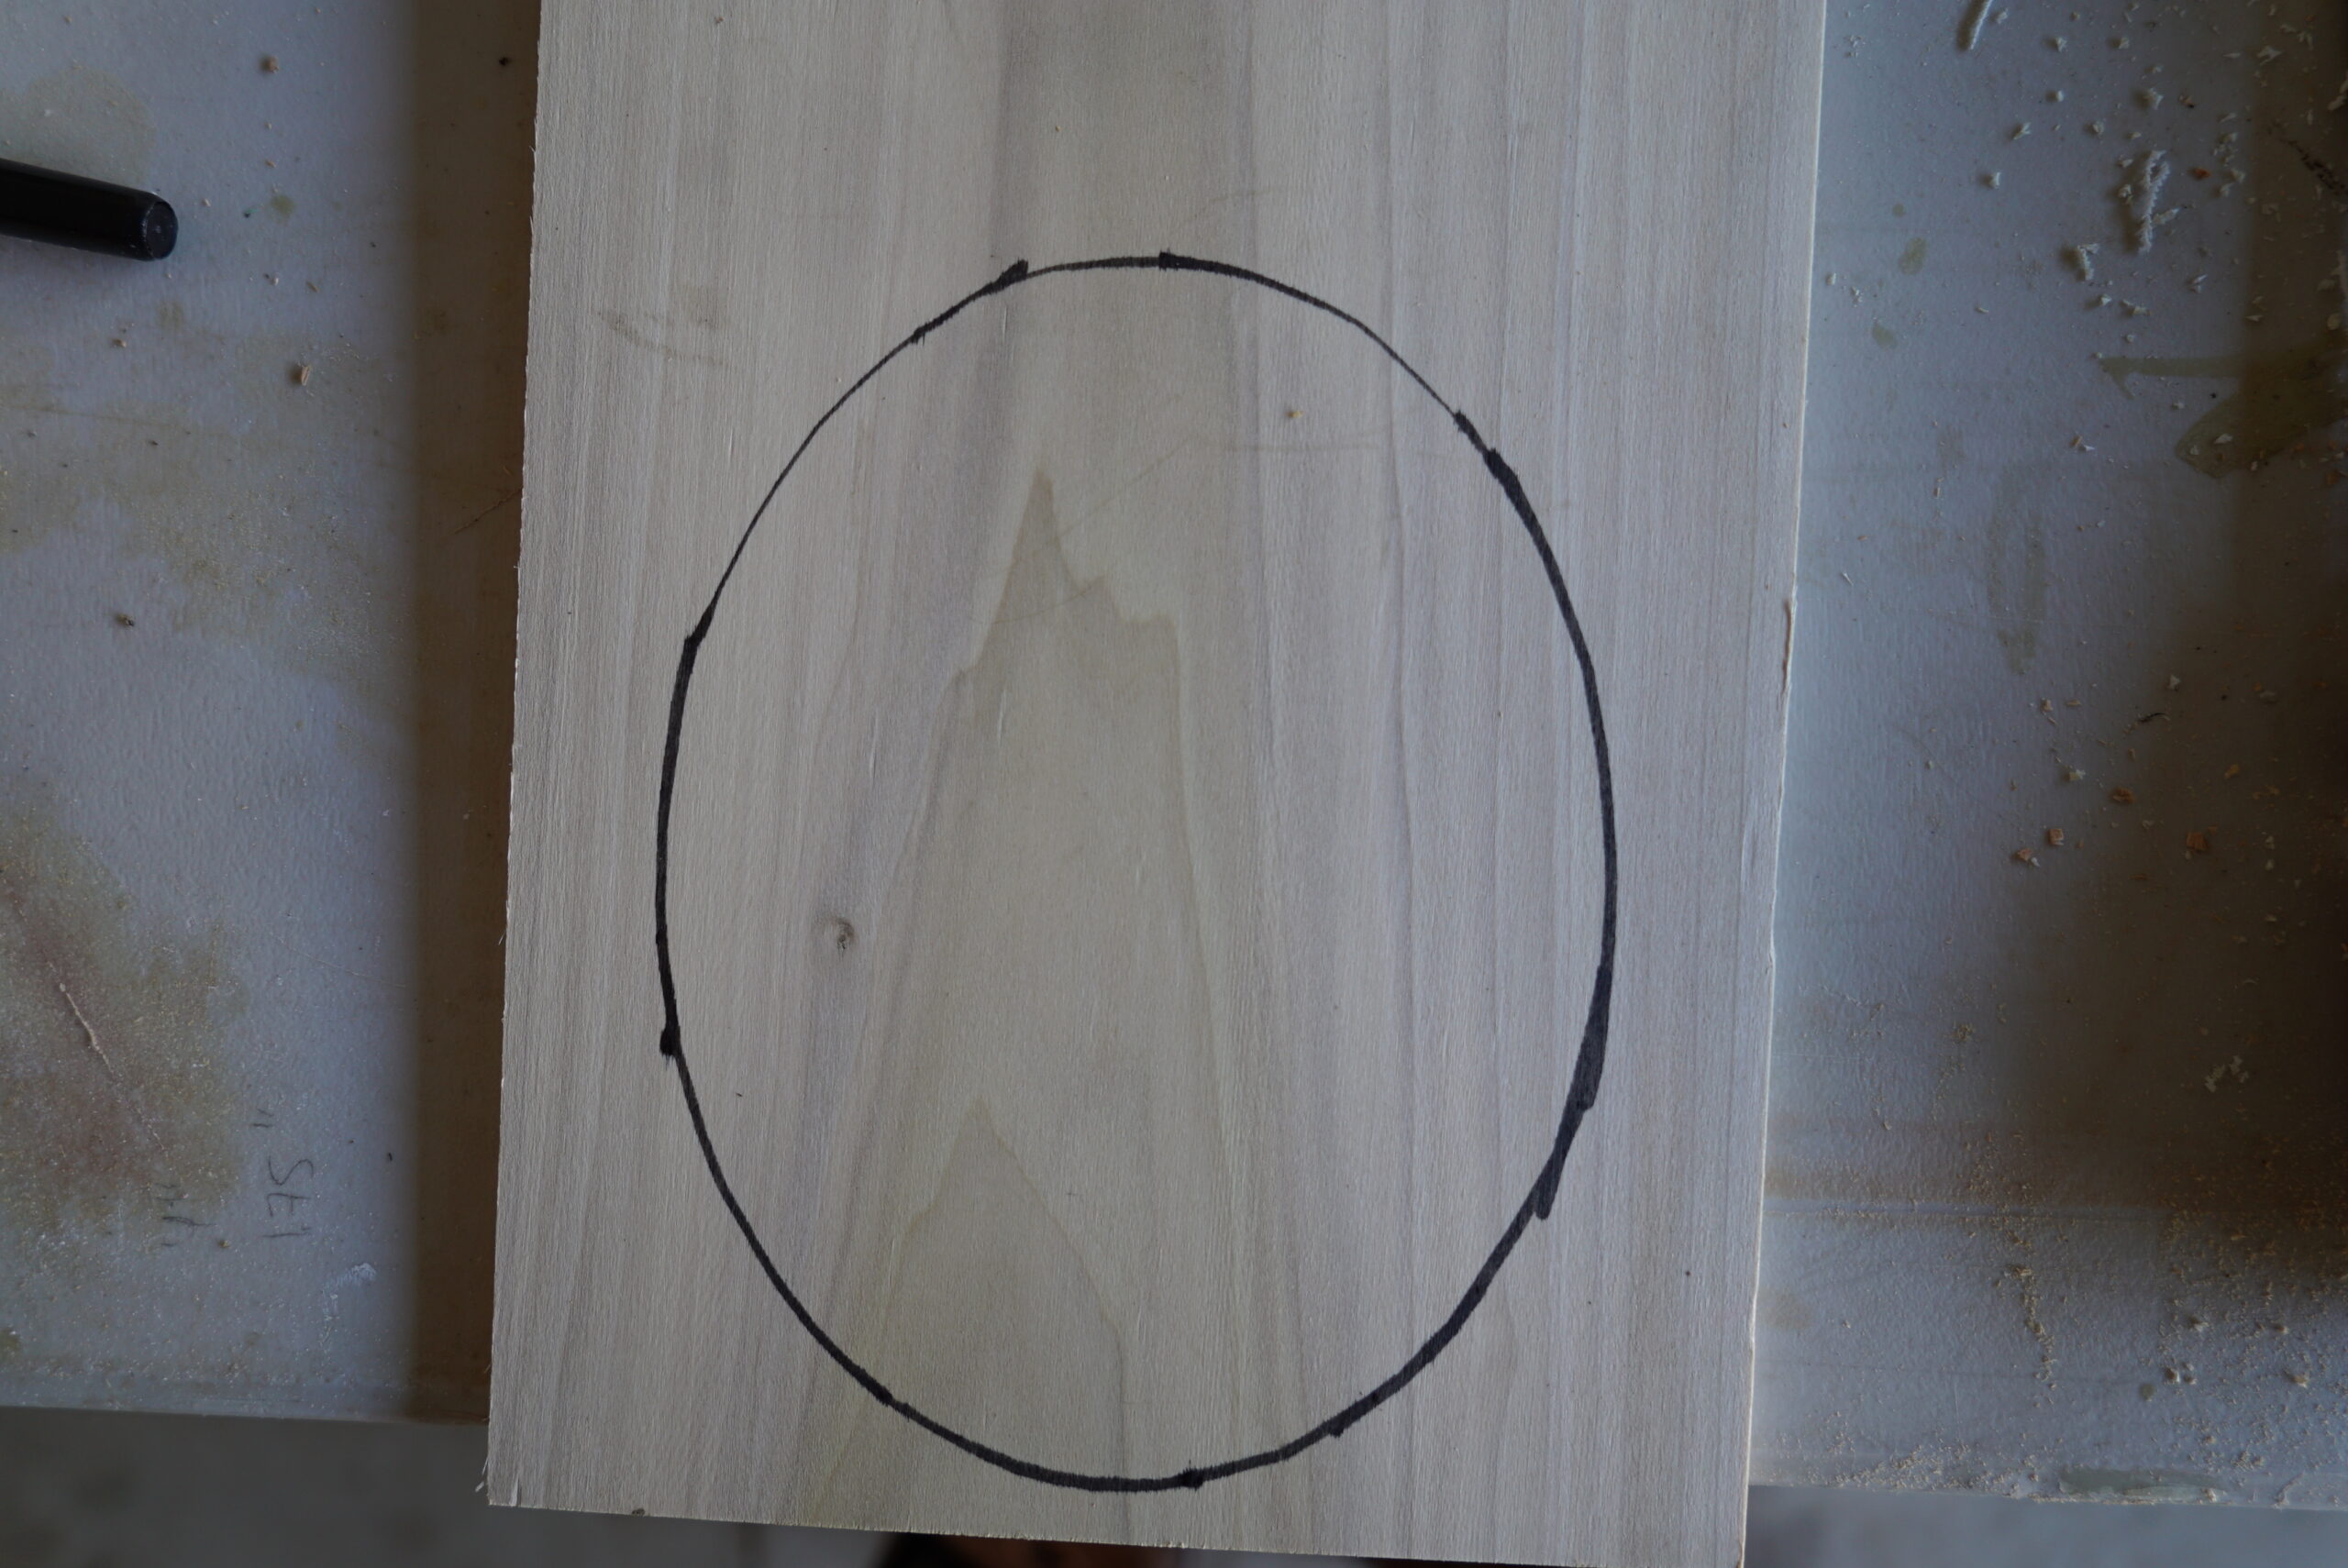
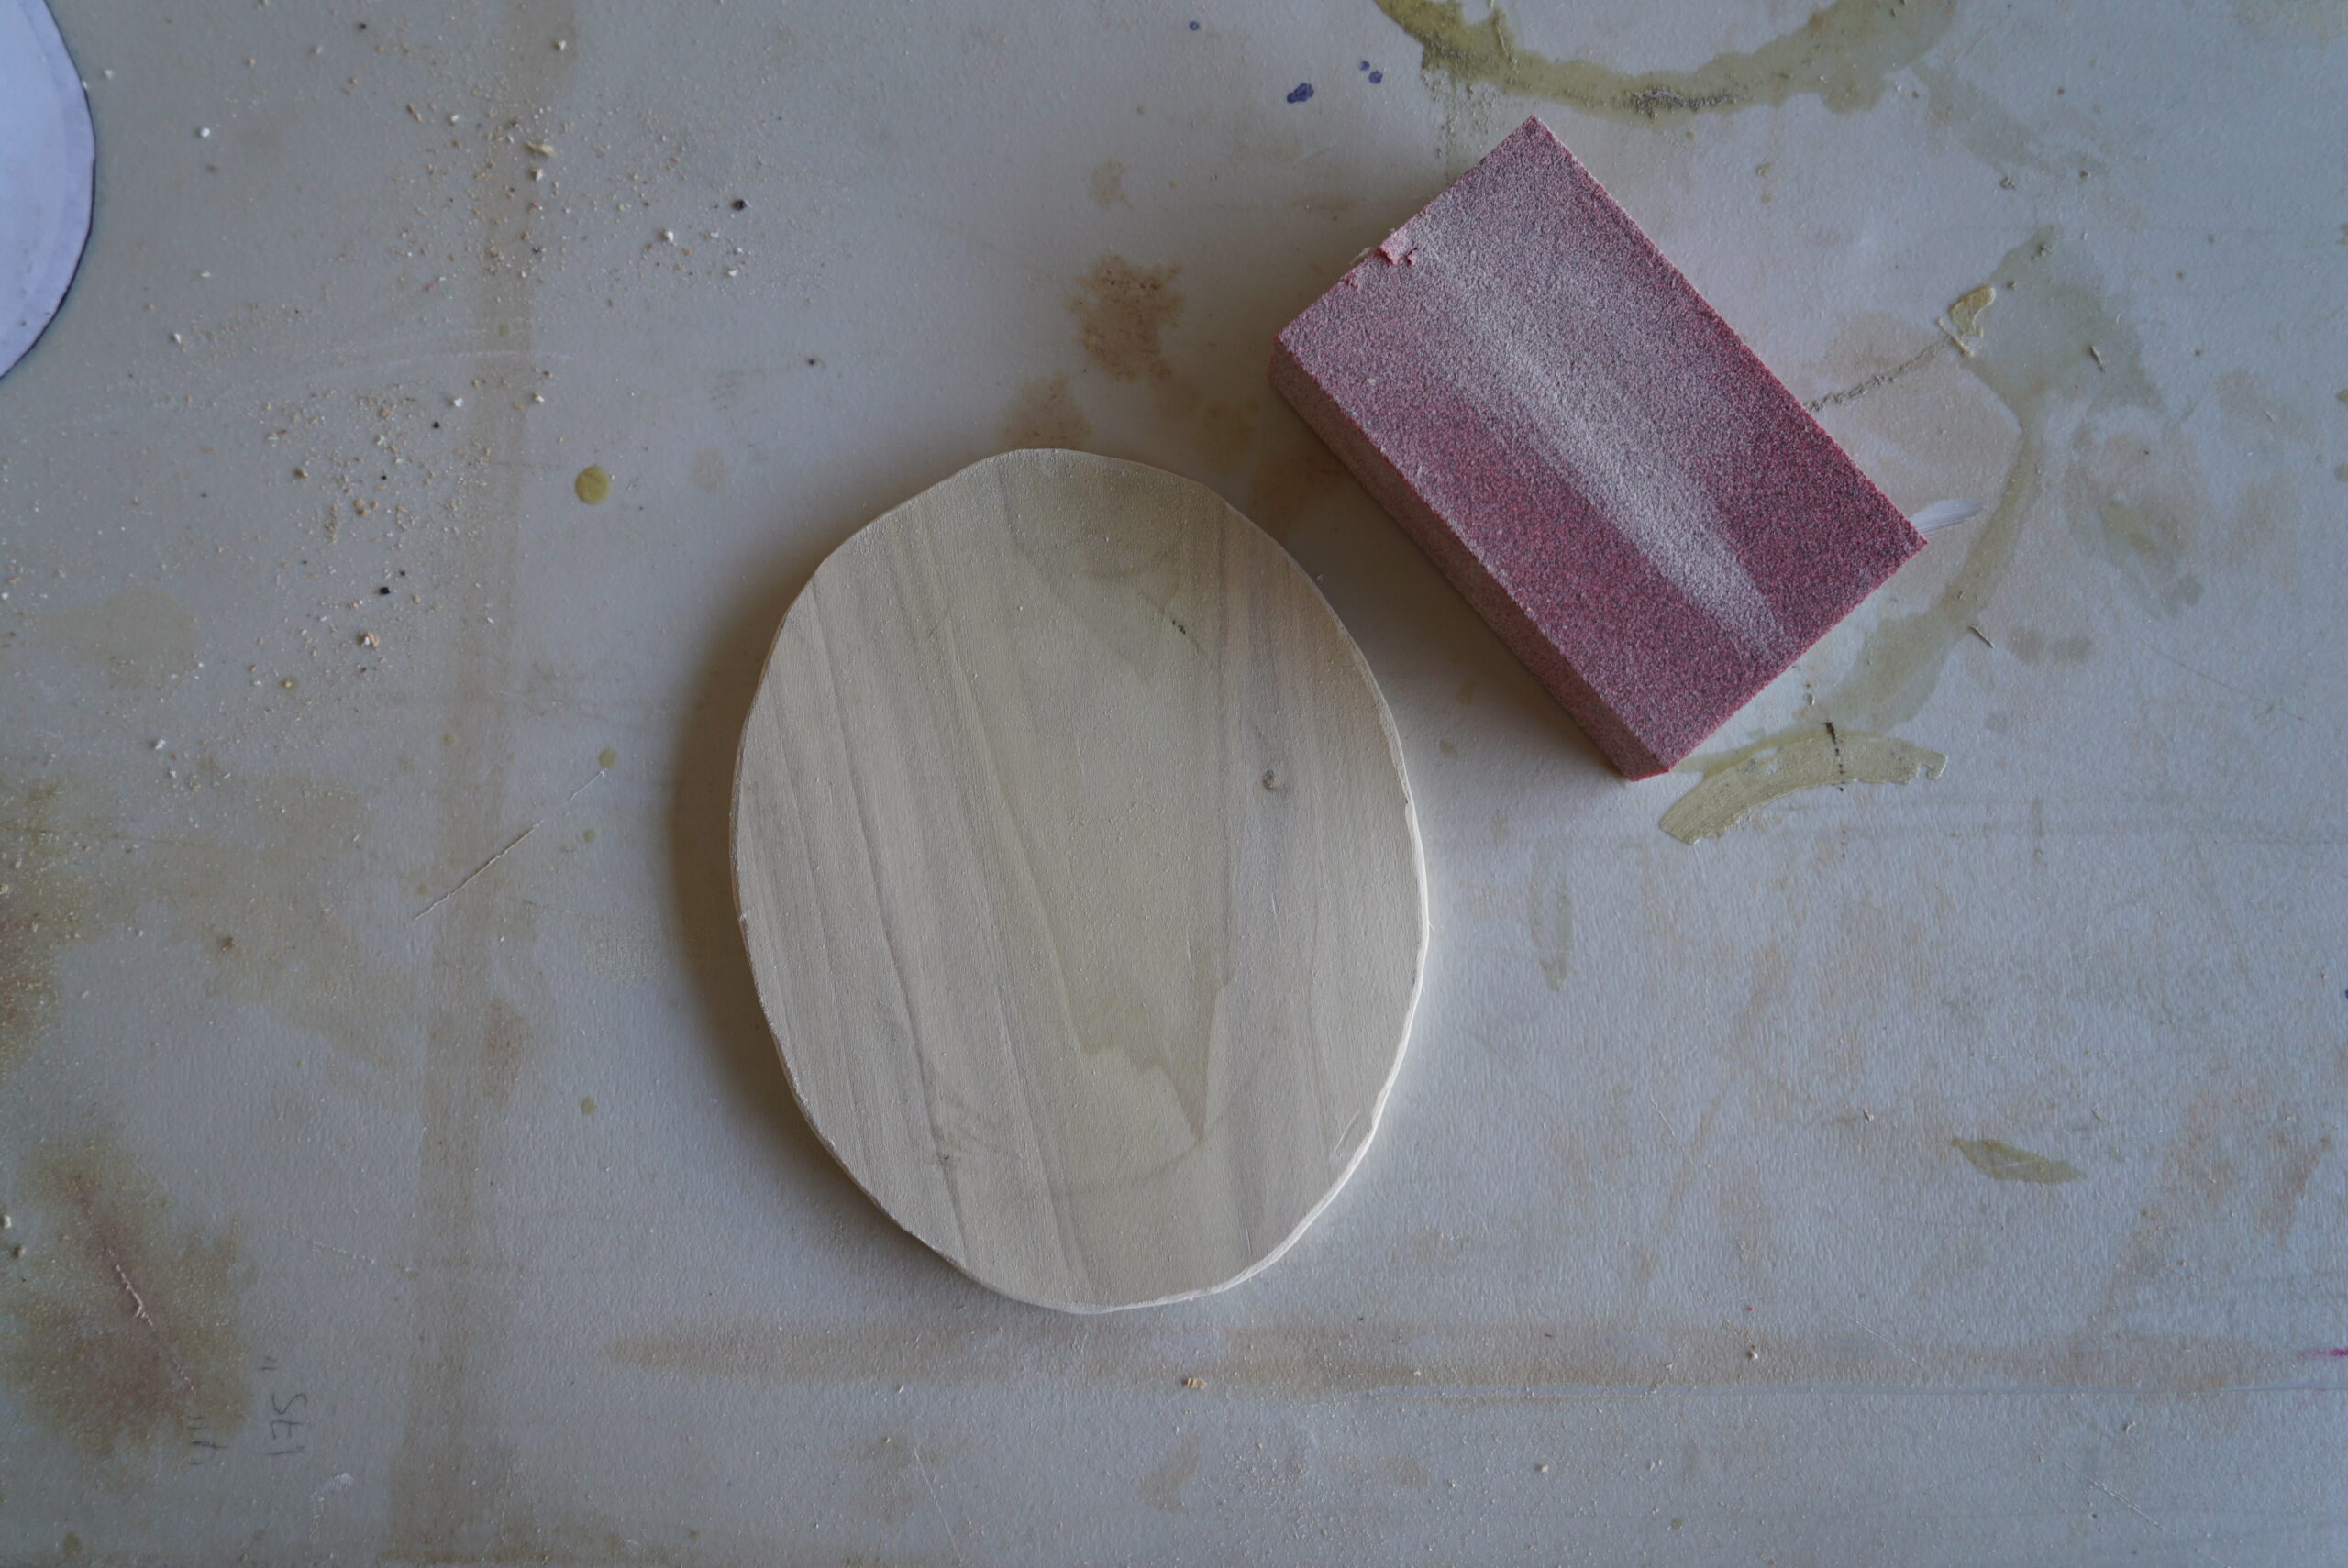
The cap base is the back of the cap and is what the antlers will be attached to. Start by creating a template. This can be any shape, but I prefer an oval. There are multiple ways to do this. I made mine by printing up an oval on the computer and cutting it out. Another way is to fold a piece of paper in half longways and cut out half an oval when you open the paper up it will be even. There is always the option to free hand it as well. If you want to make it really easy you can buy pre-cut boards at a hobby store that will work
Next, draw the cap base onto the ¼” hobby board. I use a Dremel tool or jigsaw to cut it out. Once cut, sand the edges and make it as symmetrical as you can, but it doesn’t need to be perfect. This is the board that everything on the cap will connect to.
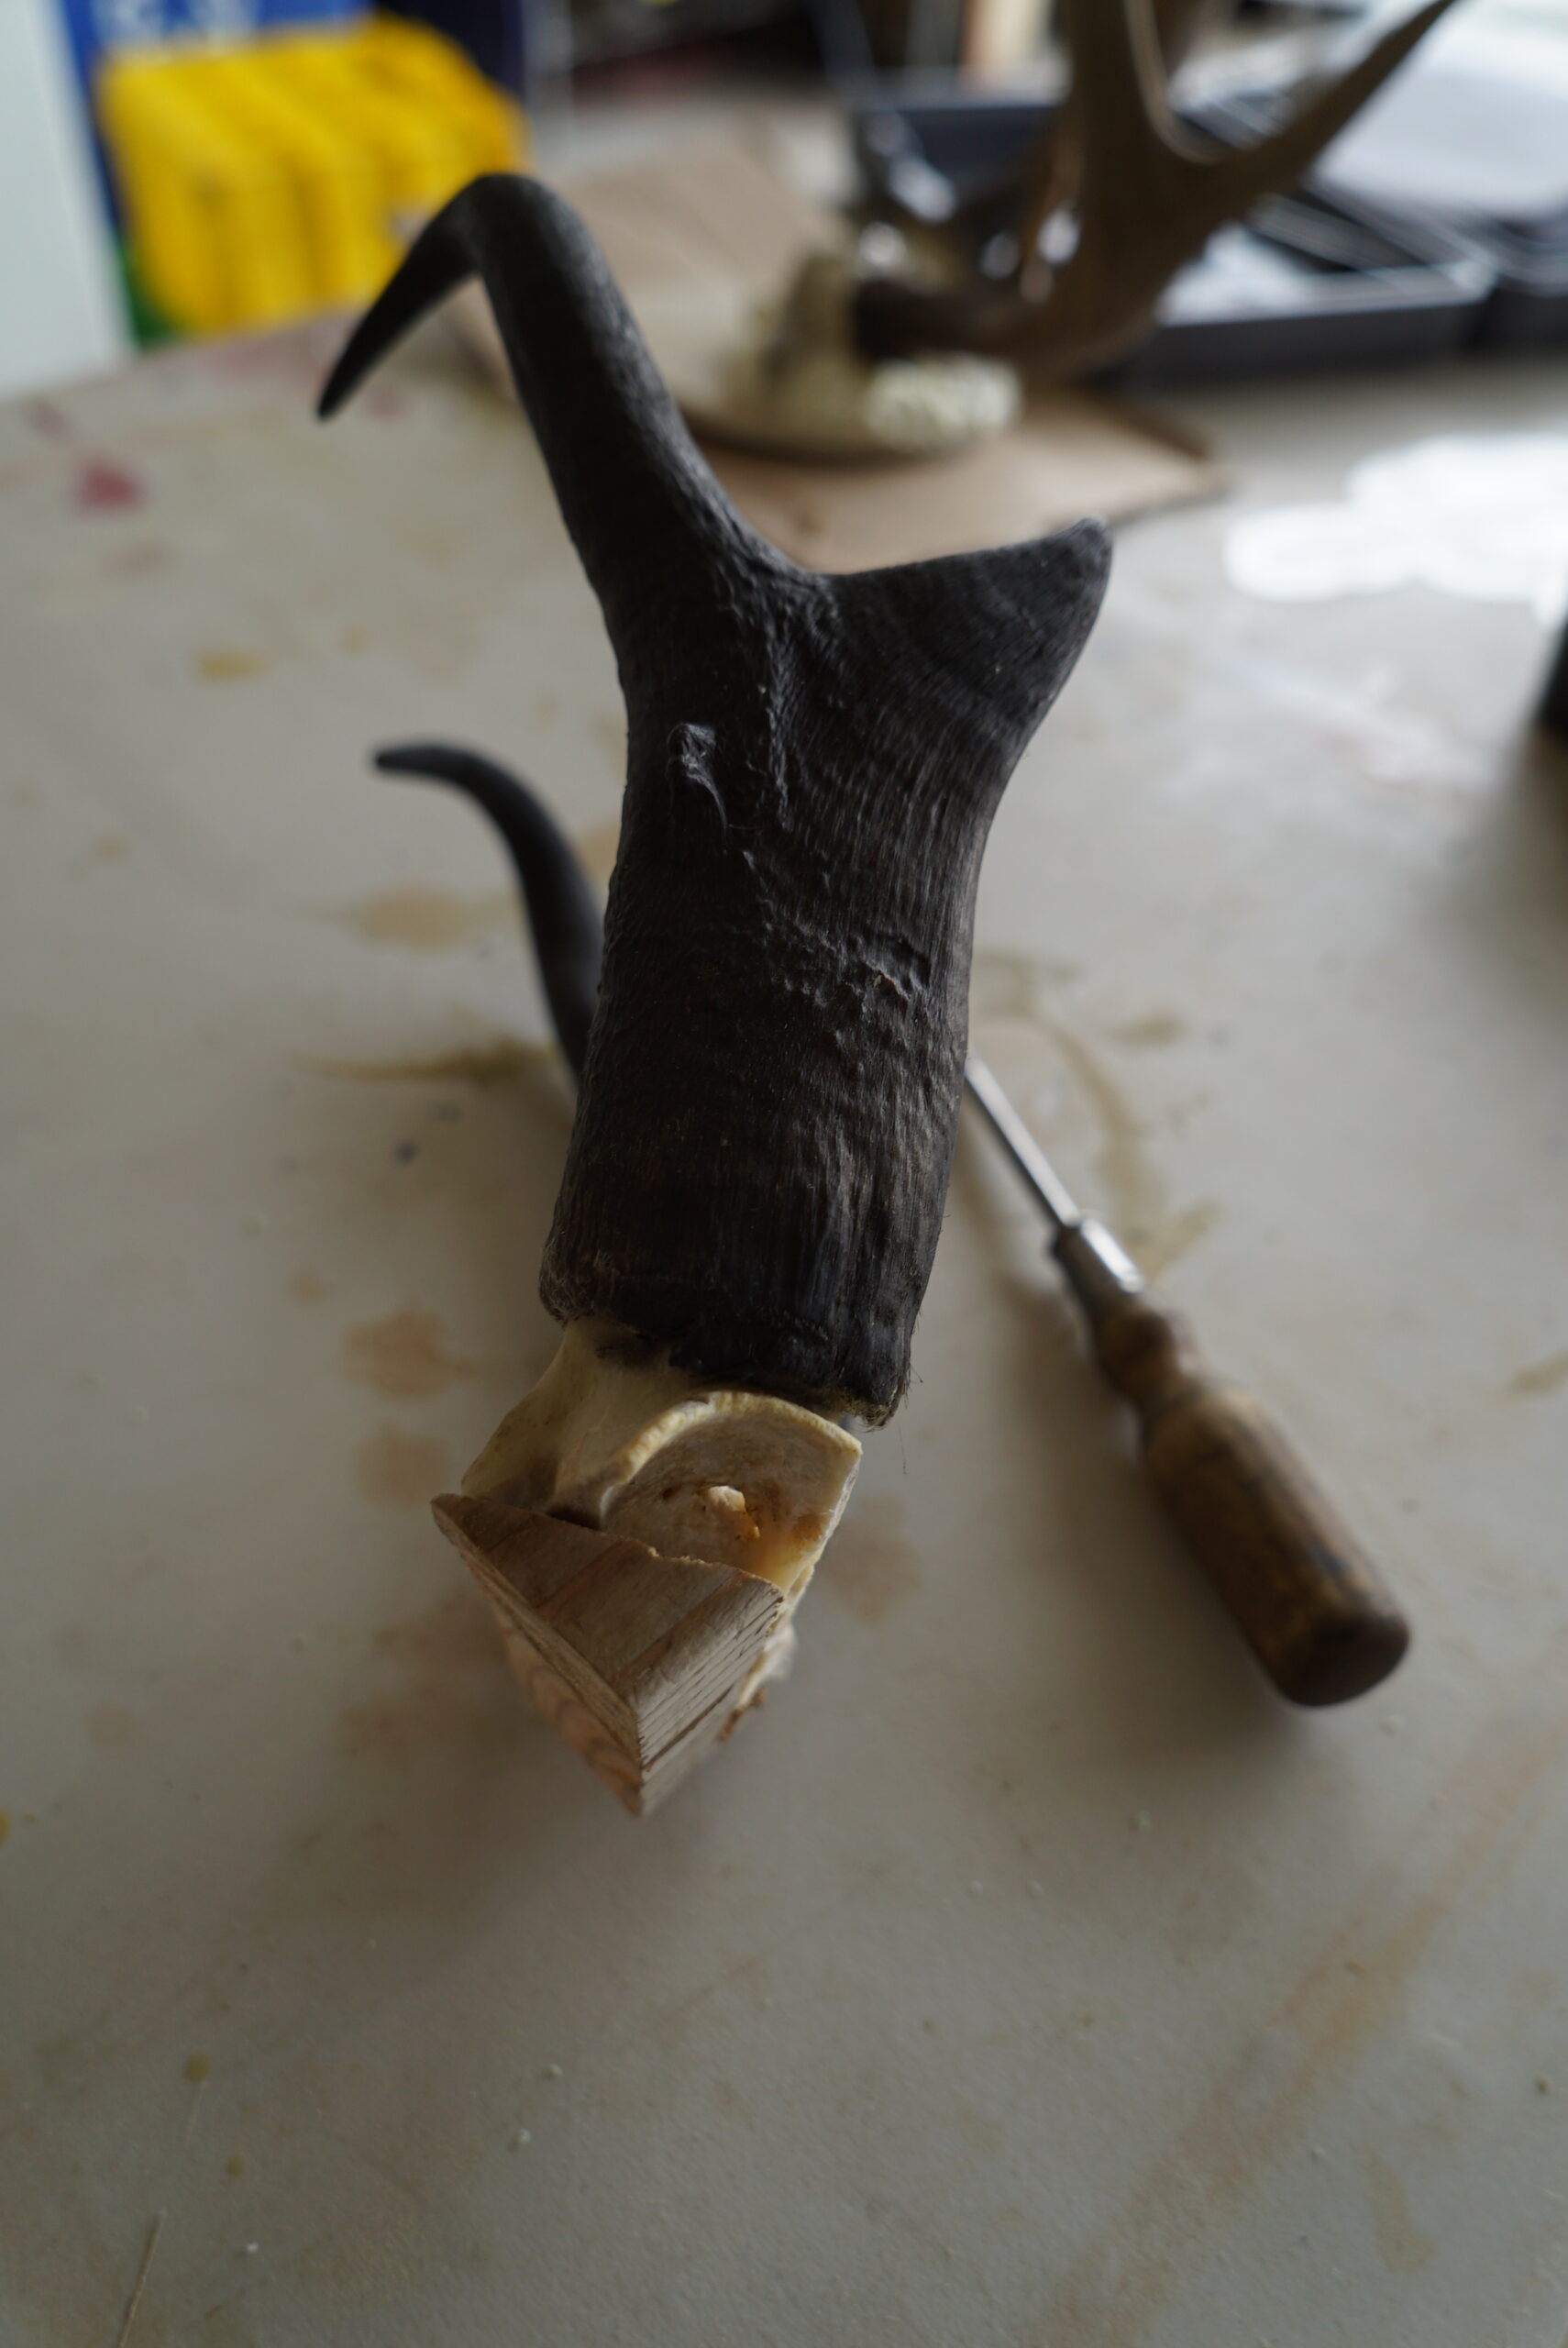
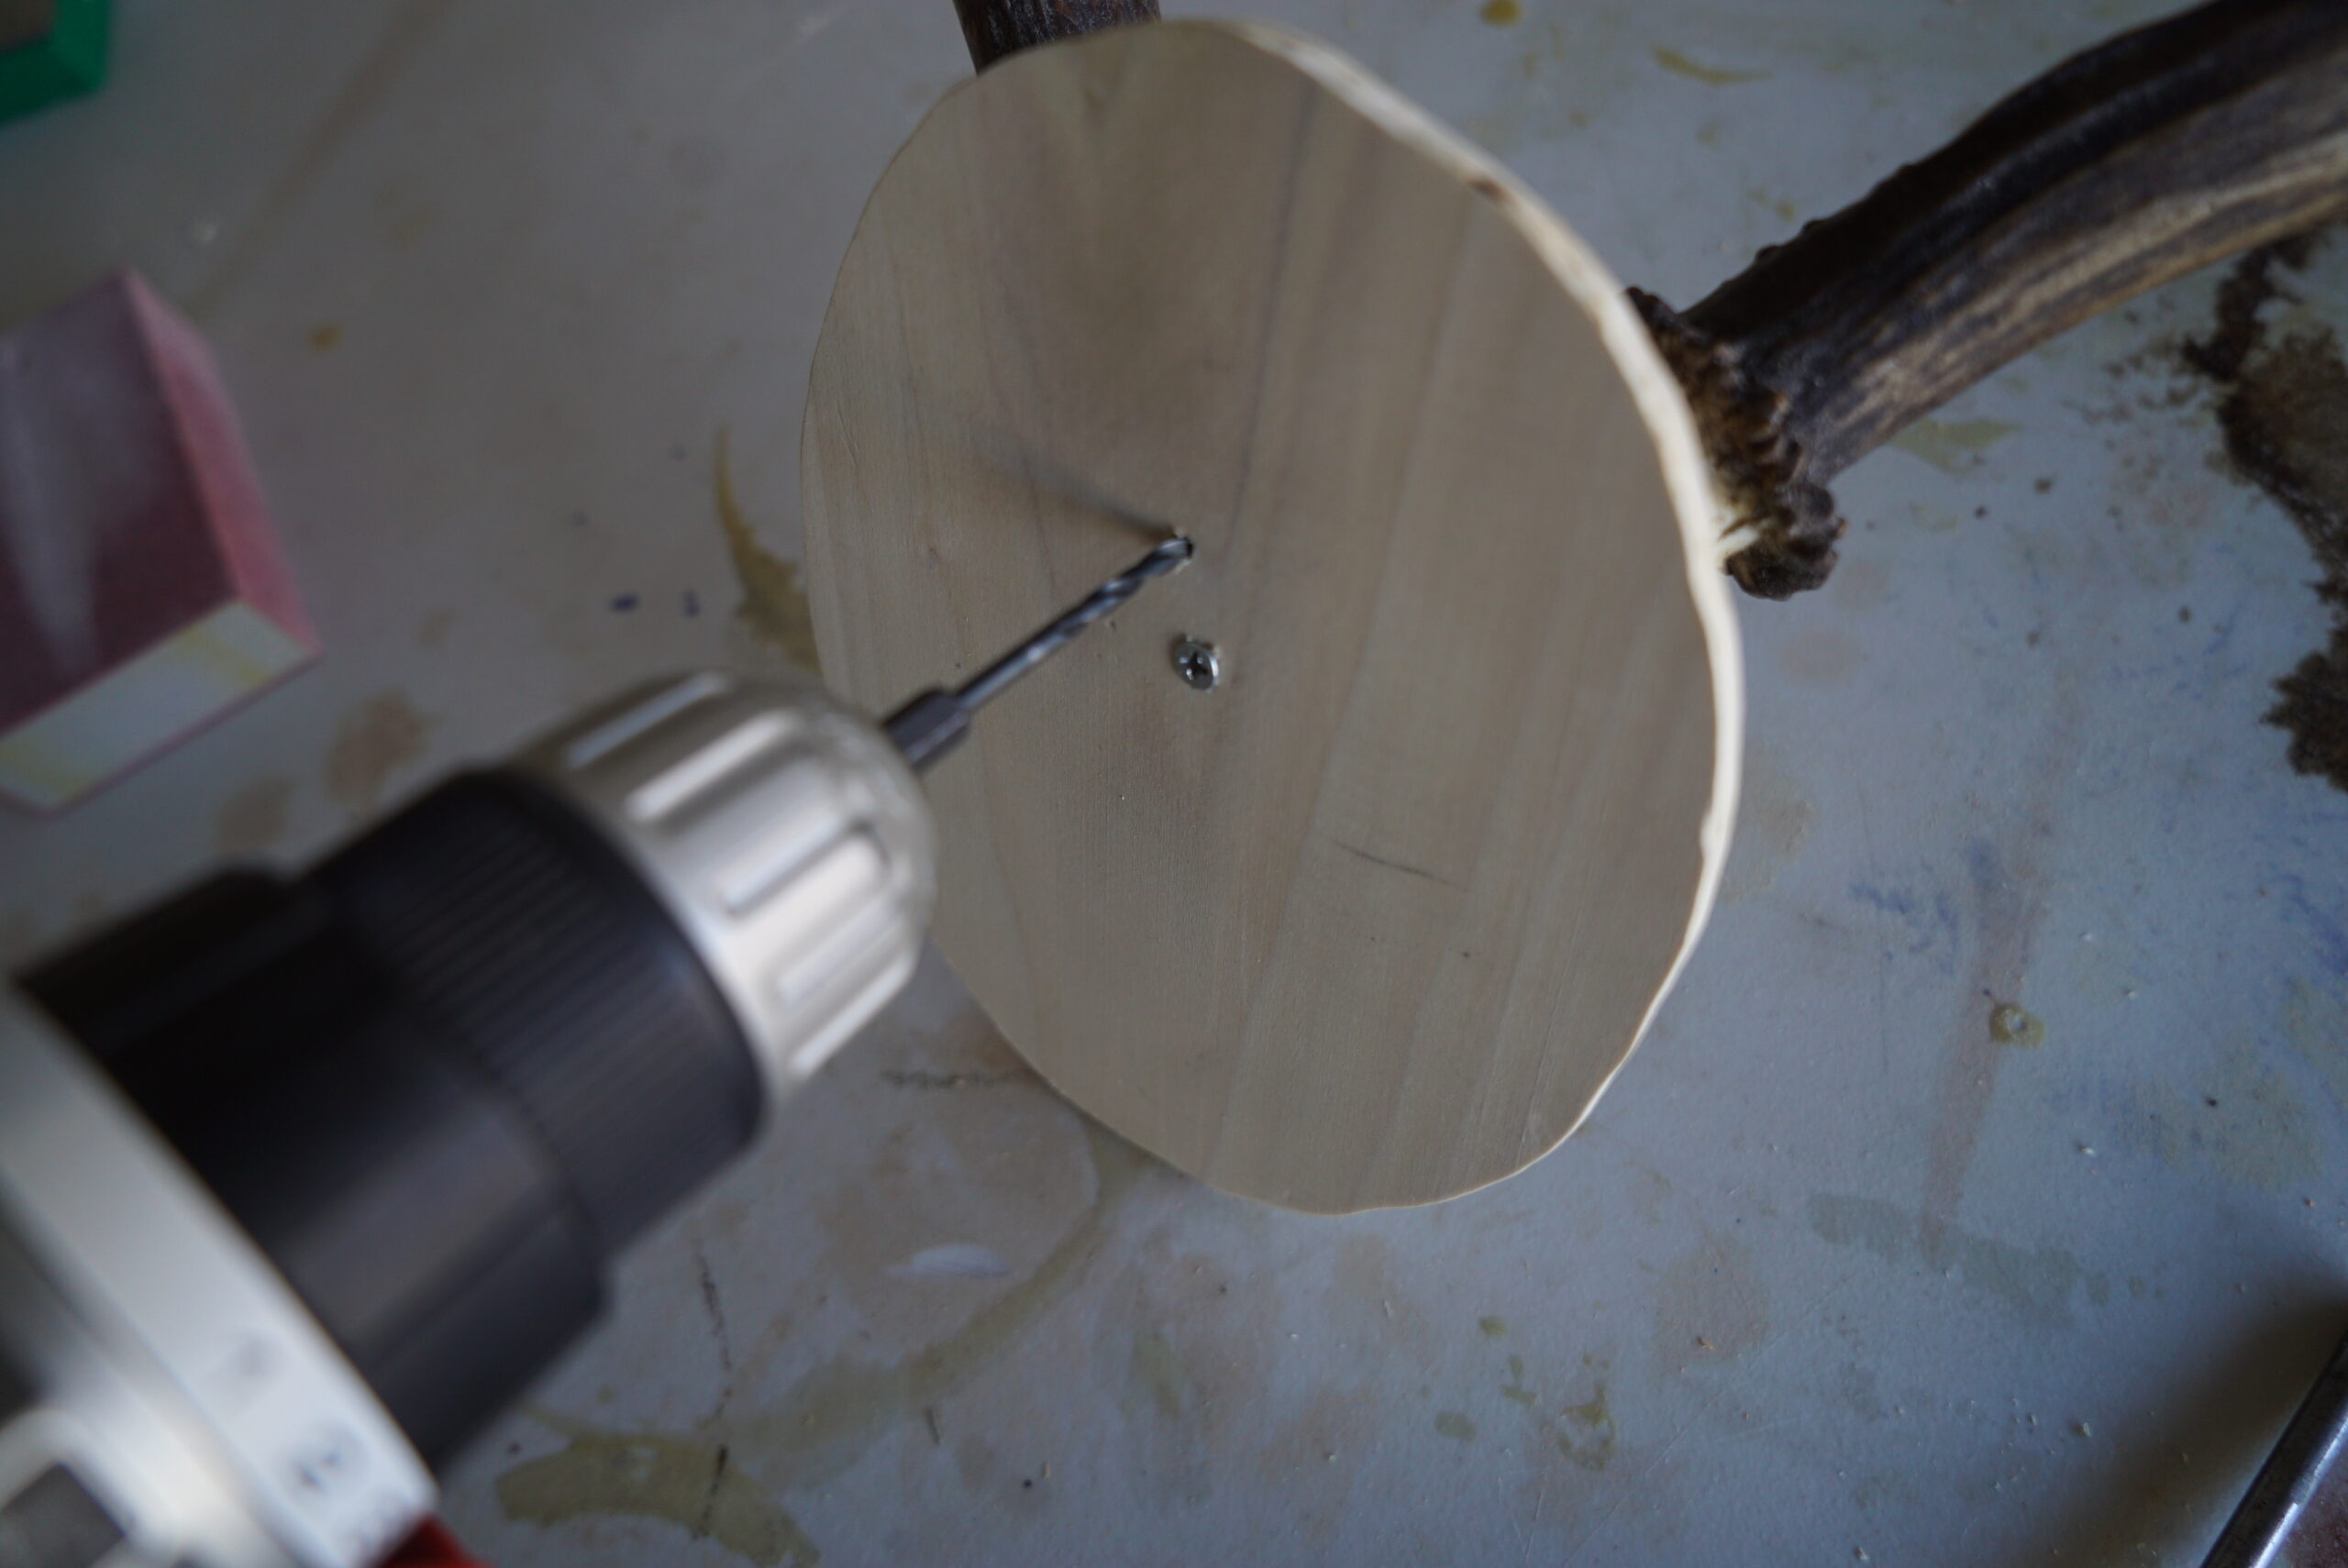
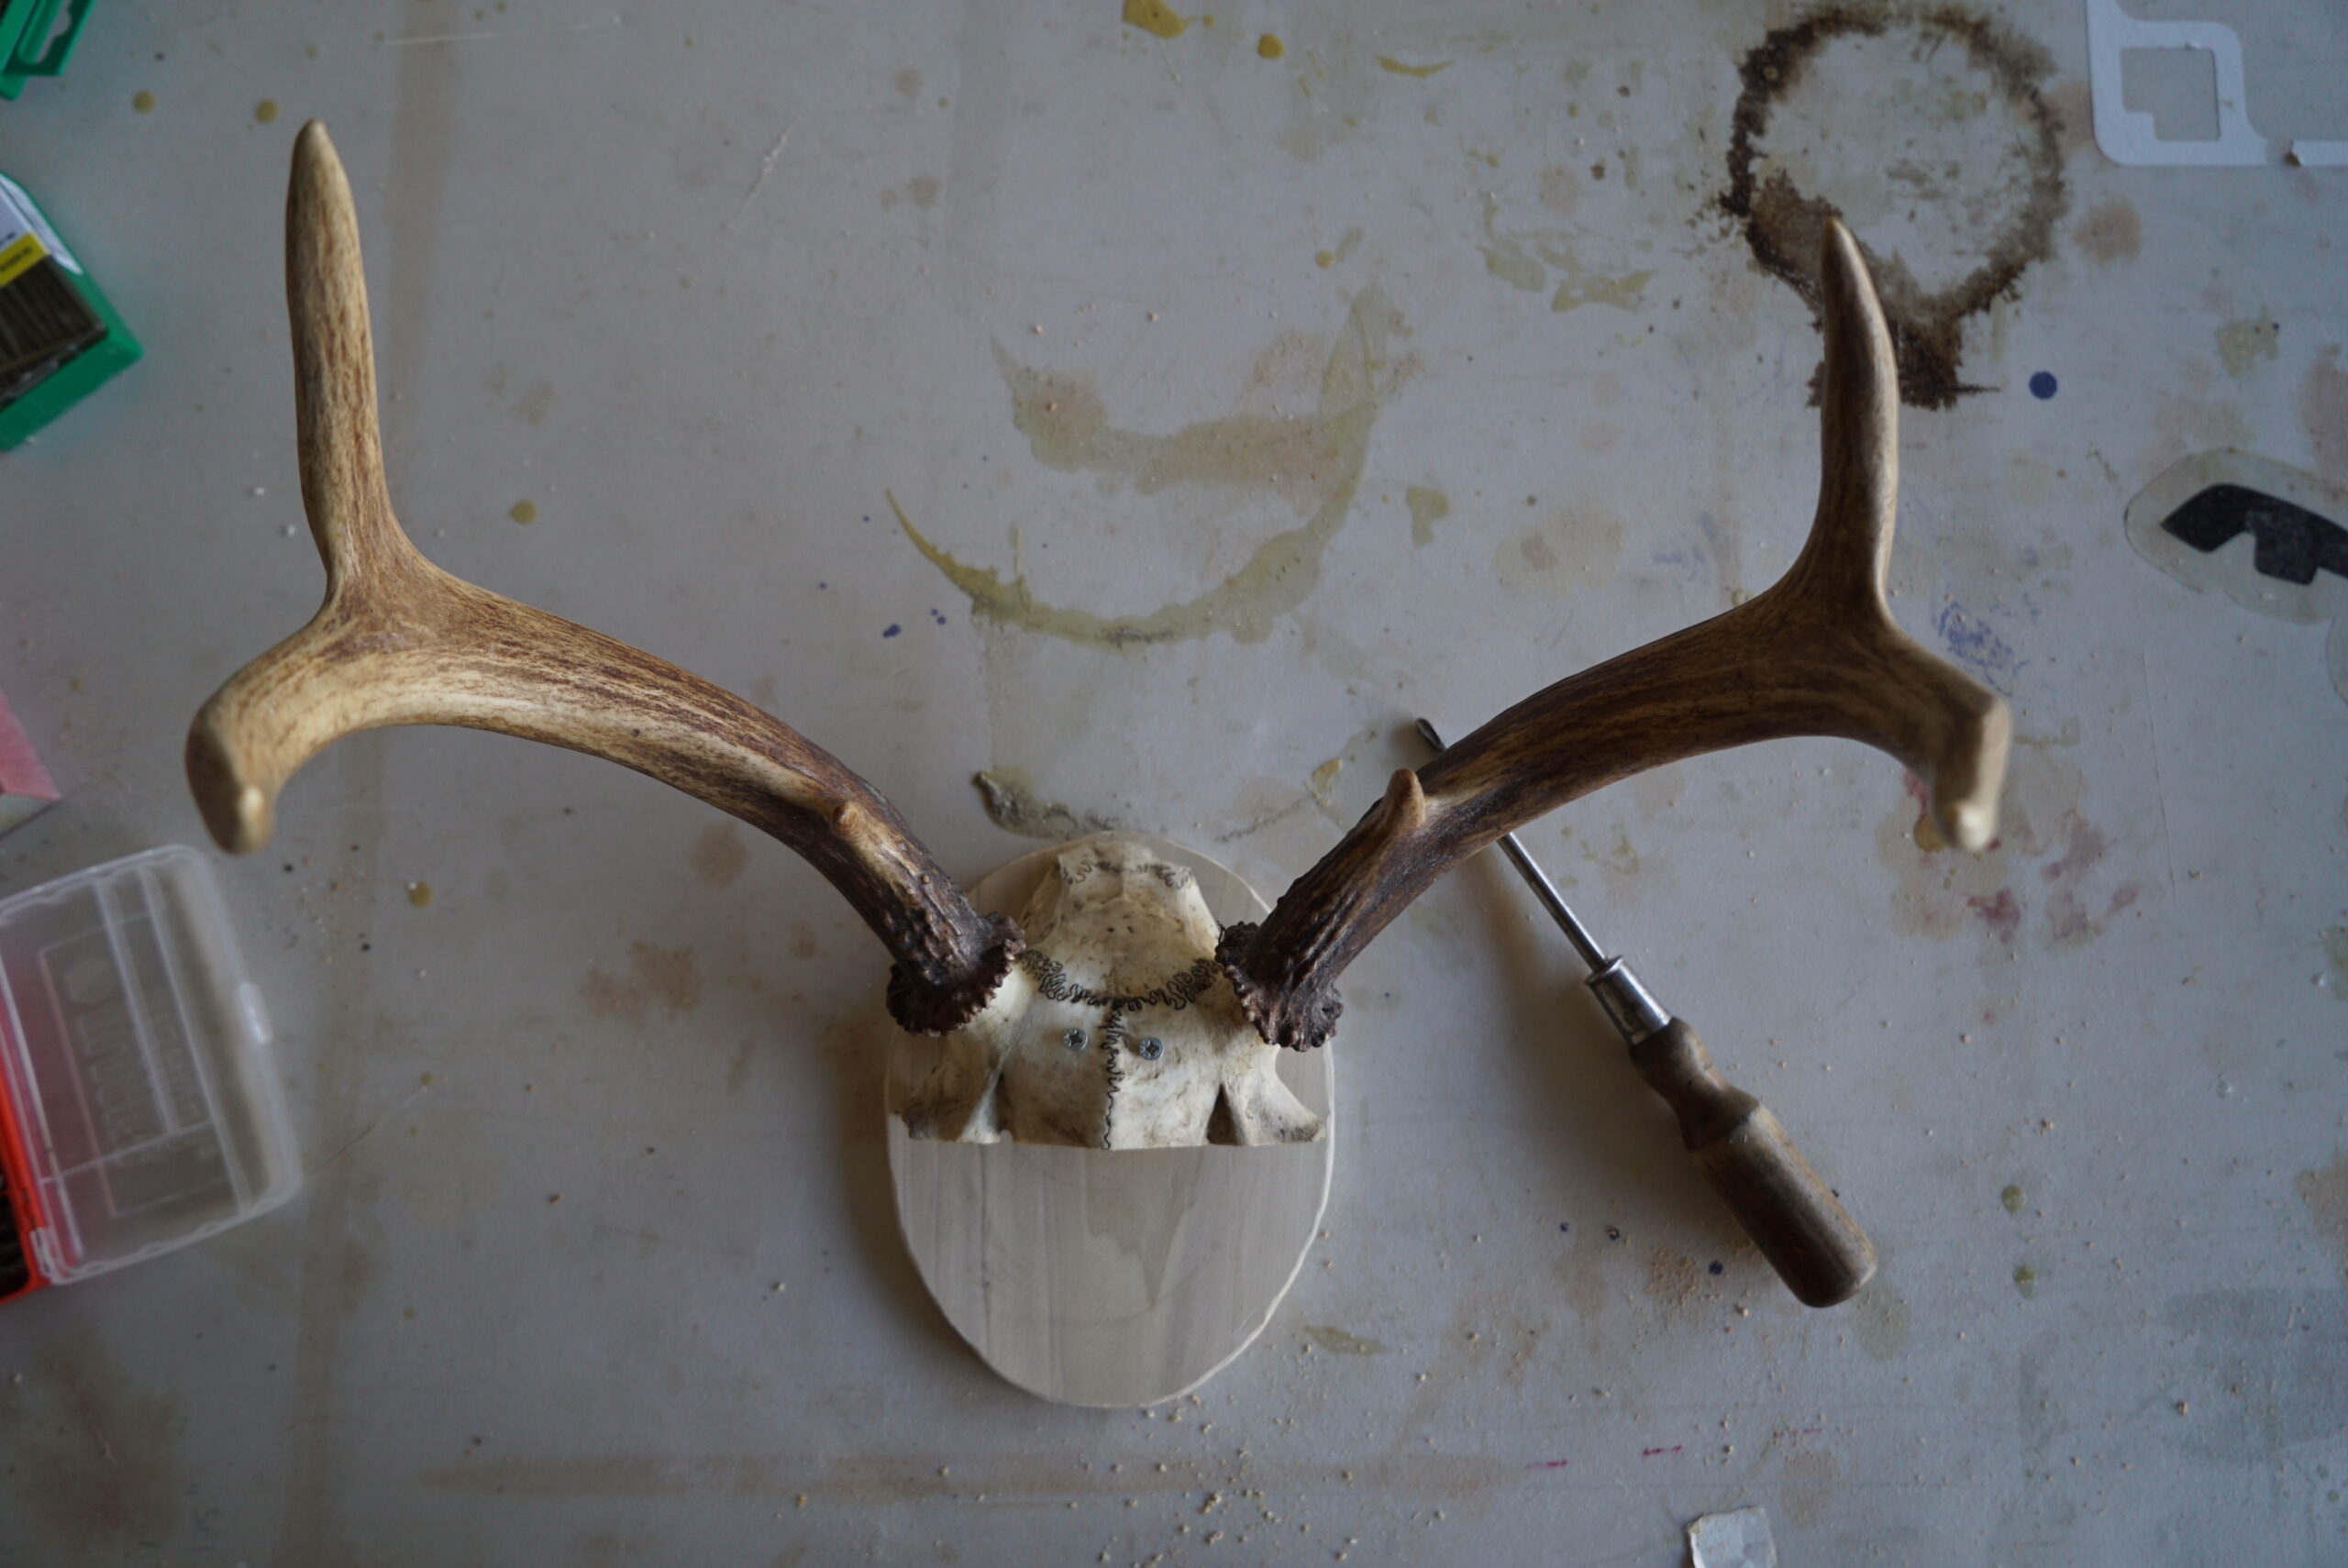
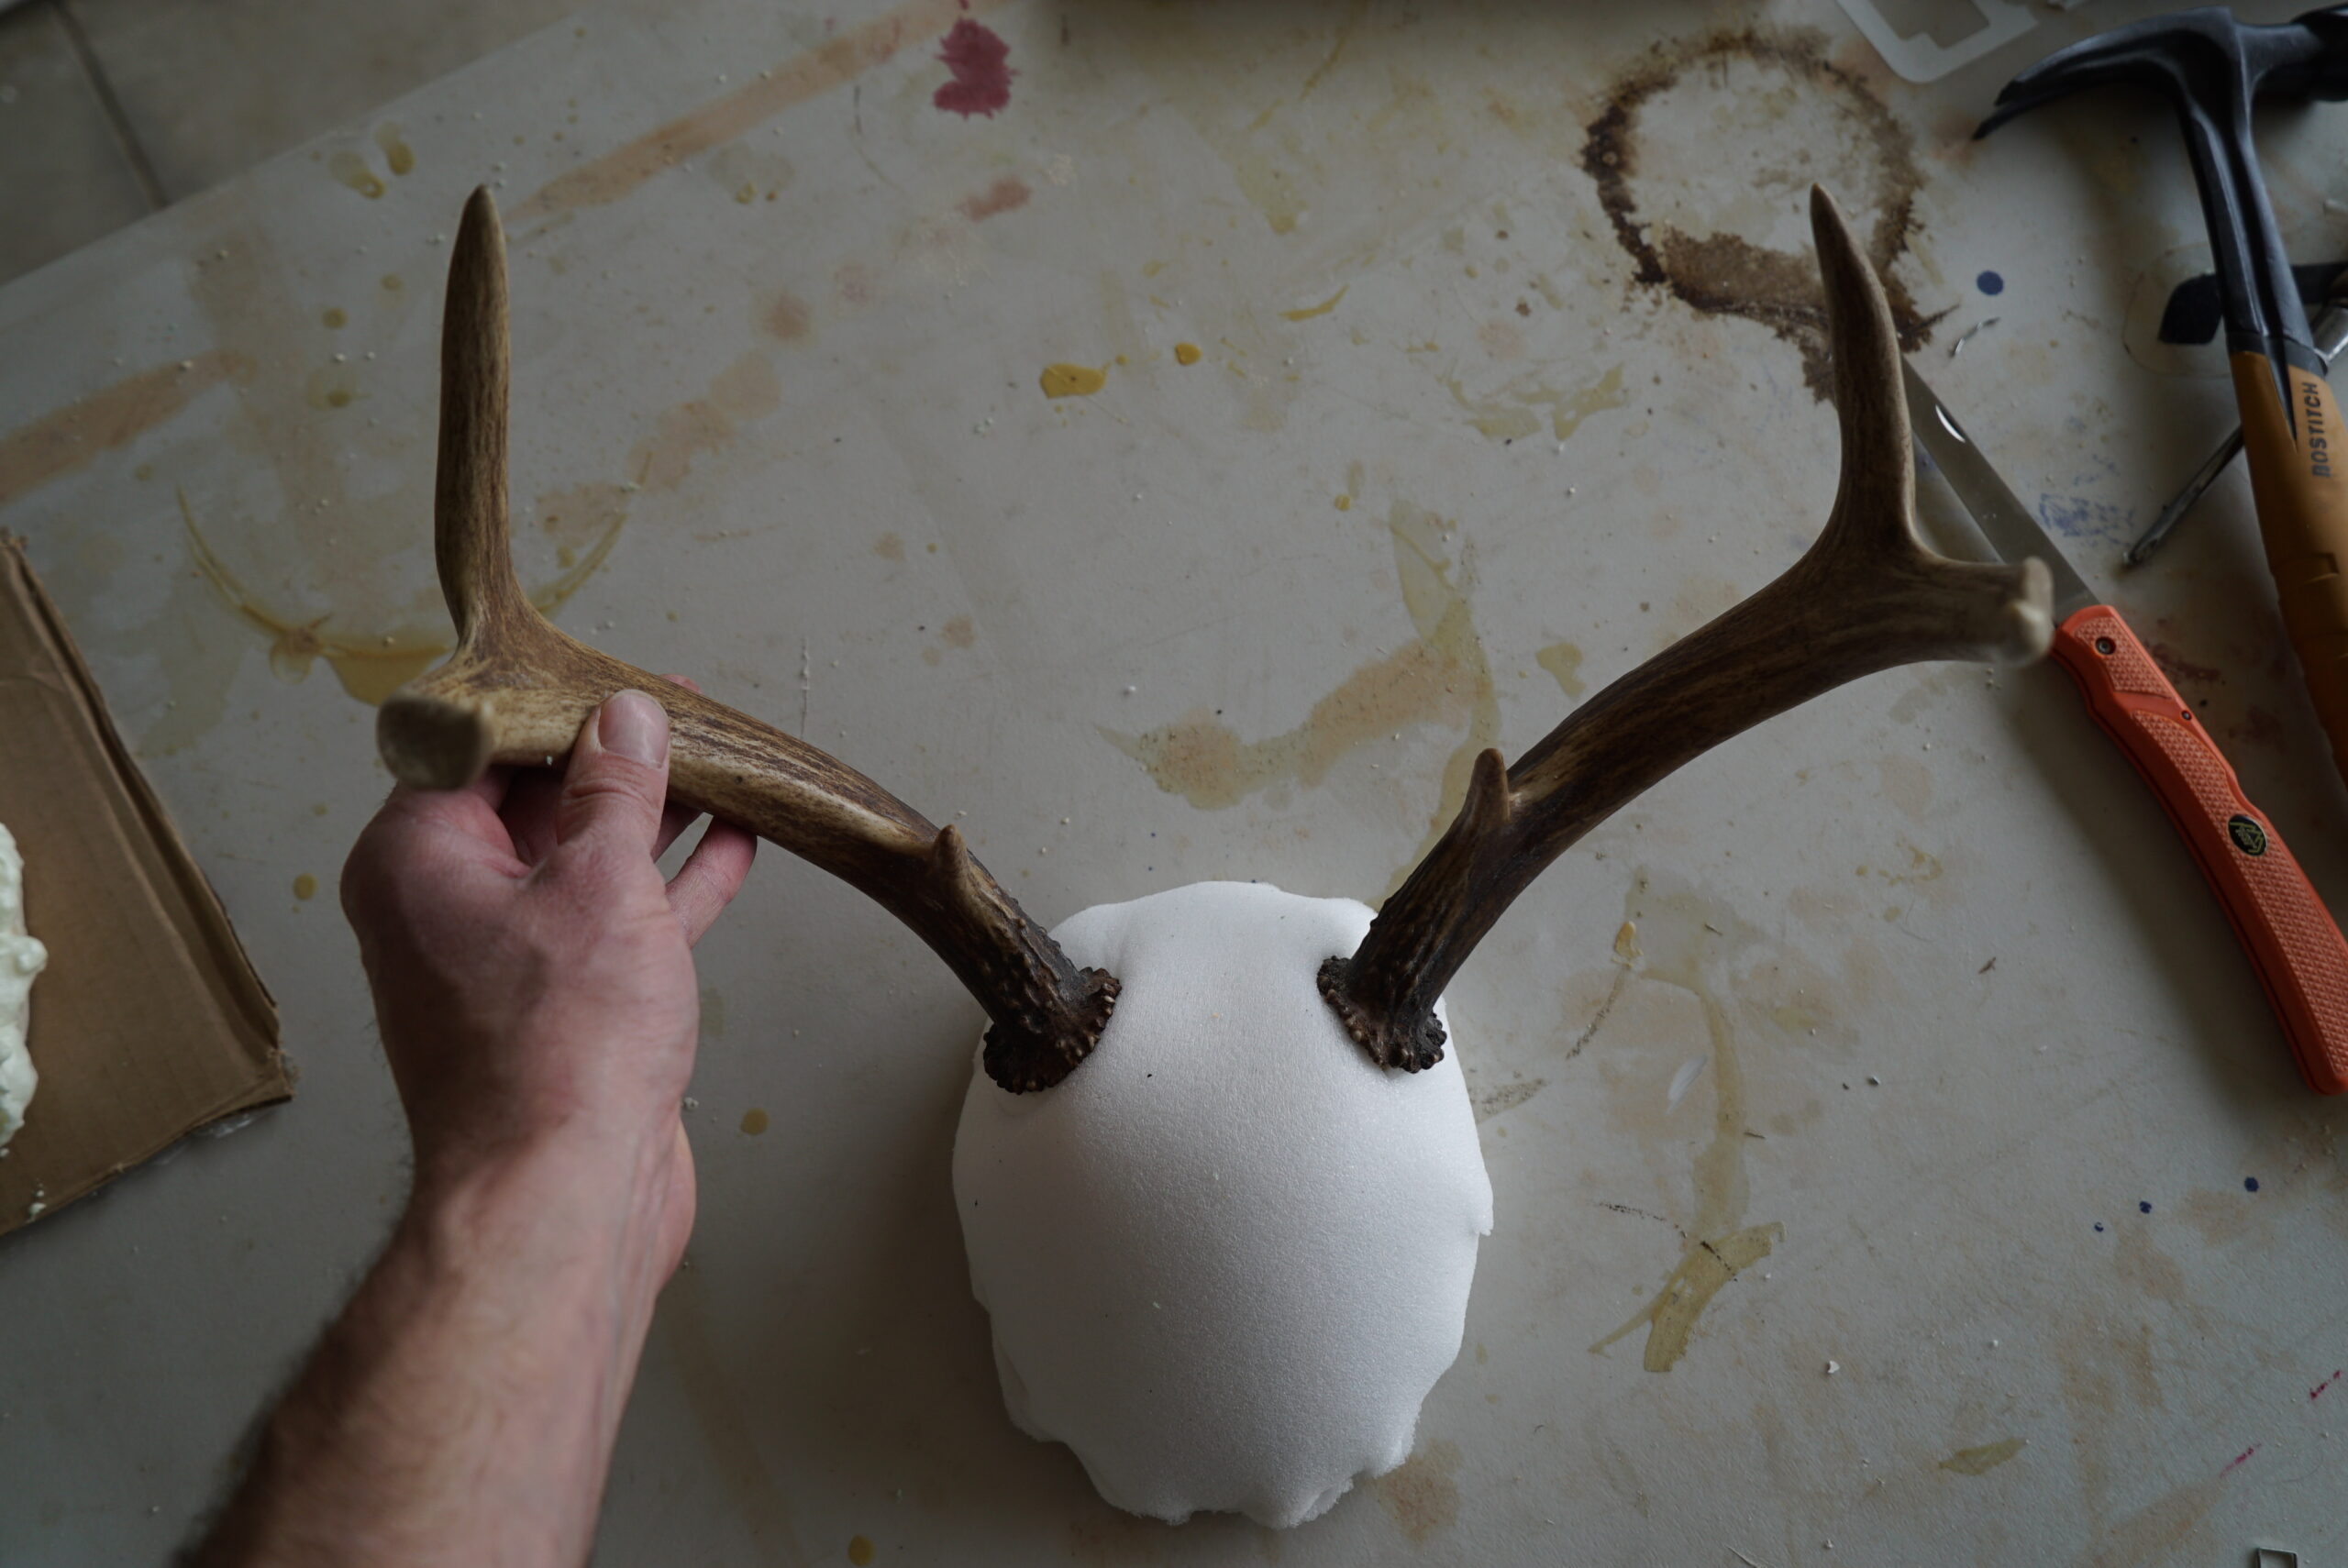
Step 4: Connect the antlers to the cap base
Do this by first predrilling a hole into the base. Place the antlers where they look even, left and right, and attach with the first screw. You will be screwing this into the board attached to the antlers. Once they are attached, level them out and then predrill the second hole through the baseboard and securely affix the antlers in place.
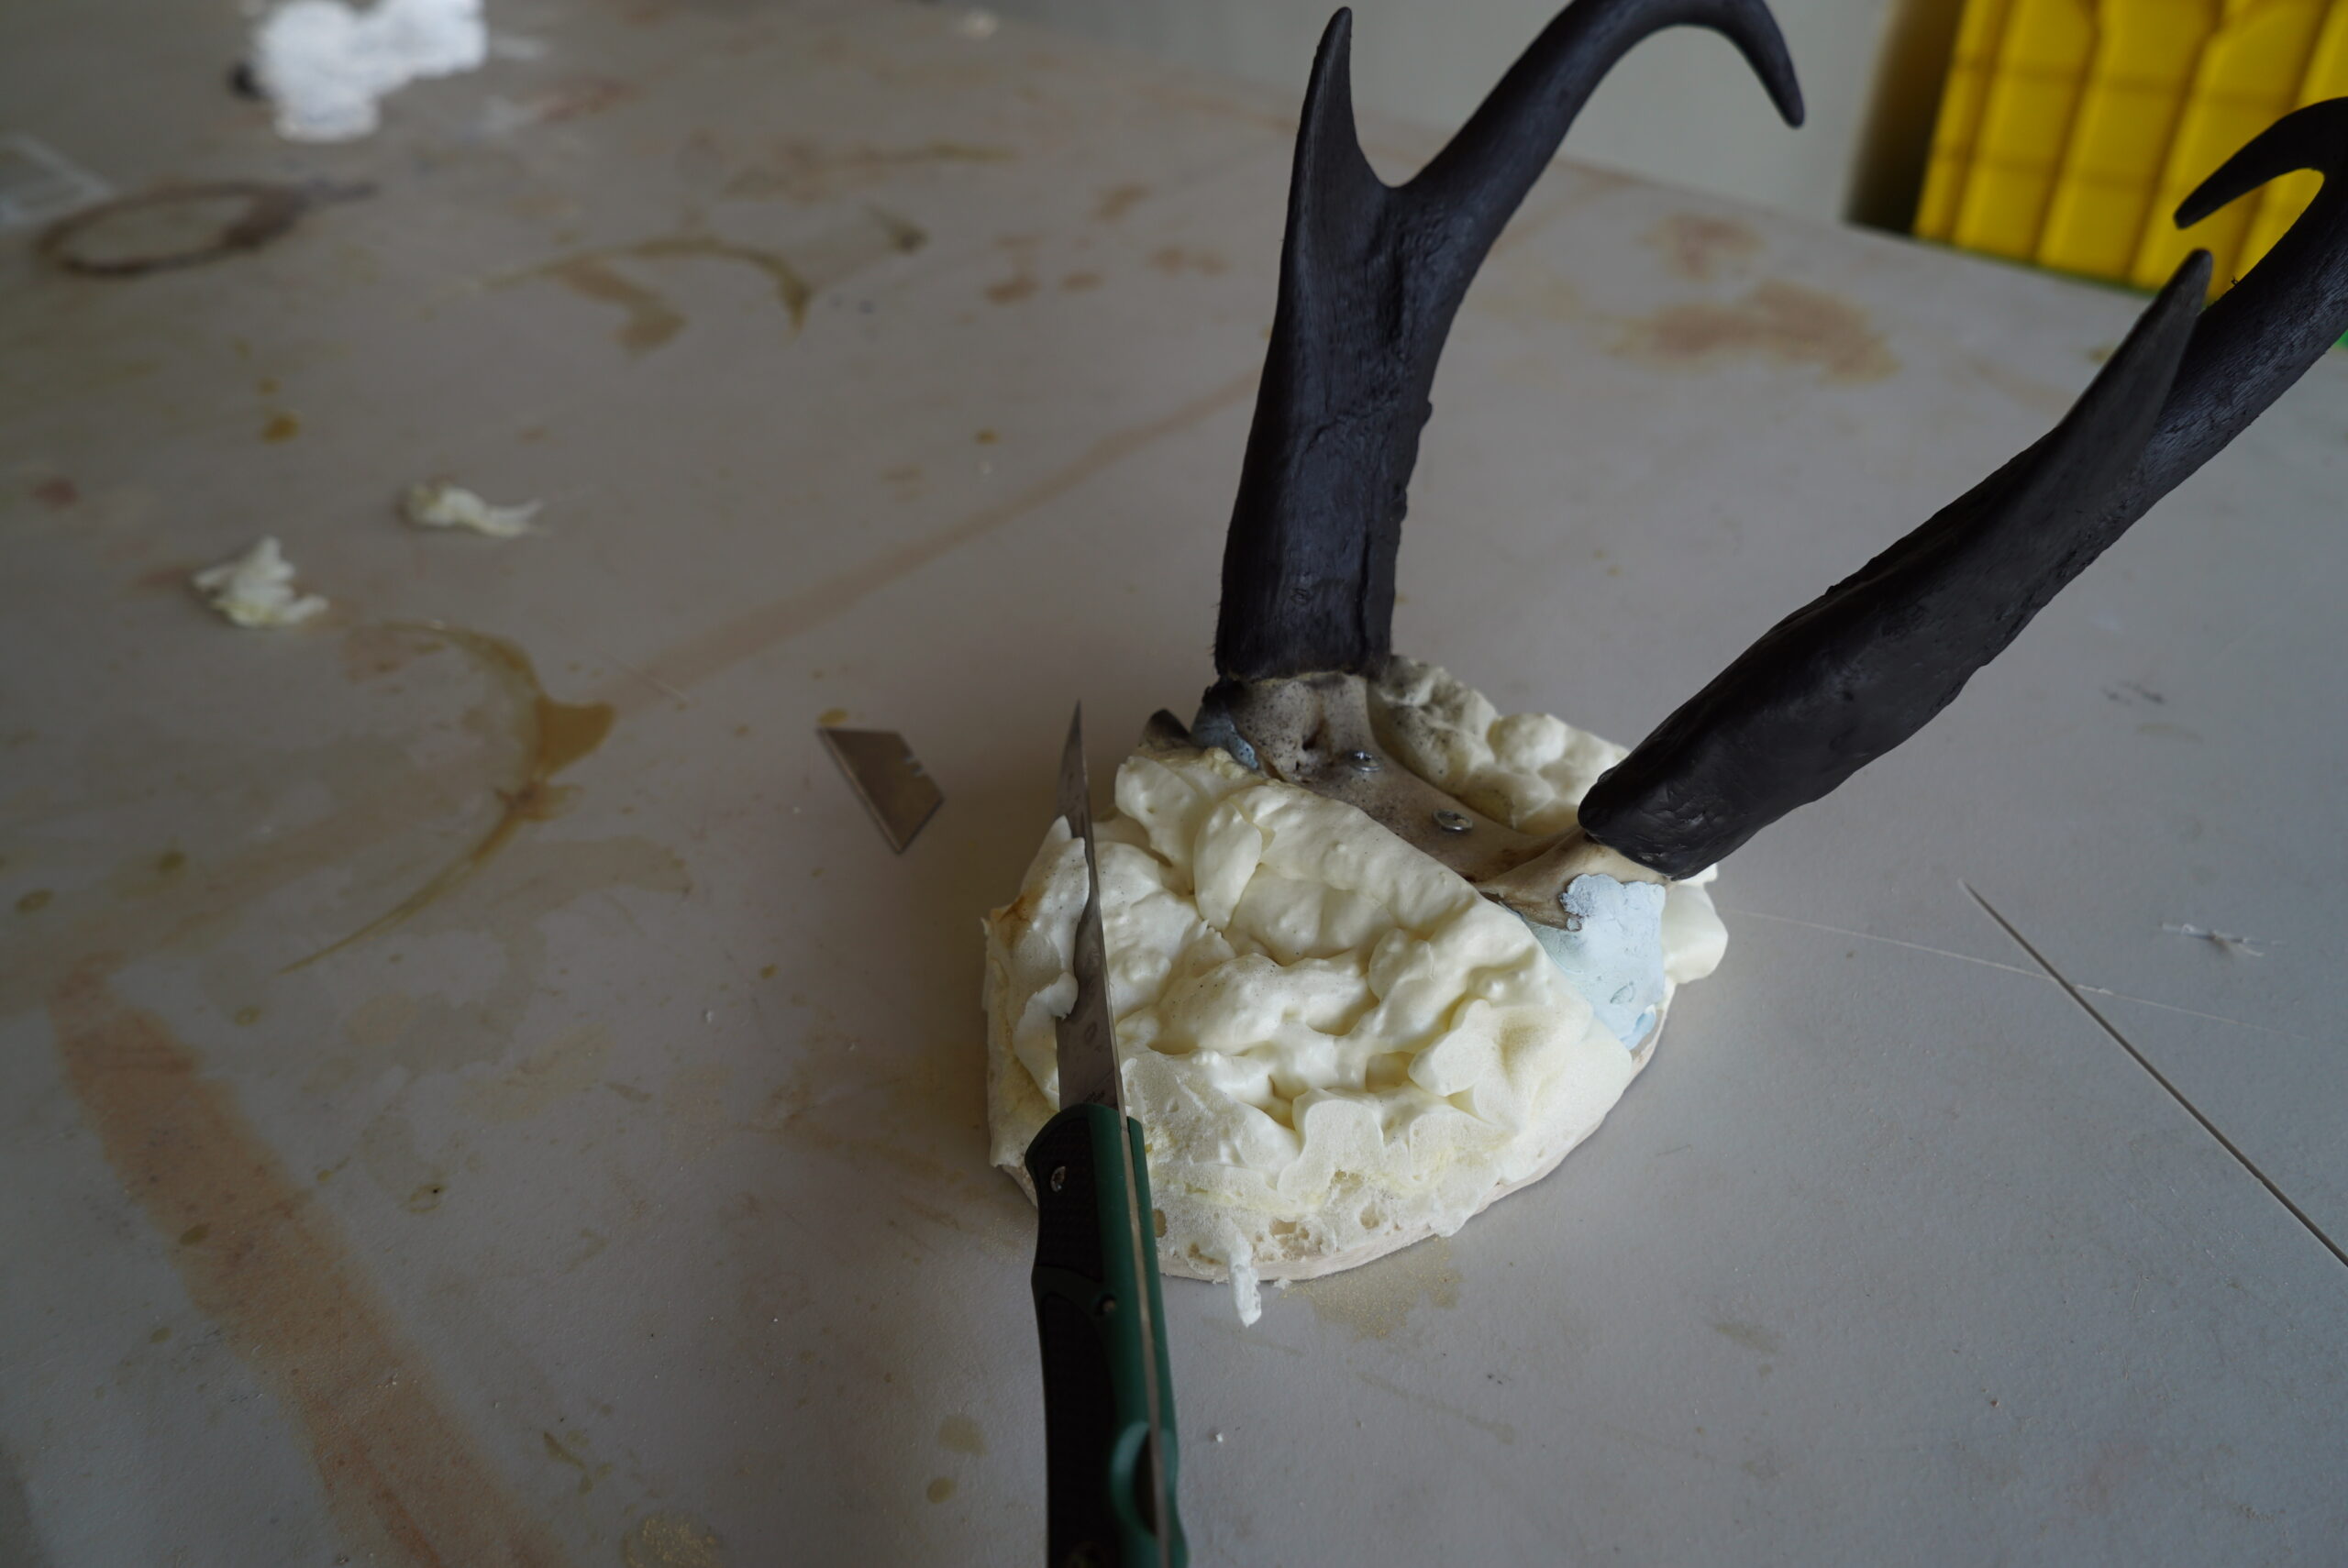
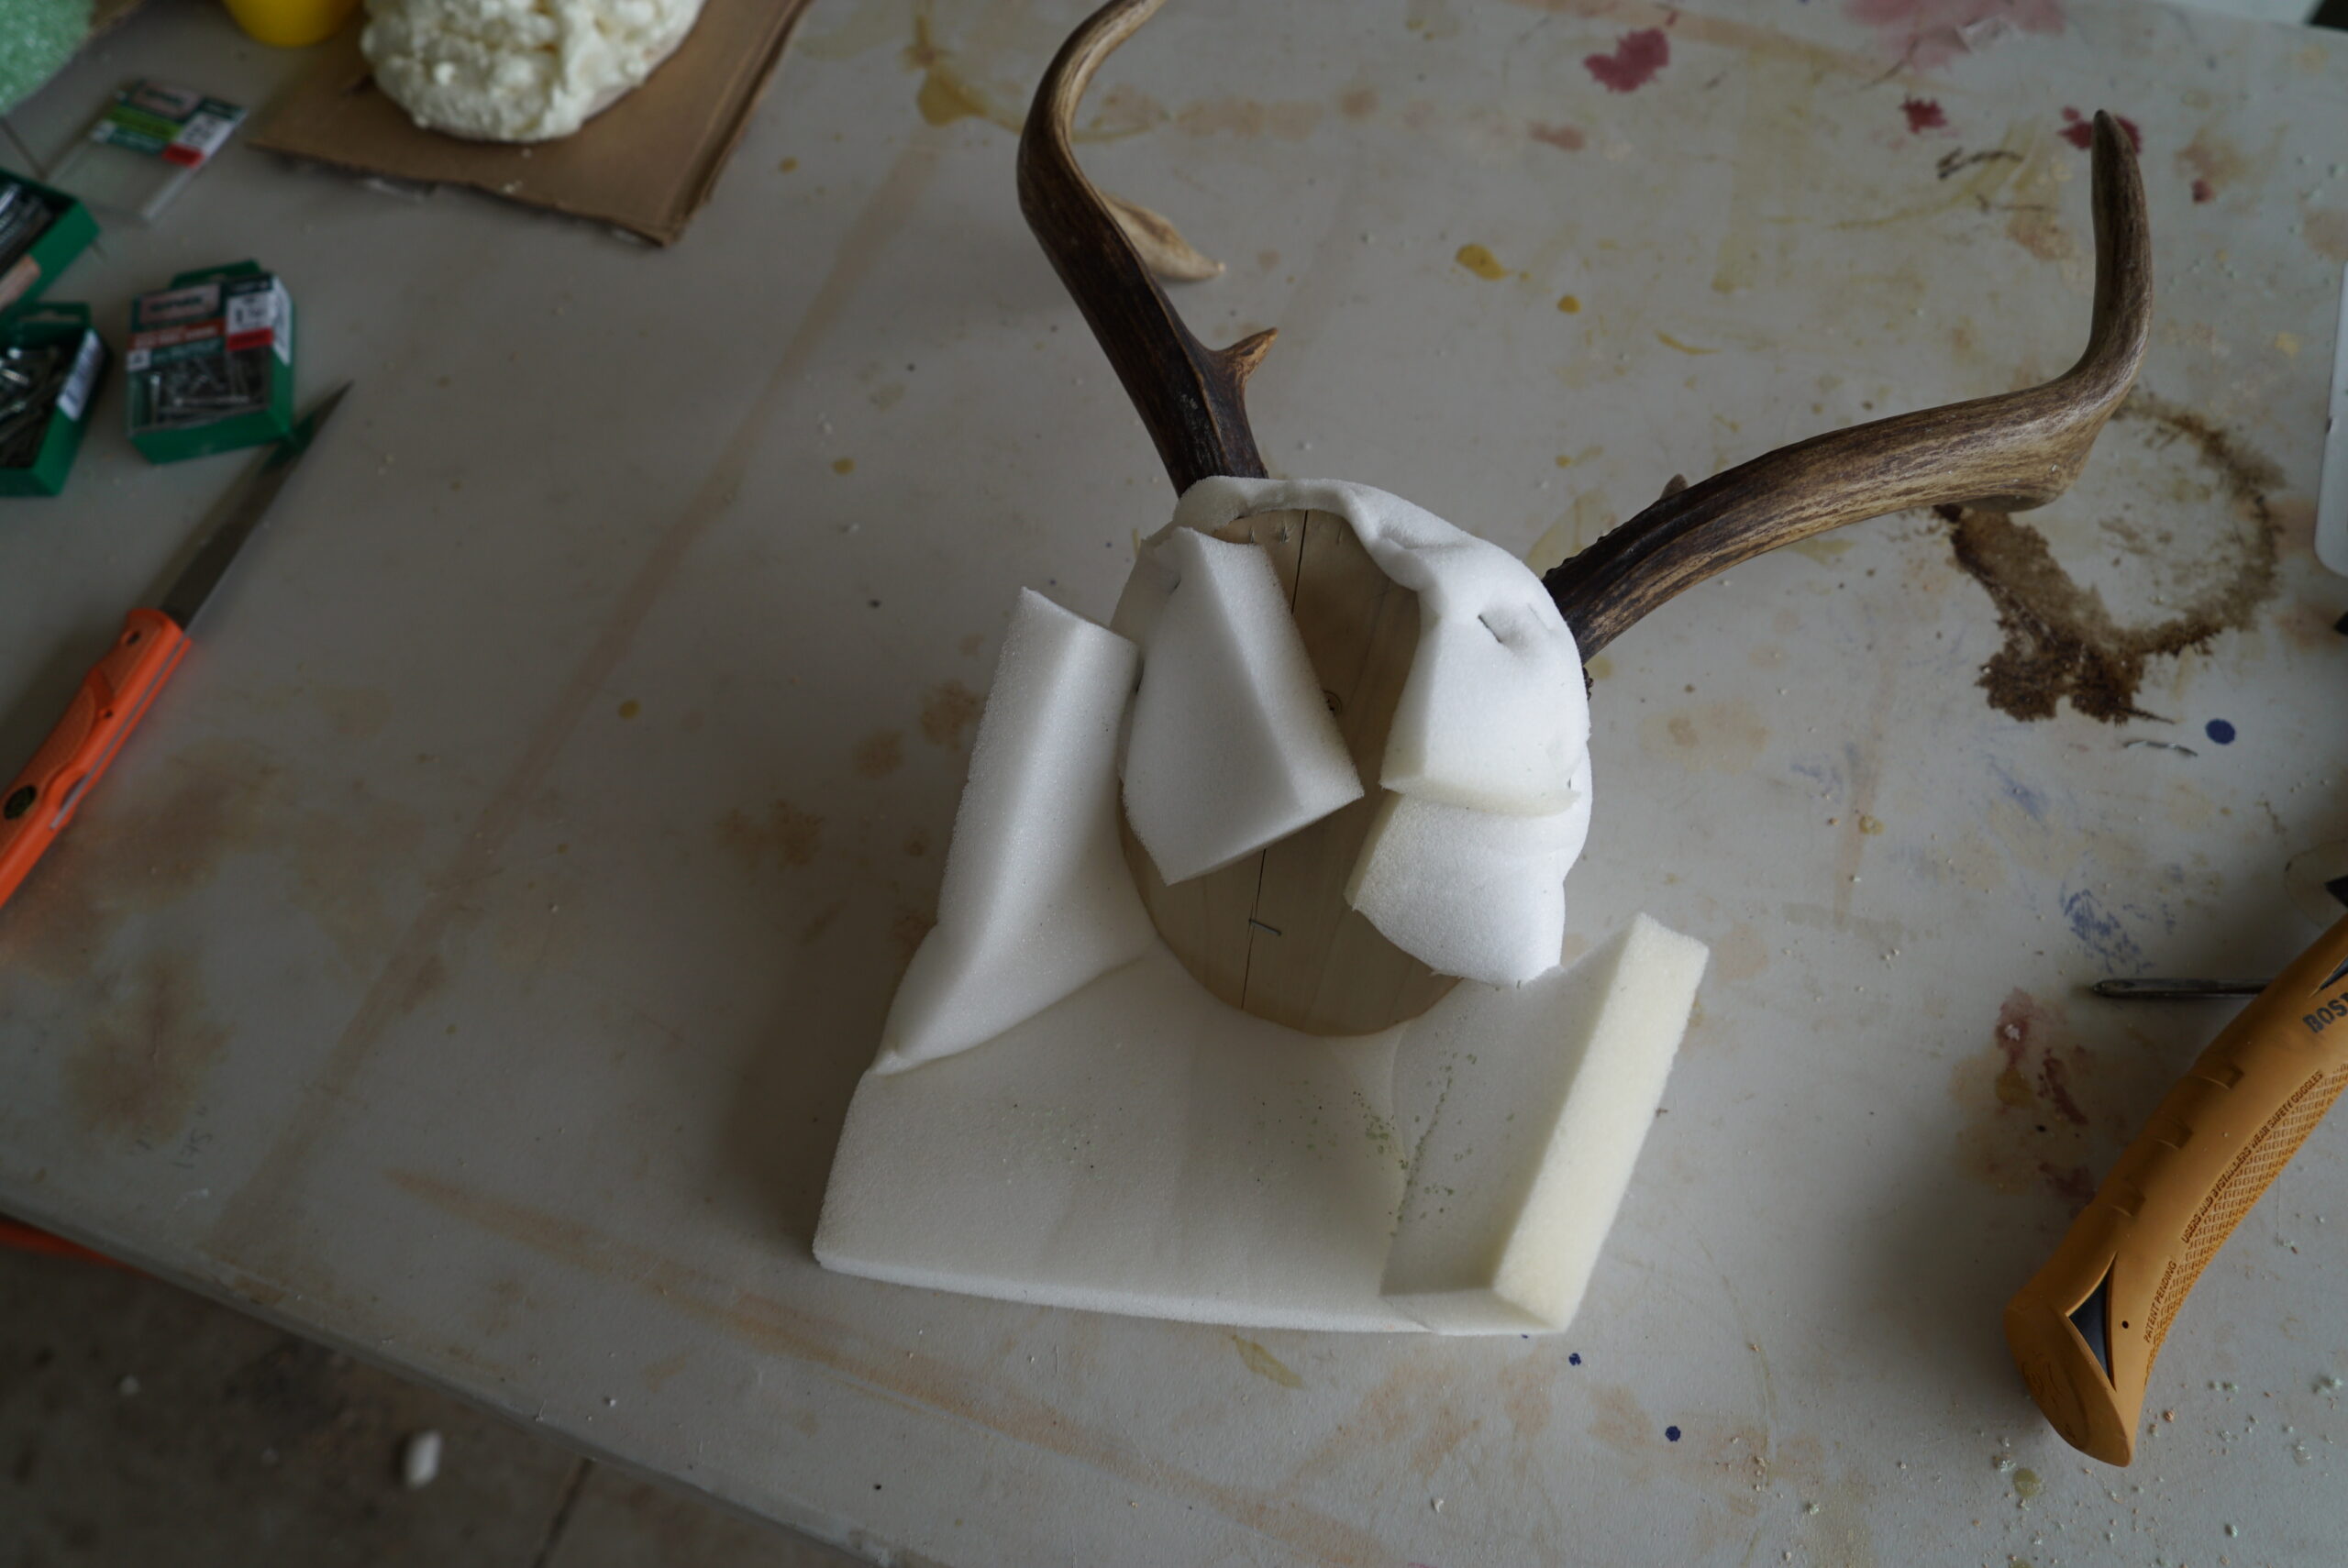
Step 5: Spray foam the gaps
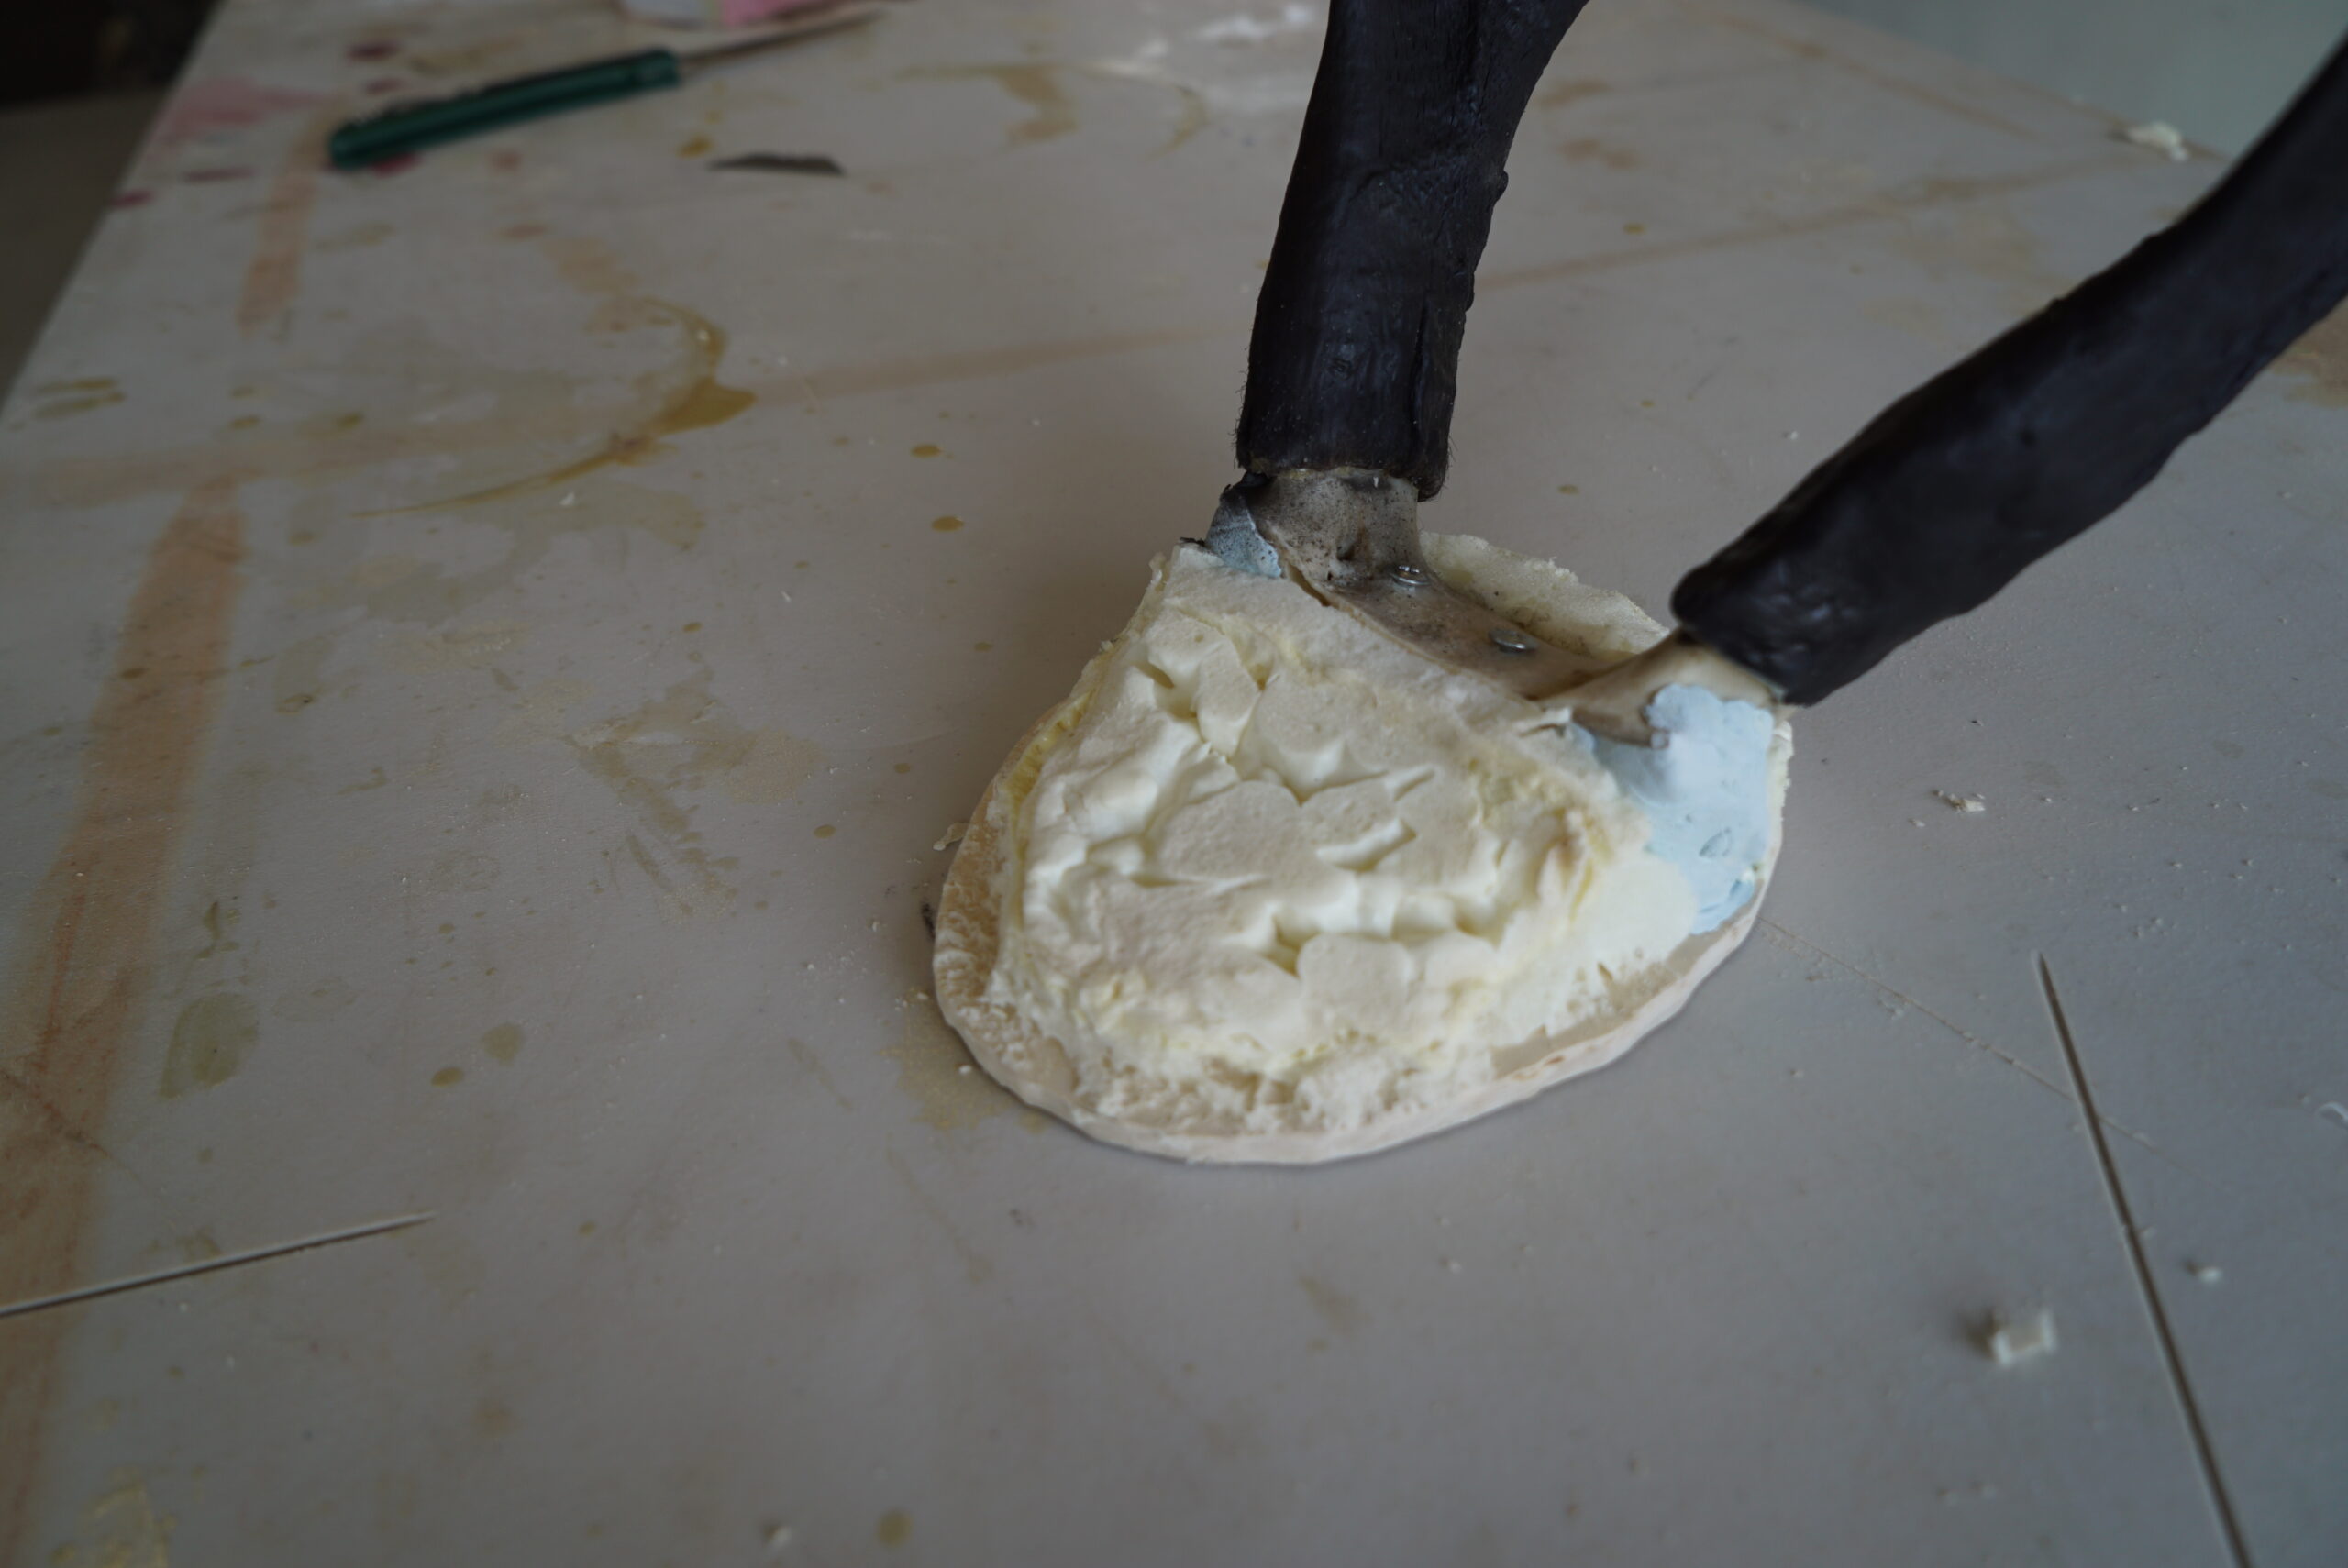
Take your spray foam and slightly build around the skull plate. Remember to go sparingly - the spray foam will grow, and this step isn’t to build the whole cap, just to fill some void. It also doesn’t have to be even, because you’ll be putting a cushion over it. You could even skip this step and just use the cushion, but I like to fill in the gaps to make it stouter.
After you spray the foam, leave the project for a few hours and let it dry. Once dry, use a knife to shave the foam down. You don’t want it anywhere near the pedicles or too high. Remember, this all gets covered.
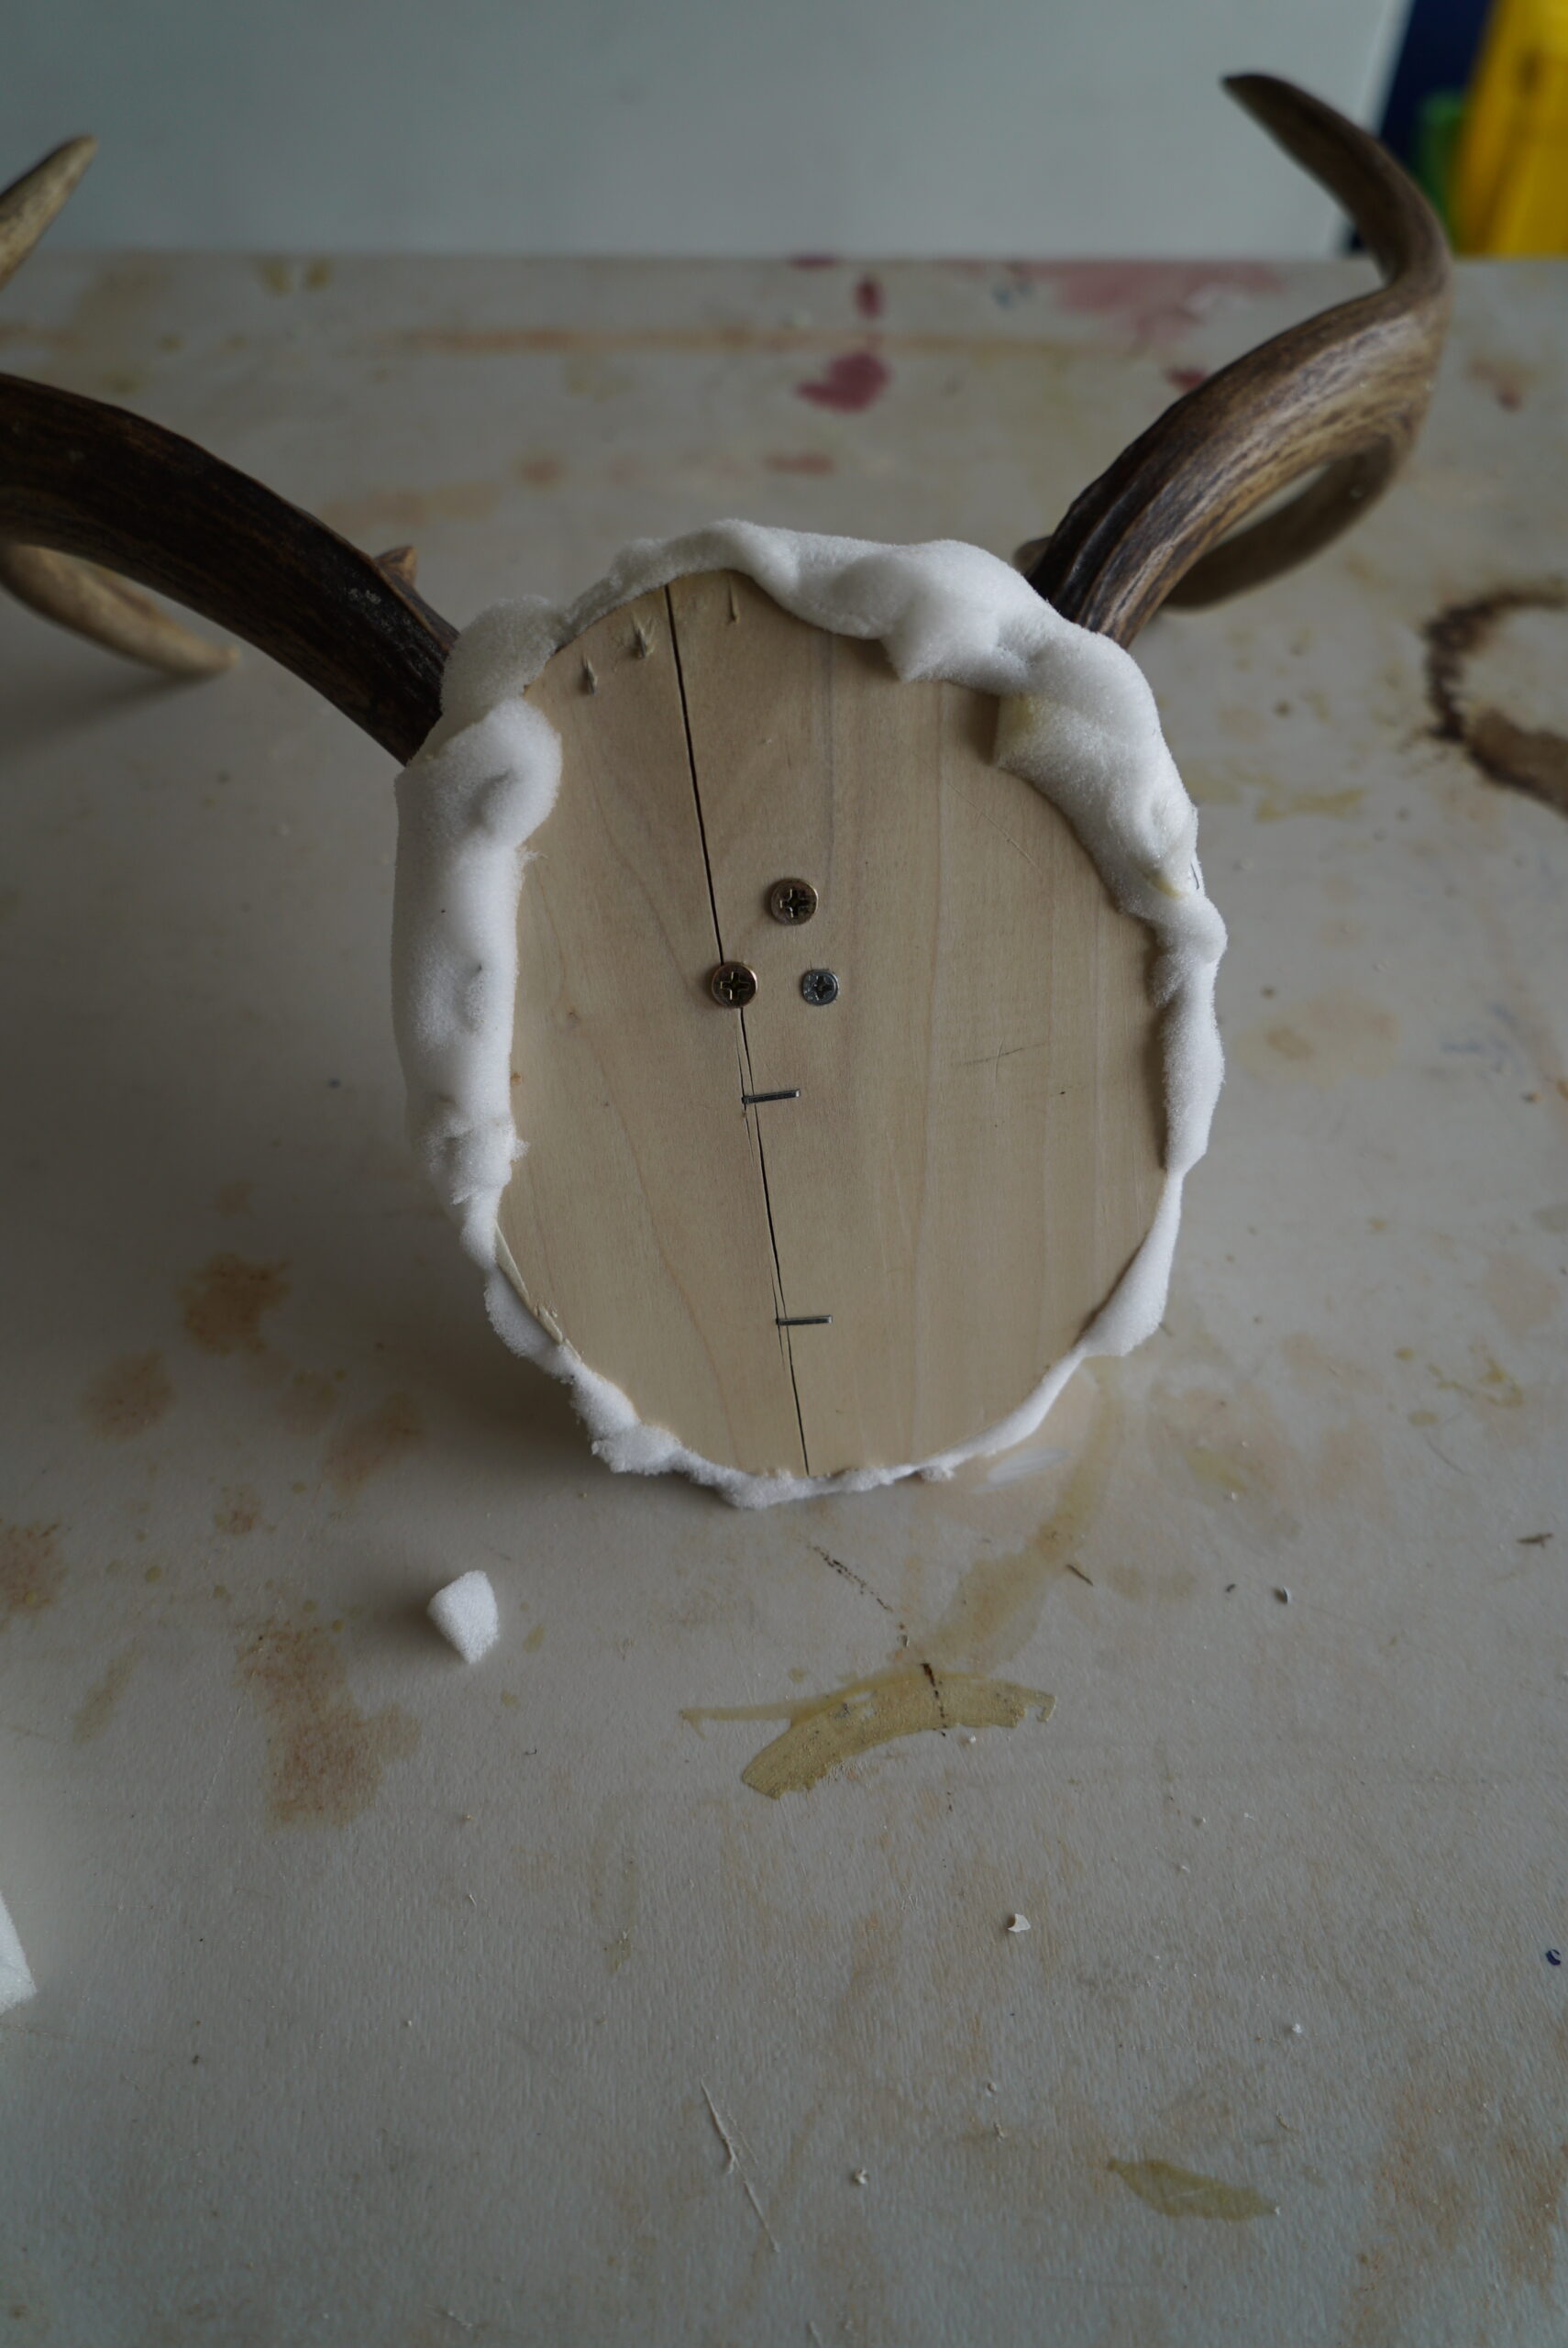
Step 6: Cover with the Cushion
The cushion is what will cover everything, even it out, and make it look professional. This covers any imperfections underneath and is a lot quicker and easier to work with than using foam and plaster for the whole cap. I’m using a ½” upholstery cushion. If you can’t find it at a hardware store, you can always find it at a craft store or online.
Attach the cushion by taking the stapler and stapling to the bottom of the cap base. You can run your staples on either the edge (preferred) or the back, but never the front. Work your way toward the antlers, stapling and pulling tight. Once you get to the antlers, cut a straight line to the antler pedicle in the foam. Try not to cut it too long; you want it to be tight. Once it’s secure, pull it around and staple to secure it. Do the same on the other side.
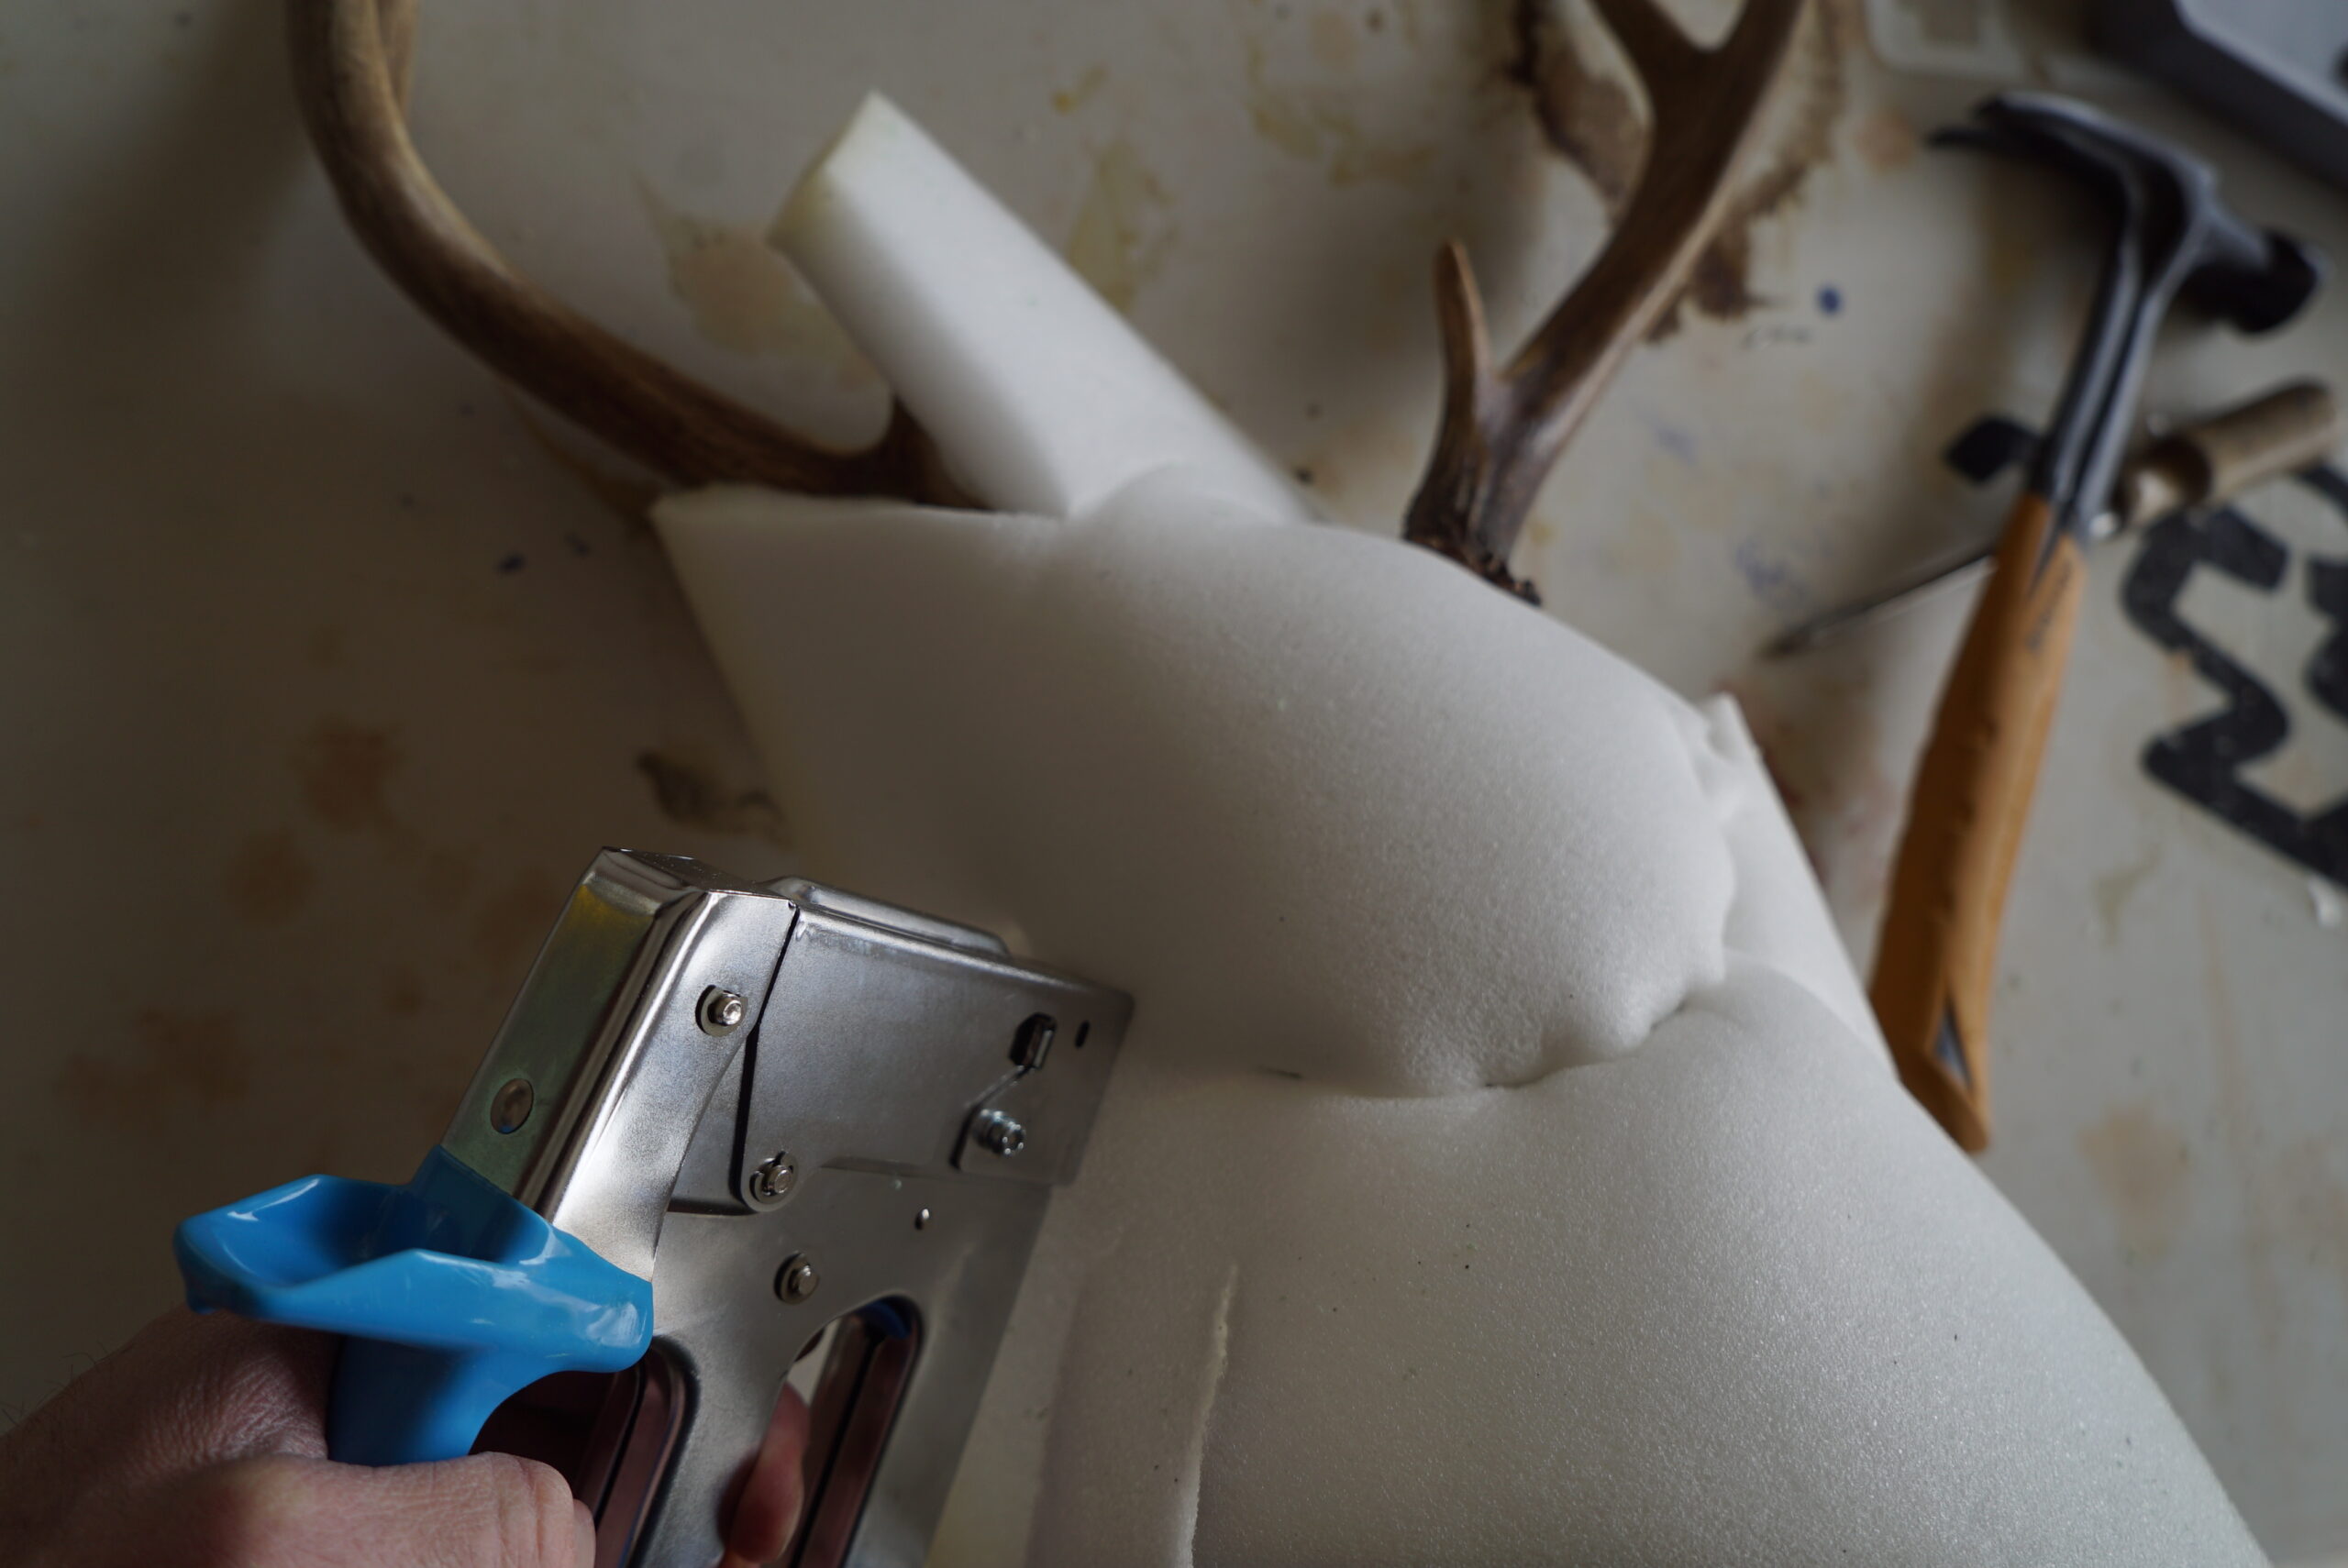
Once stapled, cut off the excess cushion foam with your knife. You’re now ready to apply the material to the cap.
*Note: you can use a hammer to tack in or fold over staples that don’t fully go in. If you crack the board accidentally, it’s not the end of the world - just staple it together; it should still hold. Using the spray foam helps give the ¼” board some strength and is another reason not to skip that step if you have the time.
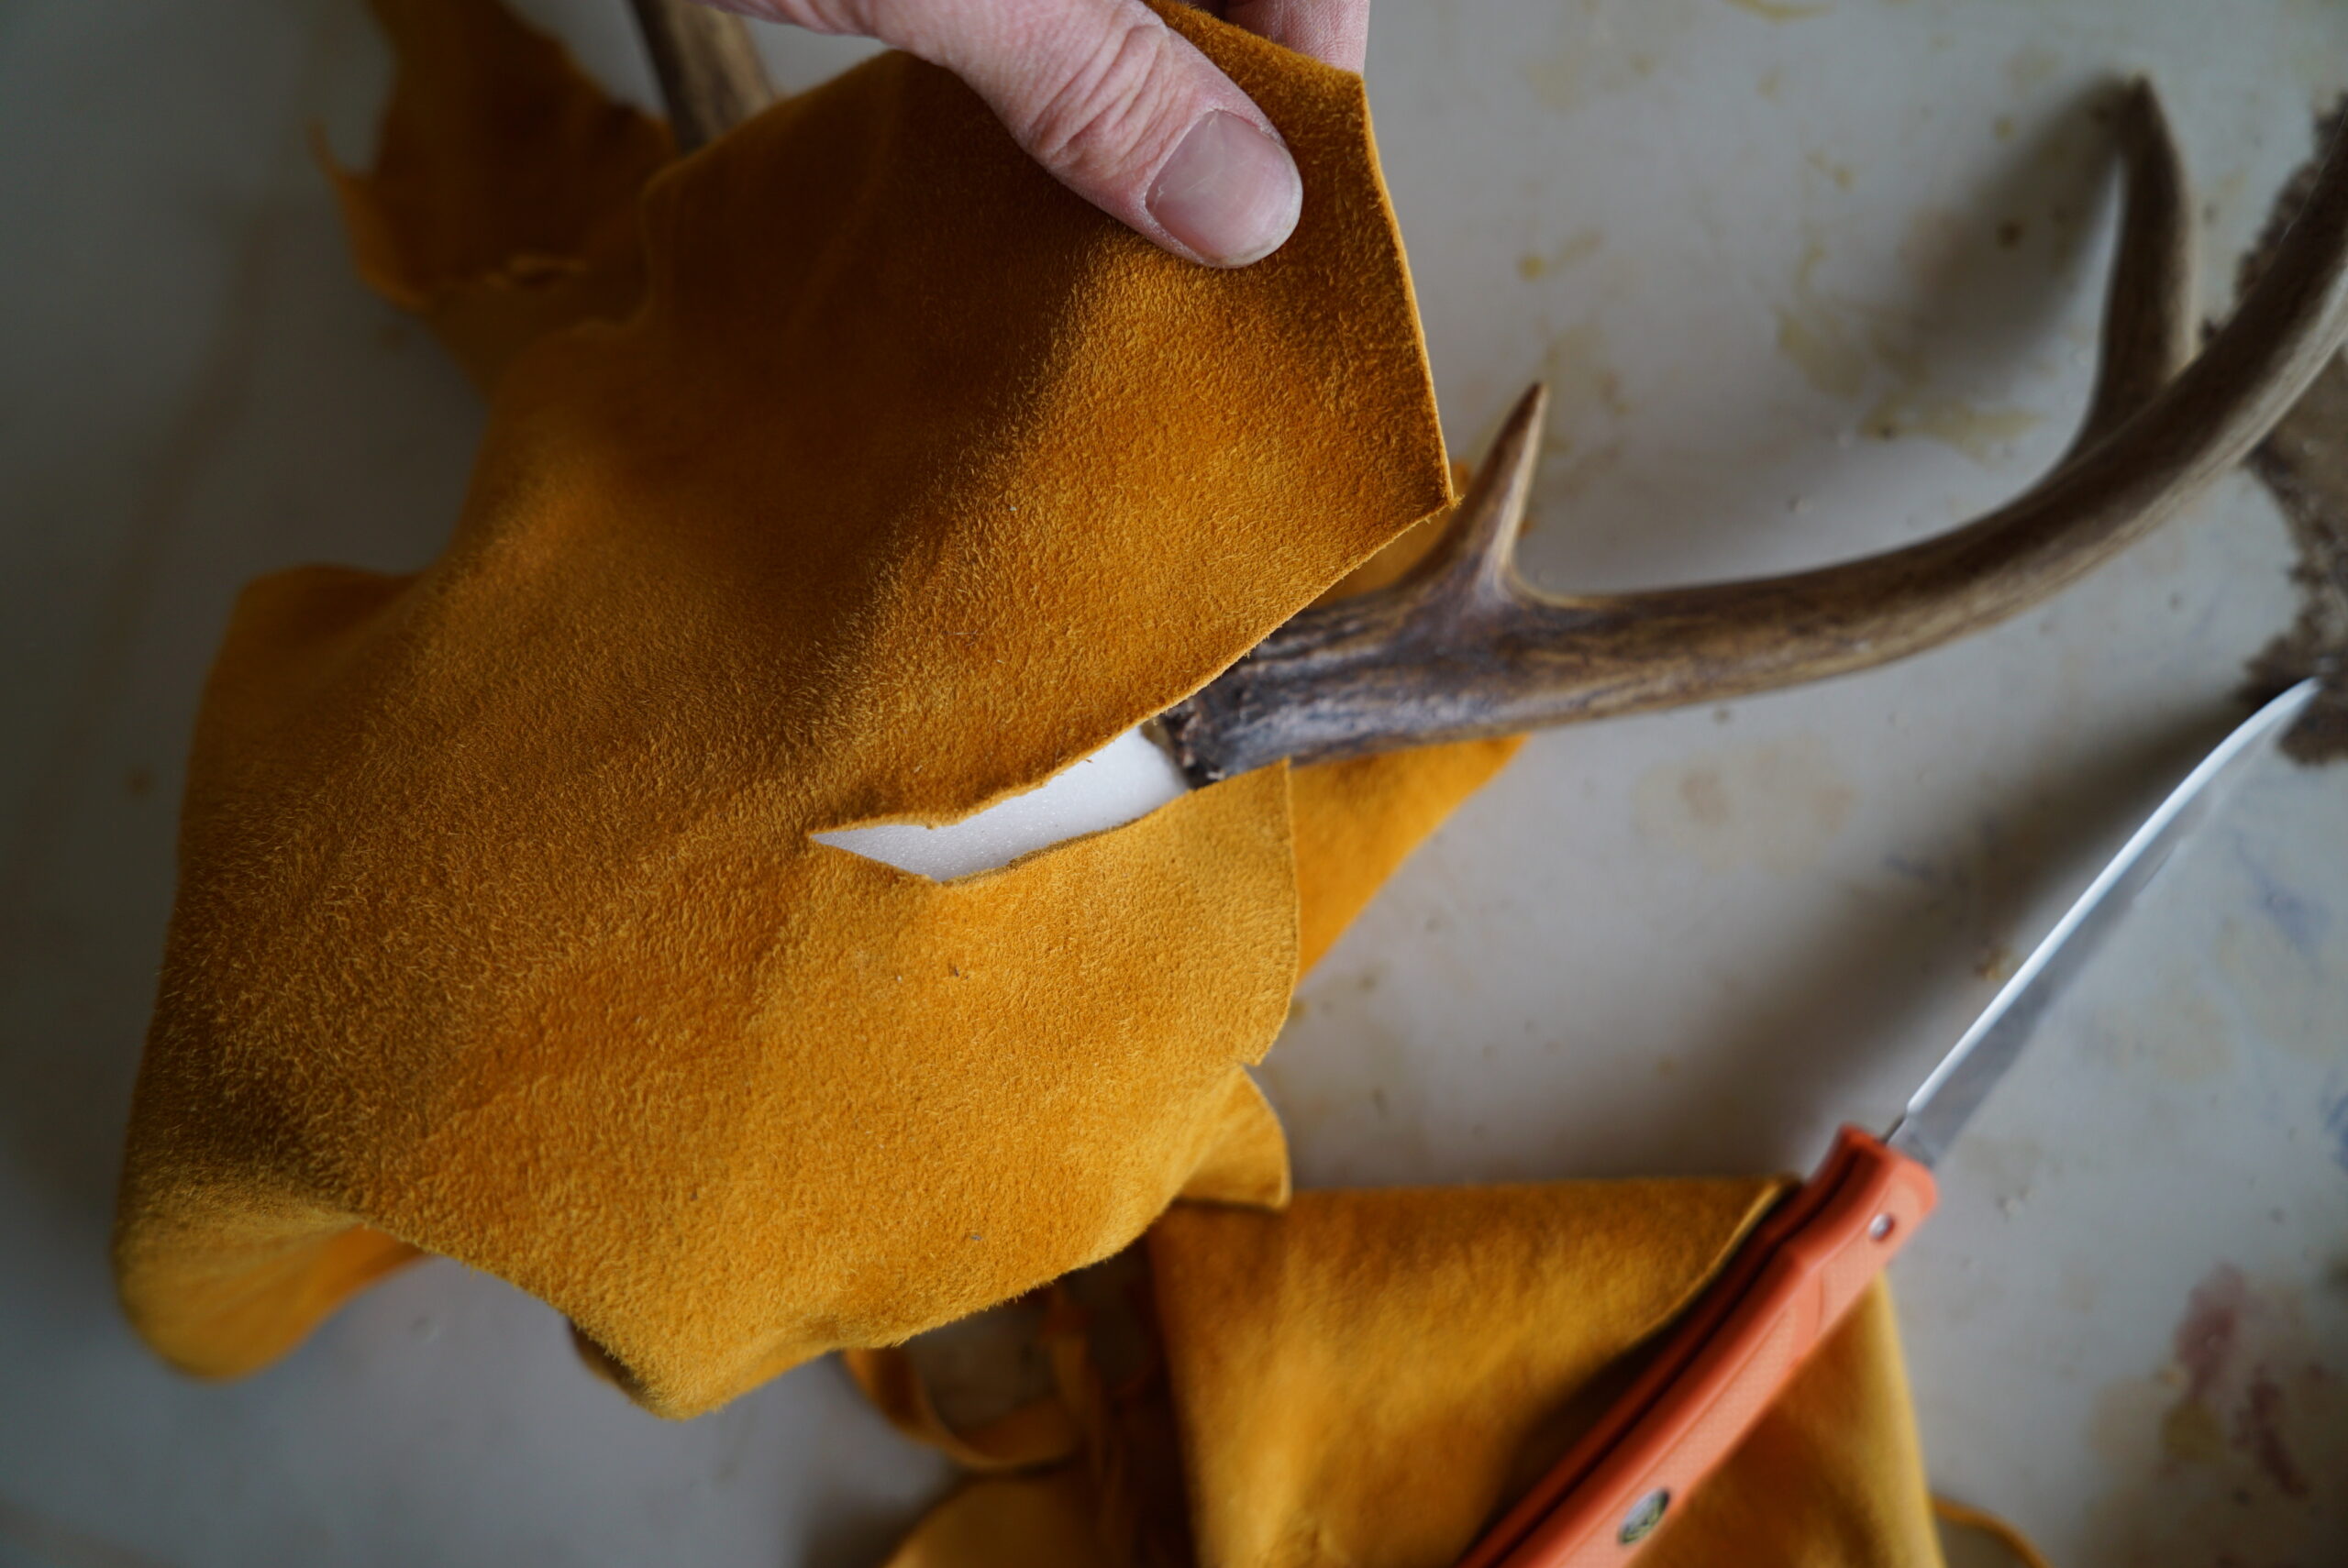
Step 7: Cover the Cap
You will now cover the cushion foam with whatever material you choose. Camouflage, old jeans, a bandana, leather, corduroy - you name it, this is where you can be creative and customize it. For these two antler mounts, I’m using leather from a deer I shot. For the deer antlers, I am using the rough side up. For the antelope, I’m using the smooth side up, just to show two different looks.
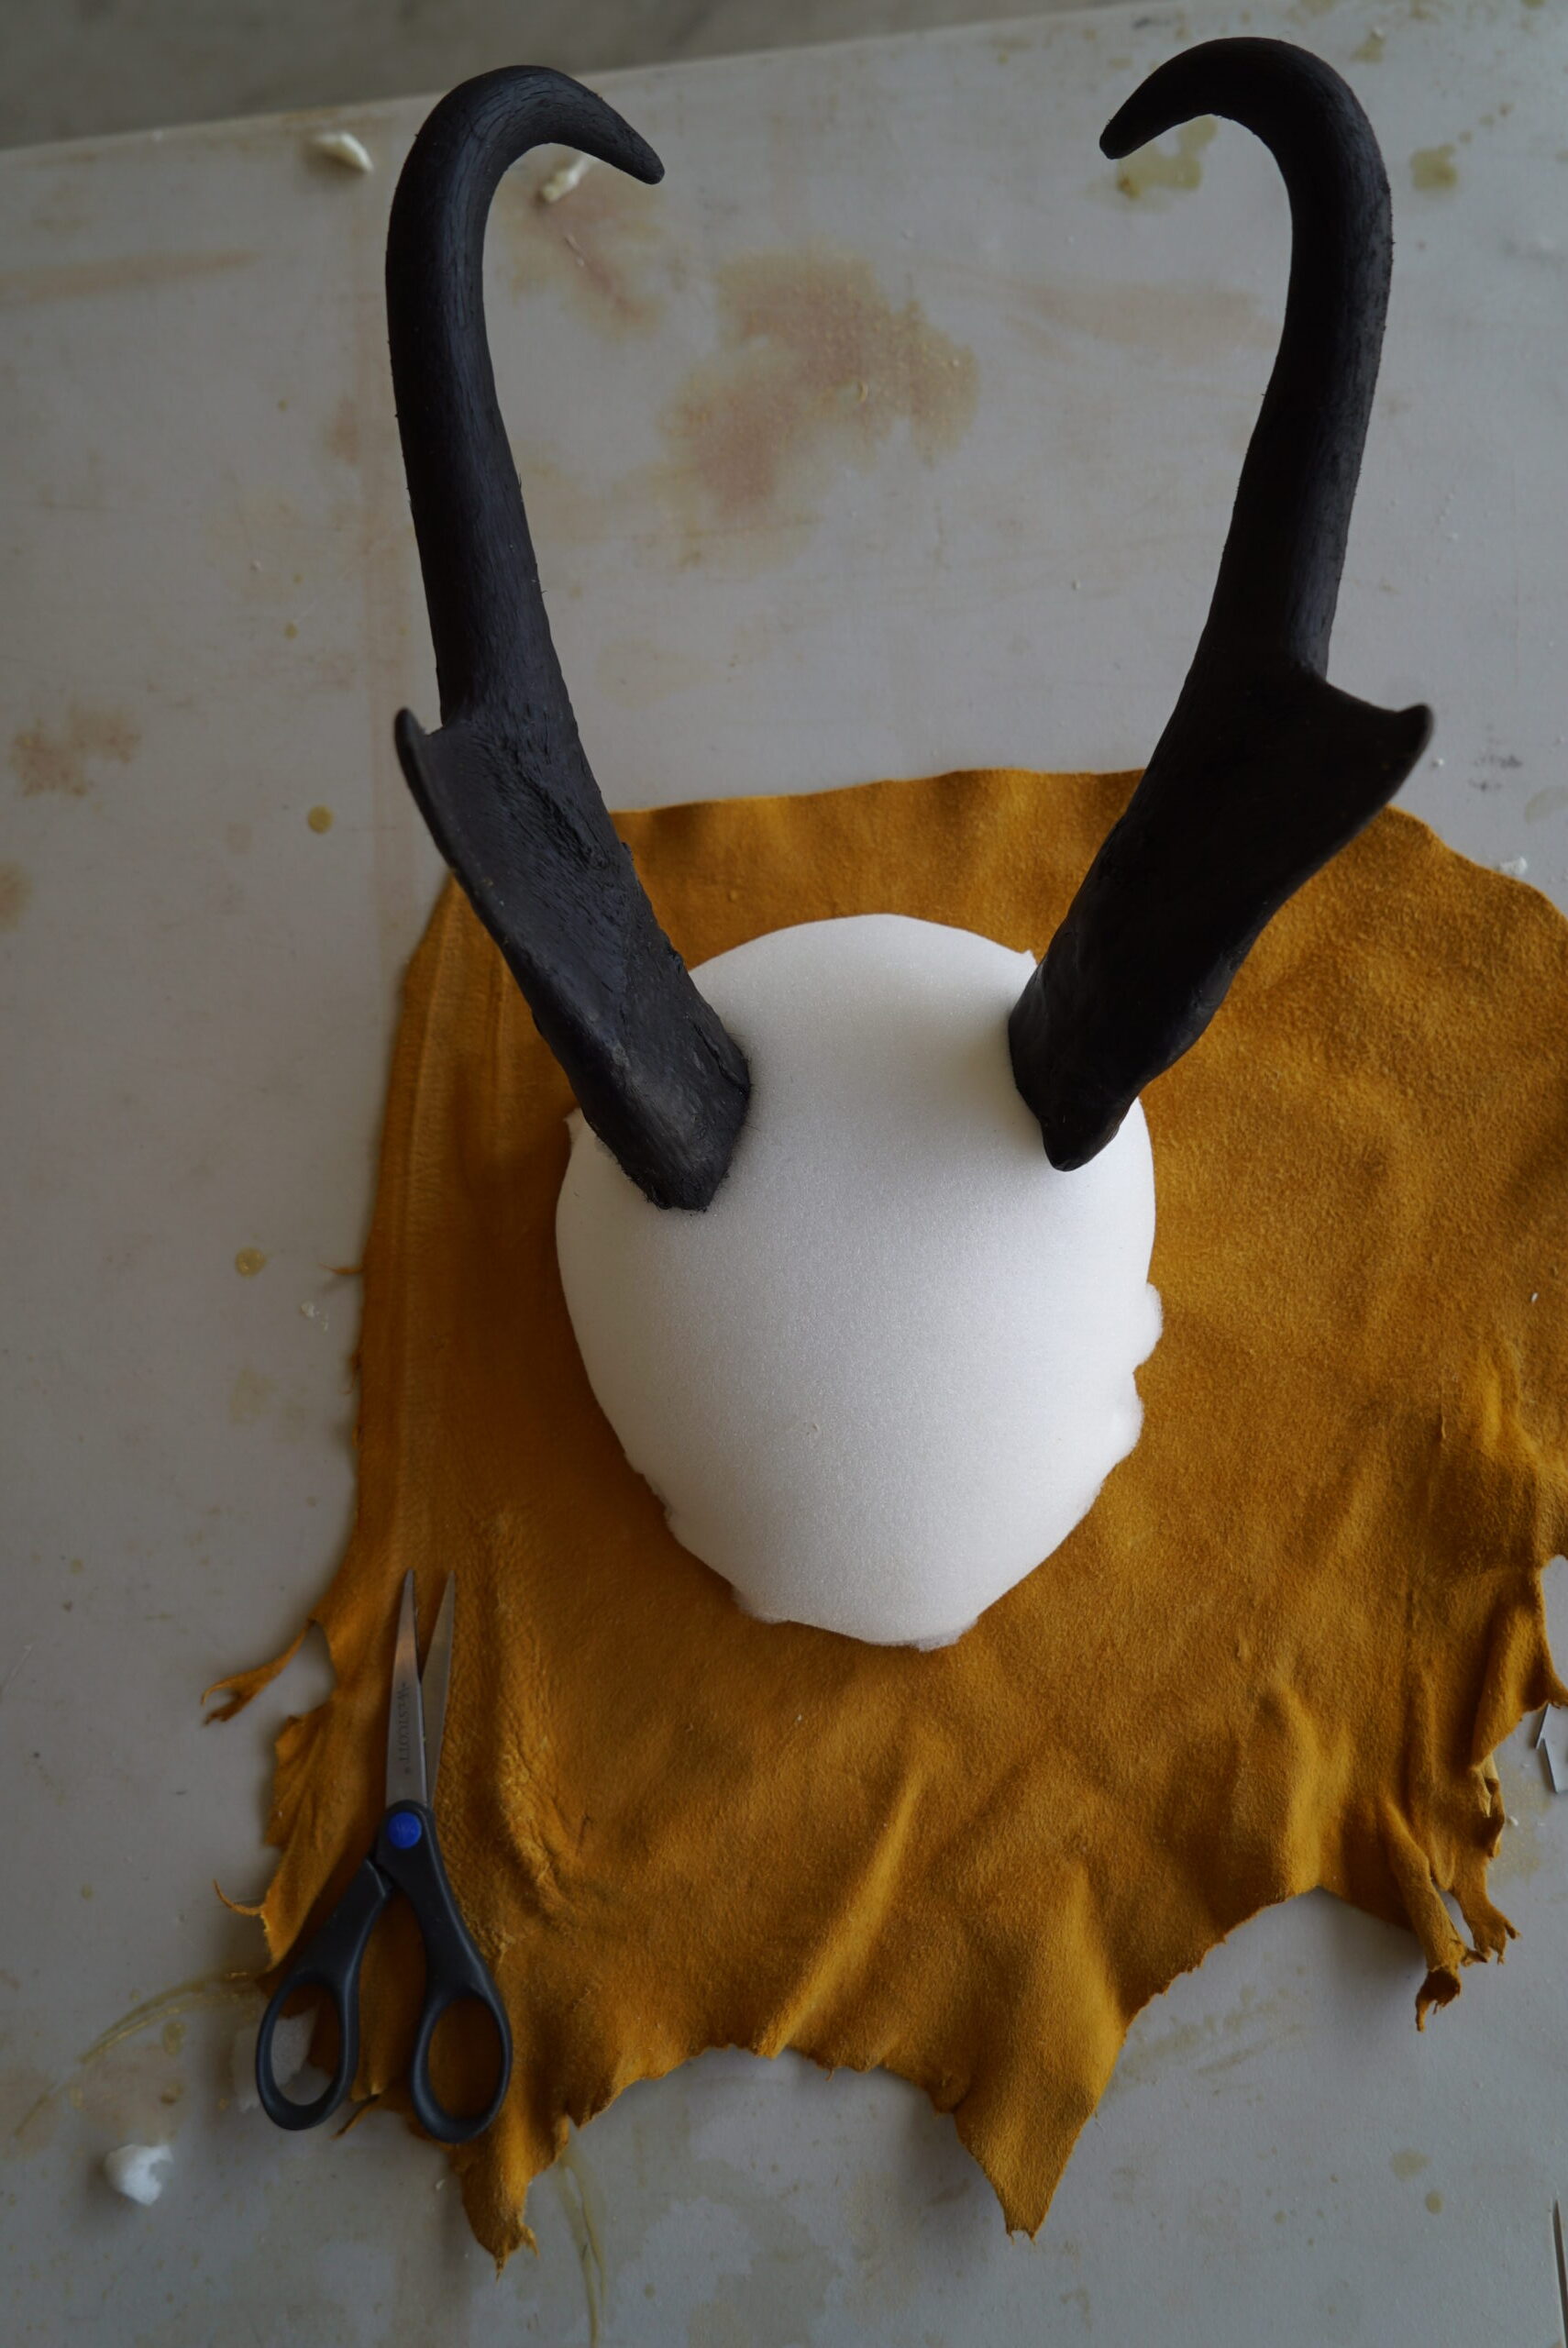
Start from the bottom the same way as you did with the upholstery cushion and staple the leather to the back. Pull tight and work up to the antlers. Next, cut a slit down to the pedicle on each side of the cover material. Make sure to pull the material up, continually stretching. You can trim anywhere you need, but the key is to keep everything tight. The center flap between the antlers will then be pulled up and secured by staples to the back.
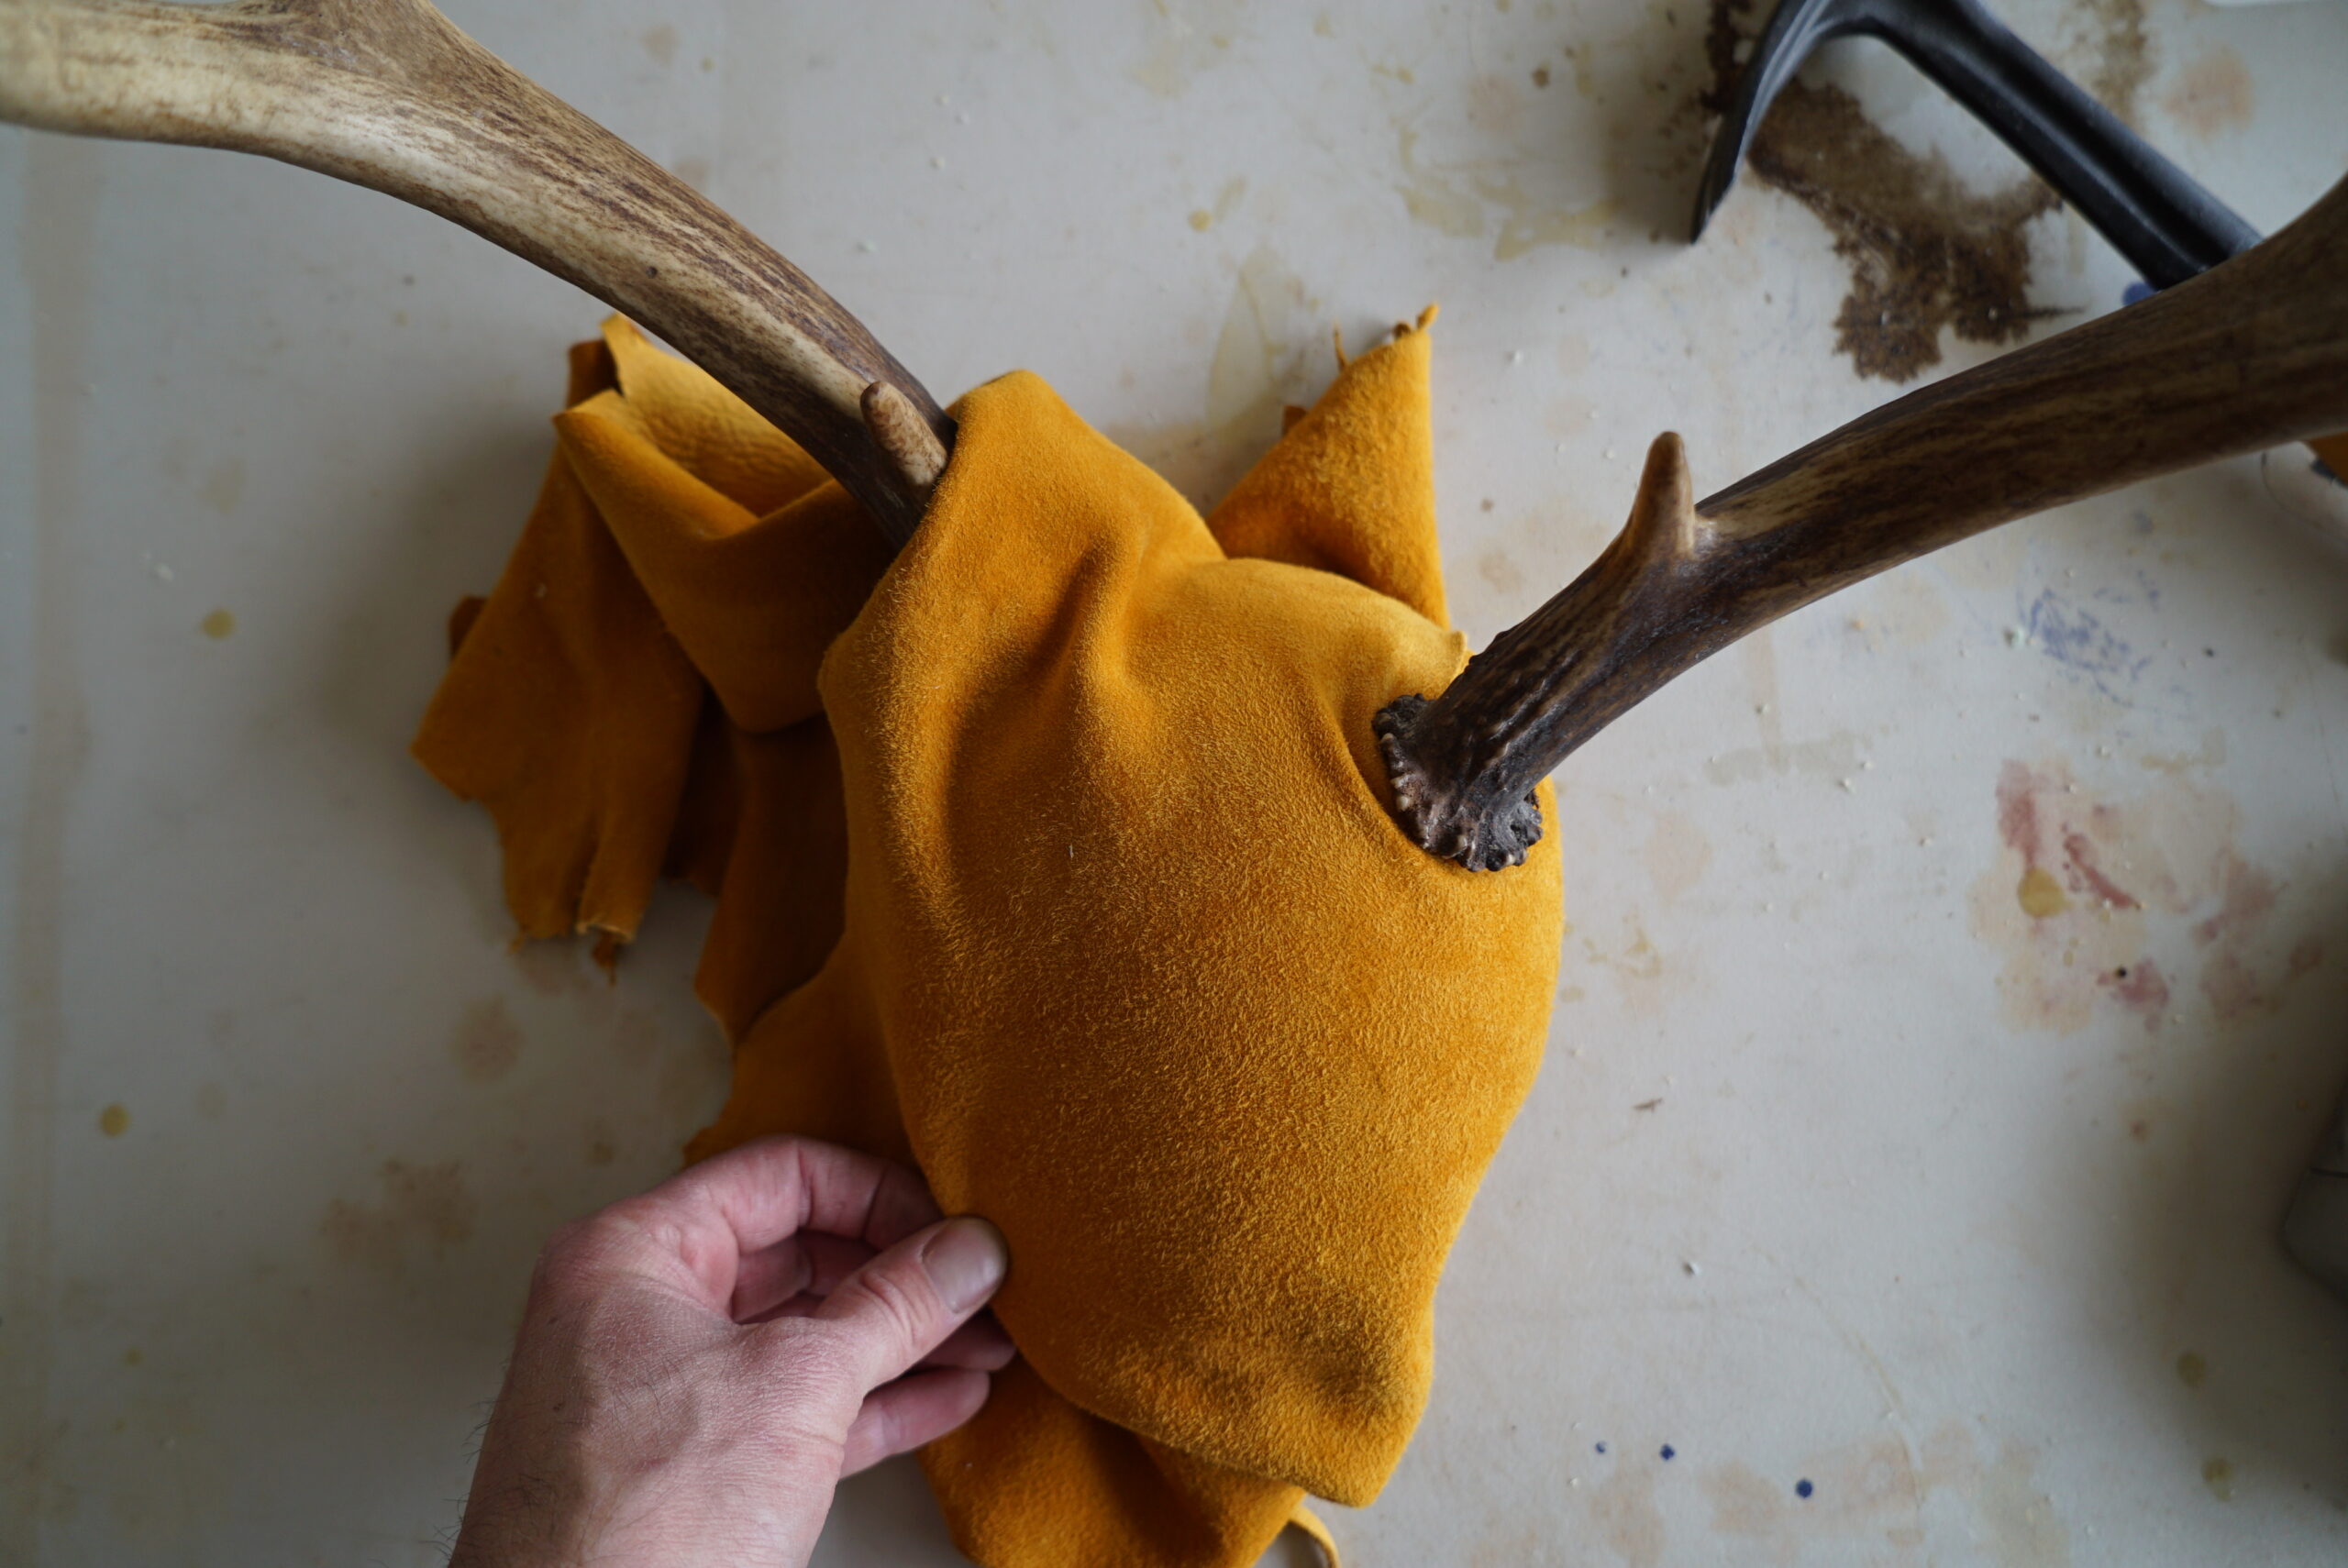
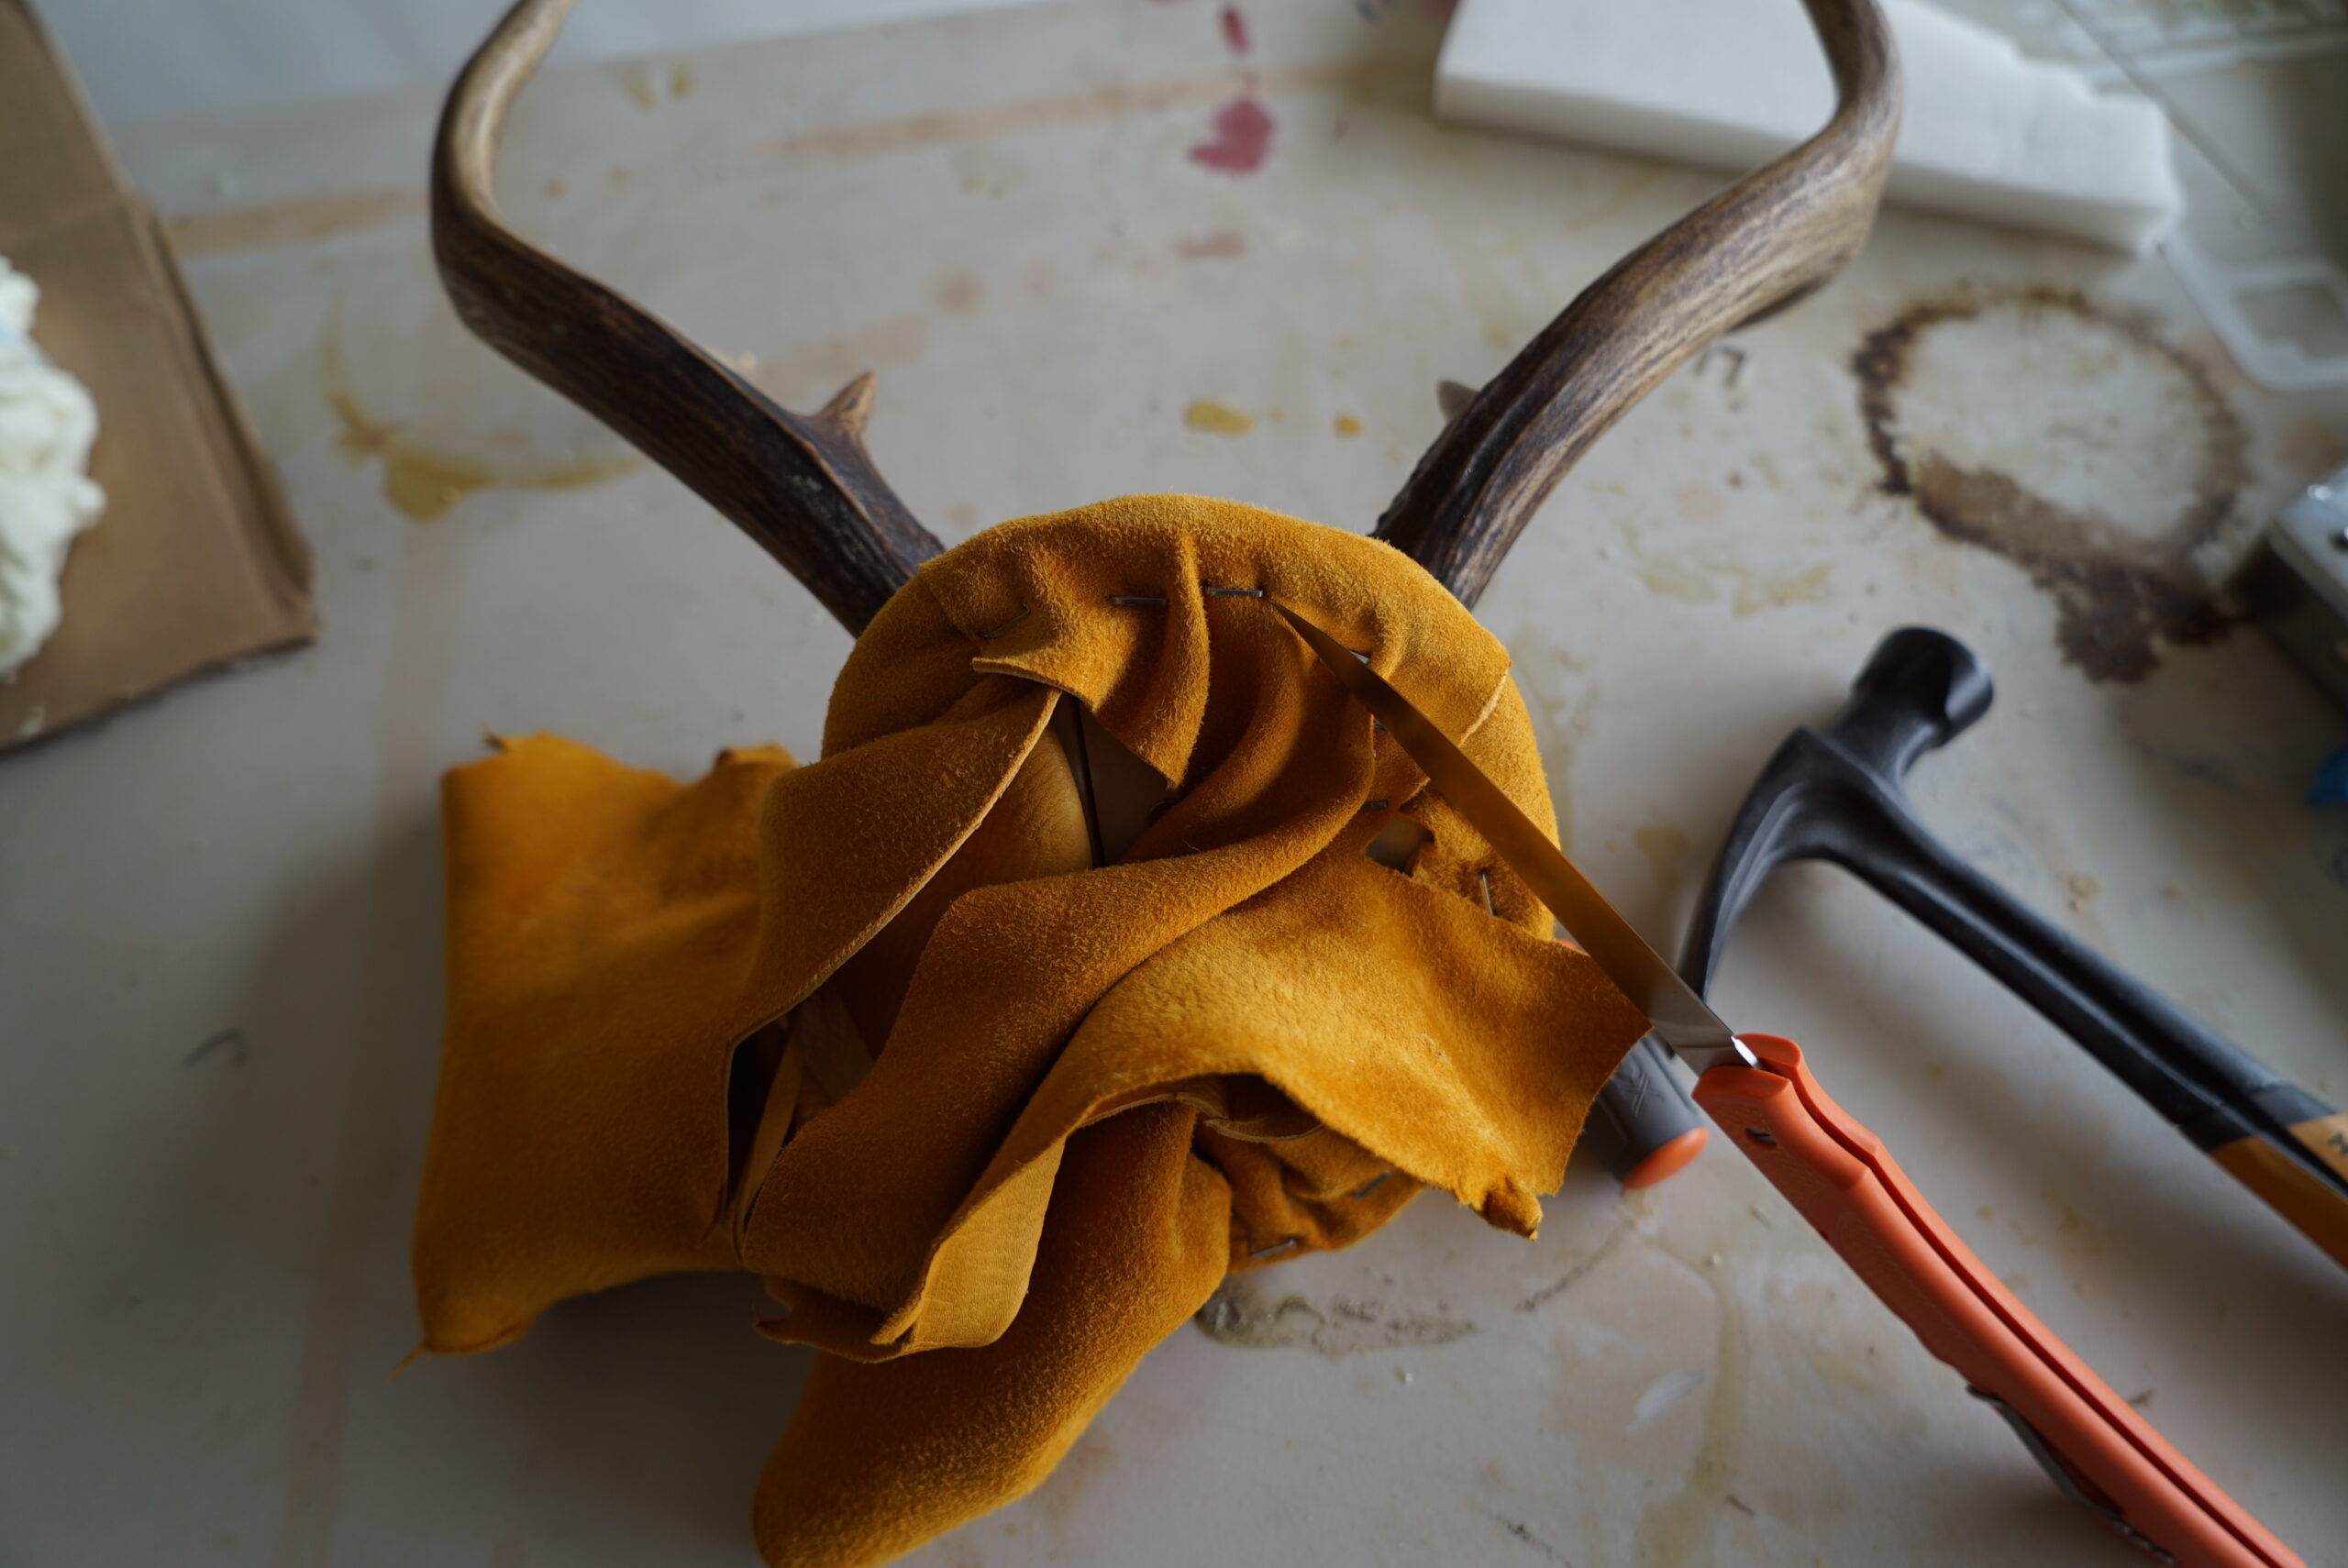
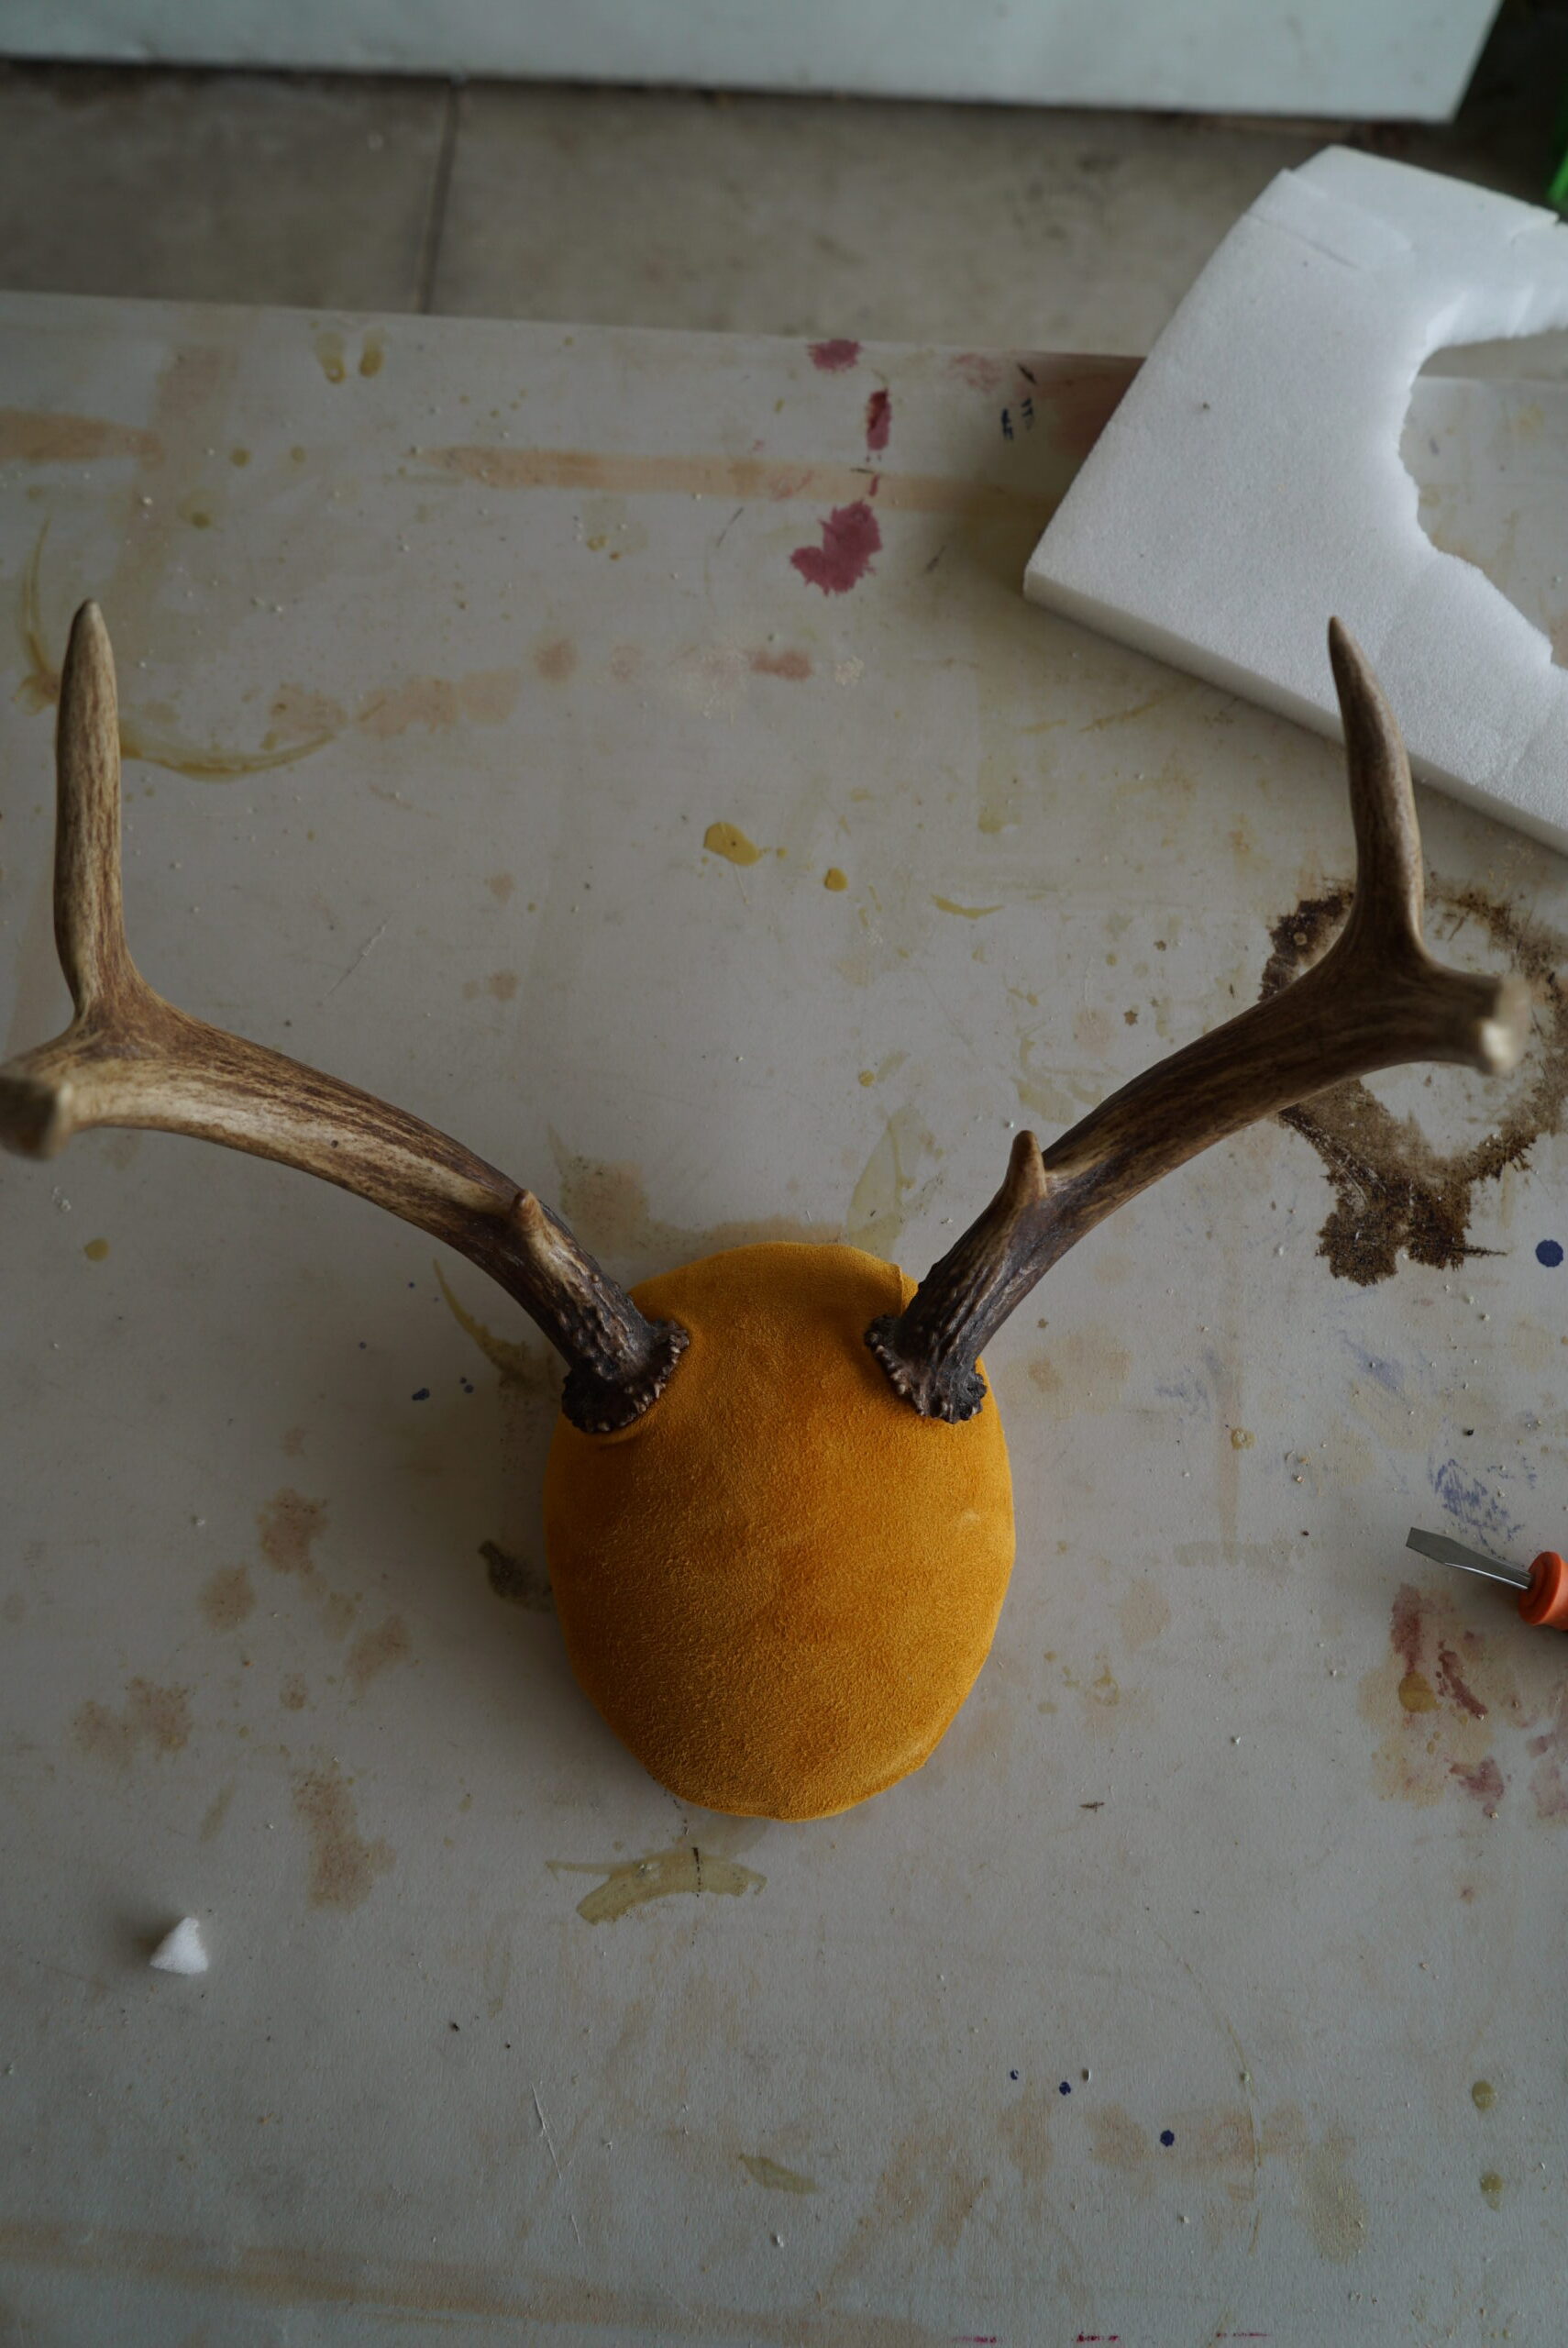
When finished, there should be no creases. You’ll now trim off the excess material and your antlers and cap will be ready to mount to your plaque.
Some people will run a piece of rope or thick cordage around the base of the antler, up against the pedicle. This can hide any cuts or part of the pedicle showing if there is any. Some people also just like the look of it trimmed out like that. Once again, this is your project, so do what you like. It may take some practice to get it right, so you may want to plan on trimming with rope or cord for your first few.
Step 8: Choosing the Plaque
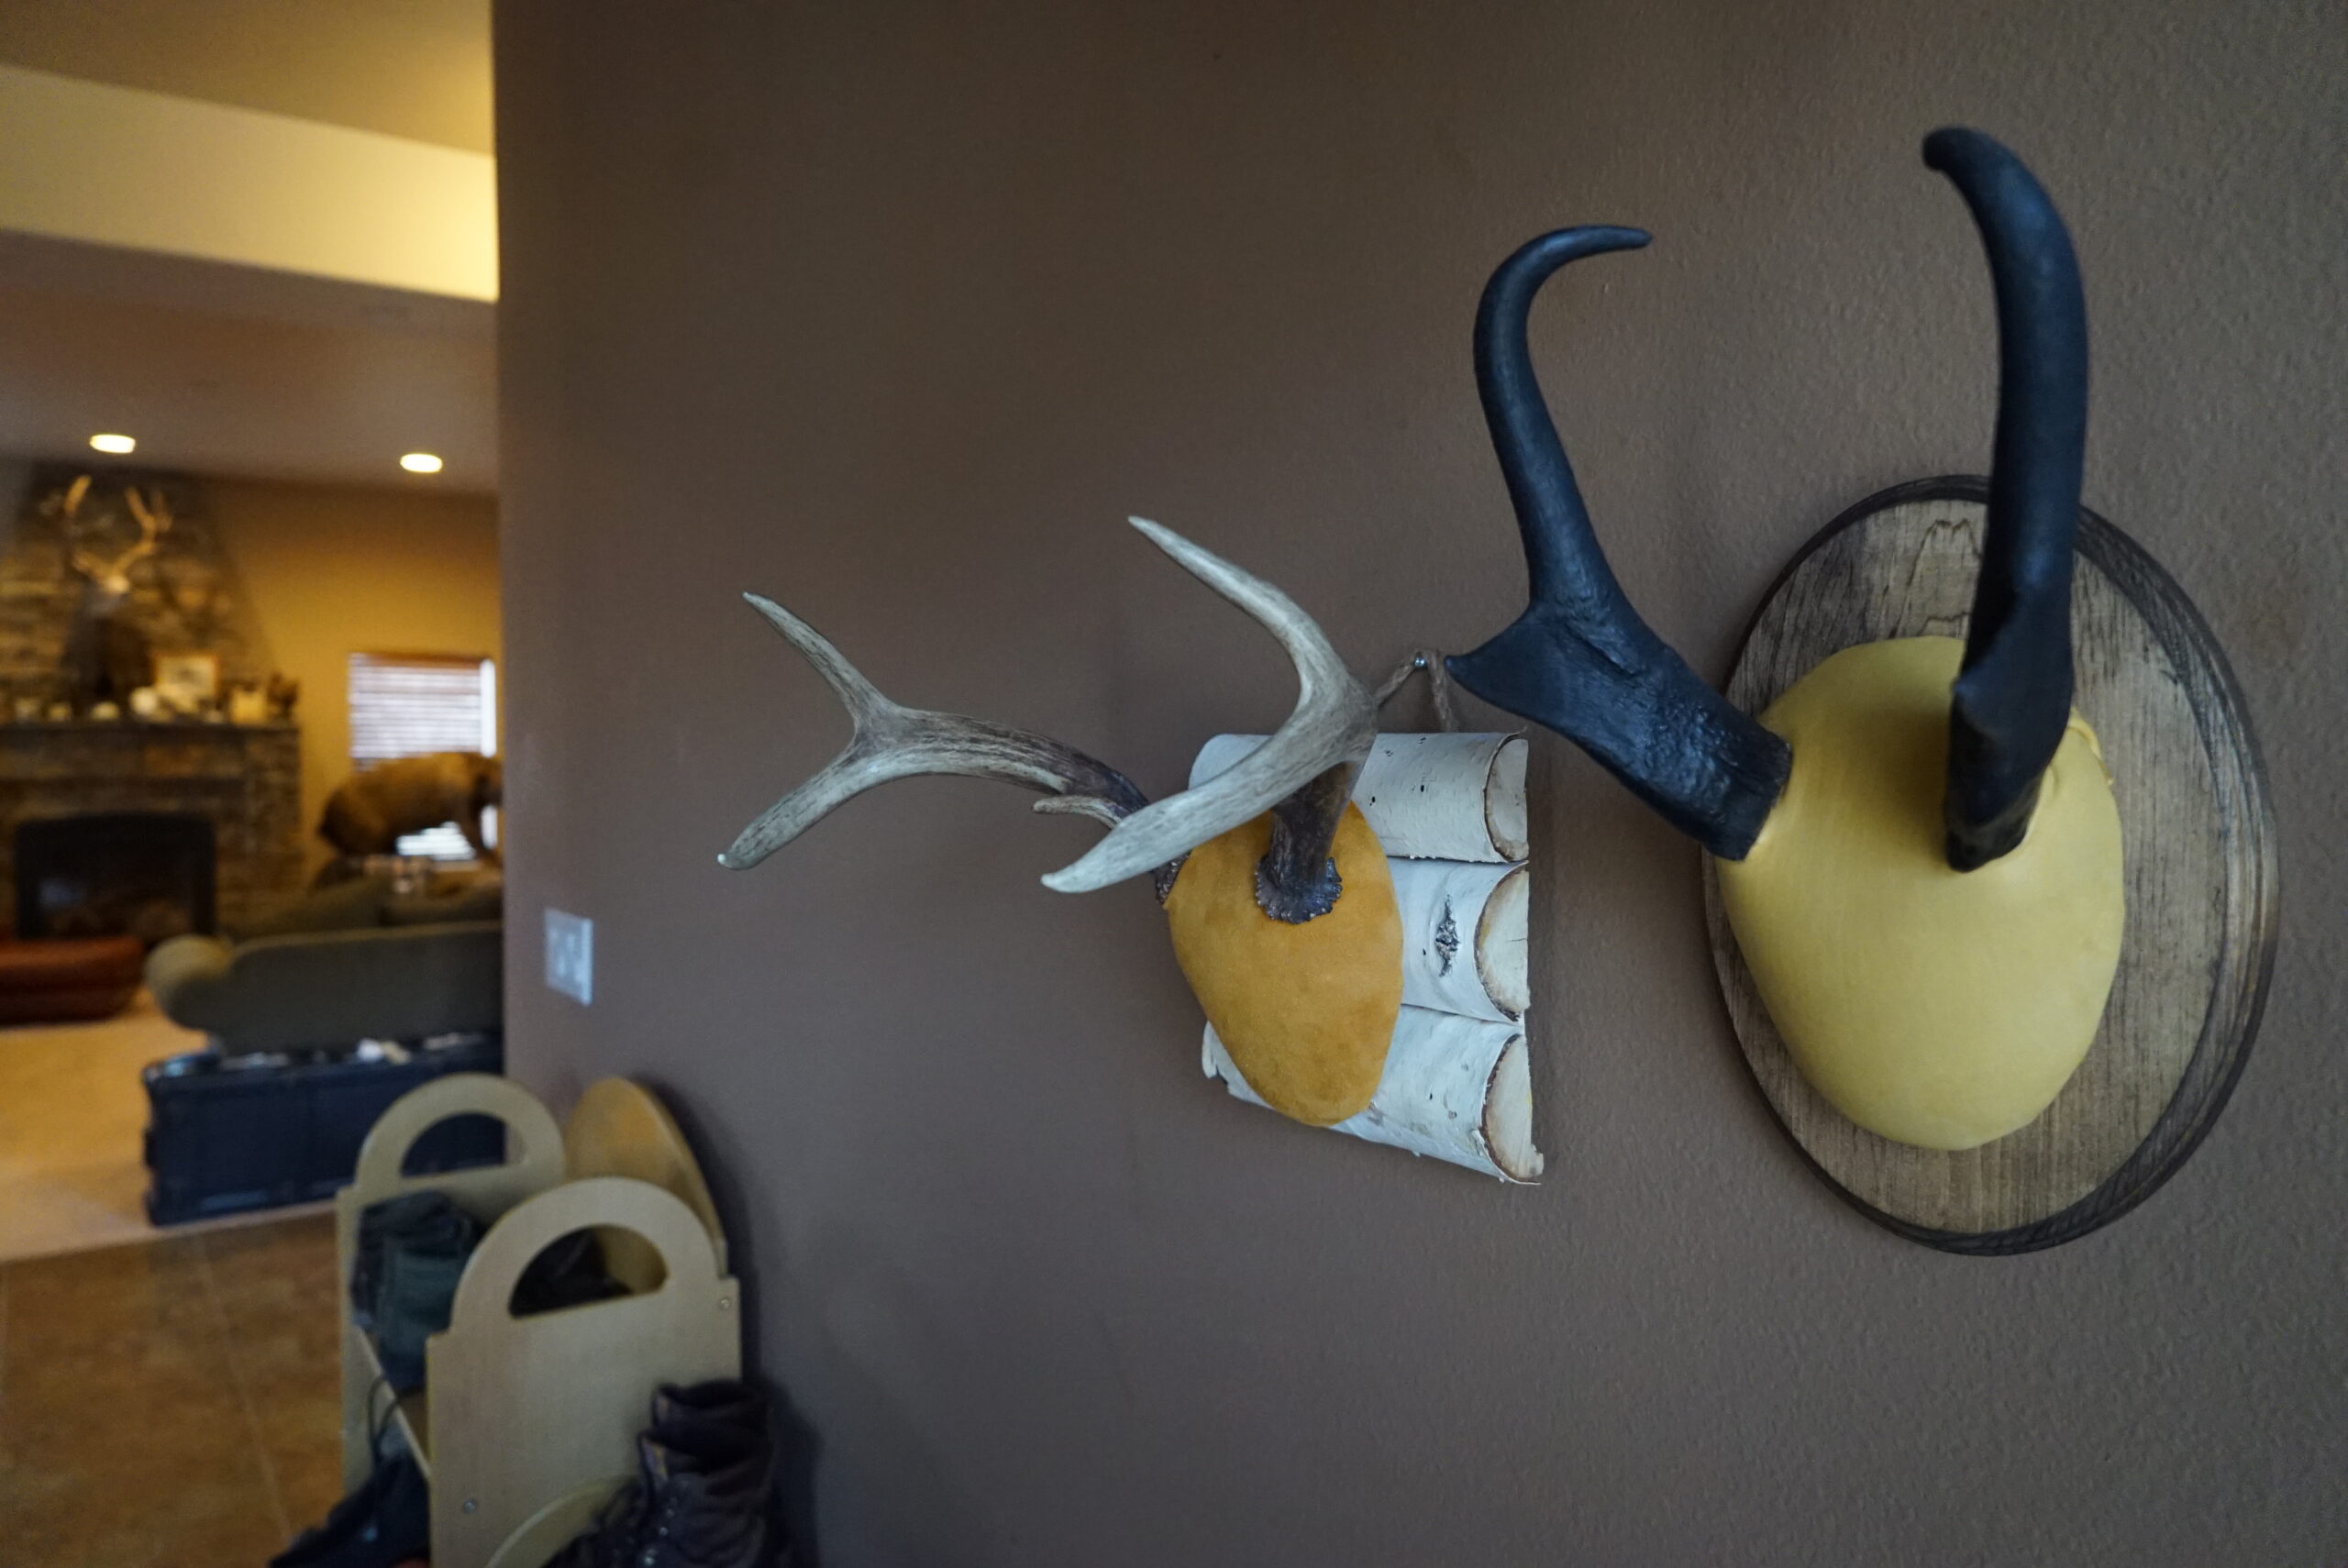
Here is another step where you can customize. I chose two ways, just to give you some ideas. There are a lot of options for the plaque: a cut round log, barn wood, or something purchased and stained. All are great options.
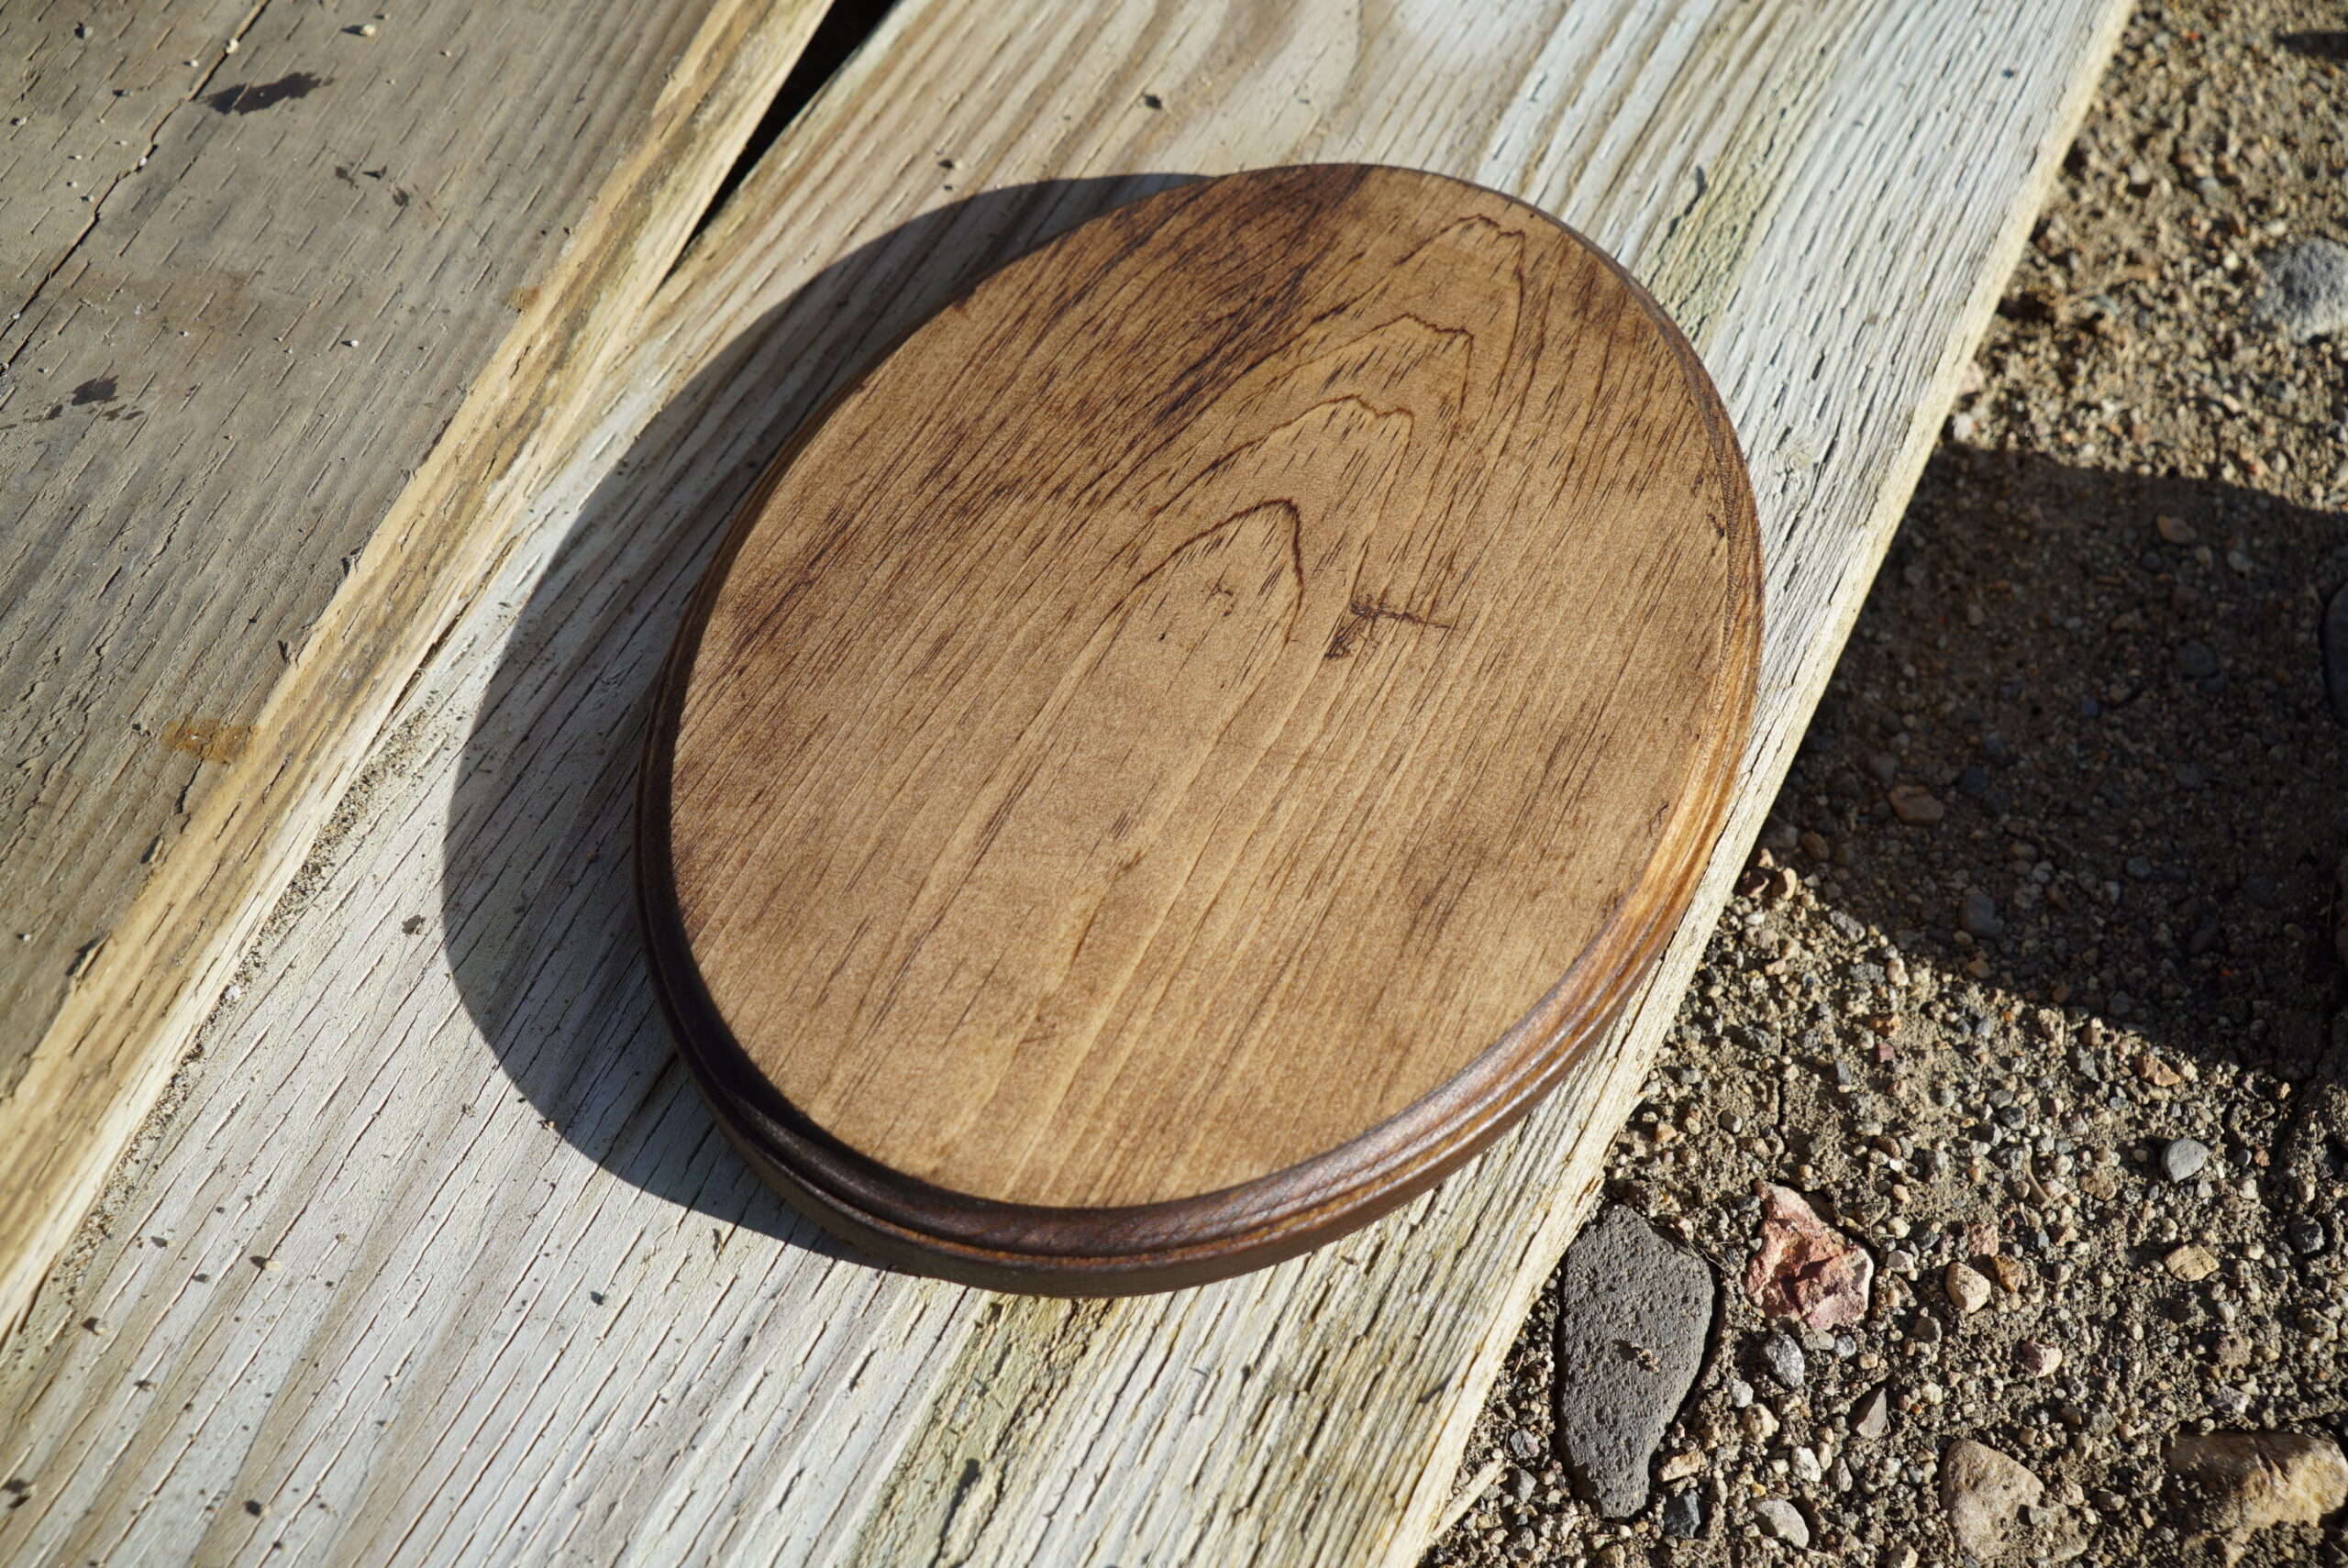
For the antelope, I picked up a cut oval piece of wood for $3 at a craft store. That’s the easiest and always looks good. I brushed on some leftover stain I found in the garage after using my sanding block to smooth out any rough edges and the face. I also drilled out a bigger hole in the back where my nail from the wall will sit.
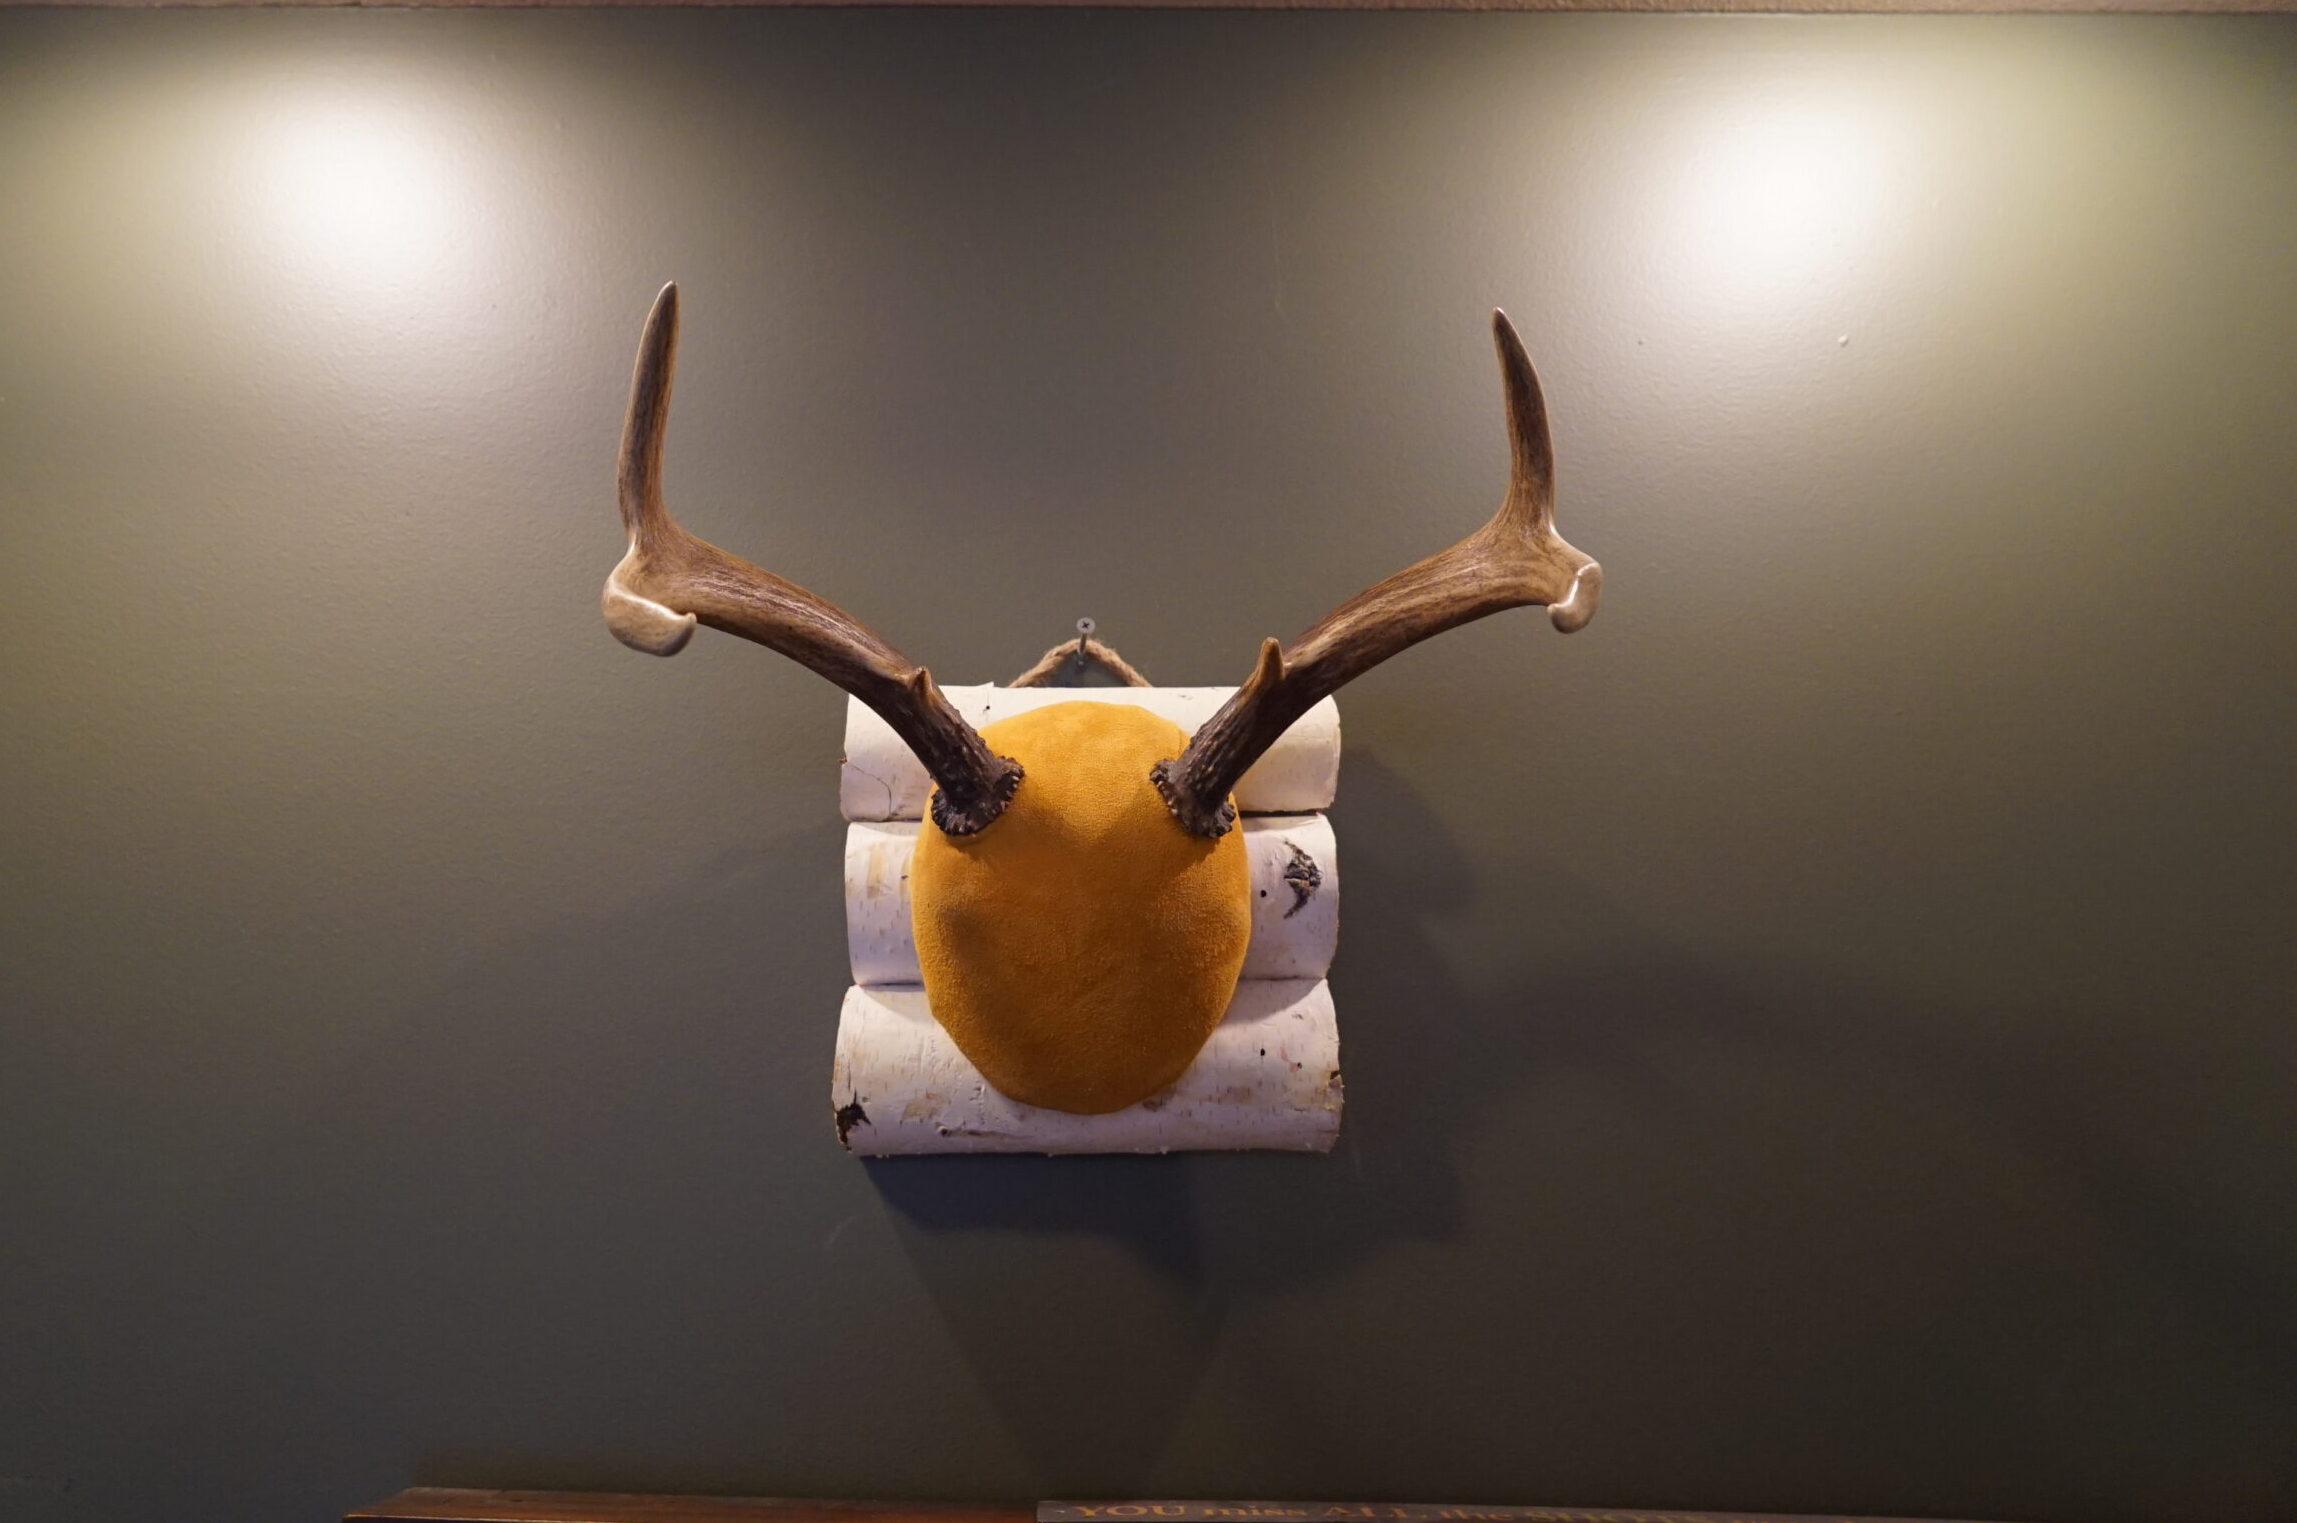
For the deer, I wanted to try something a little different. I took some paper birch rounds I had lying around, sawed them in half, and attached them using leftover scrap wood from when I cut out the cap base. I decided to use a rope at the top to hang it from to give it a different look.
Step 9: Attaching the horns to the antler mount
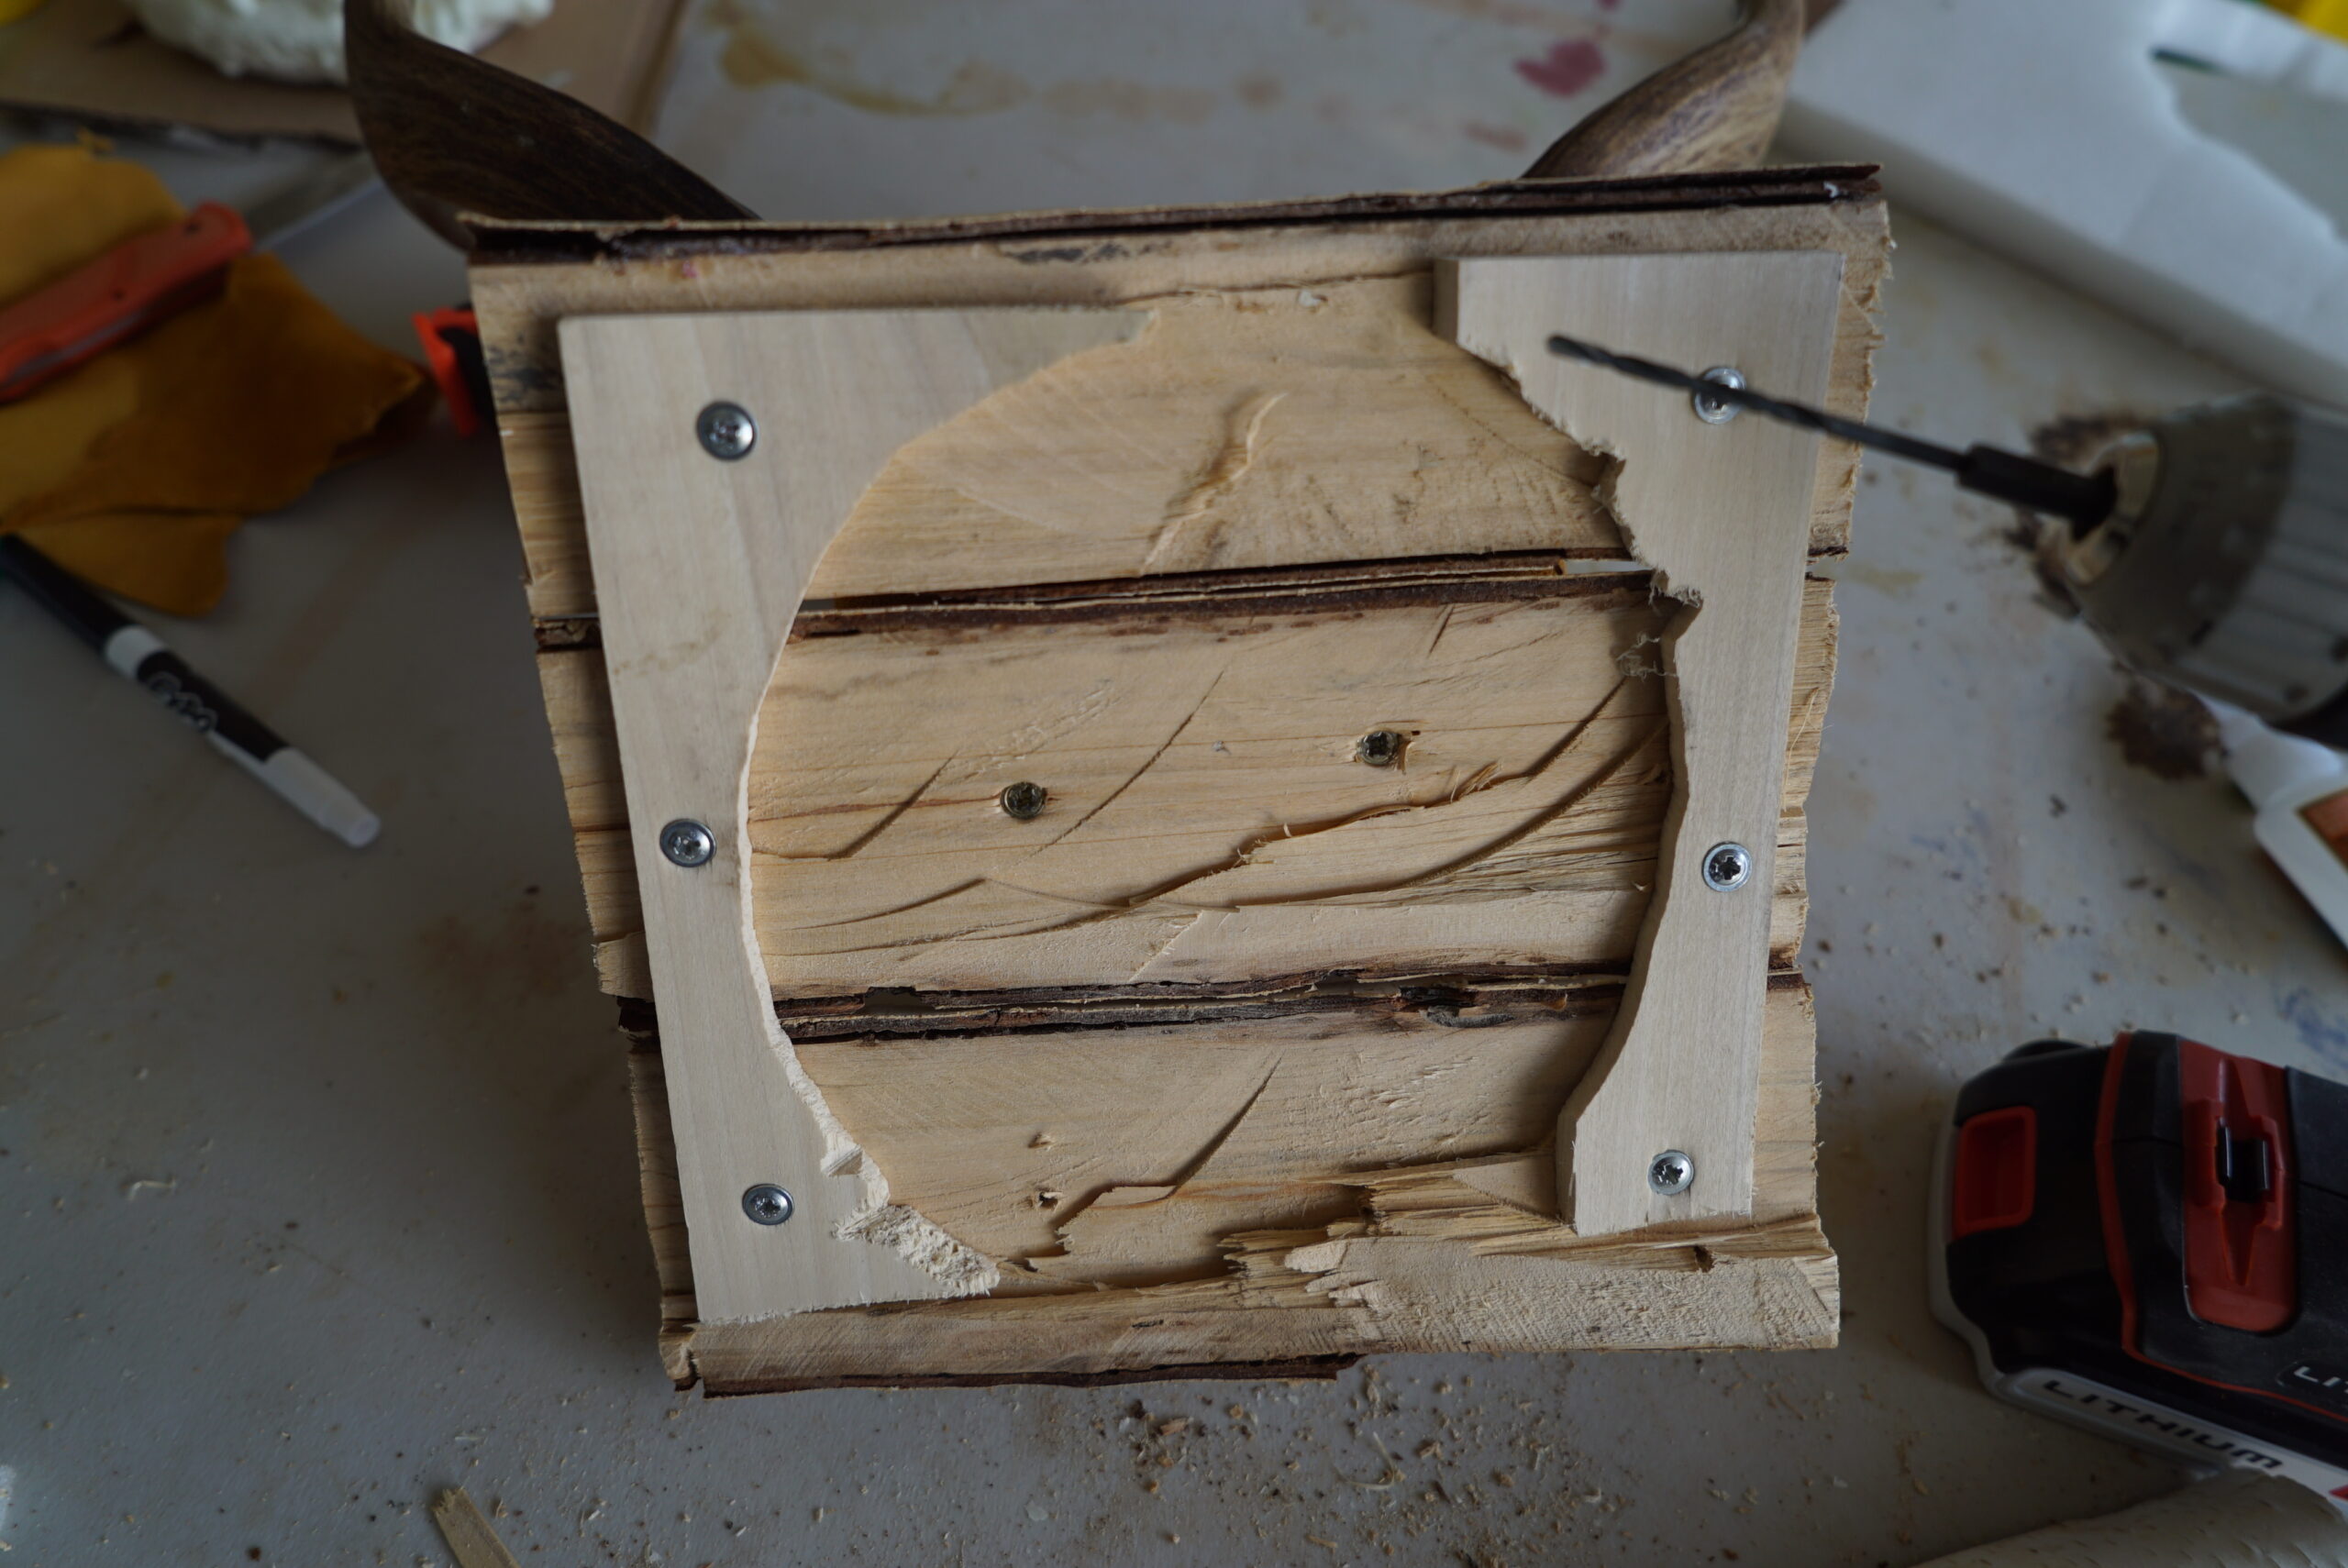
The last step is putting it all together. First, center the antlers on the plaque where you would like them to be. You can use masking tape if you want to help hold it in place.
Next, predrill a hole smaller than your screw into the back of the plaque and into the cap. Attach your first screw and sink the cap tight up against the plaque. Now, make sure the cap is still level. If not, you can adjust it and then predrill and set your second screw to anchor it into place. Once that’s done, predrill and add two more screws just to be safe. Make sure that the screws are flush with the back of the plaque and the cap is snug with no gap.
Once again, you can trim out around the cap with cord if you wish. The whole process, not including dry time of the spray foam, is about an hour if you have all the tools at hand and depending on how intricate/creative you want to get.
Making your own antler mount can be a lot of fun and pretty easy. It's extremely cost-effective and another way you can take pride in the final product on the wall and remember the hunt.