NOTICE: Certain links on this post may earn a commission for Western Hunter Magazine from Amazon or our other affiliate partners when you make a purchase. Thank you for your support.
DIY Bow and Arrow Tuning
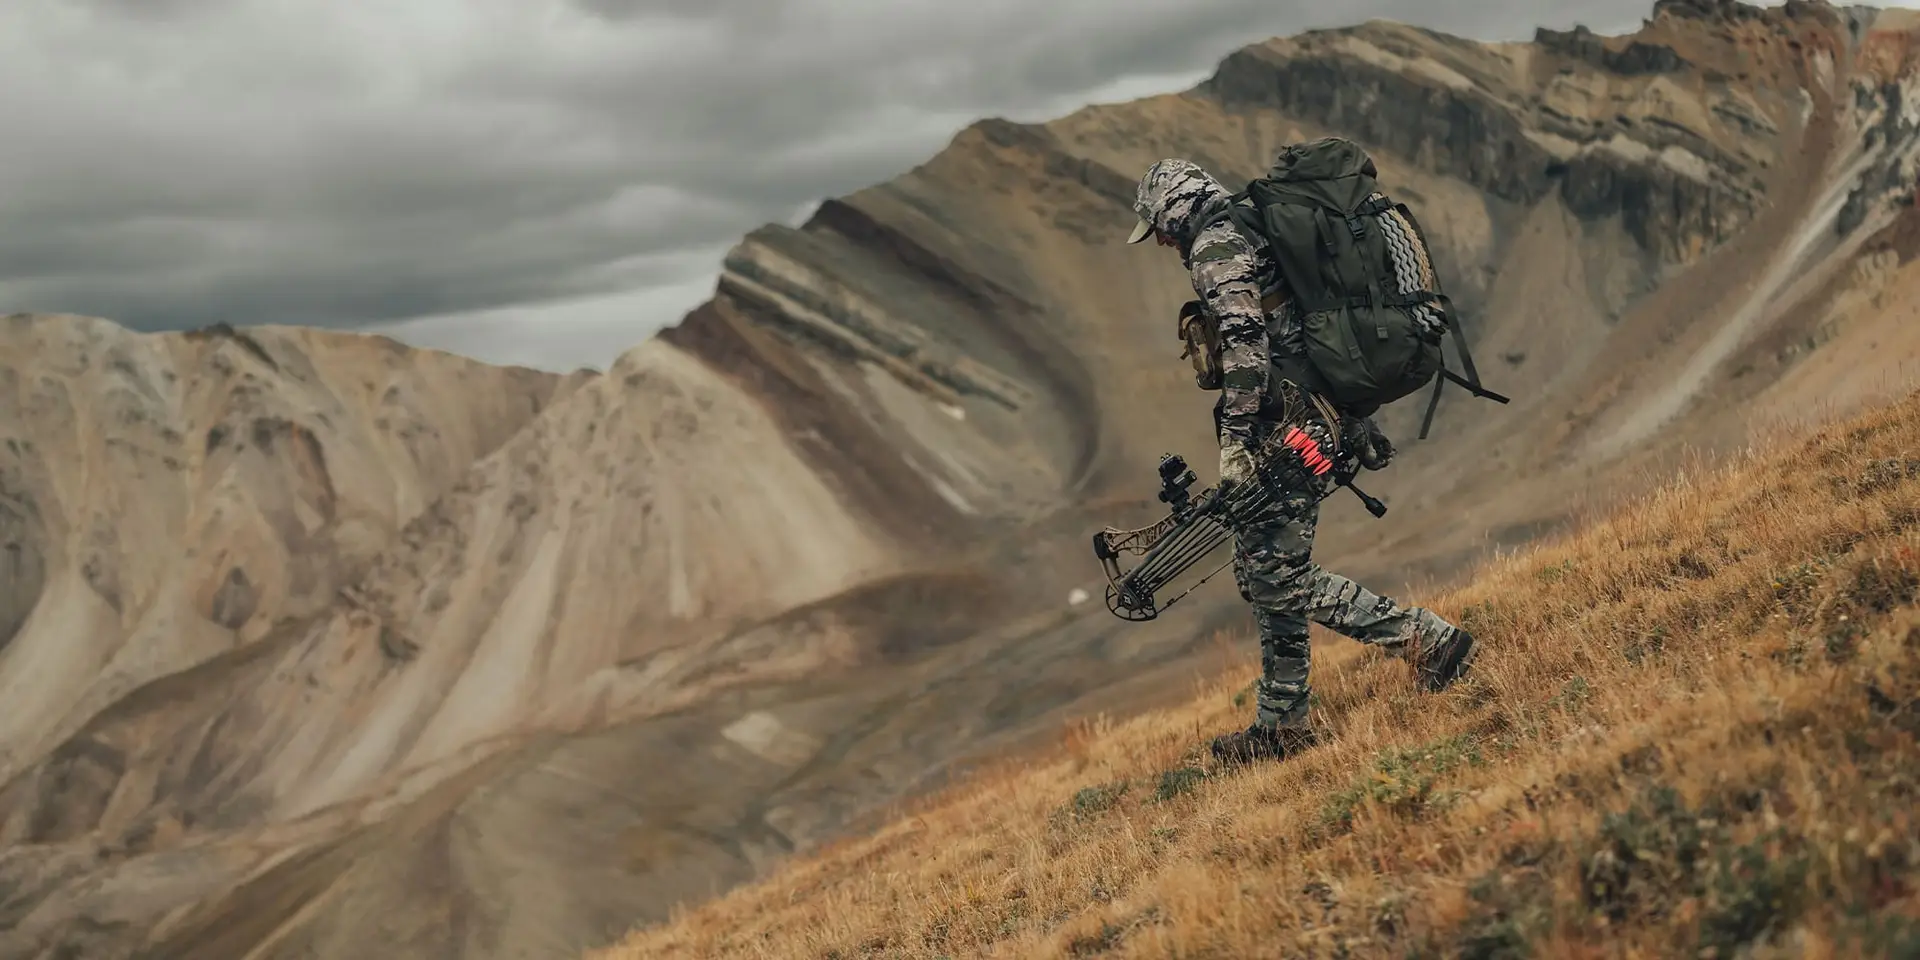
Nothing instills more confidence as a bowhunter than working on and tuning your own archery equipment. Knowing your bow and arrow inside and out will not only make you more accurate but will make you a better bowhunter. So much about shooting a bow is mental, especially when you are drawing back on a trophy buck or bull. Having the confidence that your bow is well-tuned and your broadhead will hit behind the pin will empower you to make a good shot in the moment of truth. My archery skills took a big leap forward when I took the plunge into working on my own archery equipment.
Why Tune Your Own Bow and Arrow
Even if you get your bow initially set up by an archery pro shop, having the ability to work on your own bow and arrow after the initial setup is very important. A few of the most important reasons to tune your own equipment are:
- No two people shoot a bow the same. How you grip your bow, how you anchor, how you stand (posture), all affect how the bow shoots. If a bow tech tunes your bow, your bow is tuned to his shooting form, not yours. A bow tech can definitely get you close, but your bow definitely won’t be super-tuned if someone else is shooting it.
- Generally, pro shops tune bows by paper tuning. Even if you, the bow owner, shoot the arrow through paper while the bow tech makes the tuning adjustments for you, paper tuning is only a start. Getting your bow super-tuned requires more than just shooting through paper.
- A bow’s tune can and most likely will change after the initial setup. The cause of this is string and cable break-in. Even if you buy high-end, aftermarket string and cables, they will settle after a few hundred shots, and the bow tune can change.
- It's not unheard of that your bow tune can change throughout the year because your form (grip, anchor, posture) may change slightly, your bow may get bumped in the field, or perhaps a bolt works itself loose. Shooting your bow and checking your tune throughout the hunting season is critical to ensure everything is perfect for when it matters the most. Being reliant on a pro shop for a mid-season tune-up will cost you precious time.
- If for no other reason, knowing how to tune your bow is especially important for broadhead tuning. If the ultimate goal of a hunt is to pierce a big game animal’s lungs with a broadhead, broadhead tuning should be pretty high on your priority list.
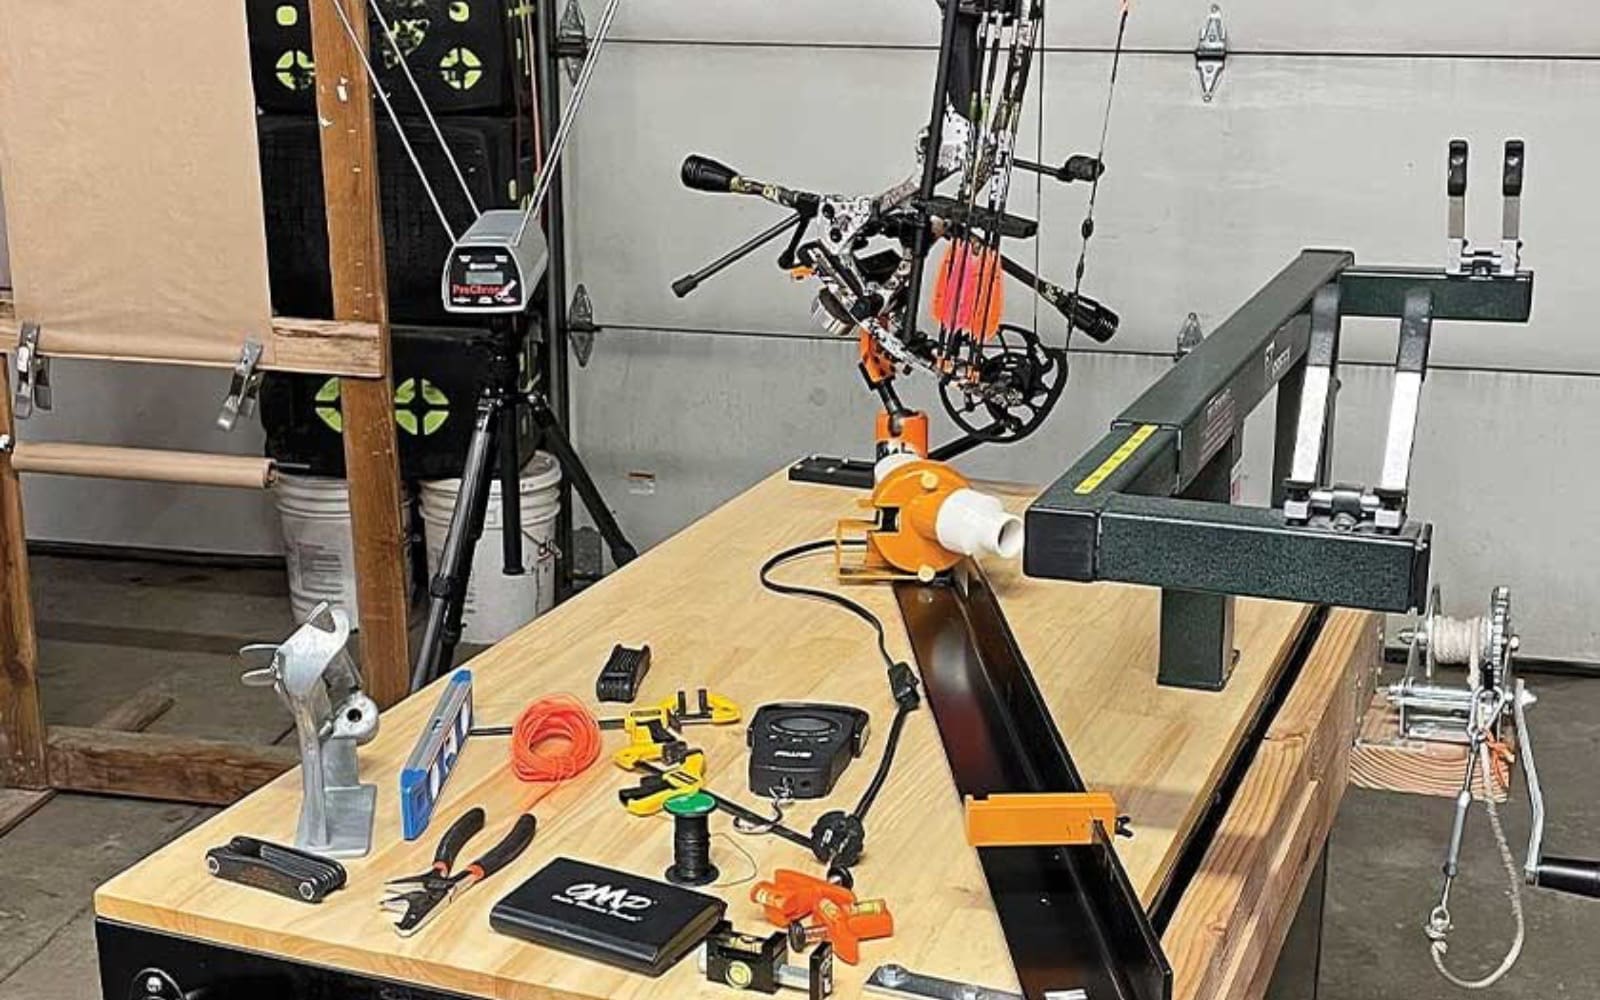
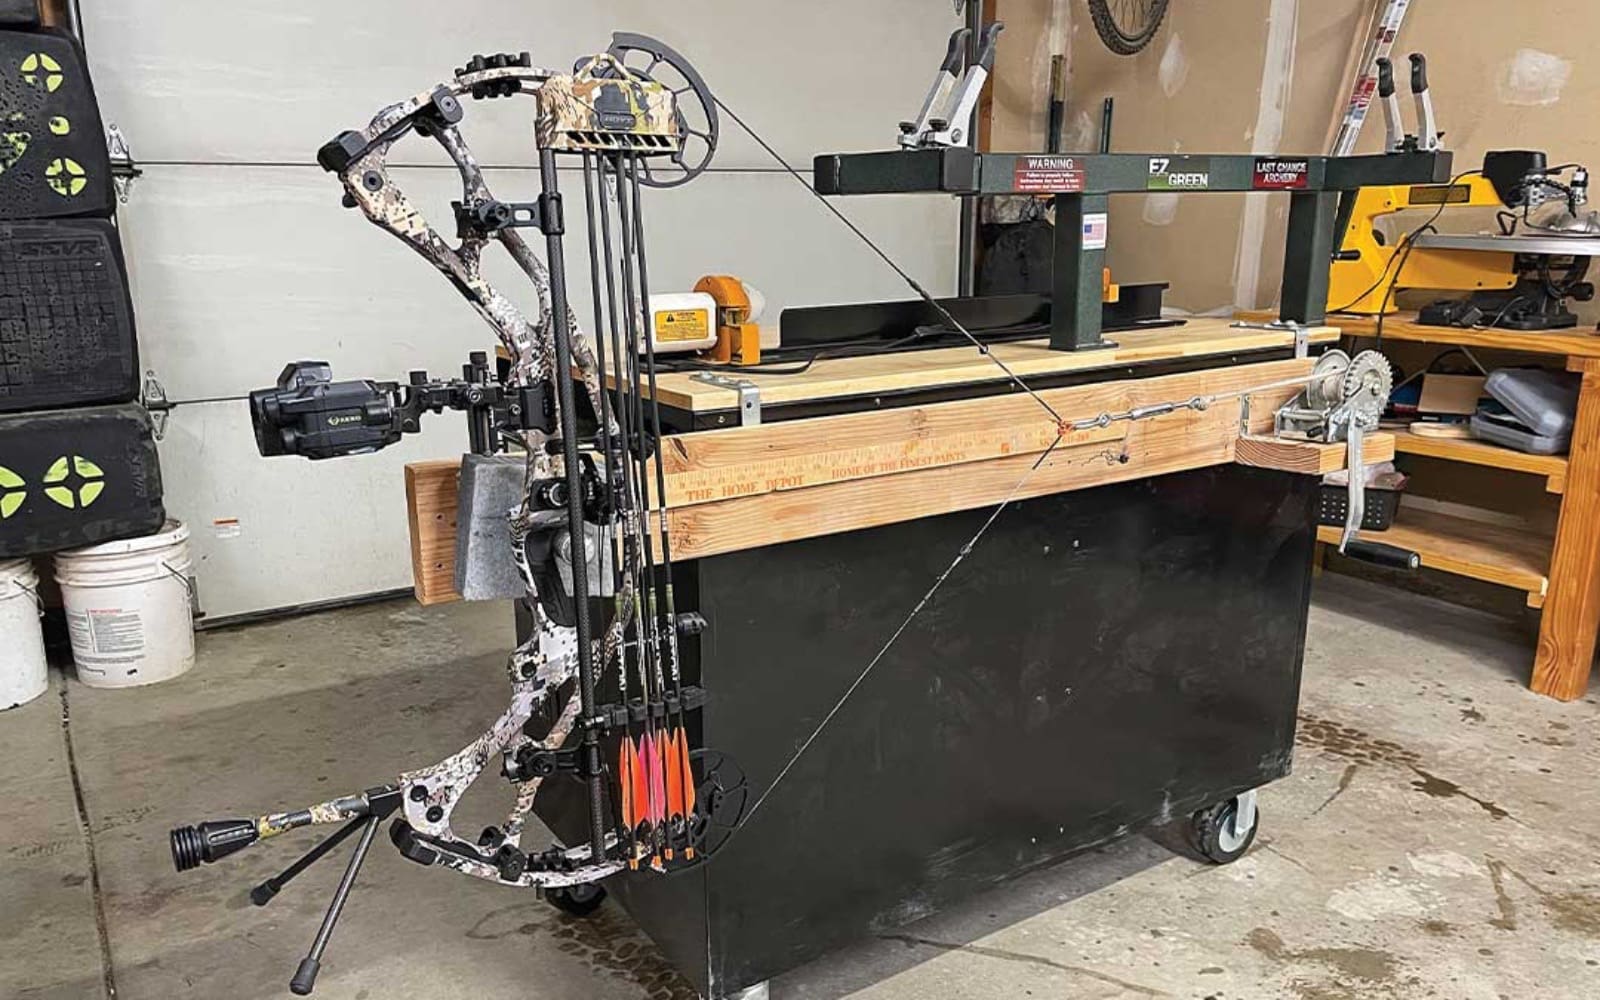
My DIY Archery Shop
Over the years, I’ve purchased every major piece of archery shop equipment to completely tune my bow and arrow at home. I’ve purchased nearly all this equipment from Blackovis.com; they have a great selection all in one place. The following is a list of shop equipment that I have used and recommend:
- Last Chance Archery EZ Green Bow Press
- OMP Versa-Cradle Bow Vise
- Easton Pro Hex Allen Set
- OMP Accu-Arrow Digital Archery Scale
- G5 Arrow Squaring Device
- Bitzenbruger Arrow Fletching Tool
- Hamskea Gen2Pro Third Axis Archery Level
- Easton Elite Multi-Pliers
- Pine Ridge Archery The Arrow Inspector
- Last Chance Archery Bow Scale 3.0
- Weston 8000 RPM Arrow Saw (I wish I had the Last Chance Archery arrow saw)
- Competition Electronics ProChrono LTD
- Homemade drawboard (will be discussed in a future article)
- Homemade paper tuning stand (will be discussed in a future article)
- 48” Husky Mobile Tool Chest/Workbench
Tuning your Bow should Start with Archery Software
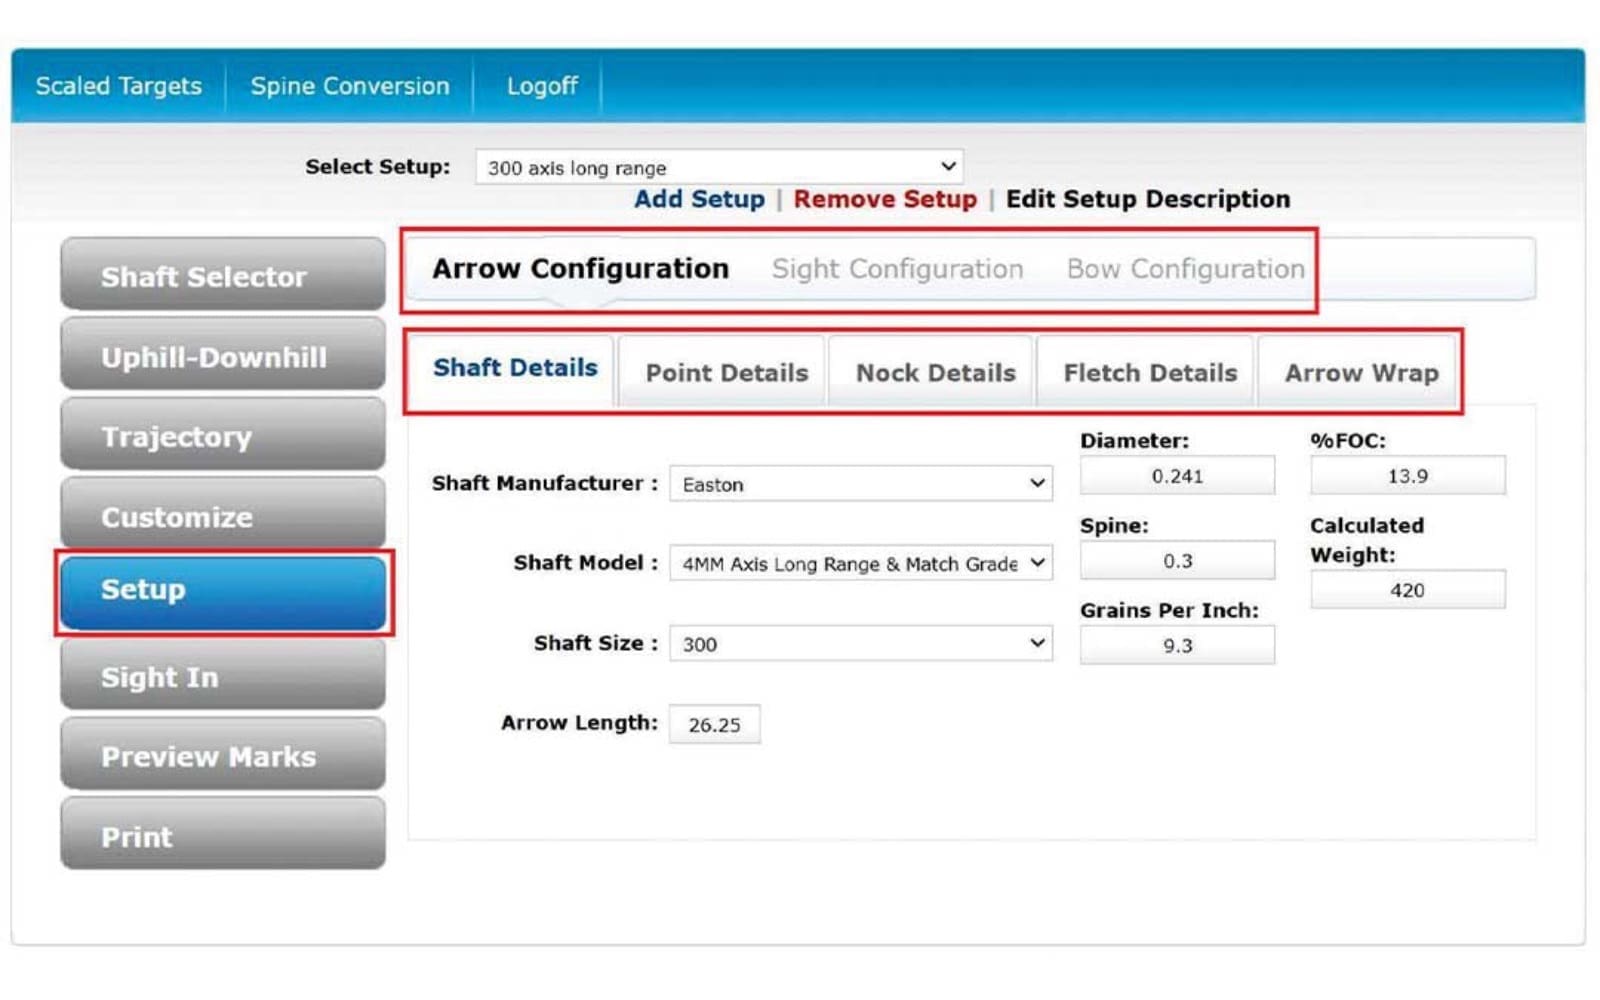
Tuning your bow starts with tuning your arrow. If you have not already read my three-part series on “Bowhunting Forgiveness” in previous issues of Western Hunter Magazine (Sept/Oct 2021, Nov/Dec 2021, and Jan/Feb 2022), I highly suggest you do so. In this series, I walk the reader through the process of picking an arrow design to maximize its effectiveness for a specific hunt. Once you have arrived at a chosen arrow design, the first thing to do is build out the arrow design using archery software. Personally, I use Archer’s Advantage Online. It's $20 a year and worth every penny for shaft spine selection and building custom sight tapes.
For Archer’s Advantage to work best, you need to start with a known arrow weight and arrow velocity (shot through your bow). I suggest going to a pro shop and shooting different arrows of varying weights through their chronograph. Typically, pro shops will have different arrows lying around that you can test shoot through the chronograph (the bow does not need to be tuned to the test arrow). You don’t need to find an arrow that weighs the exact same as your desired arrow design; as long as the test arrow is within 50 grains or so, it should be good enough.
Within the “Setup” section of Archer’s Advantage, enter in all your bow information and the TEST arrow build information; it doesn’t really matter what you enter for arrow build information here as long as the overall arrow weight in the program is reflective of the TEST arrow. Once this section is fully defined, go to the “Sight In” section and, under the “Chronograph” tab, enter in the velocity of the TEST arrow and click the “Sight In” button. At this point, the program has linked the test arrow velocity to the test arrow weight that was entered in the “Setup” section.

Archer’s Advantage Shaft Selector
Now, switch to the “Shaft Selector” section and here you enter into the program your DESIRED arrow build including shaft model, spine, length, and point weight. You can even play with the peak draw weight to see how that changes things. Archer’s Advantage will calculate an arrow velocity for your DESIRED arrow design based on the test arrow velocity and weight.
The program will then calculate and plot the dynamic spine of the DESIRED arrow design. For a hunting arrow, I’ve had great experience staying on the stiff side of optimal spine. The reason for this is the broadhead. Broadheads are always longer than field tips, so the increased length of the arrow with the broadhead will weaken the arrow’s spine. From a hunting standpoint, being over-spined is not really a problem; conversely, being under-spined is something you want to avoid. In the Archer’s Advantage program, I like to be in the yellow region of the spine plot or “marginally stiff.” I tweak the design of my arrow in this “Shaft Selector” section until I like the arrow speed and weight and, ideally, the arrow spines out “marginally stiff.”
The main concepts for finding the right arrow spine are as follows:
- The lower the spine number, the stiffer the shaft.
- Increasing bow draw weight will decrease dynamic spine stiffness.
- Adding point weight will decrease dynamic spine stiffness.
- Shortening the arrow will increase dynamic spine stiffness.
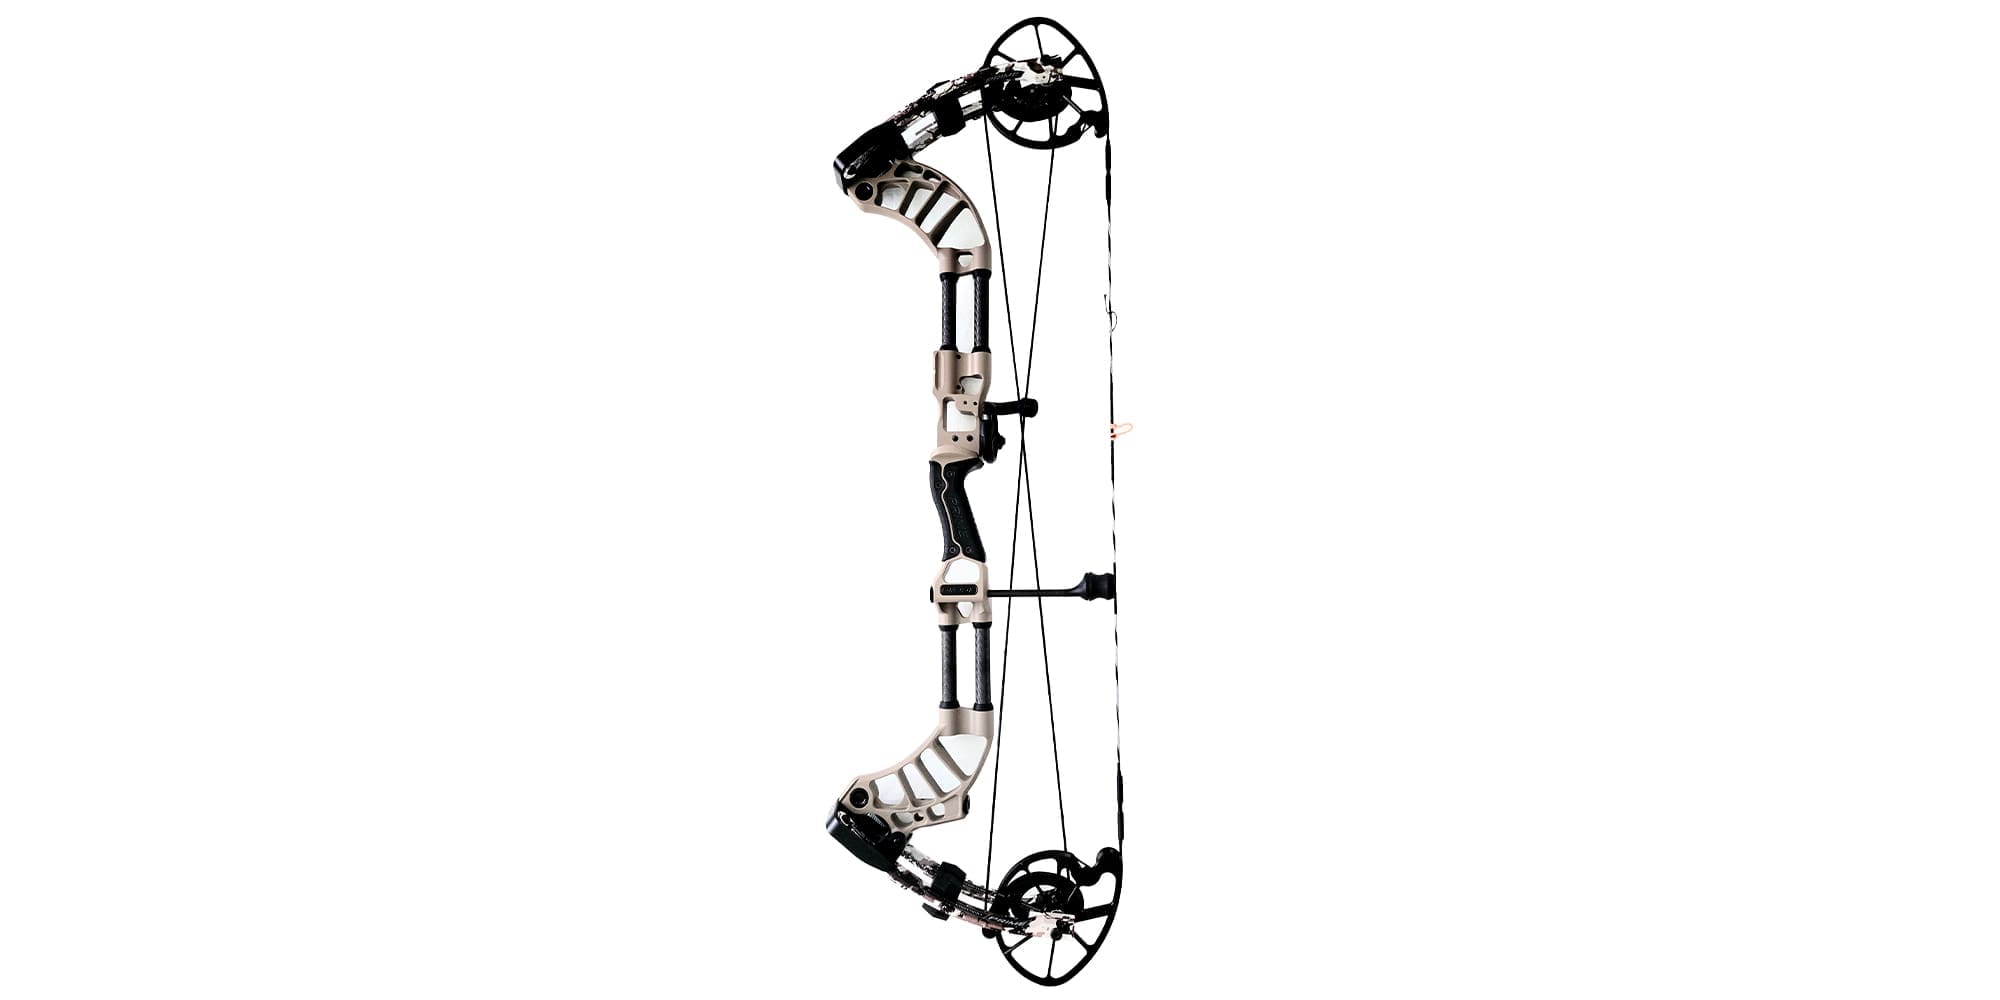
Easton Arrows and Ironwill Outfitters Insert System
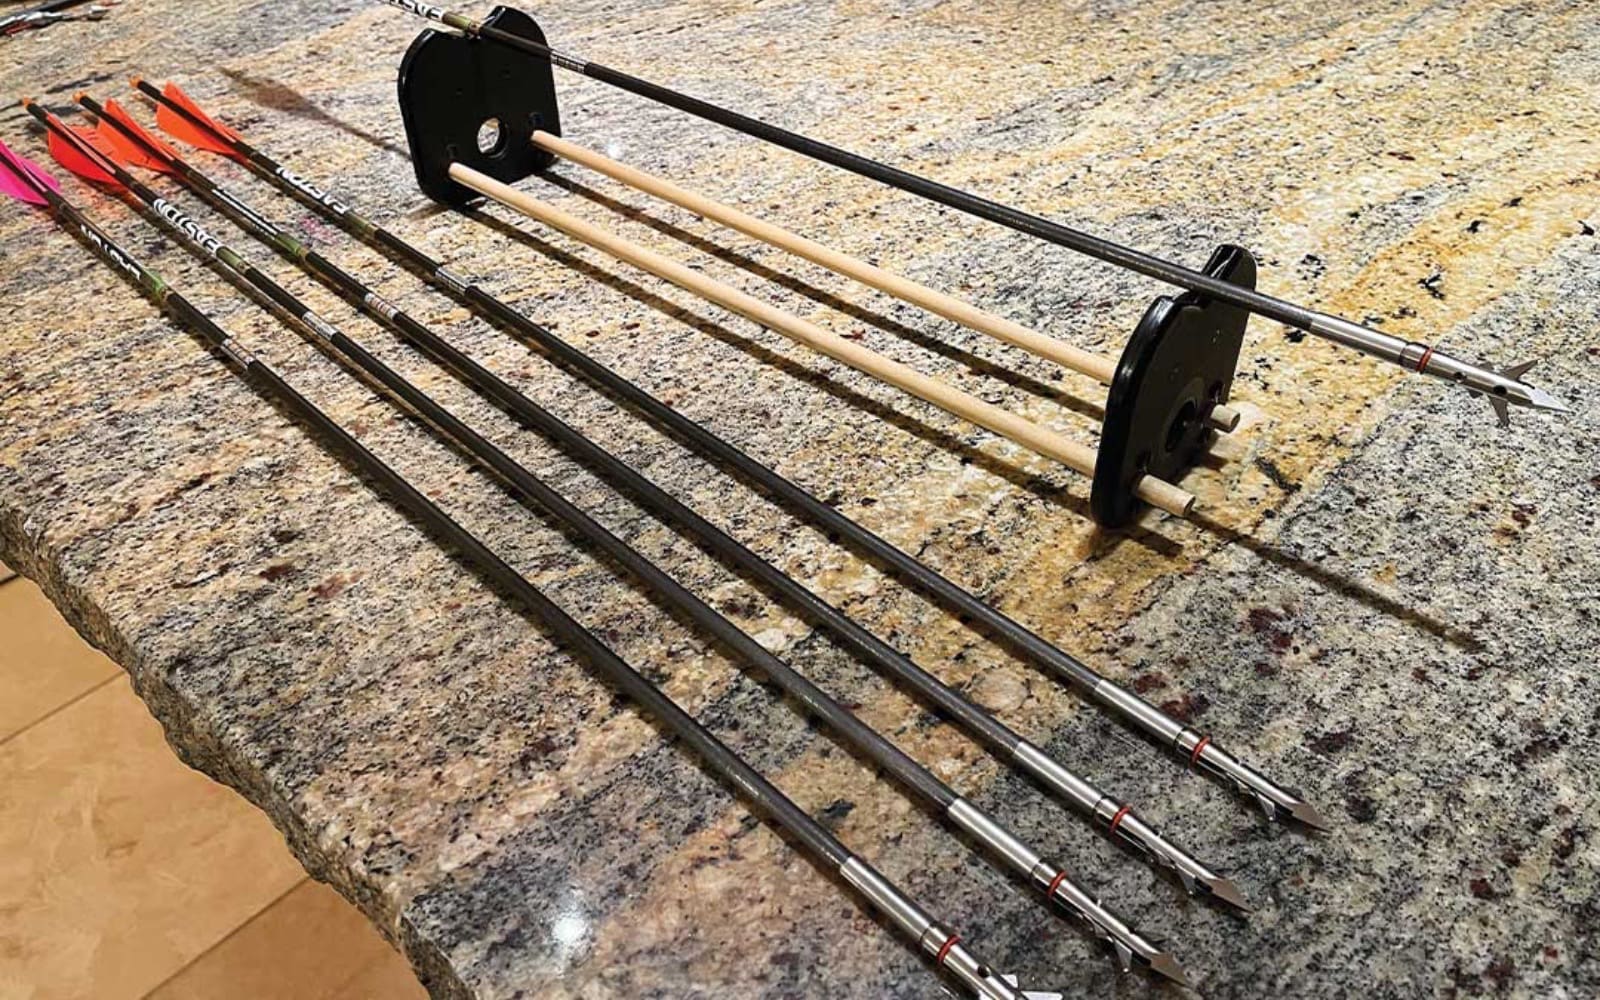
From here, the process moves to actually building your desired arrow. I like to use Easton shafts for a few reasons. The foremost reason is that they are very consistent in spine from shaft to shaft. Additionally, Easton shafts do not have a prominent spine line, which means they have more consistent circumferential spine. This translates to less time nock tuning to get arrows to tune together. The second main reason is that Easton hunting shafts are made by pultrusion/Acu-Carbon process; the ends of the arrow are not prone to wobbling like arrows that are made from the wrap-and-roll process; this is especially important if you have a long draw length.
To start building, I typically cut a little off the insert end of the arrow, and then square it with a G5 arrow squaring tool. I intentionally leave the arrow long at this point. I then insert the arrow with the chosen amount of insert weight. I prefer micro diameter (4 mm) shafts, and my favorite component system for these arrows is the Ironwill Outfitter system. The system consists of DEEP SIX H.I.T. inserts that insert up inside the shaft and an external collar that slips over the shaft. This system is very versatile because it comes in a variety of weight options, and you can also double stack inserts in the shaft.
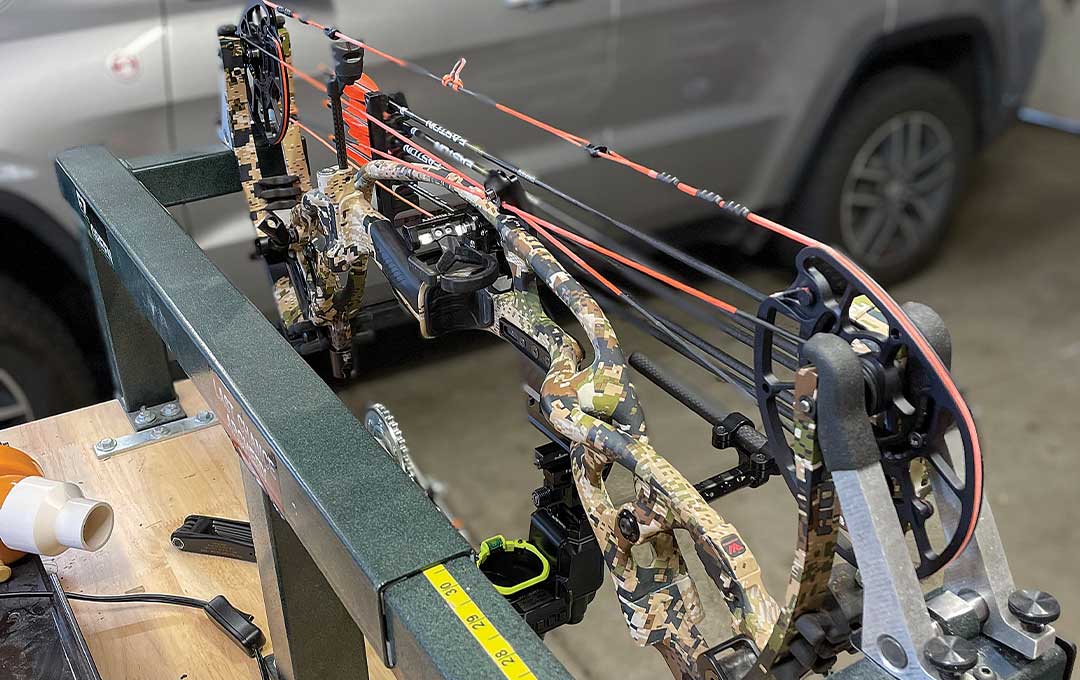
Prepping the Bow for Tuning
Once the arrow is inserted, I start prepping the bow for shooting bare shafts through paper. I start this process by setting the arrow rest to a reasonable center shot (13/16”). The next step is tying on a D-loop such that the arrow is approximately 90° to the string with the center of the shaft passing through the center of the Burger Hole. I don’t worry about pulling out an arrow square to get the arrow perfectly perpendicular to the string because, inevitably, I’ll move the D-loop up or down according to the bare shaft paper tear. I don’t cinch down the D-loop hard yet either, nor do I tie nock sets at this point (I do later) so that I can easily move the d-loop as needed. The last step before shooting bare shafts through paper is timing the cams and cam alignment. For these steps, you need a draw board and a bow press.
Cam Timing and Alignment
First: Cam timing. Draw the bow in the draw board and verify that the draw stops on the cams are hitting at the same time. If the bottom cam is hitting before the top cam, add twists to the bottom cable end. Alternatively, add twists to the top cable end if the top cam is hitting before the bottom cam. You will repeat this process of checking the bow in the draw board and adding twists to the cables until both draw stops are hitting at the same time.
Cam alignment/lean is a bit trickier. Cam lean exists when the vertical plane of the cam is not parallel to the vertical plane of the bow. Different bows have different methods for aligning the cams and adjusting cam lean. The most common methods for aligning cams are yoke tuning or shimming with spacers, top hats, etc. Either of these methods requires the bow to be pressed.
I like to observe the cam lean of the bow at brace/rest and at full draw. Because the load shifts from the string at rest to the cables at full draw, the cam will lean differently throughout the draw cycle. If the cam is leaning heavily to one side at either rest or full draw, it needs to be adjusted before tuning further. More on adjusting cam alignment below.
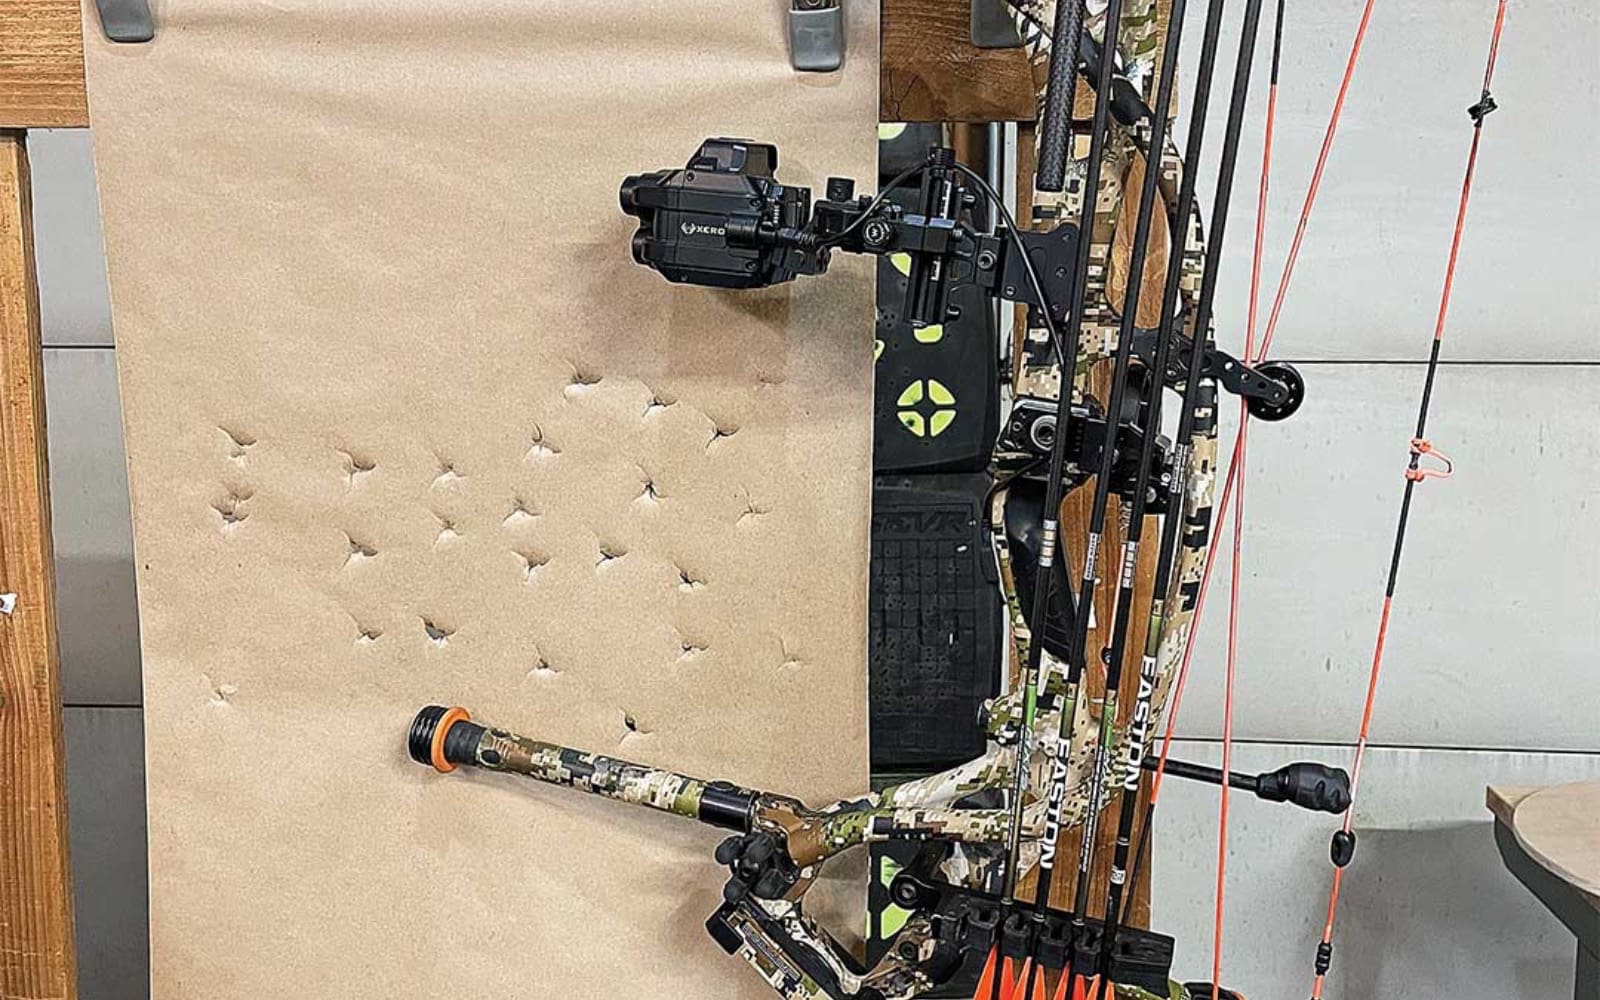
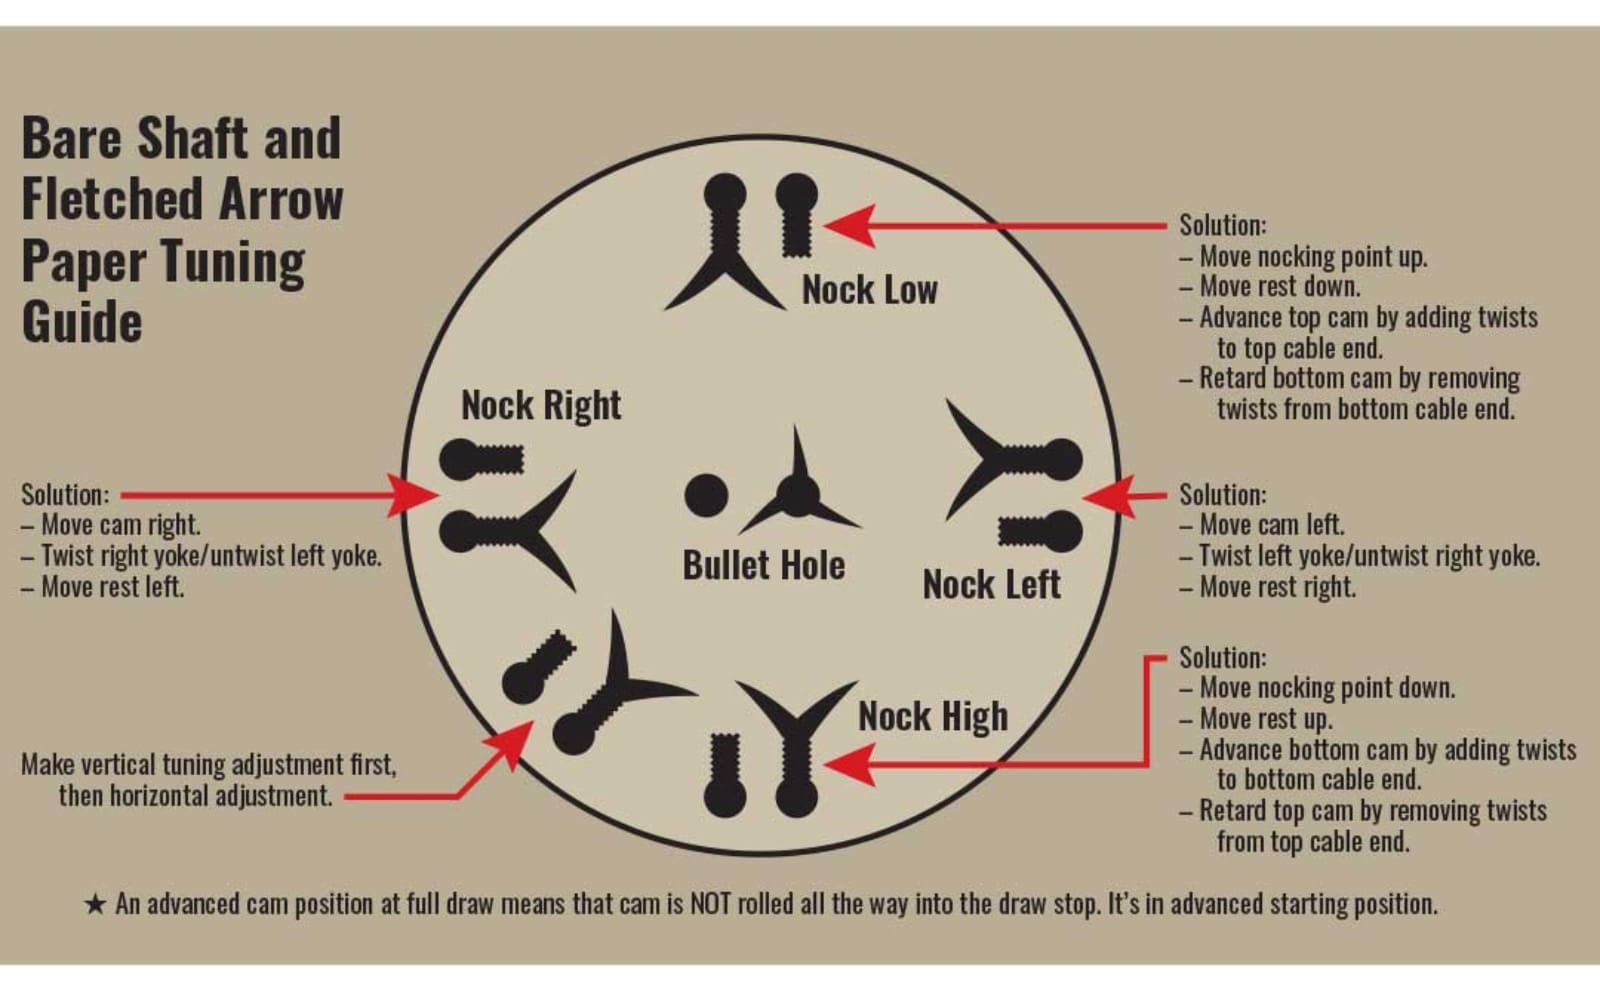
Paper Tuning
With the arrow rest, cam timing, and cam alignment/lean set as described above, I begin to shoot bare shafts through paper (remember, the bare shafts are intentionally left long at this point). I prefer to shoot bare shafts through paper because they are much more sensitive than fletched arrows. Vanes will instantly start correcting the flight of a mistuned arrow, and the vanes can also make it difficult to see exactly how an arrow is tearing. I start shooting 6 to 10 ft behind the paper.
The very first thing to do after shooting through paper is correct any vertical tear (disregard any horizontal component of the tear at this point). If you are tearing nock-high, you need to lower the nocking point by sliding the D-loop down. If you are tearing nock-low, you need to raise the nocking point by sliding the D-loop up. After correcting the vertical tear, the next step is to micro-tune the dynamic spine of the arrow by incrementally cutting down the shaft. As the length of the shaft changes, the dynamic spine of the arrow changes. This will change the paper tear most dominantly in the horizontal direction.
Tuning the Dynamic Spine of the Arrow
Shoot the bare shaft through paper again. After observing the paper tear, I remove the nock and cut the arrow from the backend of the shaft half an inch at a time until I start to see the paper tear resolve. Remember, you’ve intentionally left the bare shaft long to begin this process, which means the arrow’s dynamic spine will initially be weak. Typically, a weak arrow will tear nock-left for a right-handed shooter but will tear nock-right for a left-handed shooter. A few times I have also seen a weak shaft tear nock-high; this is more of an exception than a rule, however.
After a few iterations of shooting and cutting, as I am zeroing in on the tune, I start cutting off a quarter-inch at a time. I continue this process until the arrow shoots a bullet hole. Once the arrow shoots a bullet hole, you’ve tuned the dynamic spine of the arrow to the bow. If the arrow is longer than you would like, I don’t have a problem with cutting up to an additional inch off the arrow to stiffen it up (this may change the paper tear – if it does, you can adjust the arrow rest to compensate for it). As you are going through this process of tuning the arrow to your bow, if the paper tear isn’t resolving and you’ve cut it down to the desired length, first review your arrow profile in Archer’s Advantage to make sure you’ve selected the correct shaft spine.
If the spine is correct and cutting the shaft down isn’t bringing the arrow into tune at your desired length, the next step is to go back to the bow tune. I suggest adjusting cam alignment first and then adjusting the arrow rest second (cam alignment adjustments are macro changes and rest adjustments are micro changes). It’s certainly okay to tweak the cam alignment slightly or the arrow rest position to bring the arrow into tune at the desired shaft length. Be prudent here, as I don’t recommend going too far from the standard bow center shot or cam alignment. Going through the exercise of tuning the dynamic spine of the arrow to the bow is important to optimize the overall tune of the bow and arrow.
Tuning the Bow
Now, the question is: How do you tune the bow depending on the paper tear? We will start with cam alignment. If the arrow tip is entering on the right side of the paper, and the nock-end is tearing to the left, this is called a “nock-left” tear. To correct a nock-left tear (regardless of being right-handed or left-handed) you move the cam (top cam or bottom cam) to the left. If the tear is severe, you can move both the bottom and top cam to the left or use a bigger/smaller set of spacers.
With the example of my Hoyt RX7, you move the cam left by adding a bigger spacer on the right side and a smaller spacer on the left. In the case of yoke tuning, add a twist to the left yoke and remove a twist from the right yoke. If you don’t add and remove the same number of twists to/from each yoke, it will change the timing of the cams. The opposite of this is true if the arrow is tearing nock-right. For a nock-right tear, move the cam to the right or add a twist to the right yoke and remove a twist from the left yoke.
Like I said before, I like to adjust the cam alignment before touching the rest. I like to keep the rest as close as possible to 13/16”. Although, in the case of cam alignment, you may not find an exact combination of spacers to get the arrow to tune with the rest exactly at 13/16”. If this is the case, I adjust the cam alignment to get the paper tear as small as possible and then adjust the rest from there. If the arrow is tearing nock-left, you move the rest to the right. If the arrow is tearing nock-right, you move the rest to the left. The easiest thing to remember is to move the cam in the SAME direction as the tear but to move the arrow rest in the OPPOSITE direction as the tear. When adjusting the rest, be aware that a little bit goes a long way. I recommend moving the rest in 1/32” increments.
Confusion for Left-Handed Shooters
There may be a little confusion out there regarding tuning adjustments for left-handed shooters. I myself am left-handed. The adjustment rules that I stated above apply to both left and right-handed shooters. The reason why some confusion exists for left-handed shooters is that some online tuning charts reference the direction you move your rest by comparing to the riser (in- toward riser or out- away from riser).
For example, if I had a nock-left tear, I would move my rest to the right to correct it. Moving my rest to the right (me being left-handed) is moving the rest AWAY from the riser. For a right-handed shooter, moving the rest to the right is moving the rest TOWARD the riser. Since the riser is on opposite sides for right and left-handed shooters, this gets very confusing. So, don’t think about the riser when trying to decide which way to move your rest. Regardless of left-handed or right-handed, if you get a nock-left tear, move your rest globally to the right. If you get a nock-right tear, move your rest globally to the left. It’s that simple.
Bare Shaft Tuning Before Broadhead Tuning
The next tuning step I take after paper tuning is shooting bare shafts with fletched arrows at 20 to 30 yards. Shooting bare shafts at distance is the best way I have found to micro-tune a bow. Air resistance on arrow vanes causes the back of the arrow to track the front of the arrow; this causes a fletched arrow to quickly self-correct shortly after leaving the bow. A bare shaft doesn’t self-correct, so any tuning-related errors manifested in the bare shaft are magnified at longer distances.
Broadhead tuning is particularly important and should never be skipped. After all, the ultimate goal of a hunt is to pass a broadhead through the lungs of a big game animal. You can certainly jump straight from paper tuning to broadhead tuning if you’d prefer, but I like to shoot bare shafts at distance first to minimize the impacts of shooting broadheads into my target. Most of the time, if you get your bow tuned well enough to group fletched arrows and bare shafts at 20-30 yards, you likely won’t need to make any adjustments for broadheads. Never assume this, though. You should always confirm your broadhead flight before going afield.
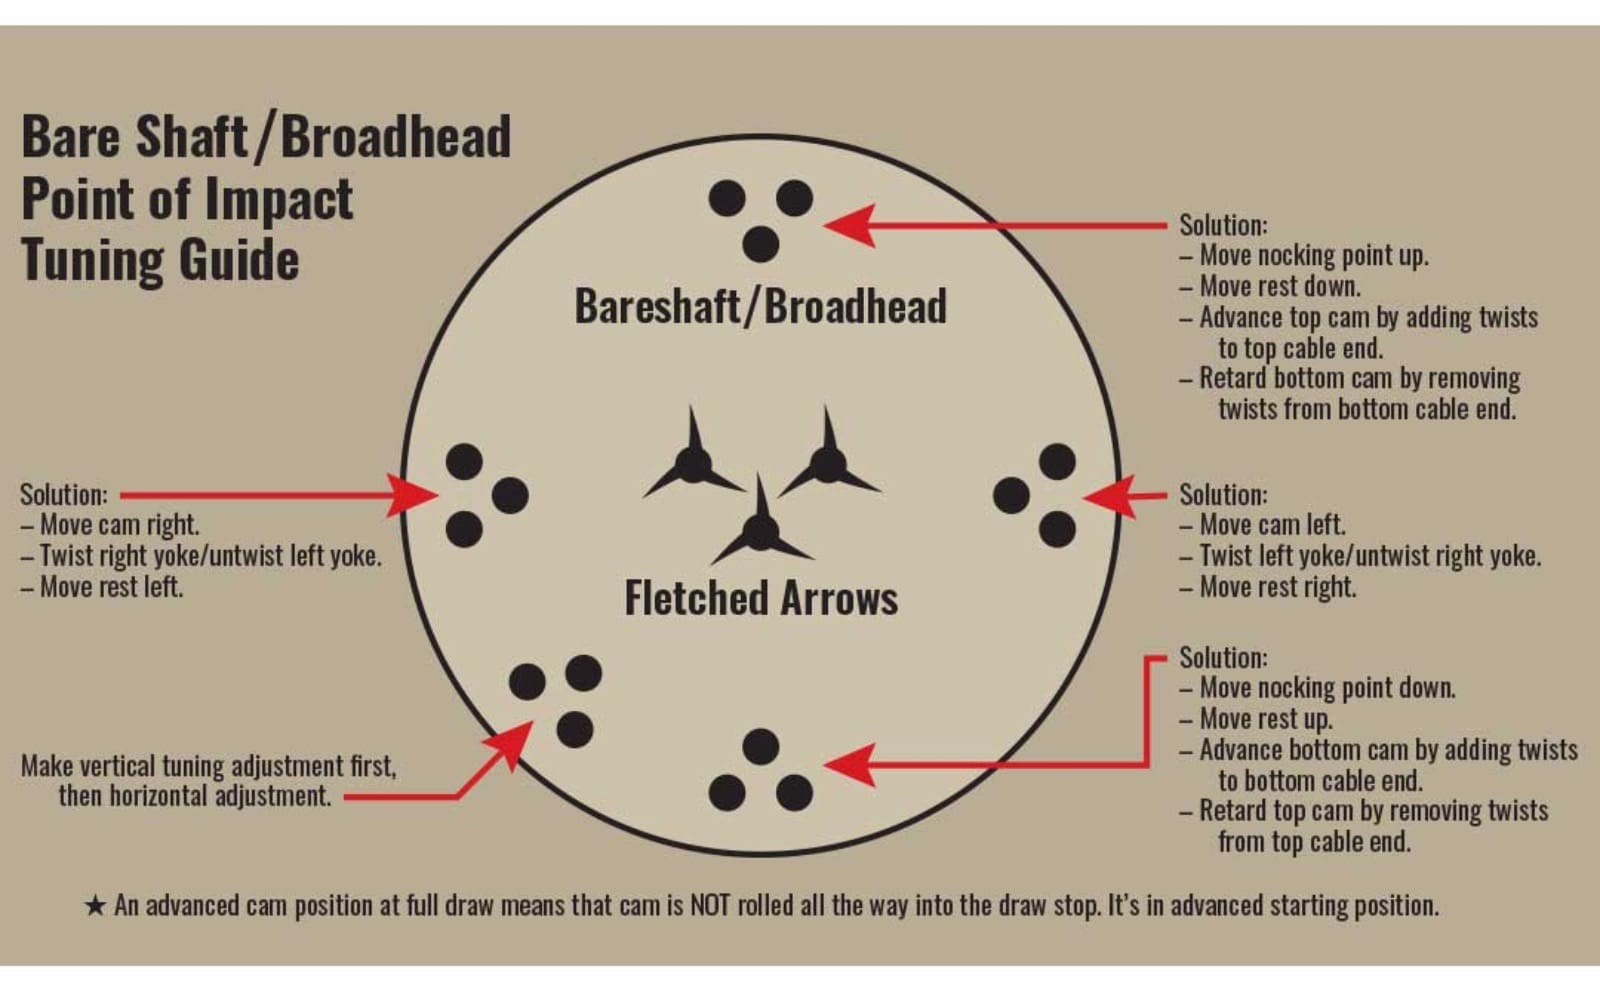
Bare shaft and broadhead tuning are not complicated. The idea is to aim at a single spot at your preferred distance and shoot both fletched arrows and bare shafts/broadhead tipped arrows. The way the bare shaft/broadhead arrow impacts compared to the fletched arrow tells you which way you need to micro-tune your bow. See the adjacent diagram for tuning solutions depending on the bare shaft/broadhead point of impact.
Nock-Tuning
When shooting multiple bare shafts/broadhead arrows, it’s possible that some of them will behave differently than others. If this is the case, you will need to nock-tune the misbehaving ones. Nock-tuning is quite easy and involves simply twisting the nock in the back of the arrow in small increments between shots. Shoot the arrow after each nock twist to see how it changes the point of impact. I like to nock tune during the bare shaft shooting phase. If you have to nock-tune each individual arrow, it can be very time-consuming. This is a huge reason why I like Easton shafts; they are very consistent in spine and do not require much nock-tuning.
Last Call for Cam Timing
One last comment about vertical adjustments. It is possible to correct a vertical tuning error by changing cam timing. However, this is not my preferred method for fixing a vertical tuning error. Depending on your bow, if you adjust your cam timing to fix a vertical tuning error, then your draw stops will not be hitting at the same time. If your draw stops are not adjustable to make them hit at the same time, the back wall at full draw will feel more spongy.
To correct bare shafts grouping ABOVE fletched arrows (corresponding to a nock-low paper tear), you need to advance the top cam by twisting the top cable end. Putting twists in the top cable end results in the bottom cam hitting the draw stop first at full draw. To correct bare shafts grouping BELOW fletched arrows (corresponding to a nock-high paper tear), you need to advance the bottom cam by adding twists to the bottom cable end. This results in the top cam hitting the draw stop first at full draw. Again, this is not my preferred method for correcting a vertical tuning error, but I wanted to bring this up because it may be the only method that will resolve a vertical tuning issue with some bows (a few older Prime bows required me to do this).
Conclusion
The off-season is the perfect time of year to learn a few concepts about tuning your own bow and arrow. Even if a pro shop does your initial bow tune, having the skill set to tune your own equipment will make you a better bowhunter. It will most certainly make you more accurate with broadheads (broadhead tuning is of paramount importance) and can save you in a pinch if something happens to your bow while on a big backcountry adventure.