NOTICE: Certain links on this post may earn a commission for Western Hunter Magazine from Amazon or our other affiliate partners when you make a purchase. Thank you for your support.
Maximizing Bowhunting Forgiveness: Part 2
Deer and elk shoulders are tough… really tough. Nearly all bowhunters who have hunted long enough have experienced the horrors of hitting the front shoulder only to see 90% of their arrow hanging out, wiggling like a noodle as the animal runs off. Animals can survive these botched shots, but regardless, they are gut-wrenching and should be avoided at all costs. I’ve unfortunately experienced this, as have nearly all my hunting friends.
Why does this happen? That’s actually a two-part question. Why does this happen from an arrow design, lack-of-penetration point-of-view? Which we will talk about later.
But why does this happen from a shot-setup and accuracy point-of-view? Why does that front shoulder seem to have a tractor beam that sucks arrows right to it?
Shot Setup & Accuracy
The couple of times that I have hit the front shoulder and nearly all of the times my friends have, the shots have occurred inside 40 yards and, most of the time, a lot closer than that. If shots inside 40 yards are supposed to be slam dunks because they are so close, why do we miss and hit the front shoulder sometimes?
The answer is actually quite simple. Short-range situations typically happen fast, under less-than-ideal circumstances, and at awkward angles. Unlike longer-range encounters, where the situation develops slowly and you have time to calm your nerves and wait for an ideal shot angle, during short-range engagements, the situation often goes from 0 to 100 in a matter of seconds. You don’t have time to completely dissect either the shot or the shot angle. Short-range engagements are present in situations like calling in elk in thick timber, sitting a treestand or ground blind, sitting water or an active game trail, ambush hunting, etc.
Typically, short-range engagements happen in thick cover, resulting in small shooting windows. Bowhunters need to think and act quickly in order to capitalize on these encounters. Because these encounters happen so fast and sometimes under limited visibility, a shot may be taken with the hunter thinking that the animal is broadside, but it might really be quartering, or a small branch that wasn’t visible to the hunter may deflect the arrow. Nerves can definitely get the best of you in these situations as well; I can personally attest to the excitement that comes along with a very close encounter with a screaming bull elk.
This Is Bowhunting
Whatever crap happens, this is bowhunting, and situations are never perfect. That is why it is vitally important as bowhunters that we select our gear to maximize our success. It’s critically important to be in the details and check off as many preparation boxes as we can.
That’s the intent of this article, to help hunters optimize their equipment selections to load the scales of success in their favor. This article is Part Two in a three-part series discussing different arrow designs, promoting bowhunting forgiveness. I said this in the first article, and it’s so important that I’m going to say it again. If the ultimate goal of a bow hunt is to pierce a big game animal’s lungs with a broadhead, what is more important than checking boxes and fine-tuning the broadhead delivery system?
If you haven’t read the first article in this series, I highly suggest you do so. I’m not talking about generically tuning your bow and arrow in these articles, I’m talking about specifically engineering an arrow design to maximize your potential on a particular hunt. The first article focused on optimizing a flat-shooting arrow design to maximize range forgiveness for long-range encounters. This article focuses on designing a bone-penetrating arrow to maximize your effectiveness for short-range engagements. Maximizing your effectiveness in short-range situations is all about designing a “shot-angle” forgiving arrow.
The attributes that make a bow and arrow setup forgiving for each of these engagement types are wildly different because the encounters are totally different. In my opinion, picking one balanced arrow right in the middle to handle each of these situations is mediocrity and far worse than optimizing for a single encounter type. With one mediocre arrow design, you aren’t taking advantage of anything; you have neither a great trajectory nor bone-splitting momentum. I do not use the same arrow on a high country mule deer hunt in Colorado that I use on a dark timber elk hunt in central Idaho.
Short Range Engagements
Here, I am talking about shots in generally thick terrain, under 40 yards, and, oftentimes, much closer. Through years of bowhunting high-pressured general units out west, in my opinion, these are the encounters that are hardest to convert into successes because there are more variables and more things left to chance. The closeness of the shot may be a slam dunk, but most of the time, you aren’t even presented with a good shooting opportunity.
Personally, I’d much prefer an encounter at 60 yards in open terrain, where I am more in control of the variables. Unfortunately, hunting in thick, close quarters is a necessary evil. When deer and elk get pressured in general units, they often retreat to their thick-country sanctuaries. So, if you want to be successful on your hunt, you need to pursue them where they are.
I consider hunting in close quarters and thick terrain to be similar to trying to score a touchdown inside the red zone. The problem is the defense is more alert, and the offense has less room to make mistakes. Everything becomes more critical in these situations, especially in high-pressured units. The wind swirling; your little movements; the noises from your pack, bow, or clothes squeaking or brushing against stuff; drawing your bow; even the sound of your breathing can be loud enough to blow up a close-range encounter.
Close-range encounters in the thick are typically harder as well because the animal is generally up and alert. It’s not like you are stalking a partially asleep, bedded mule deer in open terrain. For one reason or another, I have had SO MANY close-range encounters blow up in my face over the years. It’s because of this that I try to minimize the amount of time that I spend in the red zone. The longer you are in the red zone waiting for a perfect setup, the more likely the situation will blow up in your face. I have had far more success in close-range situations when I shoot as quickly as possible, just as soon as the first remotely good shooting opportunity presents itself. Because of this, some of the shots I’m presented with are at awkward angles.
Momentum is King
Hitting the front shoulder of a deer or especially an elk is never ideal. I never intentionally aim for the front shoulder, but this is bowhunting, and sometimes the arrow just finds its way there. The best thing you can do as a bowhunter is to be prepared for the situation. So, how do you prepare for a potential front shoulder hit when bowhunting in close quarters? How do you design an arrow to be “shot-angle” forgiving? If you can design an arrow to successfully breach the front shoulder of a bull, you’ll be in good shape for any close-range encounter.
I’ve learned over years of playing with different arrow designs that momentum is the biggest factor for breaking and penetrating a hard object like a bull’s shoulder. From an arrow perspective, maximizing momentum primarily comes down to shooting a really heavy arrow. My short-range engagement arrow weighs 658 grains. I have been shooting an arrow this heavy since 2018 for short-range encounters and have killed four bulls and a buck with it.
I don’t believe there is anything magical about 658 grains, other than the fact that this is the only arrow I’ve shot that has successfully passed through a bull elk front shoulder. I’ve mistakenly hit a bull elk front shoulder with an arrow weighing in the mid-500 grains with no luck breaching it. 650 grains+ was the next logical step in my testing, in terms of weight and momentum, after the 500-grain arrow failed. On my very first hunt with the 650-grain+ arrow, it passed through the offside front shoulder of a bull. This heavy arrow design has suited me well ever since.
Ultimately, the final weight of your heavy arrow will be dictated by the components you choose and the bow tune. That being said, for a dedicated short-range arrow setup, I’d definitely recommend 650 grains+. Keep in mind, even though this arrow may only be going 250 FPS or less, arrow trajectory doesn’t really matter as much in short-range encounters. Momentum is king here, not trajectory.
The Skinny on Skinny Shafts
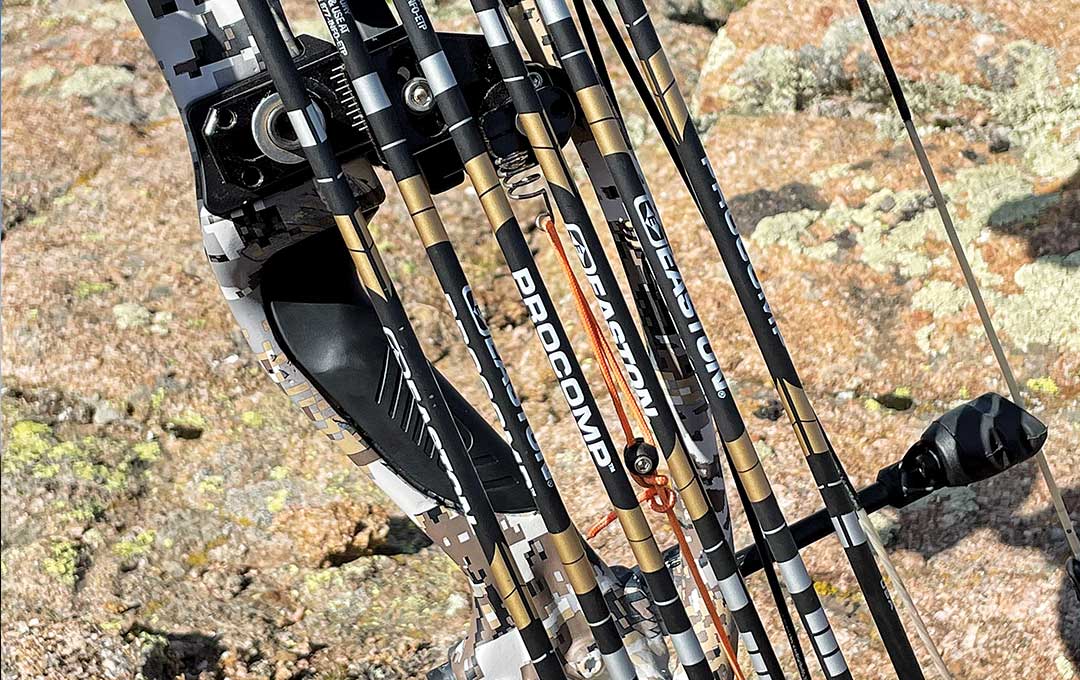
For my short-range arrow, I’ve used the same 4 mm Easton Axis Long Range shafts that I use for my long-range setup, except on my short-range arrow, I use a 250 spine. I’m also experimenting with the Easton 4 mm ProComp, which has exceptional spine consistency for superb fixed-blade broadhead flight (I’ll get more into tuning details in Part Three).
The 4 mm diameter shaft is certainly less critical for short-range engagements compared to long-range engagements because crosswinds are not as much of a factor over short-range. In order to create an arrow this heavy with a 4 mm shaft, I typically have to load up the front of the shaft with lots of insert weight. This weight upfront can really reduce the dynamic spine of the arrow and will require a stiffer shaft. The stiffest spine available for most 4 mm shafts is 250 spine. In consequence, some long-draw archers will need to move to a different arrow to get a stiffer spine.
Ironwill Outfitters for the Win
I build my heavy, 4 mm shafts with the Ironwill Outfitters insert and collar system. This system utilizes the Easton Hidden Insert Technology (HIT) in the micro diameter, deep-six configuration. The deep six system is necessary for shooting the micro-diameter shafts because I refuse to shoot any sort of outsert or half-out. Half-outs and outserts are not nearly as concentric and can be prone to bending and tweaking. I especially like HIT inserts because they eliminate unnecessary tolerance errors in the insert; they directly align the shoulder of the broadhead, which is the highest tolerance part of the broadhead, to the inner diameter of the arrow shaft (highest-tolerance part of the arrow).
This directly translates to broadheads that spin perfectly and arrows that fly true downrange. The weakness of HIT inserts is the potential for the broadhead to break through the side of the arrow with heavy side loads. This weakness is completely eliminated with the addition of an arrow collar that slips over and protects the front of the shaft like a sleeve.
A major benefit of the Ironwill Outfitter insert system is the ability to really fine-tune the front weight of the arrow. When adding point weight, I prefer to add the weight inside the shaft with a heavier insert instead of shooting a bigger, heavier broadhead. Sourcing broadheads is much easier when looking for common 100-grain or 125-grain weights, compared to less common, heavier broadheads. If crap were to hit the fan and you lost your broadheads in the field or traveling, it’d be far easier to find replacement 100-grain or 125-grain broadheads in town versus heavier ones.
Ironwill’s HIT inserts come in five different weights: 15, 25, 50, 75, and 100 grains, which really allows the archer to fine-tune the arrow front weight. The added benefit of HIT inserts is the ability to stack inserts together inside the shaft for even more versatility. For example, my heavy, short-range arrow has two 100-grain Ironwill HIT inserts glued inside the shaft, stacked one on top of the other. To complete the arrow build, I have a 25-grain steel Ironwill collar and a 125-grain broadhead. This gives a total of 350 grains of weight up front, and the arrow has a calculated front of center (FOC) of 21%.
My main goal in building this arrow was targeting the weight, not the FOC. First and foremost, I needed the arrow to tune with all the point weight and I wanted it to weigh about 650 grains. I was not targeting a specific FOC. I do believe that high FOC is important for bone penetration, but a well-tuned arrow with lots of momentum has more importance for me, personally. Don’t sacrifice the integrity of the arrow or the tune of the arrow to achieve a higher FOC.
Broadhead Selection
One additional benefit of a really heavy, high FOC arrow is its ability to cut through the wind. This heavy arrow build is very resilient in crosswinds. Typically, I shoot this arrow with a fixed-blade broadhead, but if the forecast is calling for high winds, my secret weapon is this heavy arrow with a Sevr 1.5” mechanical head on the end. Fixed blade broadheads will plane and behave sporadically in crosswinds, so it is important to shoot a low-profile mechanical broadhead in these conditions.
In fact, if for any reason (like for a wounded animal) I have to force a longer shot in gusty winds, I would opt to shoot this heavy arrow with a Sevr 1.5” over my dedicated long-range arrow setup. The combination of my heavy arrow build with a Sevr 1.5” results in far less wind drift in my experience. This is another reason why I like to build my heavy arrows with 4 mm shafts. They promote the best crosswind performance available.
For short-range encounters, I pair my heavy arrow build with a fixed blade broadhead. I’ve tried two-blade, three-blade, and four-blade broadheads. I’ve settled on the two-blade with a small bleeder blade as my preferred design. The issue I find with three-blade heads is that they penetrate poorly in bone. This is because three-blade heads must break the bone in three distinct directions/angles. It takes more energy to break the bone in three directions, so they penetrate less.
Four-blade heads cut in two directions, but they have a lot of cutting surface so they tend to penetrate less as well. two-blade fixed heads without bleeder blades penetrate exceptionally well, but because they make only a small slit cut, they produce poor blood trails. I’ve had a few nightmare blood trailing experiences as a result of shooting two-blade fixed heads with no bleeders.
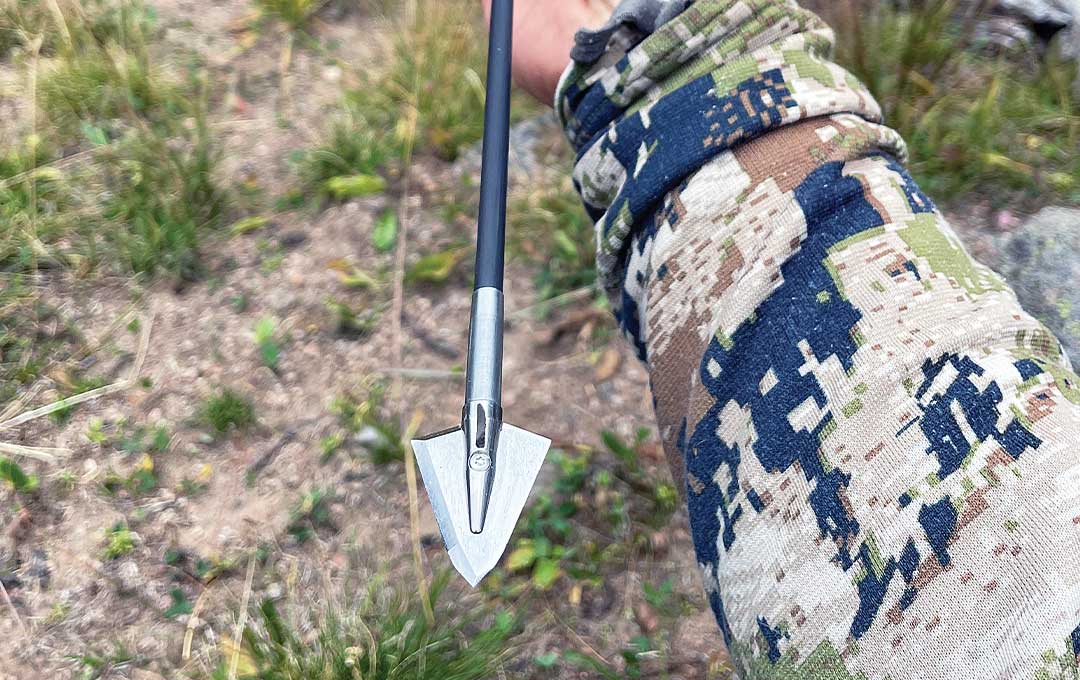
My preferred broadhead for my heavy arrow has been the Ironwill Outfitter S125. This is a two-blade design with a bleeder blade. The main blade is non-vented (so it flies quietly) and has a cut diameter of 1-1/16”. The S125 also boasts a ¾” diameter bleeder blade.
This bleeder blade does an excellent job of opening up the wound channel to generate better blood trails without sacrificing much penetration. In my experience, this broadhead combines the perfect balance of blade diameter, cutting surface, and penetration. This broadhead spins well and flies true. It has resulted in great blood trails for me and has even passed through the offside scapula of a bull elk. The attention to detail and the science behind these heads are second to none. From the cut-on-contact Tanto Tip to the hardened A2 tool steel material, these broadheads are perfectly designed. The wider Tanto Tip increases impact strength for hard bone impacts, and the hardened A2 tool steel is in a league of its own for edge retention and high-impact toughness.
Just when I thought I had found the perfect broadhead for my heavy arrow, Ironwill Outfitters one-upped their previous design. New for 2021, Ironwill Outfitters released a solid series, single-bevel head. It’s the same great broadhead as the S125 that I was previously shooting but now offered with a single bevel. I will be shooting these single-bevel heads this year, because of the science behind the single-bevel blade.
This design is engineered to maintain the arrow’s rotational spin through impact, resulting in a bone splitting effect and more tissue damage through the animal. What is most revolutionary about the Ironwill single-bevel head is the addition of a single-bevel bleeder blade. This single-bevel bleeder is paramount to open up the hole and assist in the continued rotation through the animal, and it results in massive tissue damage.
The Proof is in the Pudding
A lot of people may say that a 650-grain+ arrow is complete overkill for big game in North America, and I agree with those people when considering good shot placement. However, this arrow design distinguishes itself over others when conditions and shot placement are poor. This arrow design has never failed to completely pass through animals for me, including a shot that passed cleanly through a bull elk’s front shoulder. As I said before, I’ve not designed this arrow to intentionally shoot an elk front shoulder, but this is bowhunting, and sometimes it happens. The important thing is to prepare and stack the deck in your favor so that you can still kill your quarry even if you make a marginal shot.
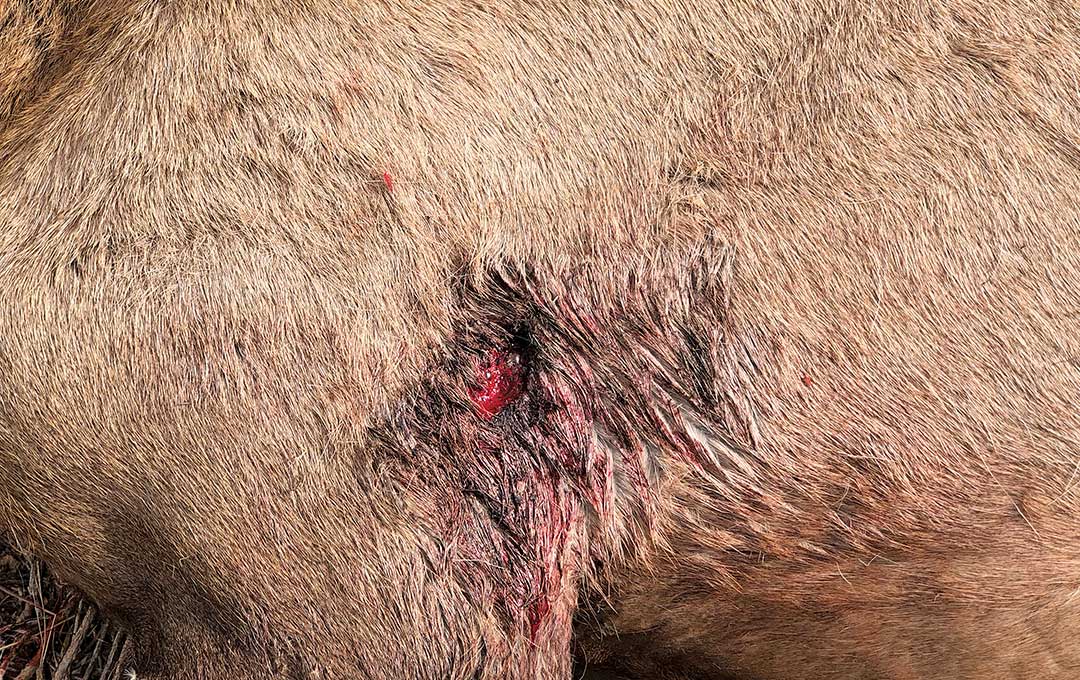
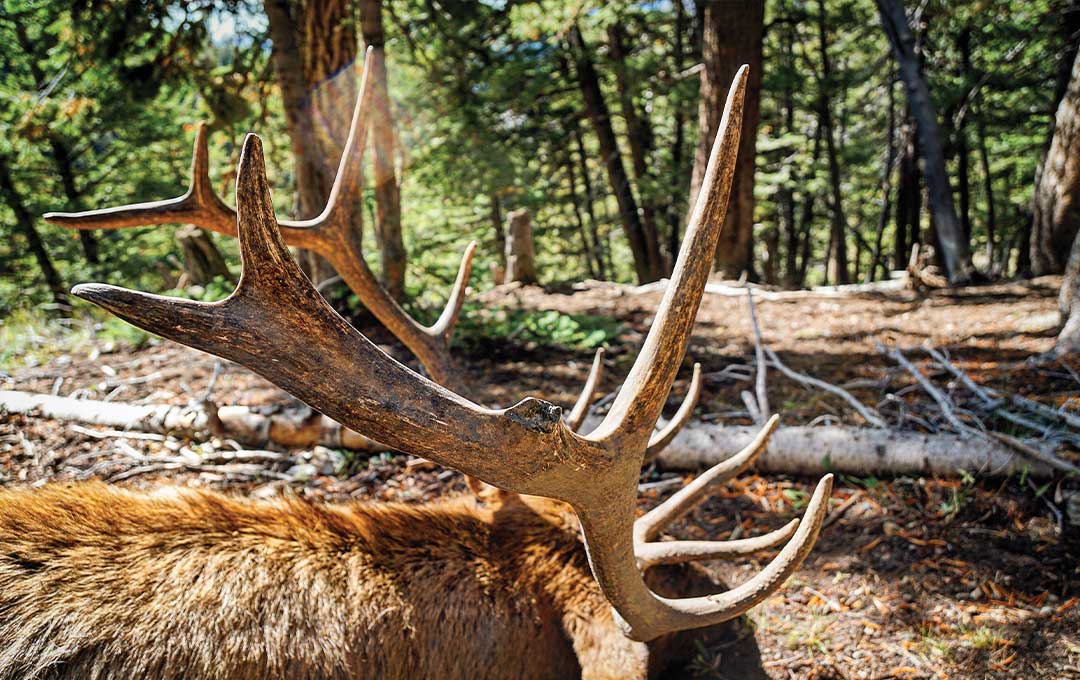
Take, for example, an in-the-field experience I had in Idaho in 2019. During this hunt, my friend Jaron and I chased elk in the thick timber. The hunt was an over-the-counter archery tag in a highly pressured unit. Because of the hordes of pressure, the elk moved into the thick timber early in the season. The elk were not very vocal, so the odds were stacked against us, hunting where we couldn’t see them. We all dream of the sweet, successful pain of a burly elk pack out, but that was looking to be only a dream by this point in the hunt.
On one occasion, toward the end of the hunt, Jaron was calling for me in a small grove of aspens. Jaron’s sweet mews pulled a nice 6x7 bull inside 40 yards. The bull walked through my only shooting lane, and I released what I thought was a perfect arrow at 36 yards. To my horror, I saw the arrow deflect right before it impacted the bull. There was a small sapling branch that I could not see from 36 yards away. The arrow entered the bull further back and a little higher than I would have hoped but still looked to be a lethal shot. Despite deflecting off the branch, the arrow stayed relatively on course and retained enough momentum to still pass through the bull. After a long, exhausting blood trail, we were able to put our hands on the bull and fulfill our dream of coming out heavy.
This story illustrates the importance of designing the right arrow for the conditions. I’m fully convinced that if I was shooting what most would consider a well-rounded arrow, I would not have killed this bull. The momentum of a 658-grain arrow kept the arrow true on its course, despite hitting a branch. Furthermore, the Ironwill S125 was still solid and sharp enough to pass through the bull. This is a perfect example of how my detailed preparation turned what would have otherwise been a sour experience into a good one. The arrow performed exactly how it should have, making up for my heat-of-the-moment mistake of hitting the branch.
Bow Selection
In Part One of this series, I covered bow selection extensively. For the sake of not repeating the same thing here, I will paraphrase. The most important things to keep in mind in terms of bow energy are brace height, cam design, and draw weight. Shortening brace height increases energy transfer into the arrow. Don’t get carried away with this, however.
Decreasing brace height is a double-edged sword. I do like to maximize bow energy, but not at the expense of ultimate accuracy. Decreasing brace height will, in general, decrease an archer’s accuracy/accuracy forgiveness. Decreasing brace height too much can also lead to the string making contact with the clothes on your bow arm. A 6.0-6.25” brace height is about as short as I would shoot because below that, the string has a greater chance of making contact with your forearm, especially with layers on and poor form in a hunting situation.
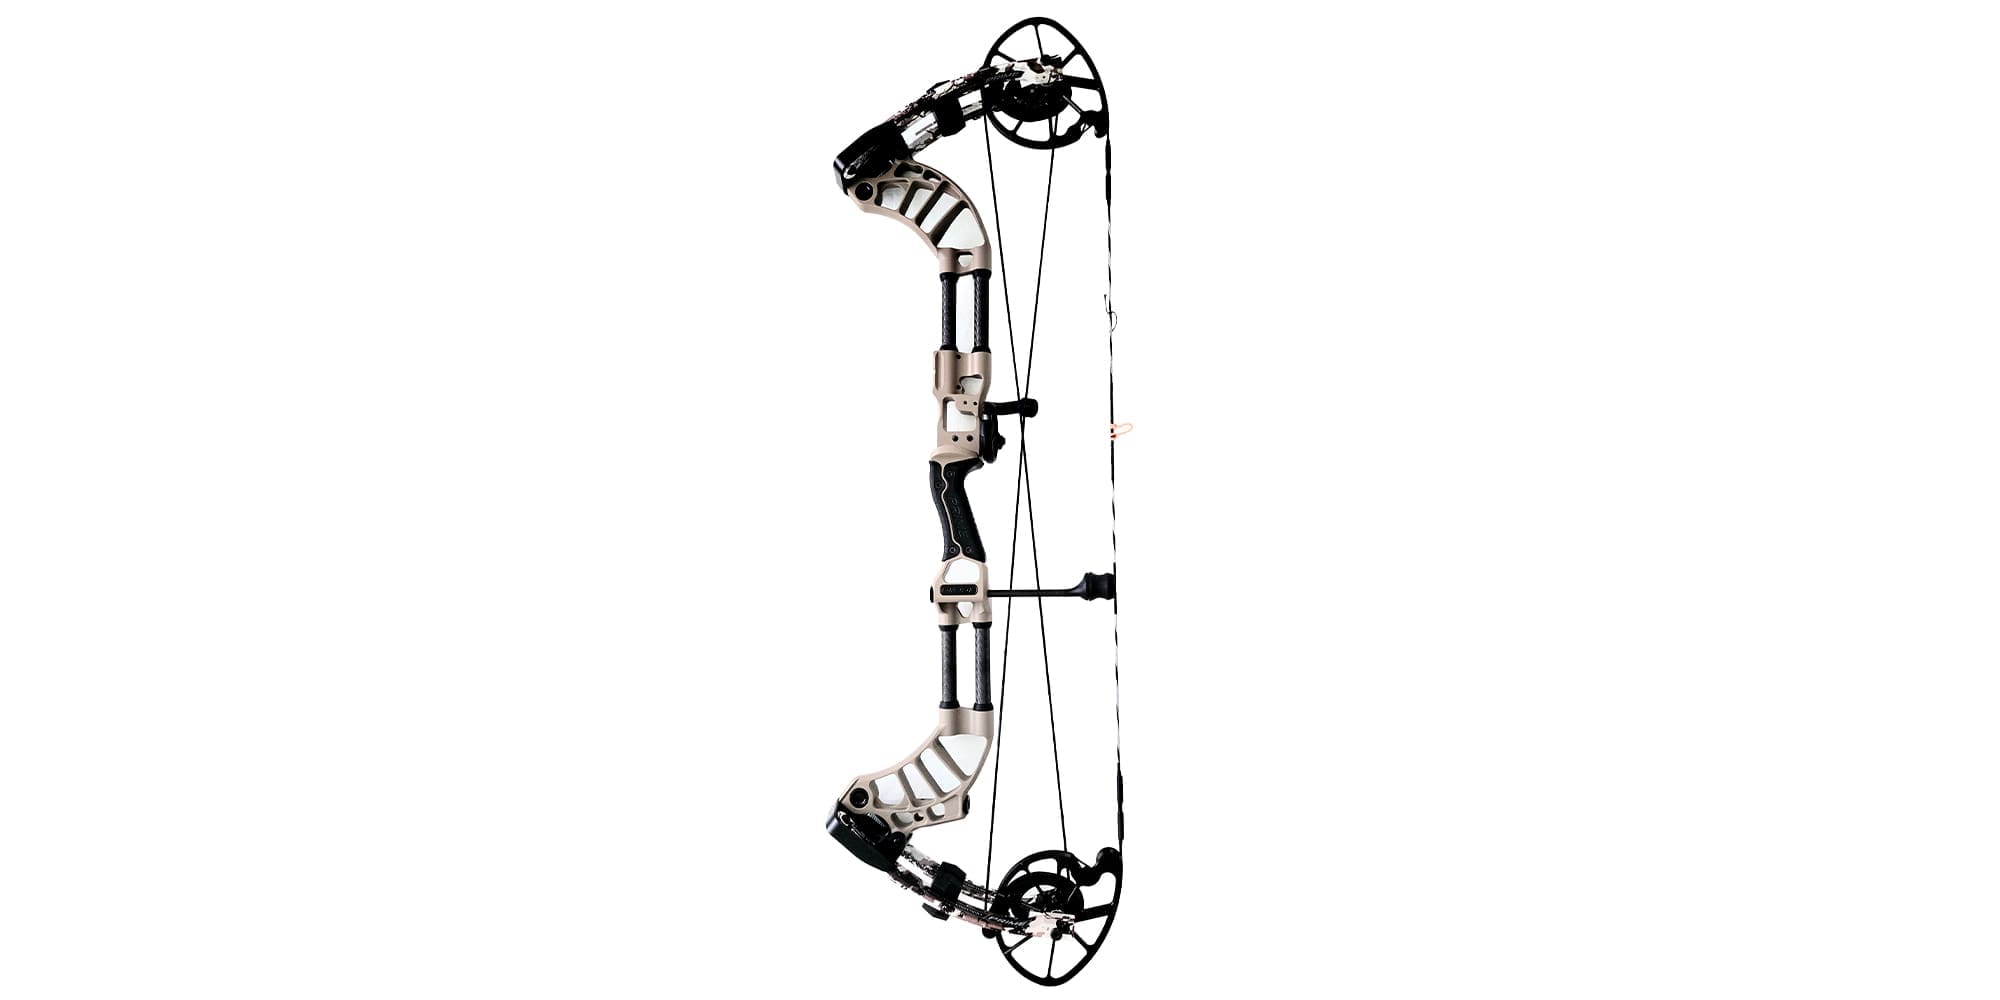
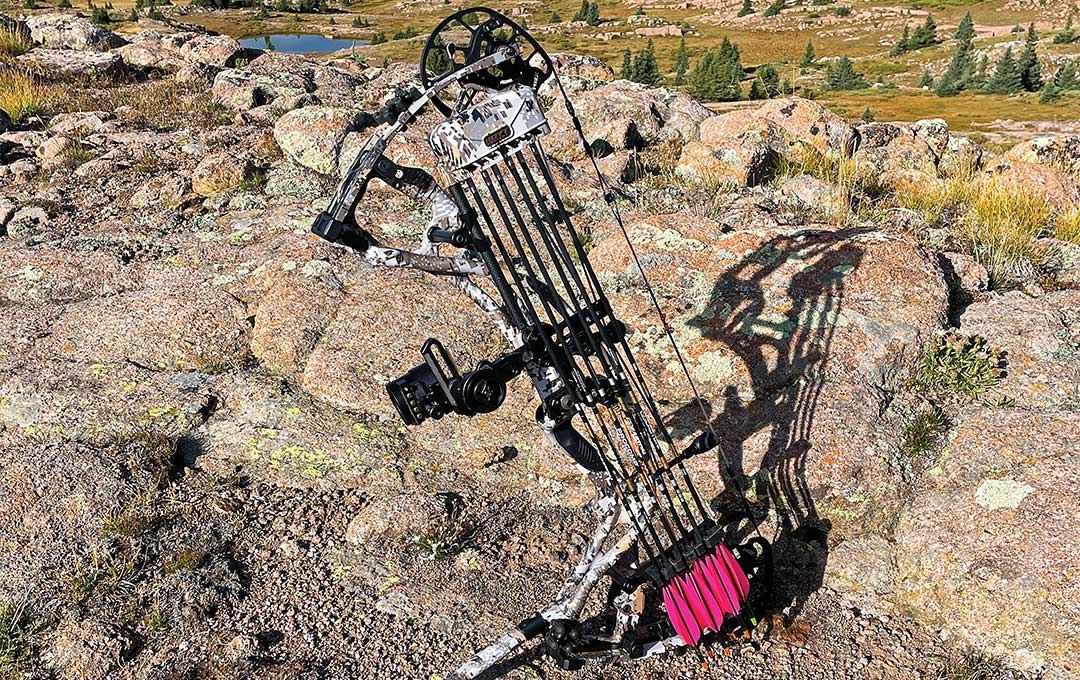
In terms of cam design, look for a bow with a cam and mod system that is optimized for your draw length. For me, that bow is the Hoyt RX-5. The RX-5 is incredibly efficient at the 28-inch draw length setting. This is because the 28-inch setting is at the top of the draw mod for this bow. Shooting a bow at or near the top of the draw length range of the mod will always generate the most energy.
Bow draw weight is going to come down to personal preference. I will give one caution. Don’t over-bow yourself simply because you are mesmerized by the performance of an 80-pound bow. Shoot as much draw weight as you can comfortably and accurately shoot. Also, consider how much time you are able to shoot in terms of the number of reps. There is no better exercise to strengthen your shooting muscles than just shooting your bow. I am a big believer in high reps to build strength and muscle memory. If you don’t have a lot of time to shoot and maintain strength, an 80-pound bow is probably a poor choice.
That being said, I would encourage anyone to shoot daily, if nothing more than shooting a high number of reps at close range in the garage. I shoot thousands of arrows a year at five yards in my garage. I’ve heard it said, you should be able to comfortably draw (no sky draw, bow arm parallel to ground) when seated flat on your butt with your legs straight out in front of you. If you struggle to do this, you are drawing too much weight.
Mechanical Broadheads Outlawed
Building a forgiving bow and arrow system to maximize the chance of piercing a big game animal’s lungs is the name of the game. I stated before that a single well-rounded arrow design to cover both long-range and short-range encounters is mediocrity and doesn’t maximize anything. The only time I consider a jack-of-all-trades type arrow design like this is when I’m hunting open country in a state, like Idaho, that requires fixed blade broadheads.
Most of the time when I hunt Idaho, I hunt elk in big timber, so I generally use my heavy, short-range arrow. However, this year in Idaho, I will be bowhunting deer in wide-open terrain, which means I want an arrow that has a flatter trajectory and more range forgiveness than my heavy arrow can provide. It would be the type of hunt that is perfectly suited for my long-range arrow setup that I discussed in Part One. The problem is, I can’t use my long-range arrow setup because it’s shooting at 316 FPS, which is much too fast for fixed-blade broadheads.
280-290 FPS is about as fast as I like to shoot fixed-blade broadheads. Any faster than this, and shooting fixed blades can be tricky, especially in hunting situations. It’s plenty possible to get fixed blades to fly true at faster speeds in practice, but when you add the difficulties of bowhunting, I don’t recommend it. Shooting fixed blades in bowhunting circumstances, with your heart pounding, uneven footing, steep angles, and windy conditions is completely different than shooting them in practice, on a flat range with no wind, no emotions, and perfect form.
Many bowhunters these days are familiar with mountain 3D archery courses like the Total Archery Challenge. Many bowhunters struggle on these mountain courses with field tips. Imagine going to Total Archery Challenge Snowbird and shooting fixed-blade broadheads. I can only imagine all of the arrow casualties.
Regardless of how tuned your bow is, shooting fixed blades out of a fast bow, in mountain-bowhunting circumstances, is the opposite of the forgiveness this article is trying to teach. In order to stack the deck in your favor in these states that require fixed blade broadheads, I highly suggest not shooting any faster than 290 FPS for the most forgiving setup. To achieve this speed, I play with arrow weight and build out my arrow design such that the total arrow weight is what it needs to be to achieve 280-290 FPS.
Conclusion
The intent of this series of articles is to inspire the reader to think more about and become more aware of the clear advantages that different arrow designs can promote. Clearly, if a bowhunter goes into the field with an arrow optimized for his/her specific hunt, that’s a distinct advantage that can directly lead to a trophy at the end of the blood trail instead of disappointment. It's critically important to be in the details when it comes to your bow and arrow setup.
I would not have had the success I have had if it wasn’t for my methodical approach to engineering my broadhead delivery system. If you are a bowhunter who hunts primarily in short-range situations where a flat trajectory isn’t as important – treestand, ground blind, ambush, or generally thick country – you should definitely consider building your arrow to maximize “shot-angle” forgiveness. With a high-momentum arrow and a stout, fixed-blade broadhead, you will be able to take advantage of shot angles and situations that were previously too risky. This will allow you to spend less time in the critical “red zone” and will directly lead to more “grip and grins” and fewer wounded animals.