NOTICE: Certain links on this post may earn a commission for Western Hunter Magazine from Amazon or our other affiliate partners when you make a purchase. Thank you for your support.
Advice for Better Fire Photography
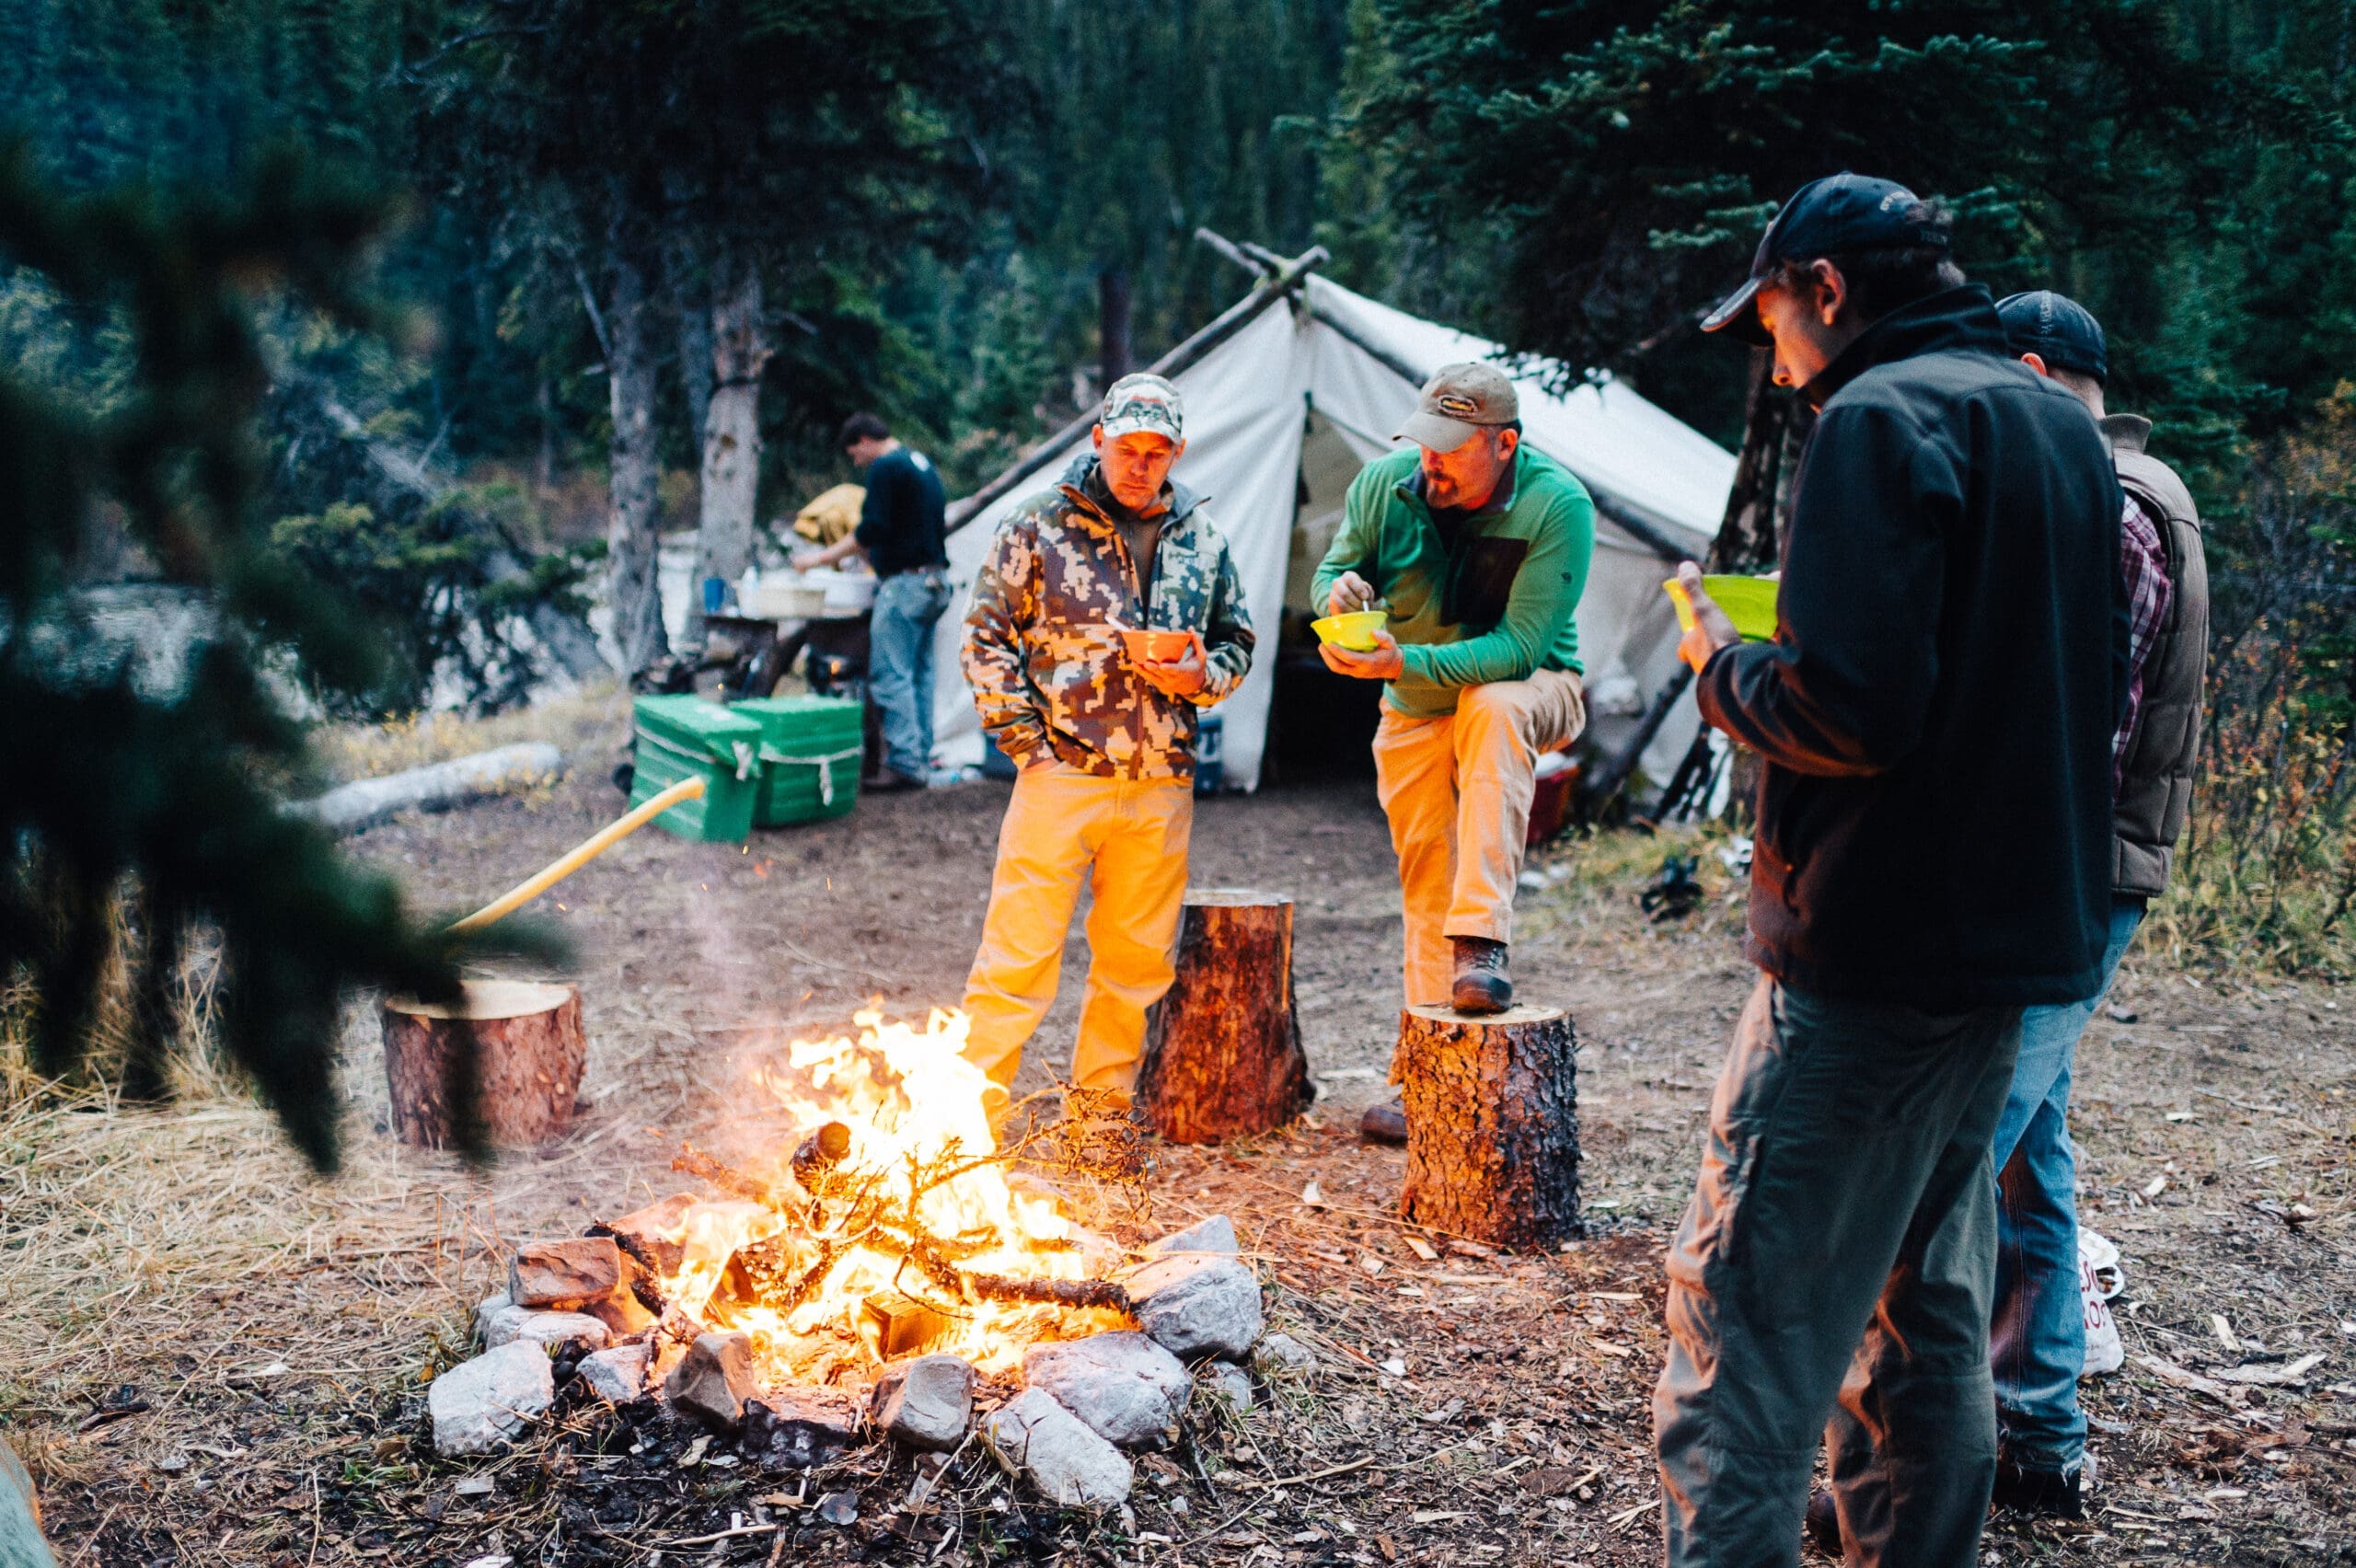
As humans, our attraction to fire is universal and elemental. When you want to gather humans, create a fire. As hunters and outdoorsmen, we use fire to warm up, cook our food, and light our hunting camps. But how do you create good fire photography? The answer, in part, is technique, practice, and some basic knowledge of light and how cameras work.
Photographing fire scenes can be tricky. While I can't change that - nor would I want to - I know with some simple explanations and a few tips you’ll be able to capture better fire photography
Fire Photography
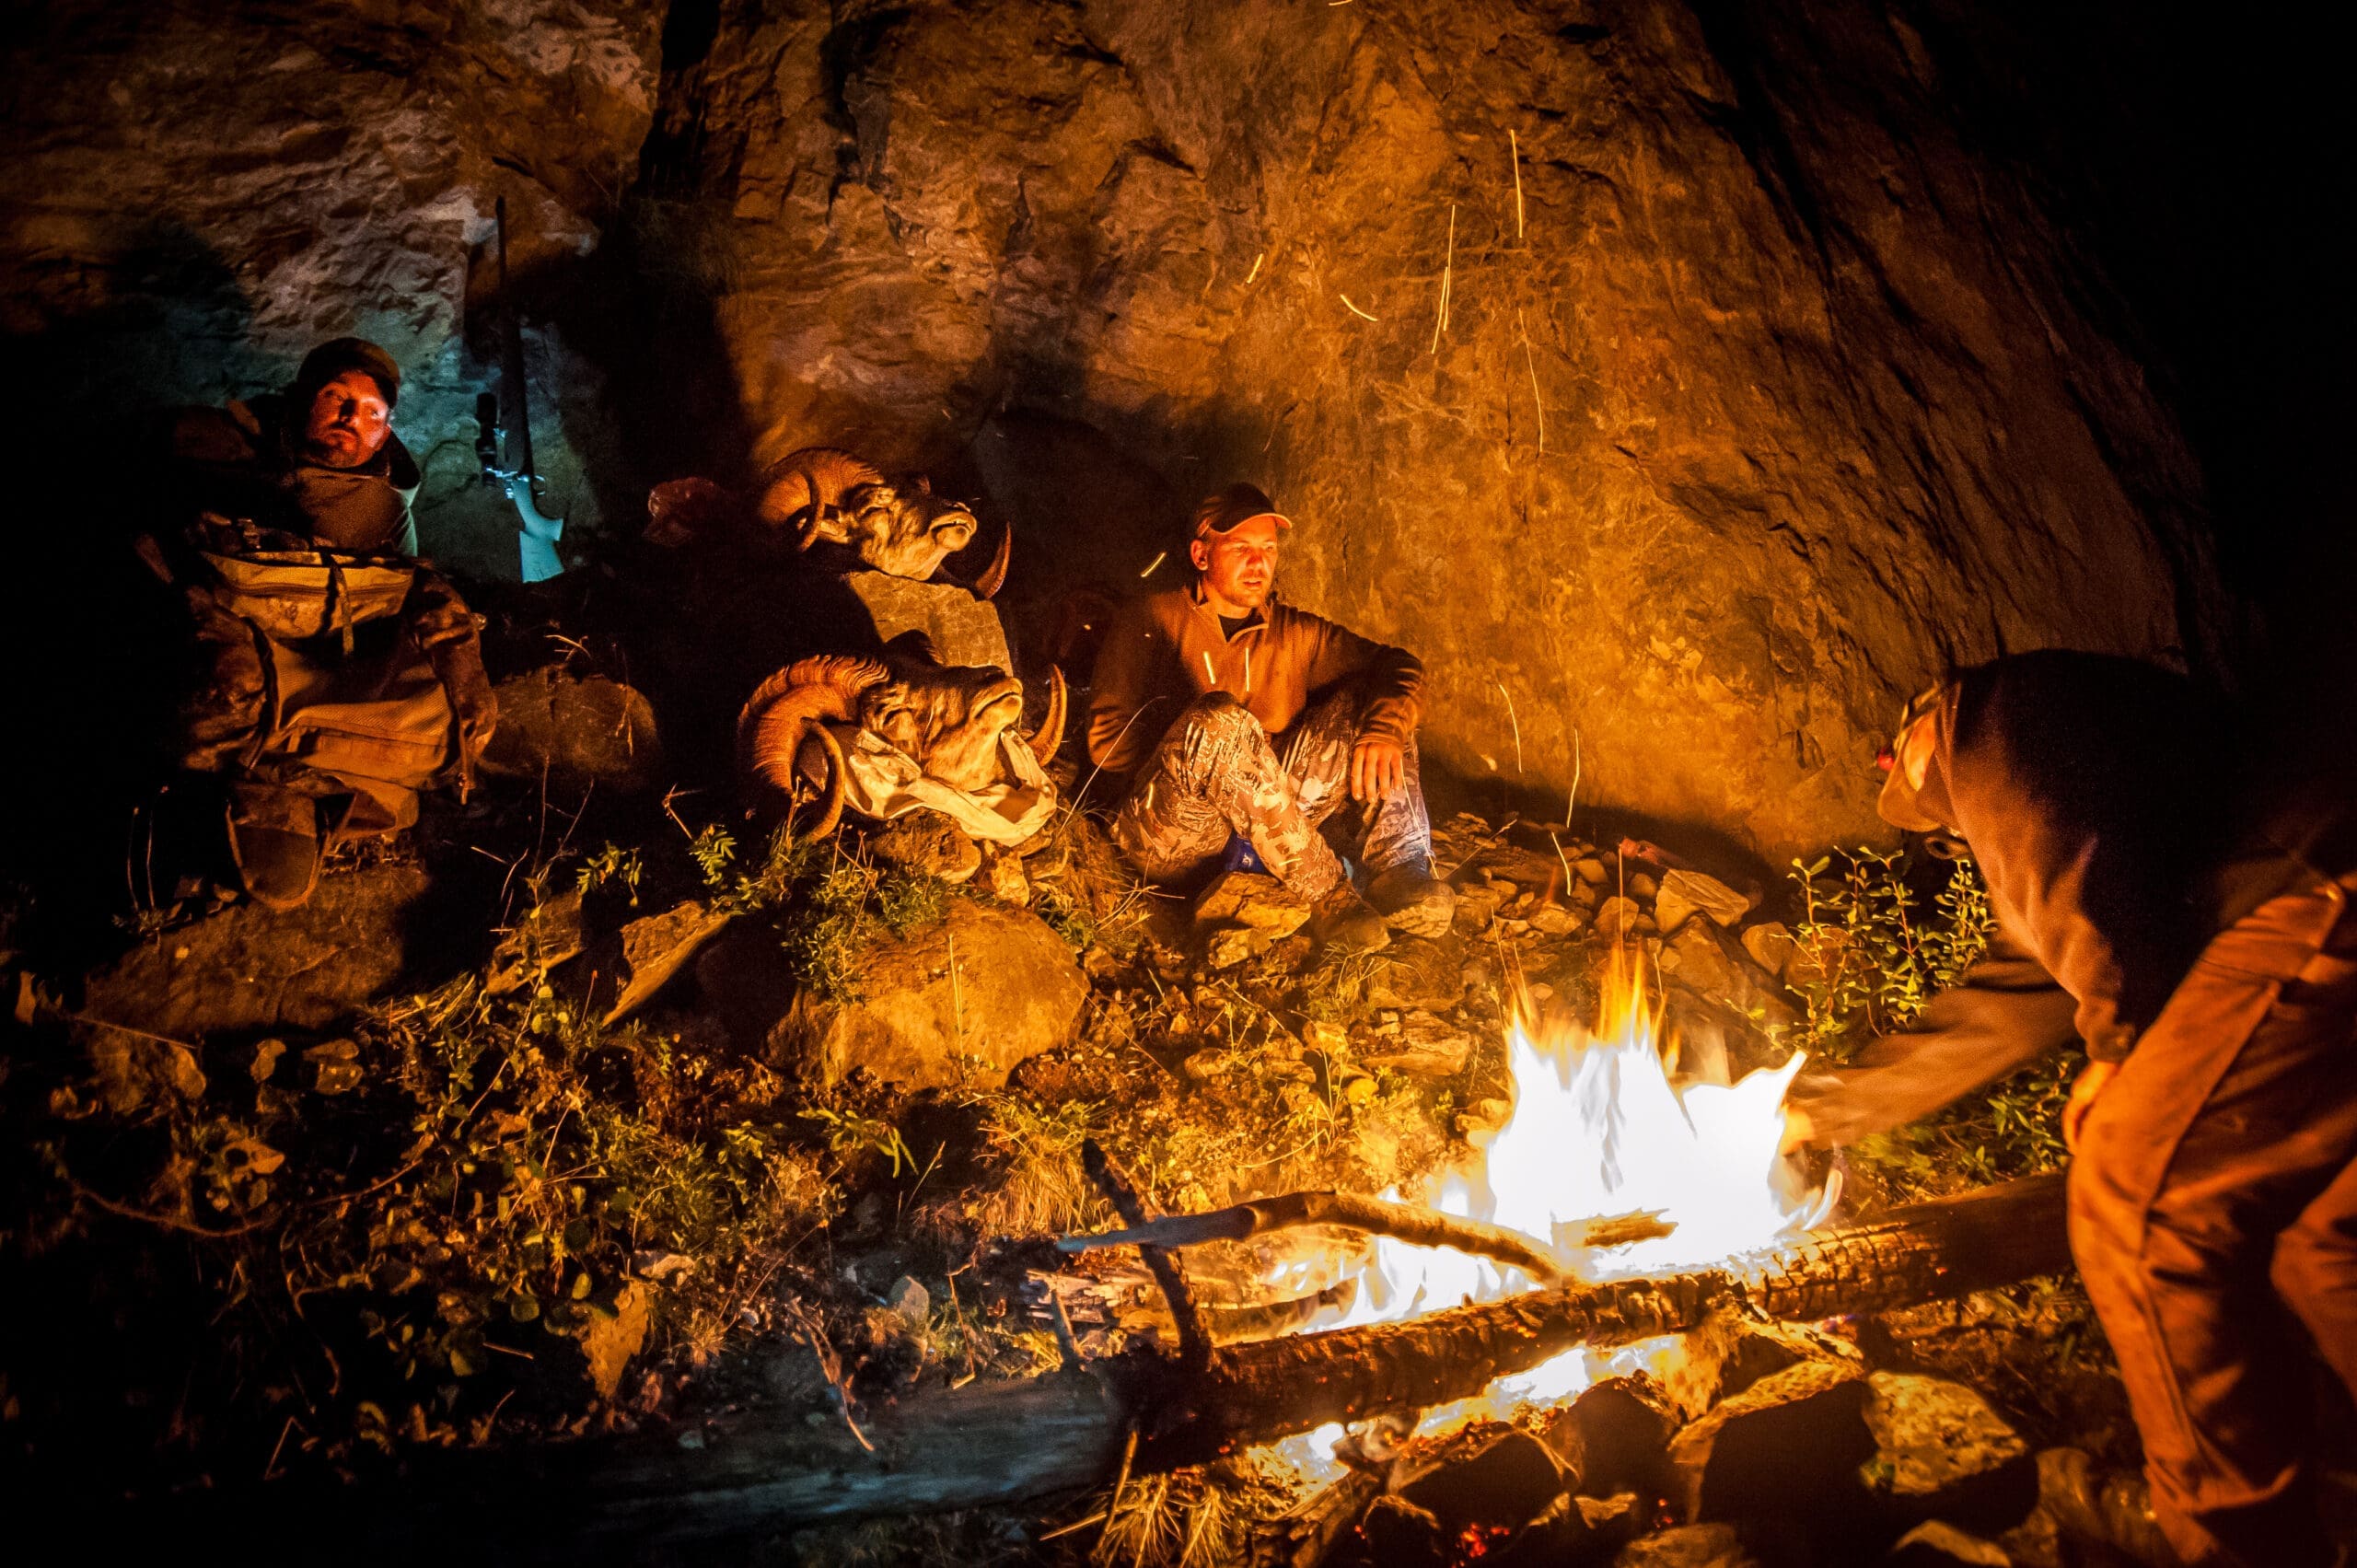
We were a day from our basecamp and daylight was fading fast. We had two rams down, skinned, boned out, and packed. Huddled against a cold, damp stone wall while sitting on a layer of sharp limestone rubble, I knew things were about to get real. Only pants and raingear separated me from the annoyance of jagged points digging into my backside. Add the sound of water drops splatting on my raingear from overhanging rocks, quickly fading light, and the chances of a seriously long and cold night, and it started to become more evident by the minute.
This was one of those times you’ve all heard stories about or hopefully been a part of. “Wouldn’t it be cool if we were stranded overnight with just what we had on our backs?”
Stressful circumstances like an unexpected bivouac always end up the highlight of any adventure. Like the time when a fire really did save you from freezing to death - you never forget it. We talk about it because it burns a lasting impression into our minds. As miserable as this night would become for me, it was still my job to take great fire photography. That’s what I’m paid to do.
Fortunately, the best, most authentic images are made under real circumstances like this. Just ask any outdoor photographer and they will tell you that reality makes for the best stories, period. The pressure of real conditions where fire has more than the purpose of ambiance - when it’s about survival - is what we cherish. When things get real, we excel, and it shows in our fire photography.
Having to produce no matter the cost is what makes great photographs, and great photographers. Besides that, when you’re working to produce fire photography like the one here, and you know it’s going to be good, you shake off the misery. Like taking a swig of whiskey when you’re cold, once it hits your belly, you’re warm and ready to make it happen. For me, creating great images under real conditions is like taking a swig of whiskey - it turns on the spirit and every pain and concern melts away.
Breaking Down Fire Photography
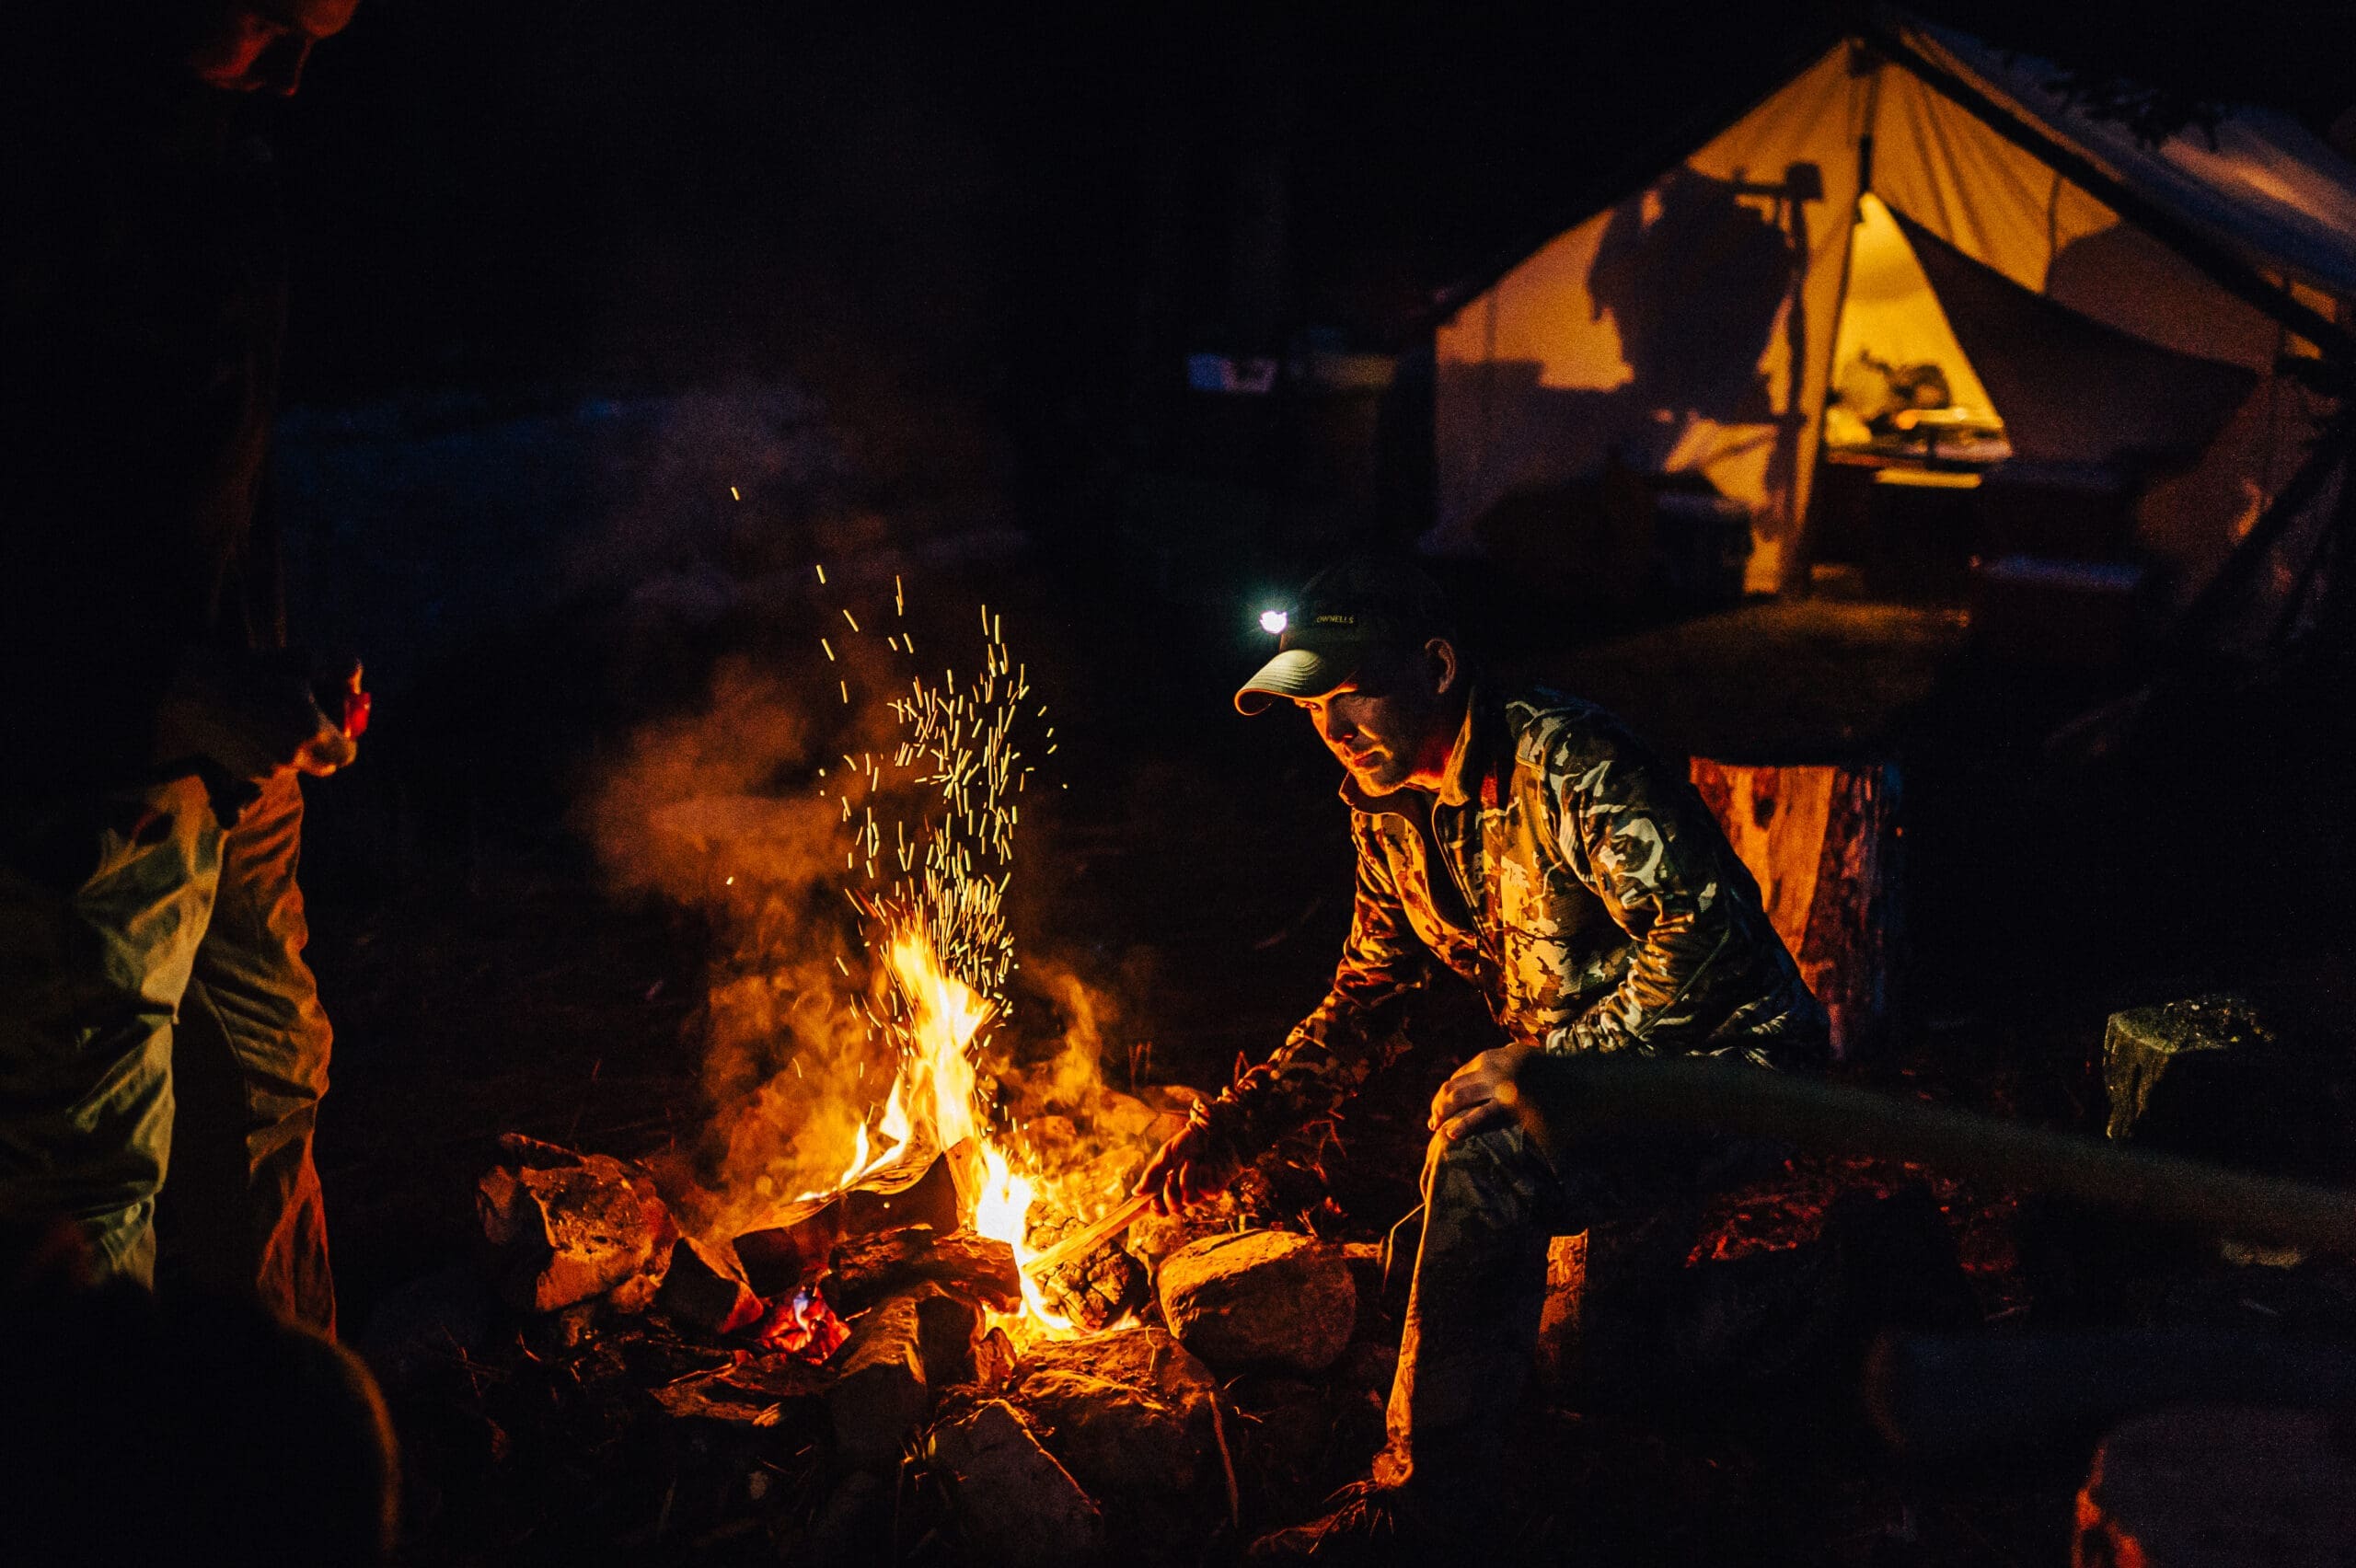
Shooting data: Nikon D700, Nikkor 24-120 f3.5-5.6 a-fs, 1/15 sec. @ f3.5 iso 6400.
Thoughts:
These are max settings in every way. I prayed that they would work out, because there wasn’t much more I could have done to make the shot. Either this was going to work, or it wasn't. Sometimes you have to trust your gut, have confidence in your abilities, and believe in the outcome.
Note that 6400 ISO was probably too high, but I knew I had to get detail in the rocks. Also, the hunter in the back was so far away that I knew he wouldn’t expose well, so I had to pick a more light-sensitive, higher ISO. The consequences were the fire blew out a bit, but I had enough light to get a decent exposure of the rest of the scene. In retrospect, ISO 800 would have worked. Fire photography is largely about trial and error, combined with careful thought and knowledge of both you and your camera’s limits. Luckily, we now have the ability to check both our exposure and image sharpness.
The key elements of light were the fire, a few headlamps, and some reflection off the cave. I knew I’d need some “extra” light in a few places. The hunter and rifle in the upper left was lit with two headlamps. I put one more headlamp on the hunter in the middle of the image along with the two Stone sheep heads.
One bright headlamp was on my head to help me see my camera and setting and to provide some targeted light for focus (my focus point was on the middle hunter). When the guide stoked the fire and as the fire intensity increased, I shot the images in rapid succession.
I shot about 40 images because I knew based on my camera setting (the very edge of my skills to handhold and the edge of the capacity of the camera to capture the image) that most of my shots were going to be out of focus or someone’s eyes would be closed, etc. Some of this could be fixed in Photoshop, but I’m not a Photoshop guy and I just prefer to get it in one frame.
The Basic Principles
The story:
Good fire photography needs to be more than cool; it needs to tell a story. To begin, choose a subject. It’s not enough to just snap a photograph, even it’s well crafted. You need to choose a subject in order to tell the story. Humans always make great subjects for fire photographs. Still life, like tents and antlers, or any a scene with no humans, can still be interesting and artistic, but it’s much harder to craft stories without people.
Exposure:
Make sure you expose for the subject of the image. Choosing a subject in the first place will help you to decide on the proper exposure. Balancing the brightness of a fire with a mostly dark surrounding is very challenging. Most of the time you can't get good detail in everything, particularly the dark areas, so choose the most important part of the subject and build an exposure that works for your subject.
Balancing light sources quickly:
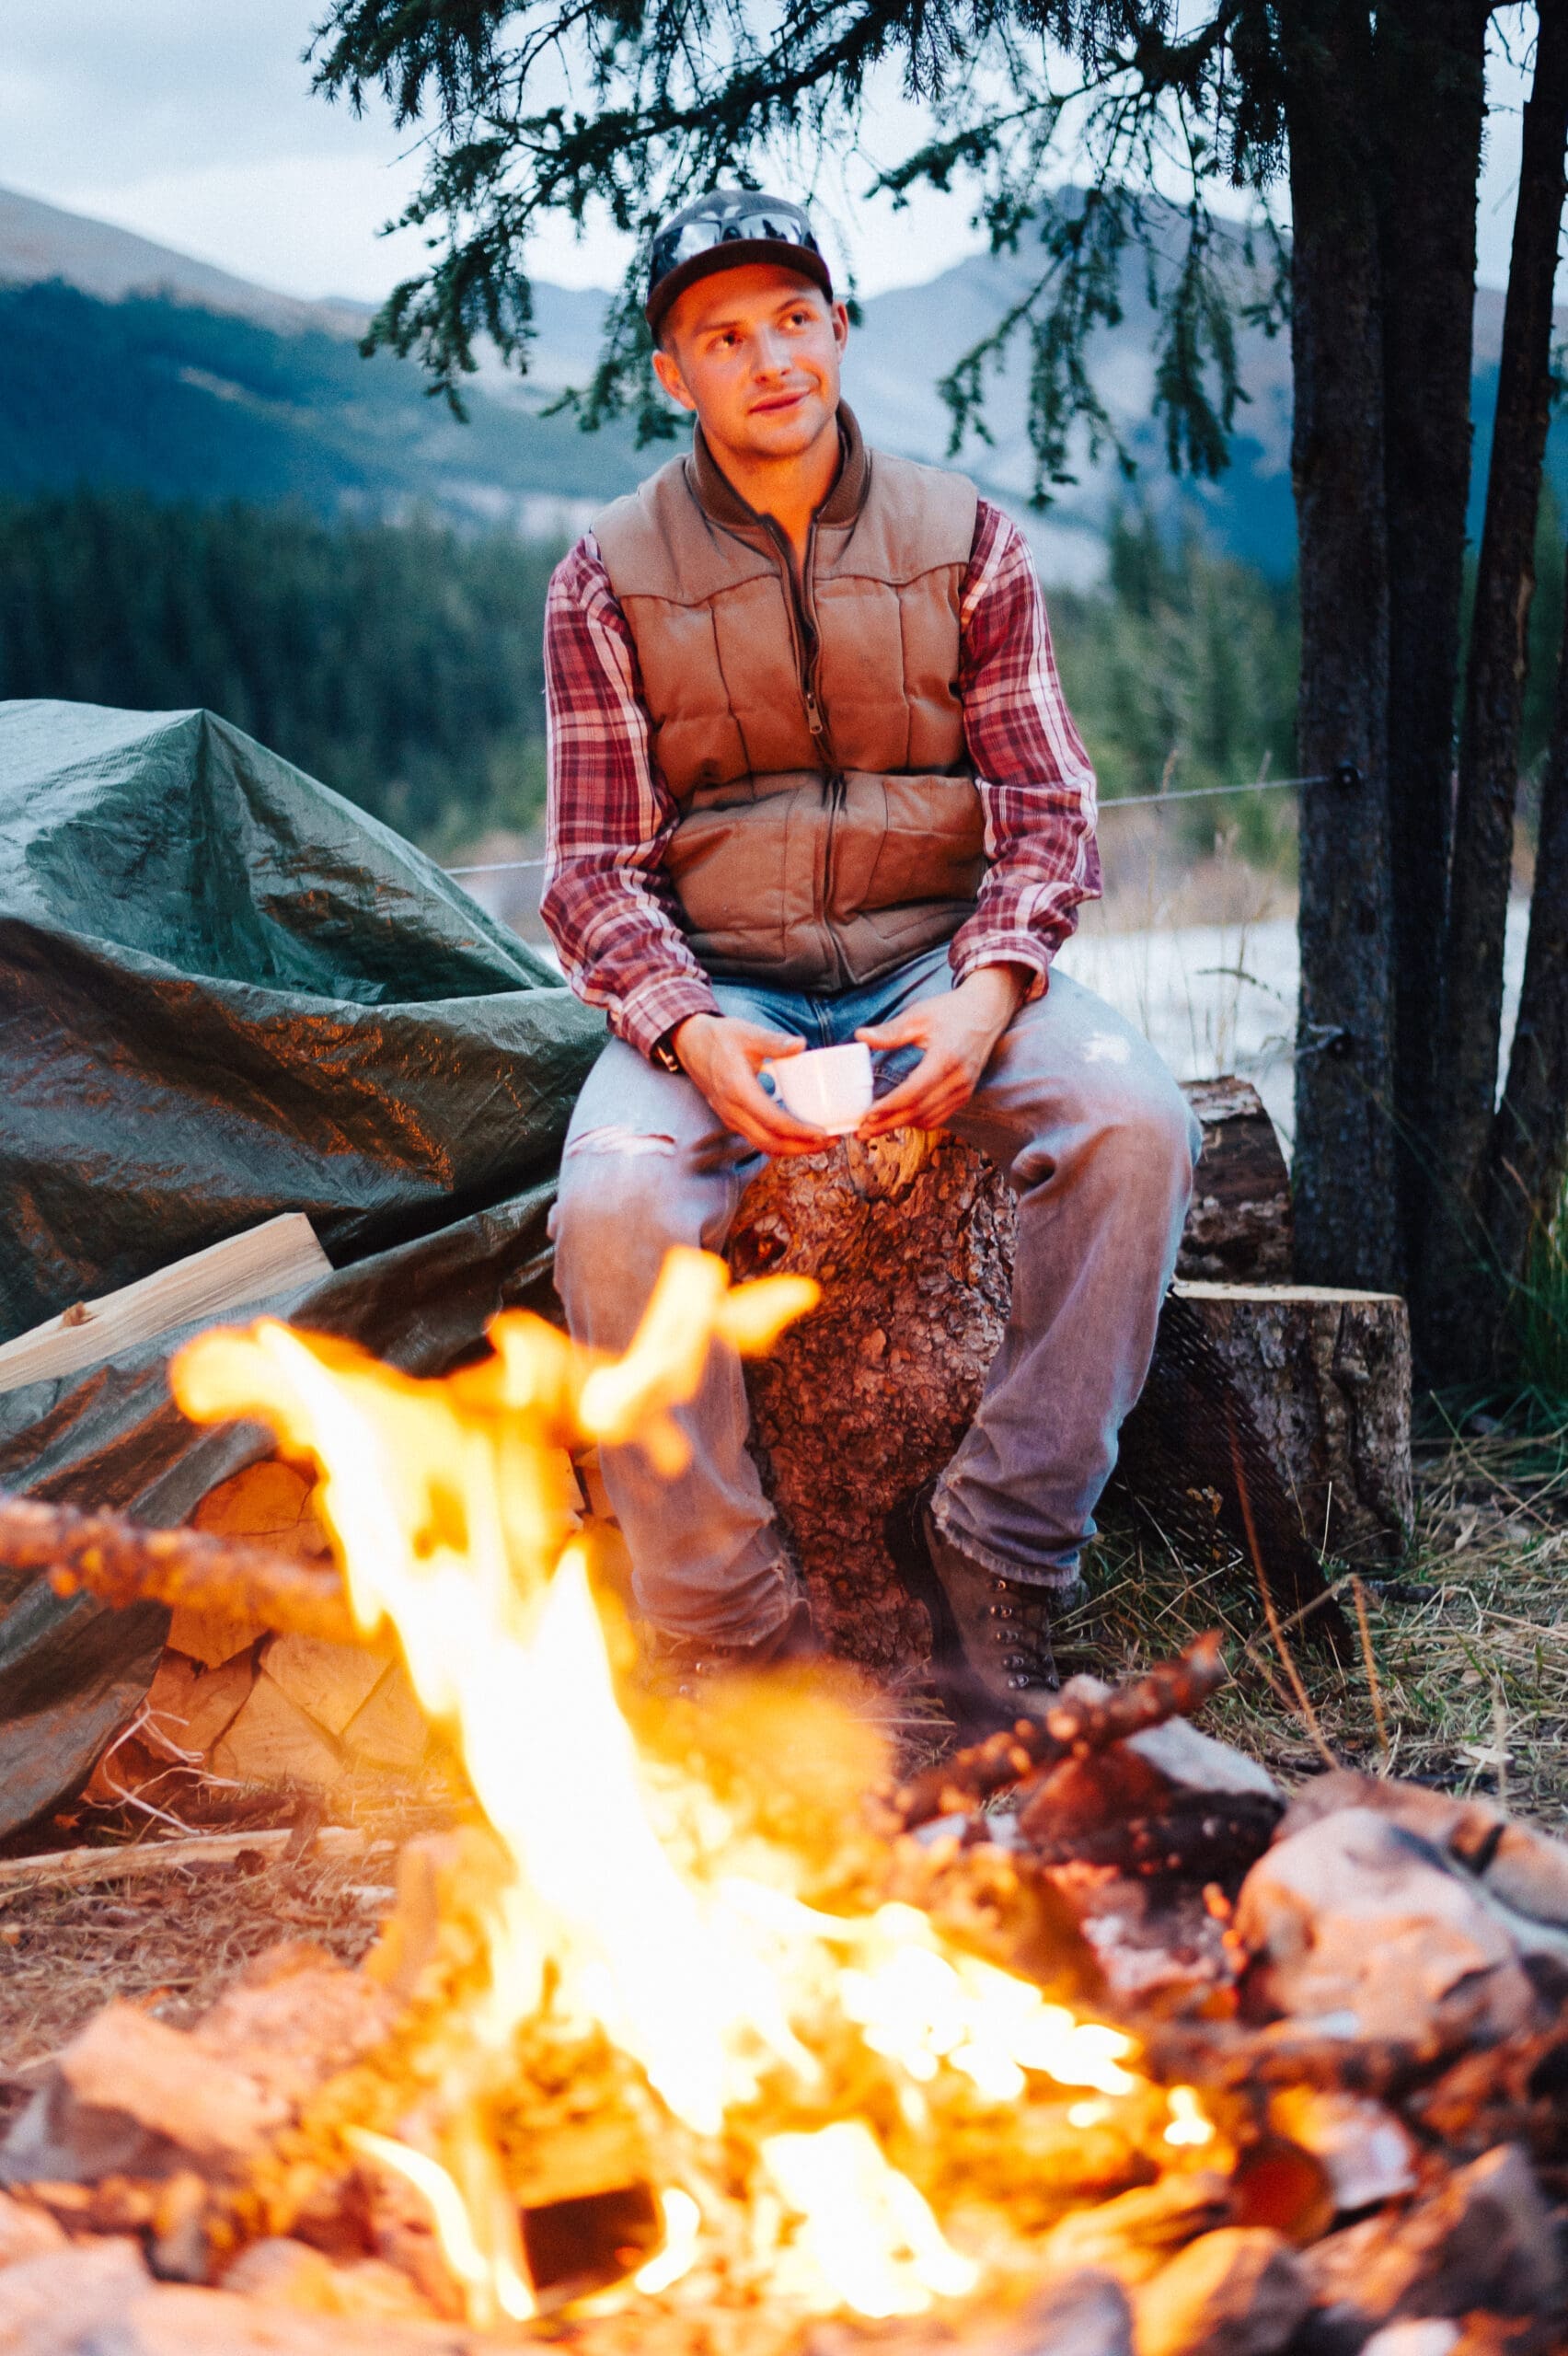
One of the simplest ways to get good fire photographs right out of the box is to shoot campfire settings just after the sun dips below the horizon. Light in the sky will balance better with the brightness of the flame, making for a simpler exposure.
Simple Setup for Good Fire and/or Lowlight Photographs
The simplest setup for fire or lowlight shots includes a tripod, a DSLR camera or one you can operate in full manual mode (I prefer full-frame cameras), a good wide-to-medium zoom or prime lens, full and spare battery, a headlamp, and cooperative subjects.
Your exposure settings will be up to you, but should be based on the amount of light available from the fire. With a nicely burning fire - not too big, not too small - meter off someone's face, meaning go over to them and take a photo of their face and look at the camera settings. That's your exposure.
A good starting point, if you’re on a tripod, is f5.6 at 1/8th of a second (you may have to adjust your ISO lower or higher as needed). Again, it’s important to consider the intensity of the fire and the distance your subject is from the fire. A bright fire or a subject very near the flame will be much brighter, which means you can use a lower ISO, faster shutter speed, or a smaller aperture.
If you’re hand-holding, you have to choose a shutter speed that’s at or faster than the focal length of the lens. A 50mm lens means you’ll need to shoot it at a 1/60th of a second or faster. Newer lenses or camera bodies with image stabilization would allow you to slow that shutter speed down to 1/15th, assuming good technique.
Your focus should be on your subject or slightly in front of it. Once you choose your subject and your focus is accurate, snap the image. Check the back of the camera for exposure and adjust accordingly. Either open the aperture or change the shutter speed to allow in more or less light.
A word about ISO:
I always start at the lowest ISO I can. For me, when shooting fire, I know I’ll be starting at about ISO 800, but may wind up higher, say 1600 or even 3200. Make sure you know what your images look like at that ISO (meaning how well your camera handles higher ISO) before you bank on getting a great fire shot. Most consumer level cameras peak at ISO 800, meaning any higher and you will lose detail.
That said, higher-end DSLR’s - especially full frame cameras - will handle these ISO ranges and still produce remarkably usable images. As the sky darkens, you’ll need to up your ISO or increase your exposure times. As your exposure times increase, you’ll have to be more careful of image blur or subject movement.
Bracketing:
One trick for better overall exposure is called “bracketing.” It’s possible to shoot multiple shots, each with a different exposure (usually one underexposed, one at the metered exposure, and the third one stop overexposed) and combine all three in Lightroom or Photoshop. You have to be on a tripod for this to work well and there can’t be any movement.
A lot of wind can make for some cool fire flames, but the smoke and flames may look unnatural in the final blended image. This technique can produce the best results, but it requires a lot more work “in the lab.” I like shooting photographs, not spending time in front of a computer monitor.
Adding Extra Light to Your Scene
As in my opening example, you can add extra light. Just be aware that most headlamps and flashlights have much “whiter” light. The light from the lamp or the torch could even look blue, while the rest of the scene is warm yellow and orange. These light sources can also add too much light, so a good idea is to use a lower power headlamp when adding it to the scene.
Use extra lights to put an emphasis on other parts of the scene or to enhance some other details that otherwise would be lost to darkness. This takes practice, but trust me; most headlamps can add enough light to create an interesting effect. You’ll just have to play with it. Luckily, you can see the image on the back of your camera and adjust as necessary.
Fine-Tuning
Tips to produce better stories:
- Watch the light. Try to shoot when there’s still good balance between ambient light and the brightness of the fire (right after sundown and right before sunup).
- Watch the smoke and the flames. Heat waves and smoke often throw off auto focus and can create distortion. Set up your shots or snap images when the flames, heat, and smoke aren’t directly in front of your subject.
- Wide or narrow? Shoot some images wide and capture the entire scene. Then, focus in on a specific person or object lit by the warm glow of the fire.
- Shoot lots of frames! Due to camera shake and fire movement, you’ll need many to create few keepers.
- Show motion. At least one person needs to sit still. Use slow shutter speeds to show motion, both in the flames and sparks, and people moving around.
- Focus points should be on the subject, or just in front of it. If it’s getting too dark and you’re having trouble with autofocus, switch to manual or use a flashlight to light your subject, giving the camera enough light to focus. After the camera focuses, turn off the flashlight, disengage the autofocus, or activate the shutter without activating the autofocus.
- Watch your background. Add or remove key elements of the story by moving around. But be careful - add to many elements and you’ll confuse the image; add too few and it’s a portrait of a person or just a static scene.
- Wide or large-aperture lenses work best, because they gather more light. Watch the depth of field (area that’s in focus). Shooting at wide apertures allows a lot more light, which means faster shutter speeds, but it also mean there is less in focus.
A Blend of Science, Art, & Technique
The great thing about Fire photography and creating fire-lit images is that it’s a bit of knowledge, skill, and some creative luck. When I’m shooting, I make sure to get the shots I know I want. Once I have those, I let my creative liberties take over and have some fun with it. Sometimes experimenting leads to some great images and it certainly makes it fun.
However, there are always tradeoffs. You can't get something for nothing. For example, when you increase your ISO, you diminish the quality of the final image. The tradeoff is, of course, not getting a photograph at all. My policy is to get the shot, even if it’s not the best.
Fortunately, it’s easier today to make great photographs that it’s ever been, but technique and know-how can still win the day. On your next adventure, whether it’s hunting, camping, or just for practice in your backyard, take some of these tips and put them to practice.
Remember, while Fire photography is technical and the gear is better than ever, it’s still an art and it still requires practice. That’s never truer than when you’re shooting fire. Good luck, and if you do get some good shots, let us know we’d love to see them.