NOTICE: Certain links on this post may earn a commission for Western Hunter Magazine from Amazon or our other affiliate partners when you make a purchase. Thank you for your support.
The Workin' Man's Custom Rifle - Part 2
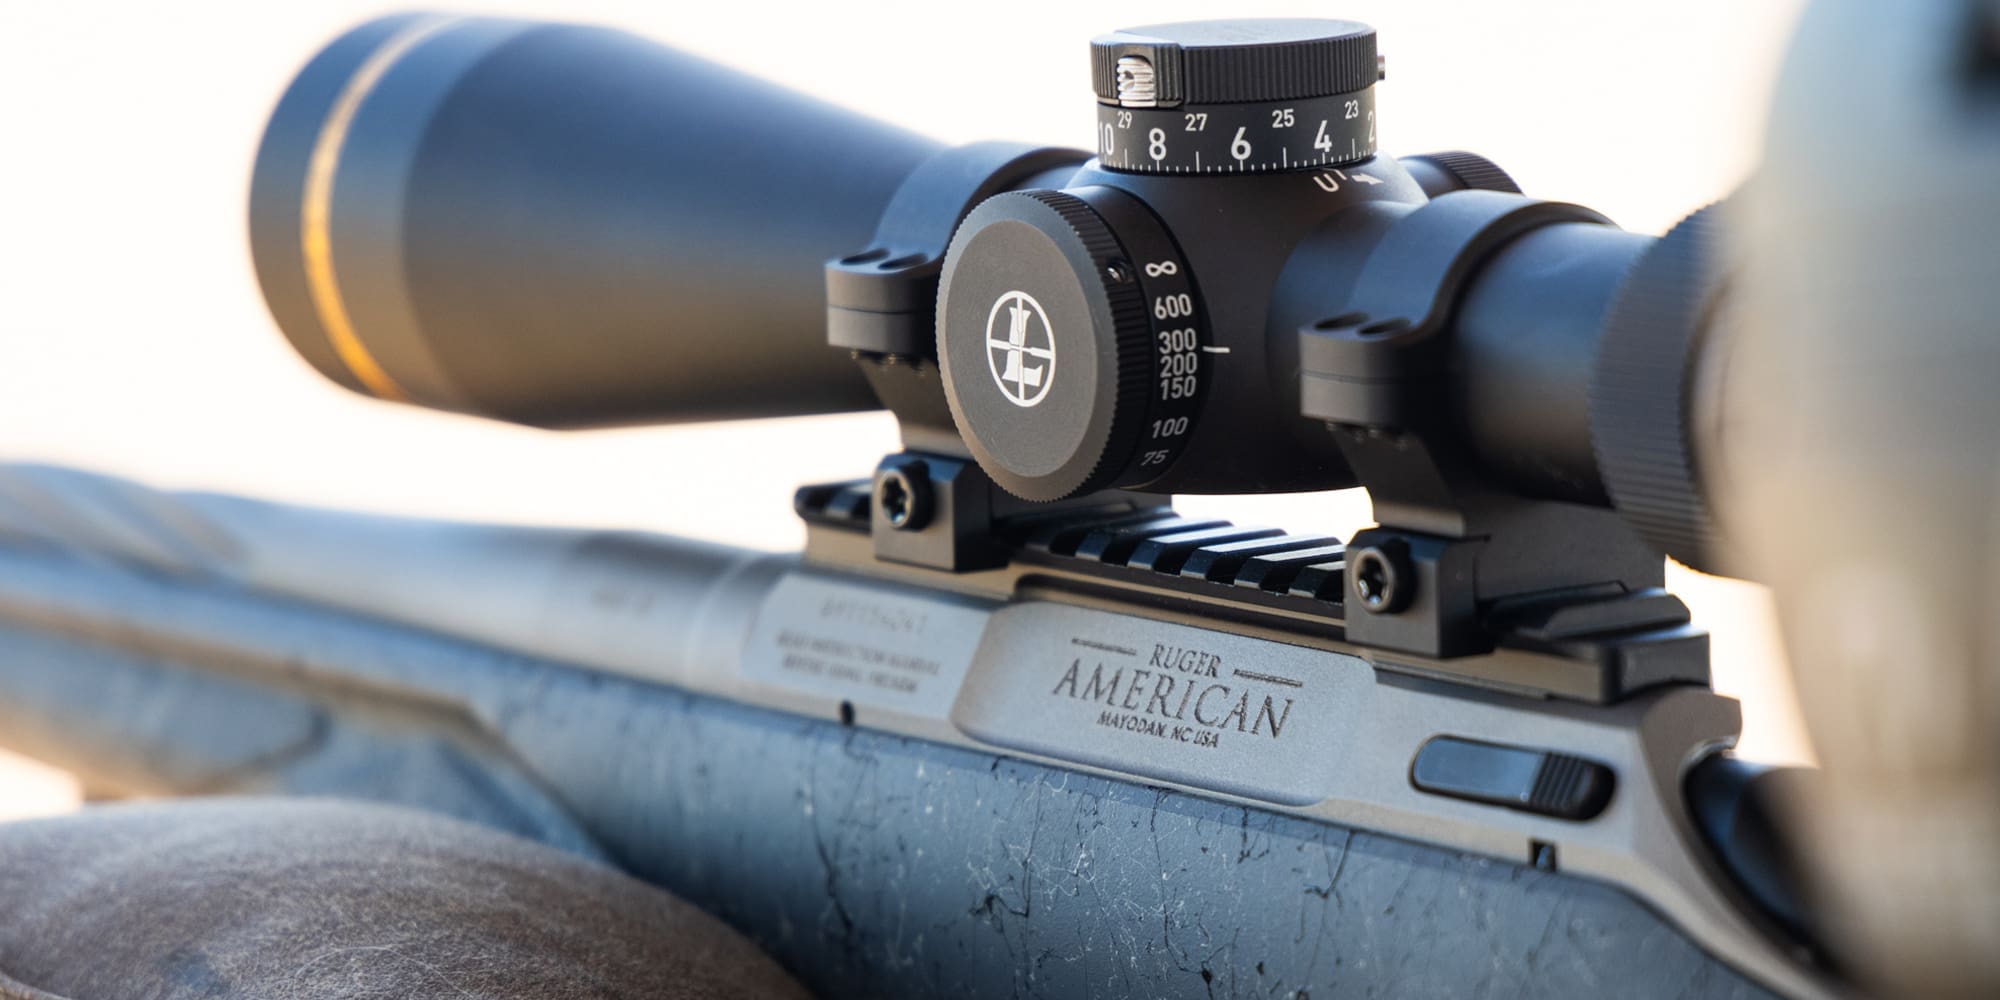
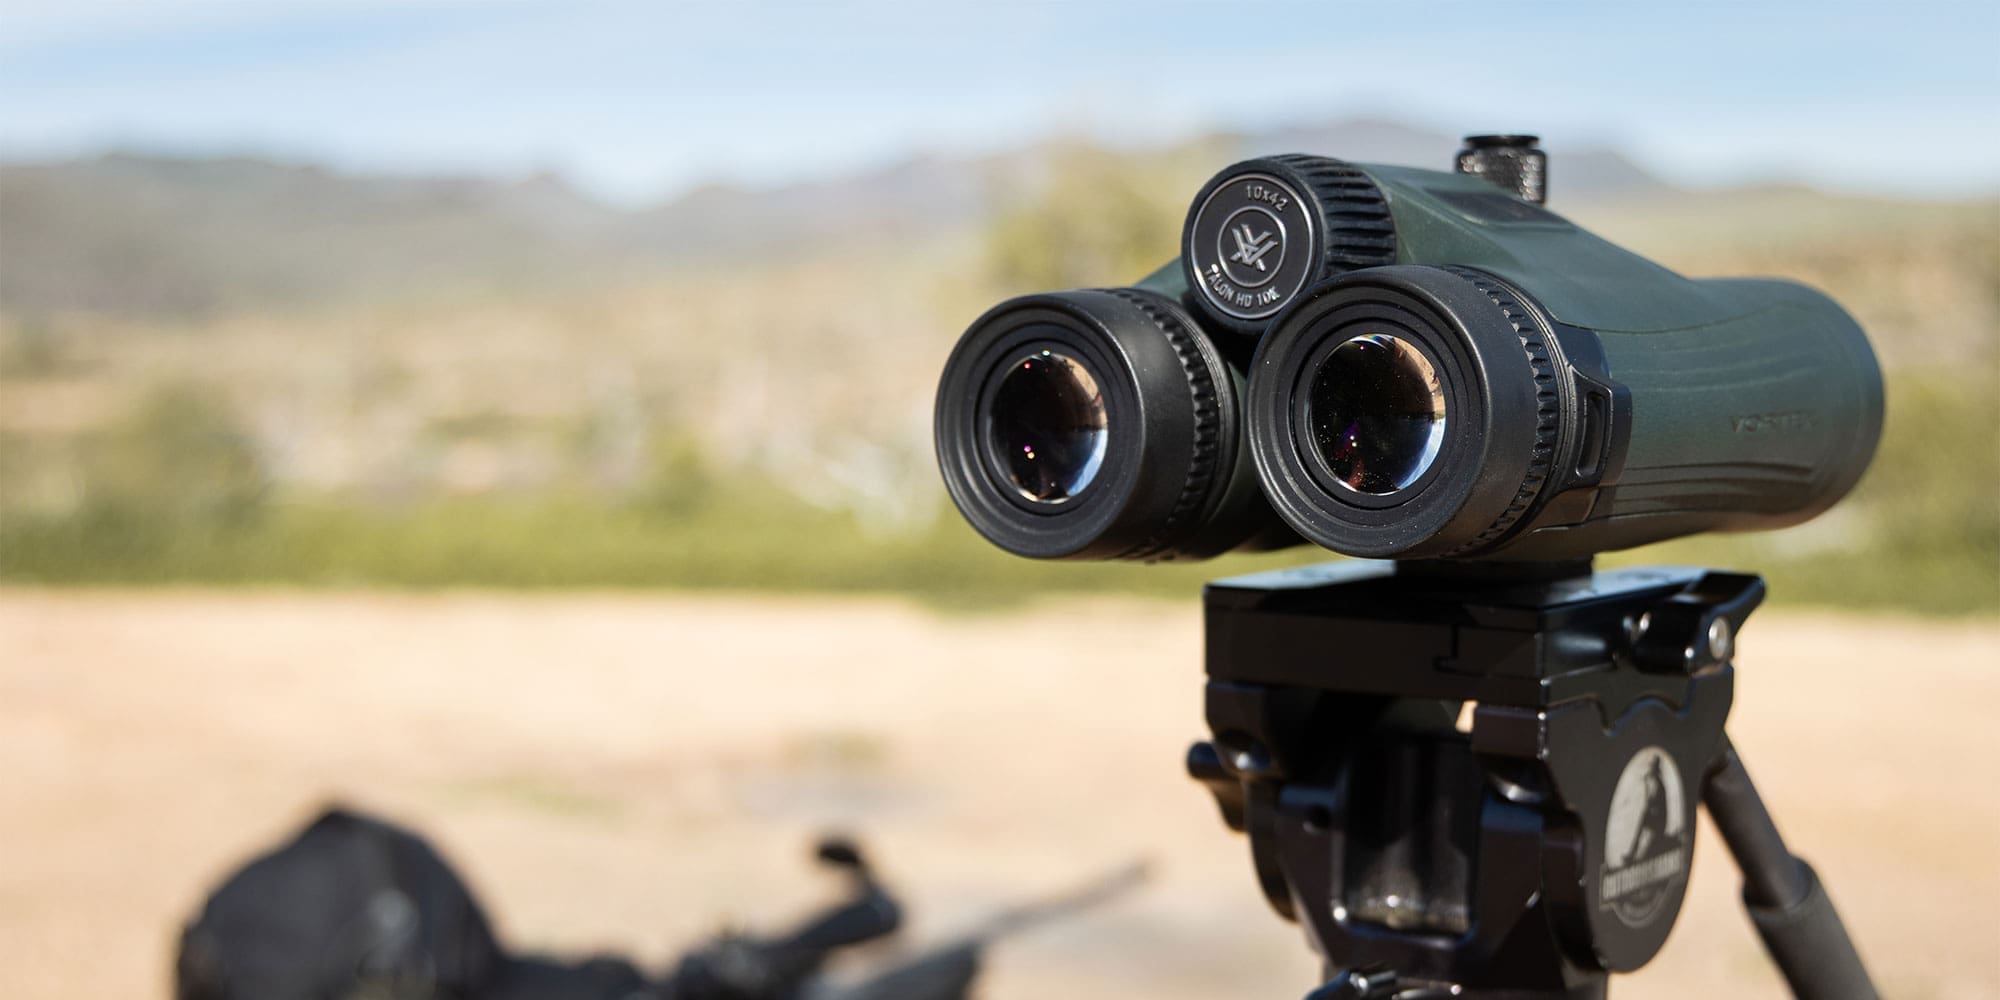
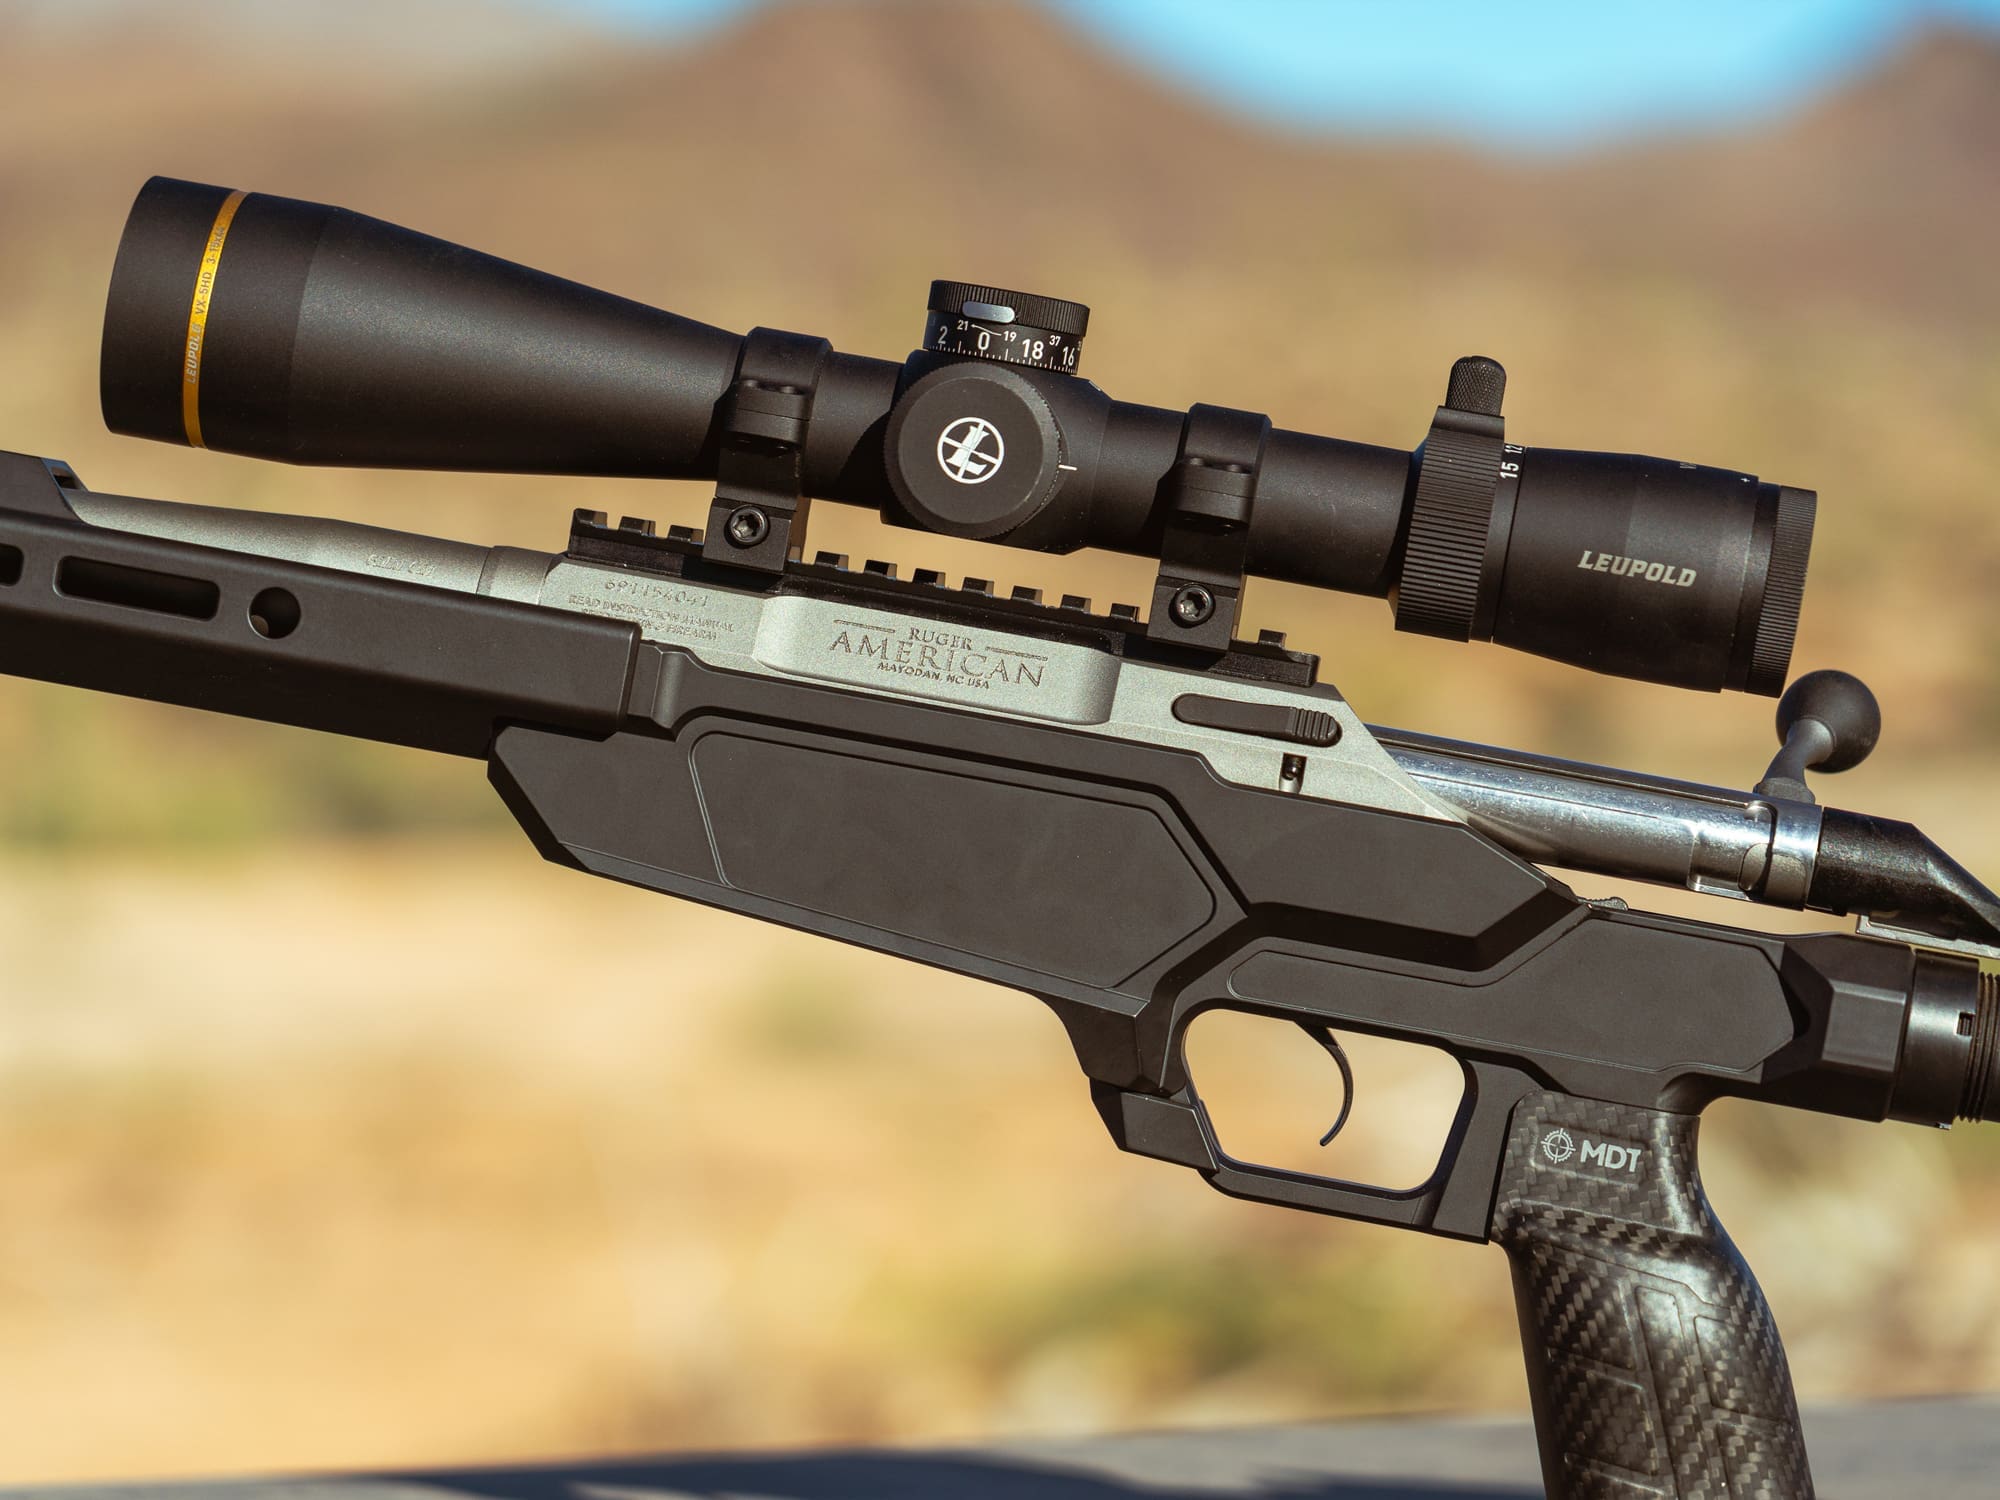
If you haven't yet, read Part 1 of this series we're calling The Workin' Man's Custom Rifle. If you don't want to, the short explanation is that we wanted to take a very affordable rifle and turn it into a "custom" hunting rig. Part one mainly dealt with the base rifle of choice, the optic, and the caliber. The building blocks were a Ruger American Gen 2 in 6mm Creedmoor and a Leupold VX-5HD Gen 2. We had some very interesting revelations while shooting 200+ rounds through it for that portion.
Now, we get to get into the fun stuff. Once I had a rough idea of what I wanted to do with this rifle, I got to work researching the most fun and cost-effective ways of beefing it up slightly–improving the ergonomics, the field-readiness, and a little bit of functional modification. The goal was a highly tuned Coues deer rifle, although I think it would be great for any deer-sized game. My original list went like this, in order of priority:
1:) Aluminum Chassis
2:) Upgraded Trigger
3:) Furniture (Stock and Grip)
4:) Folding Mechanism
5:) Upgraded Muzzle Brake
Chassis
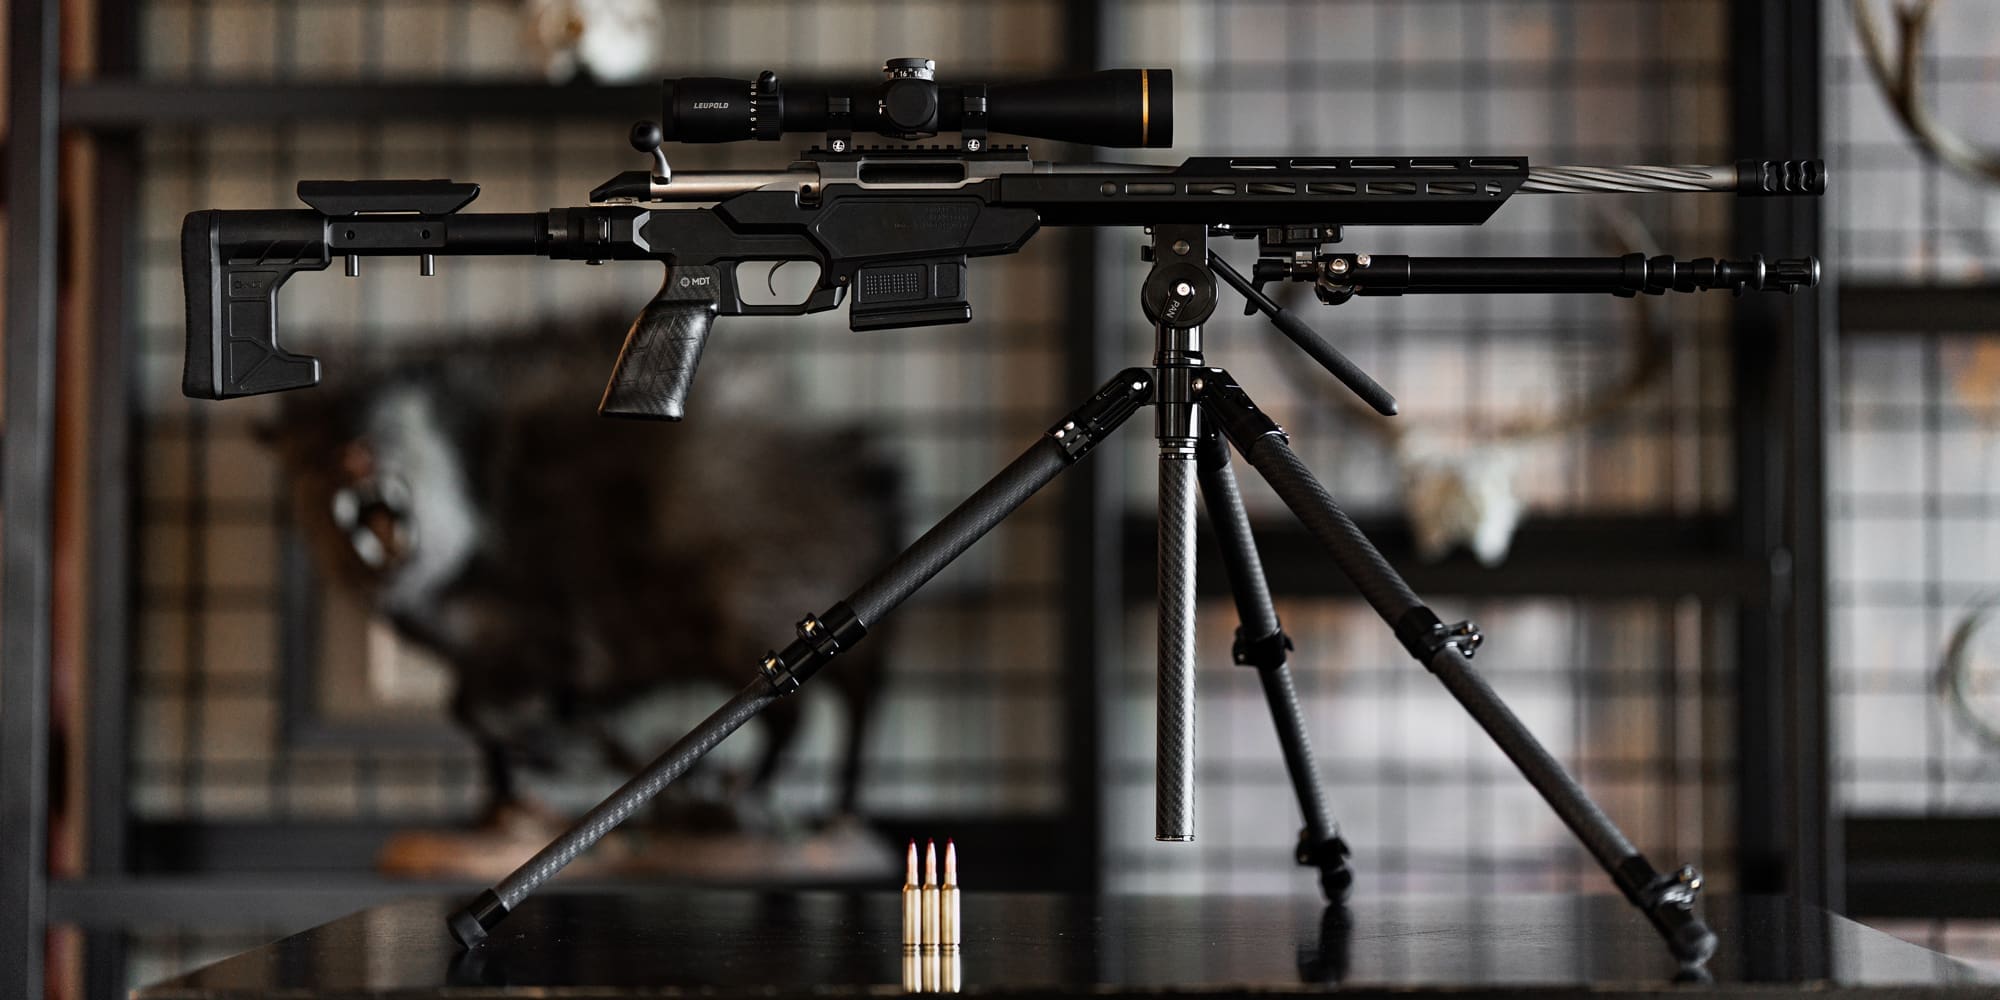
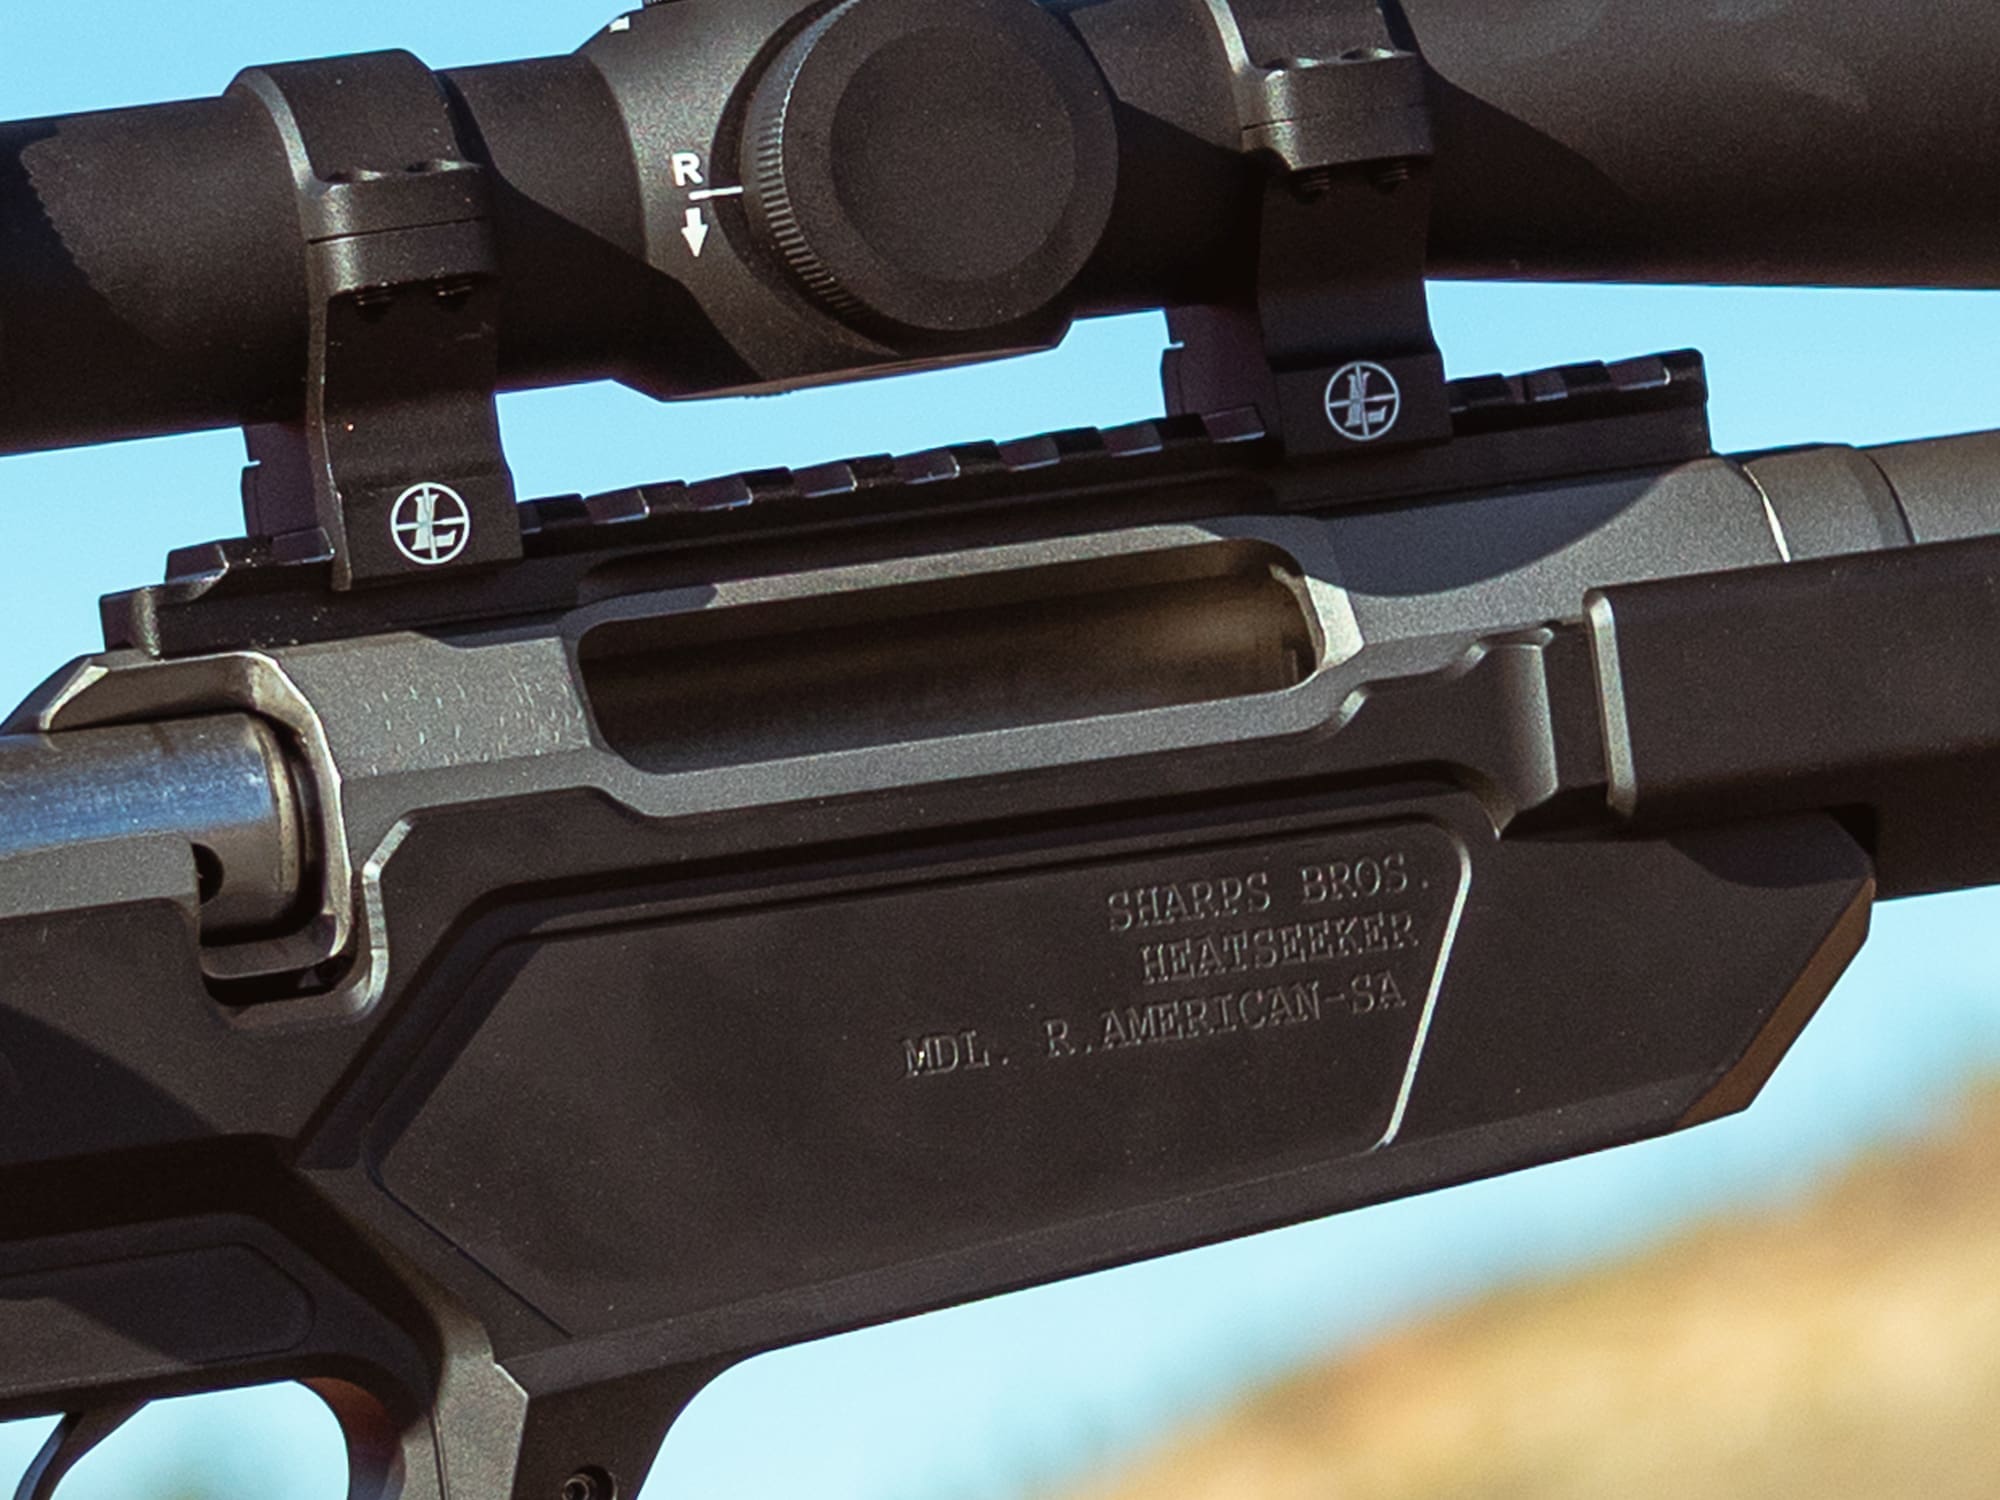
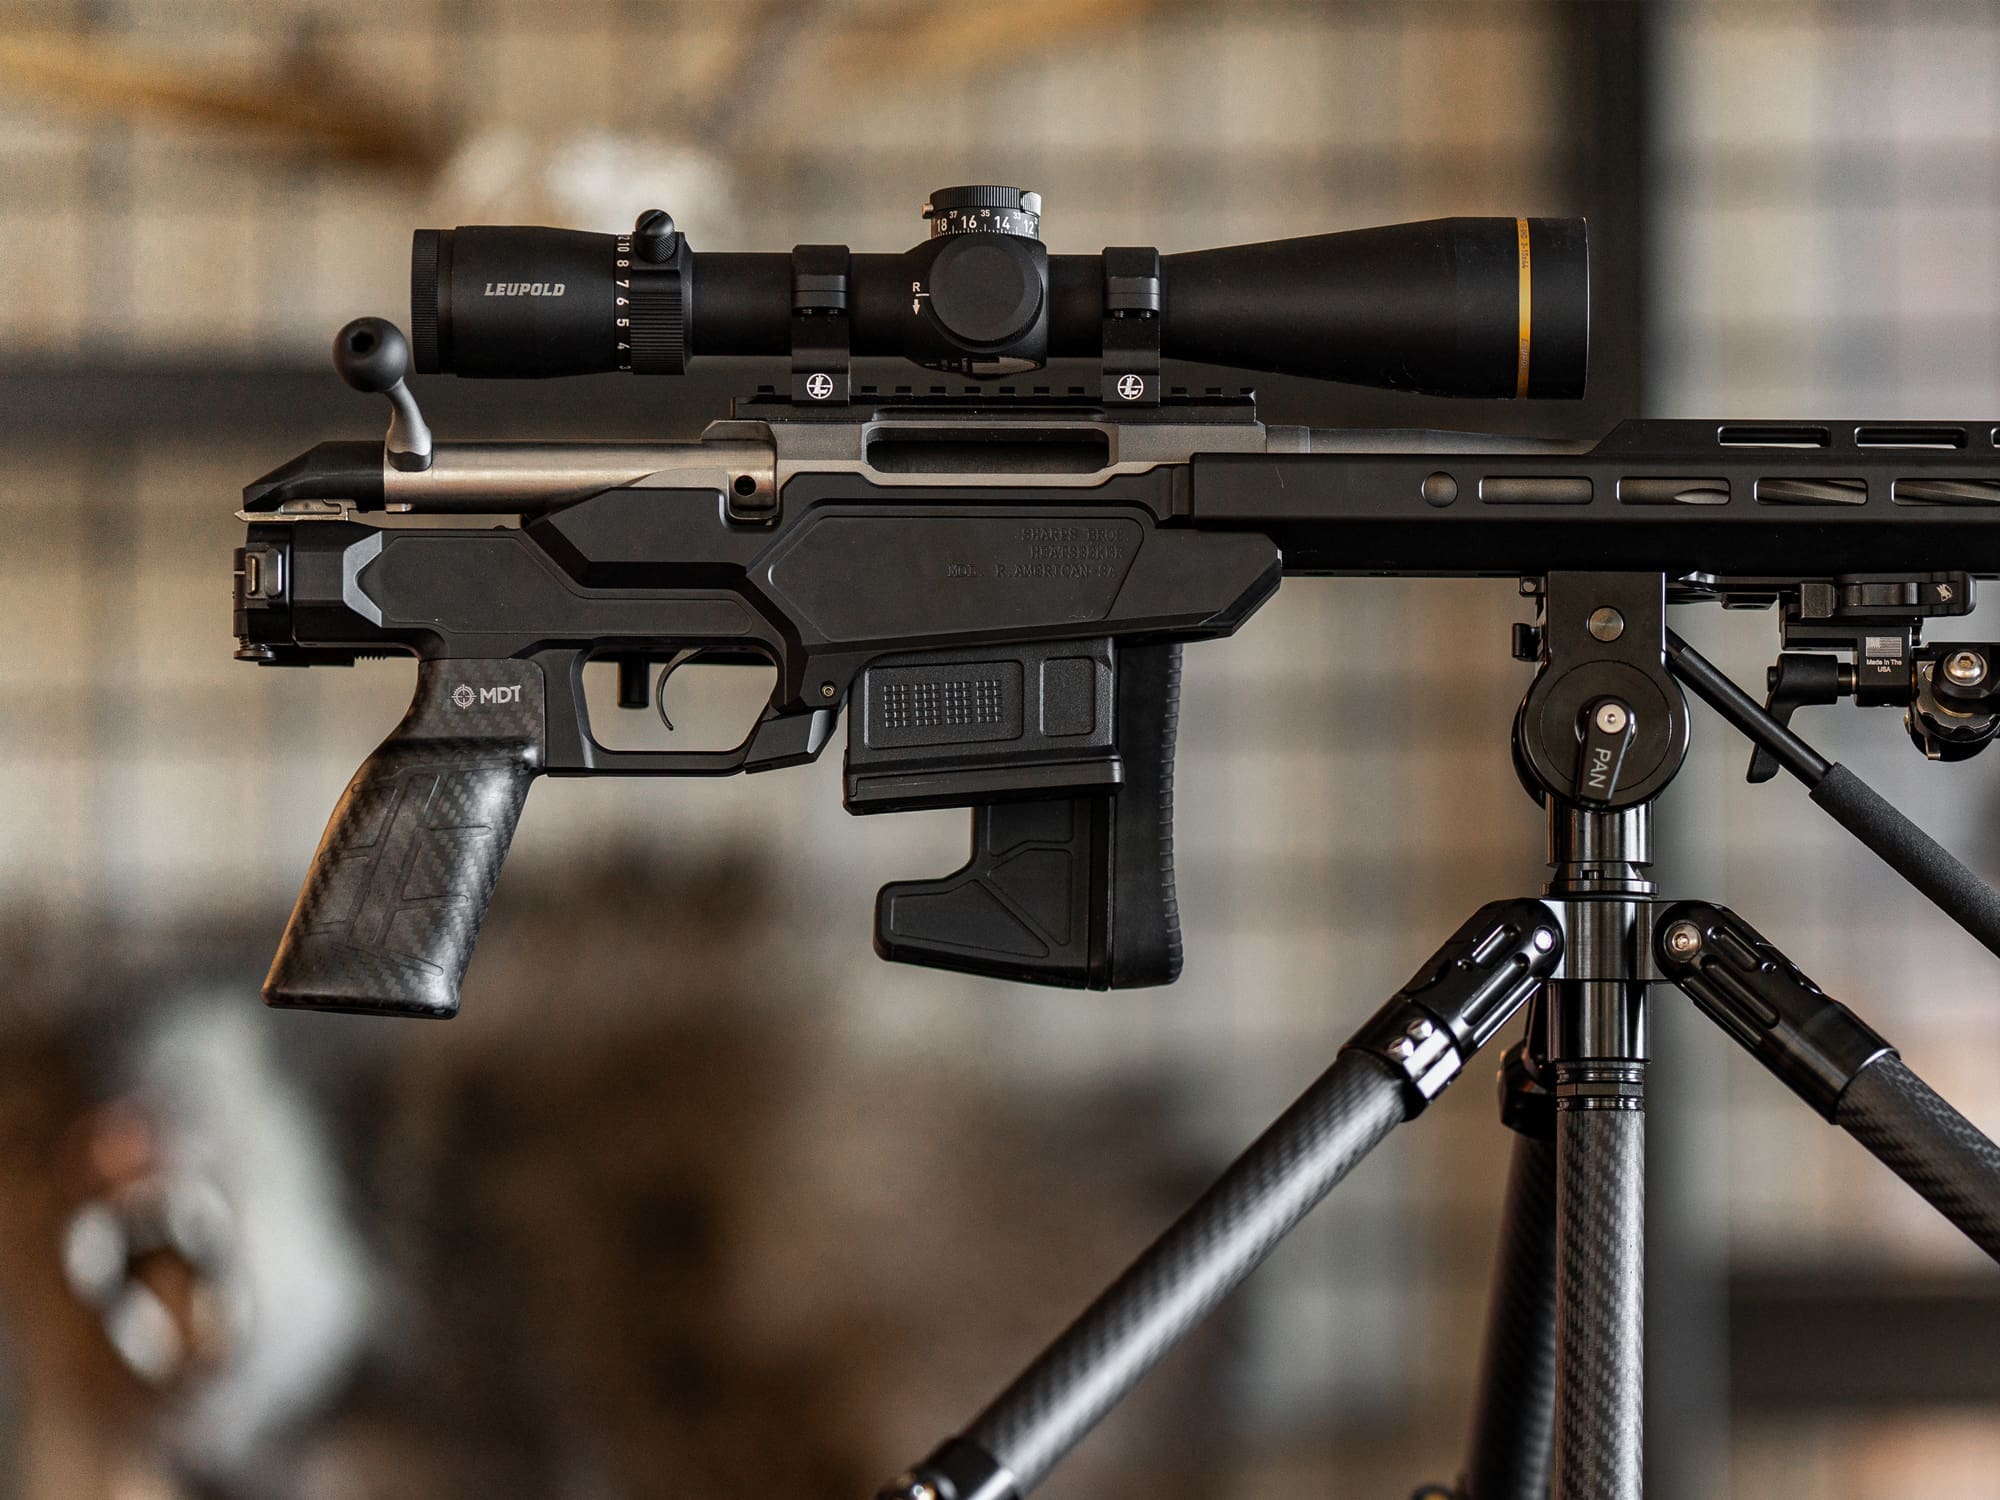
I looked all over the place, into the deepest corners of the internet, for the perfect chassis for the Ruger. I was pleasantly surprised to find plenty of options from major sources, but sometimes the obvious choice just isn't quite as fun. After hours of reading niche forums, a pattern emerged. A name that popped up over and over at the bottom of each thread as an excellent, affordable option: Sharps Bros.
So, I went to Sharps Bros. I reached out to the owner, John Sharps (who may or may not have brothers), with some questions. Within 20 minutes, I had a very thorough response and some very clear recommendations for his products and others. He's a big fan of the Ruger American line, and he was so extremely helpful that it made the choice a no-brainer. The chassis he designed is called the Heatseeker. How cool is that?
A few days later, I had a wicked-looking little chassis platform in my hands. Folks around the office commented on its quality from the moment I opened the box. The stock swap process was very straightforward, and all of a sudden, I was looking at a very different rifle. Easy M-Lok and QD attachment points, beautiful machine lines, and a very solid feel. It is slightly heavier than the original stock, but it opens up a lot of room for customization. On such a lightweight rifle, a little extra heft makes it shoot easier, anyway.
Trigger
The next stage of the build was finding a trigger. There was really only one option, but it was a good one. Timney is the only company I could find that made a trigger for the American/Gen 2 rifles at the time. That seems crazy, given this rifle's popularity, but it made the choice easy. The factory trigger on the Ruger leaves a little to be desired, but that's standard practice for reasons such as, well, safety. I would have been just fine with it forever, but my preference is a little lighter and sans blade safety mechanism.
The Timney, as they are on the 25 other rifles in this building, is money. It's set at 2.5 lb and really makes a difference at the moment of break. That's one of the biggest upgrades in this list, and if you were looking for somewhere to start with any rifle, that would be my suggestion.
Furniture
This build-out phase took a fortunate, yet slightly different turn. There are infinite ways to outfit a chassis rifle, and it just so happens that my good pal Brody had some leftovers from an experiment that he did with a much more expensive action/barrel/chassis combo. I would have likely opted for the good old Magpul MOE grip and buttstock, but the hand-me-down MDT Carbon Pistol Grip and Composite Carbine Buttstock were too good to pass up. The cost difference isn't huge, but they look great, and I really enjoy the fat grip. A composite version of this grip is available for $29.99.
I'm a big guy shooting a small rifle, so this makes it not feel like a toy. The Composite Carbine Buttstock is lightweight, adjustable in length of pull and comb height, and it was a breeze to install.
Folding Mechanism
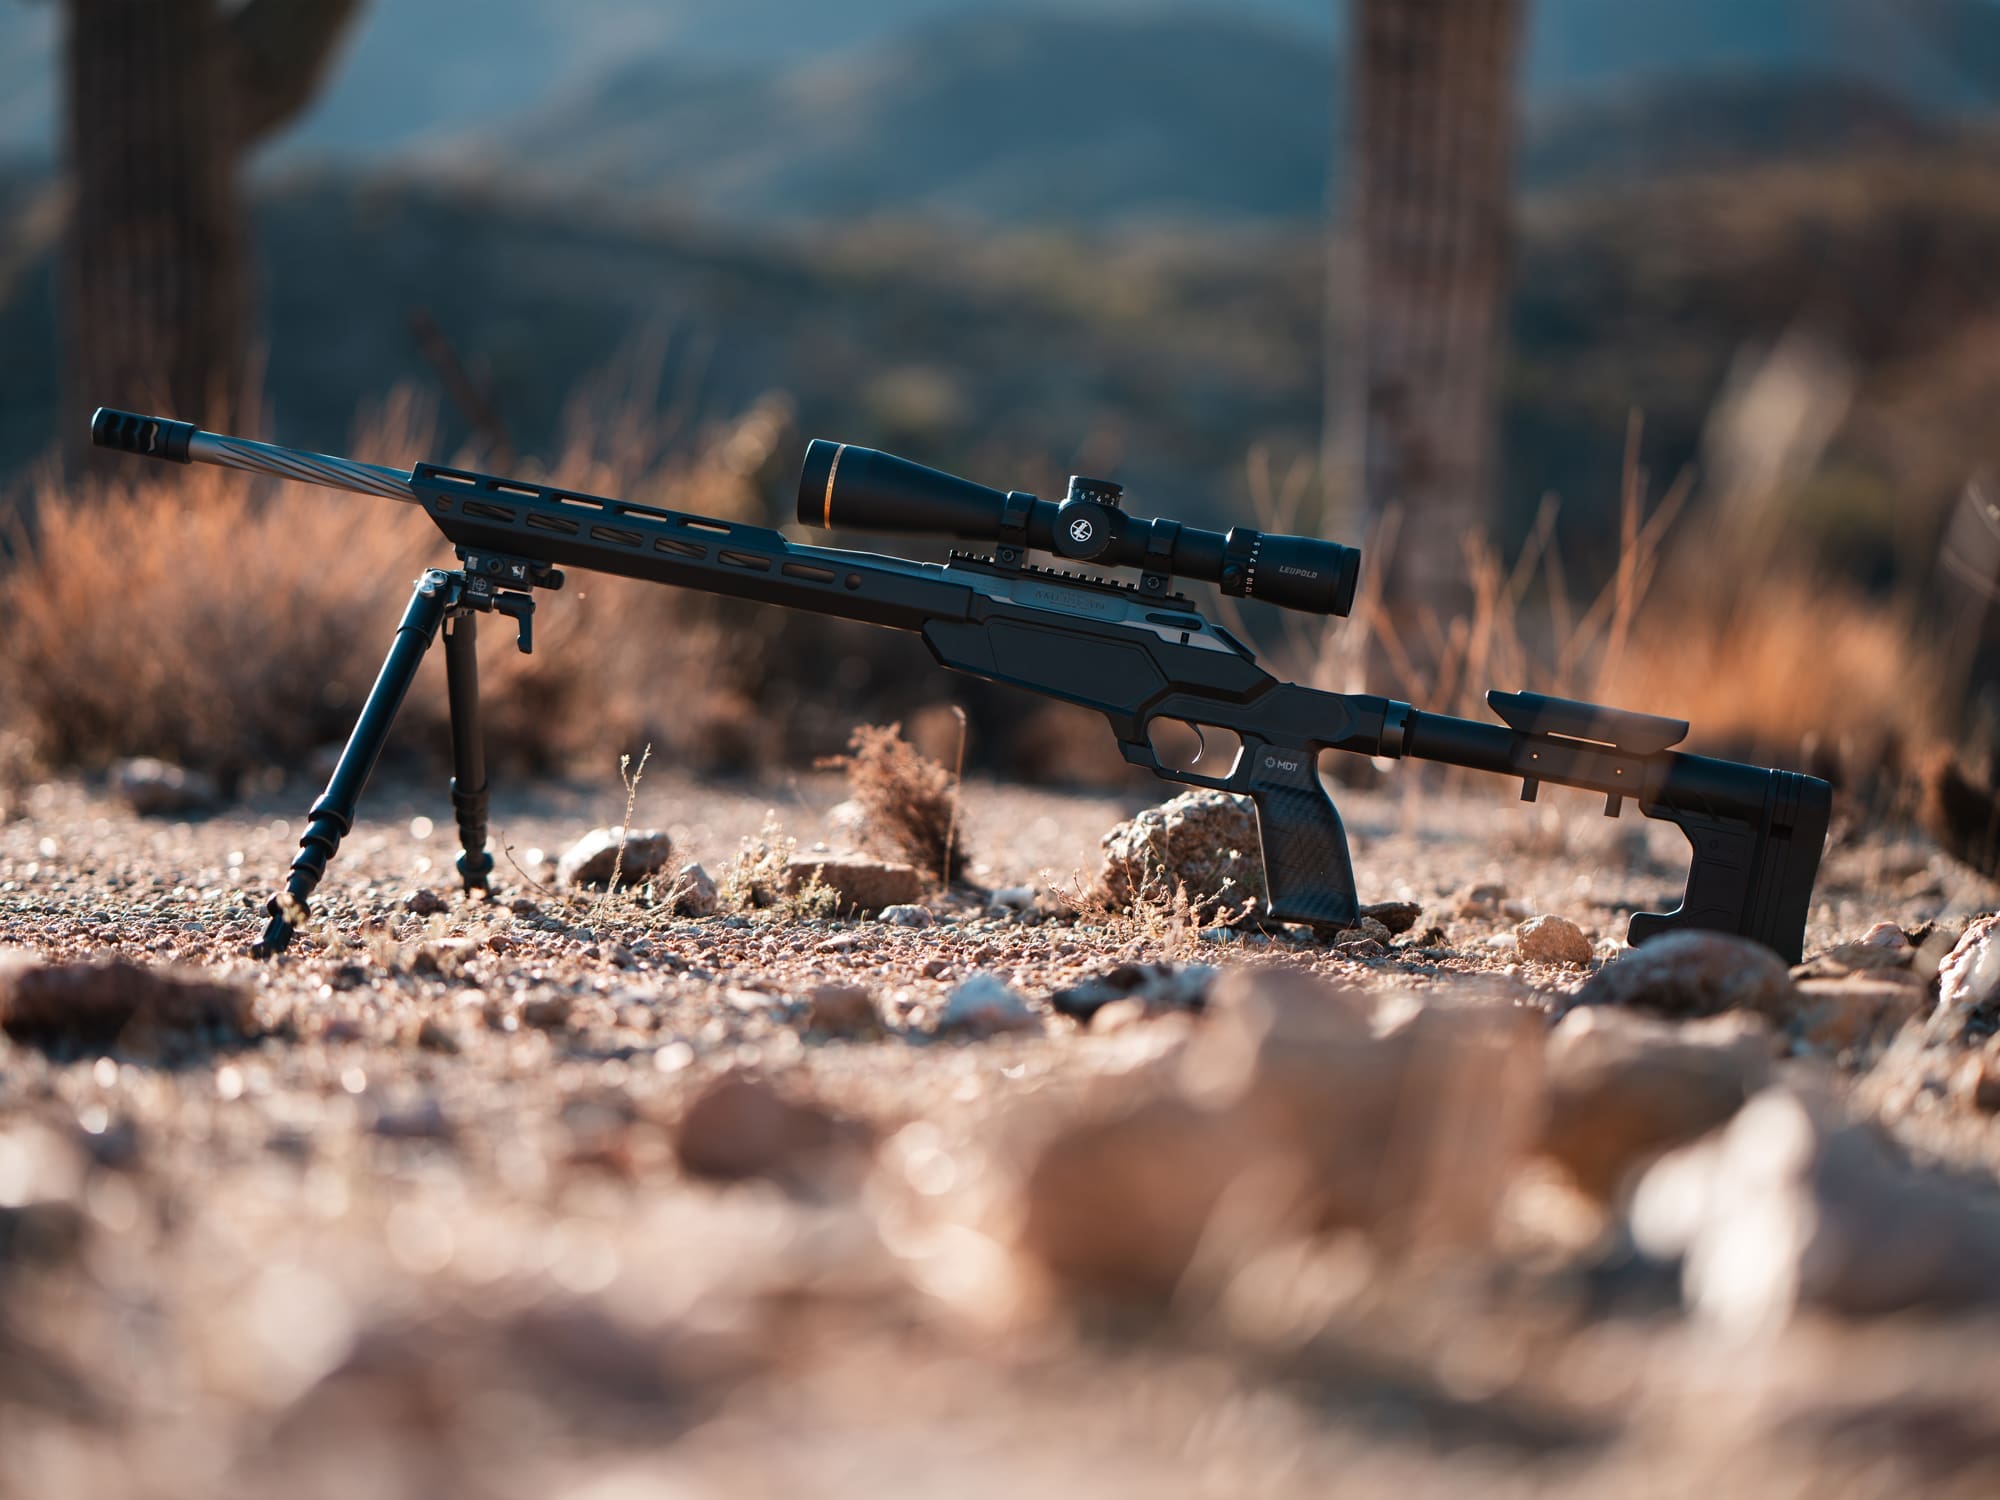
I have wanted a folding stock since the first moment I knew they existed. However, most of the popular ones were just a bit outside the scope of this "budget" project ($350+). After some research and some more help from Mr. Sharps, I ordered a Sidewinder unit from Matador Arms. Instead of a folding stock, it's a folding joint that goes between the chassis and buttstock. To some, this may be an age-old concept, but to others, it might be a hot new idea. Again, this was very easy to install and align, and the results are dramatic. This 1,000-yard-capable rifle with a 20" barrel now fits in a 36" case with several inches on each end. That's huge. It will now fit inside my 4500 cu/in pack.
One small note after a few months: My chassis features a classic buffer tube interface. Mr. Sharps initially recommended a 1913-style (Picatinny) interface version of the Heatseeker, and if I could go back, I would almost certainly opt for that. The buffer tube adapter has slightly more play in it than I'd like. These 1913-style stocks are less common and therefore more expensive, but I think the extra few bucks would be worth it for a really solid connection point. Again, it didn't quite meet the "budget" requirement, but in real life, I'd be willing to up the budget for it. Also, the Matador Sidewinder is now unavailable everywhere.
Muzzle Brake
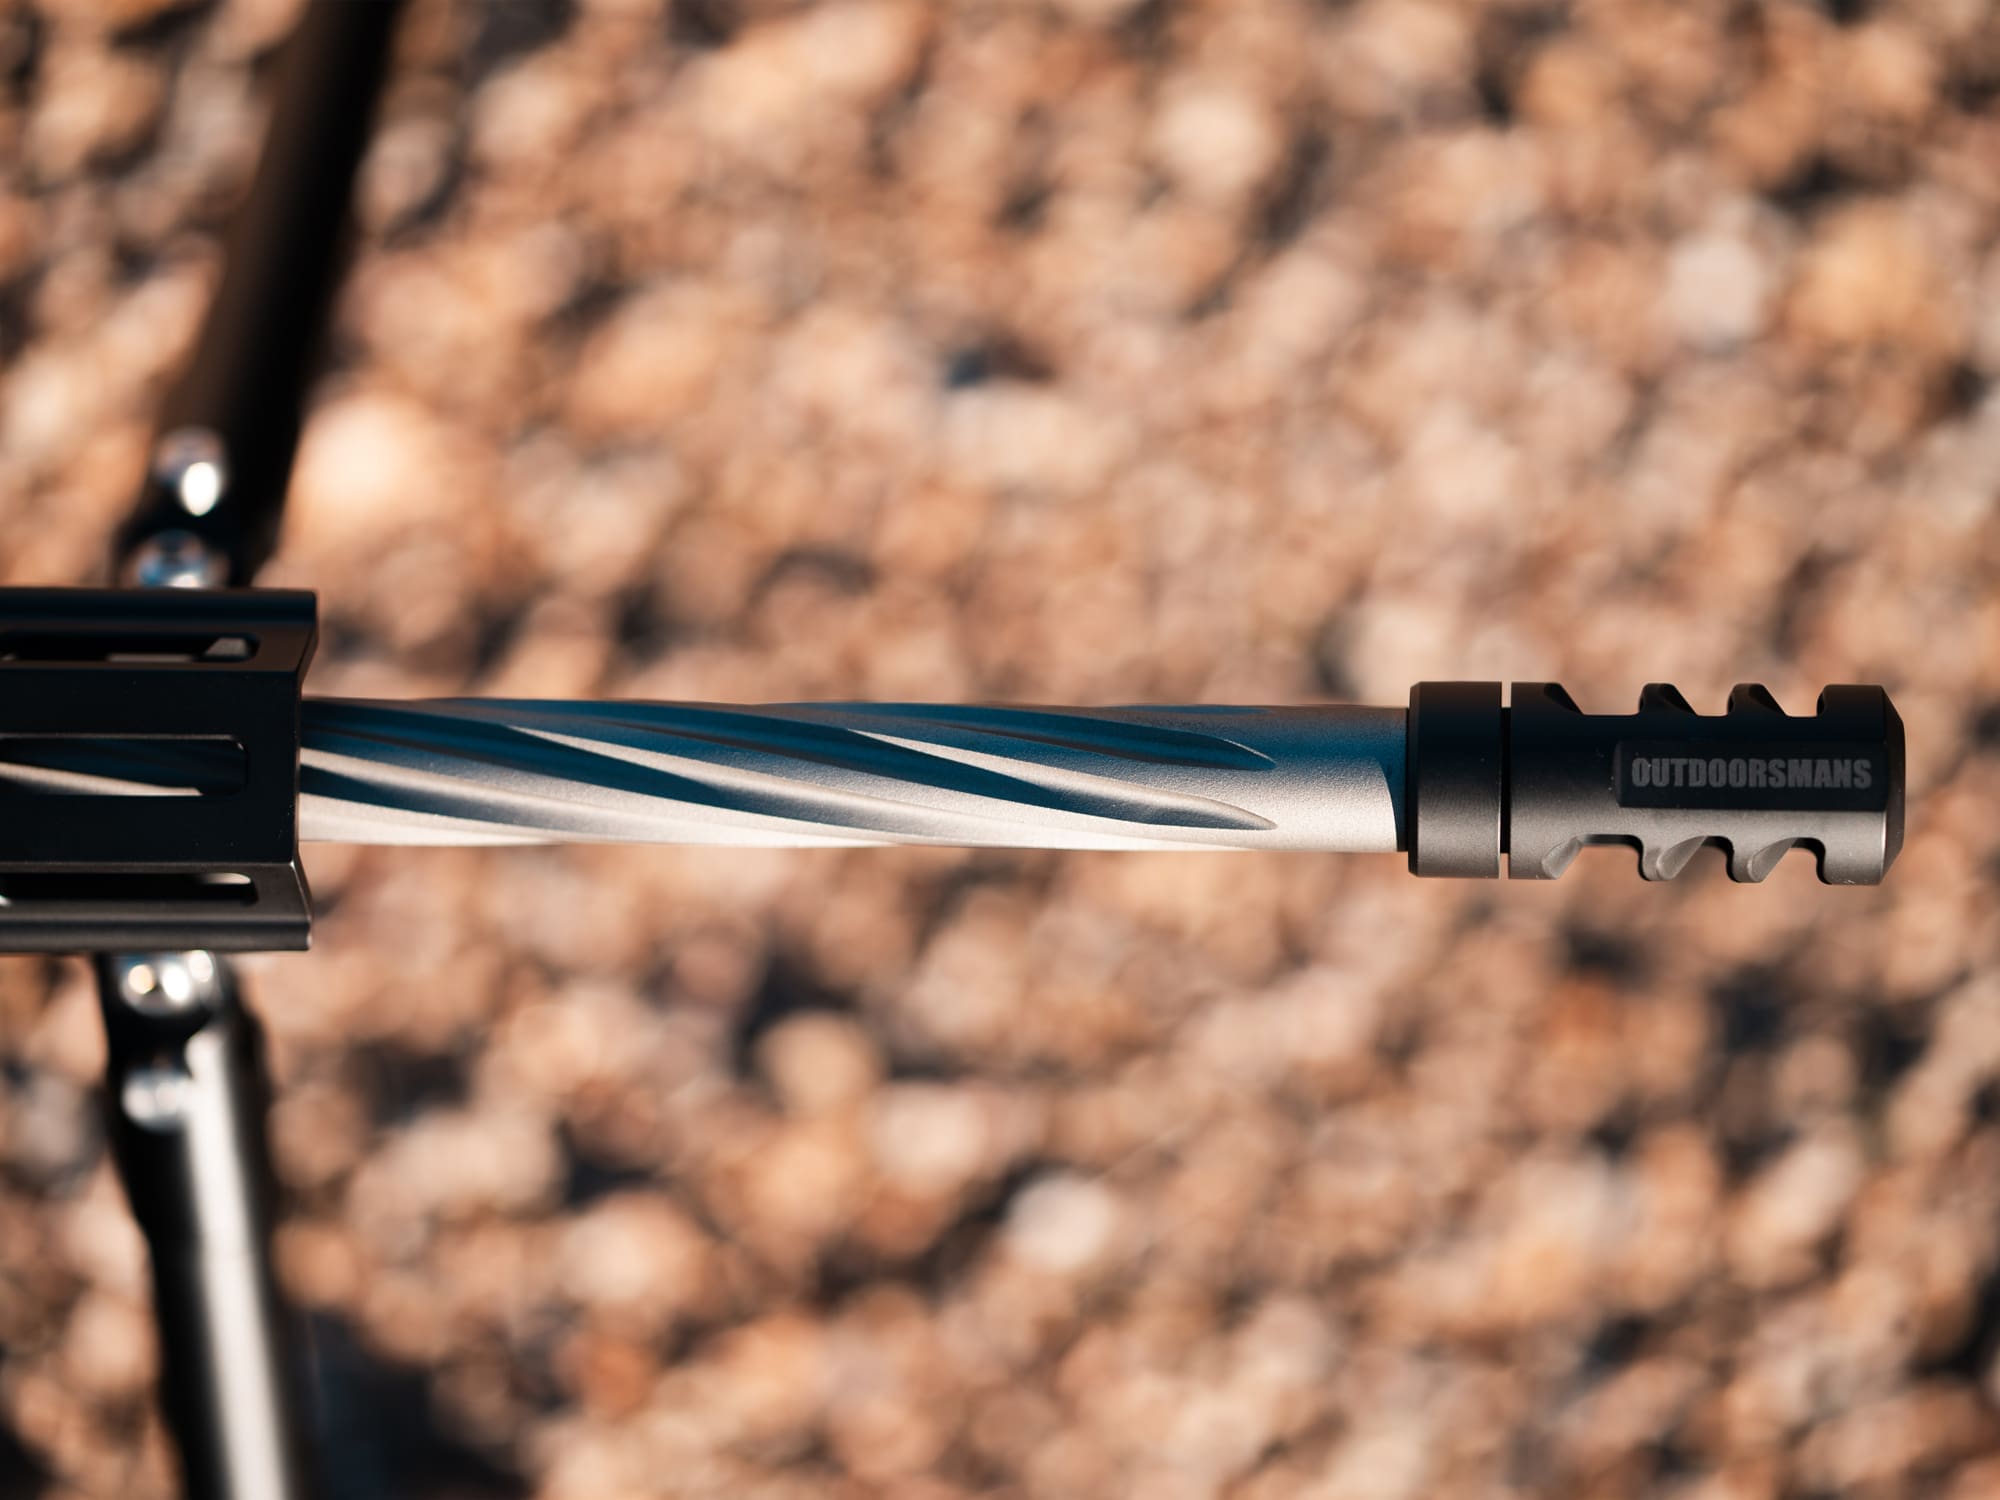
The factory muzzle brake on the American Gen 2 is excellent. The best thing about it is that it comes standard! There are many rifles in the $1200-1500 range that do not offer that. This also means that it's threaded for a suppressor. That doesn't fall within the budget constraints of this project, but it's something I plan to look into ASAP.
Although the factory brake is great, especially for 6 Creedmoor, I'm fortunate to work at Outdoorsmans, and we carry one of the best self-installed brakes around. It was impossible to resist adding the Titanium Self-Timing Brake from Salmon River Solutions. Ken Trapp and his company make incredible products, and it likely won't be the last SRS accessory on this rifle.
Bipod? Bipod.
I've gone back and forth on this a bit, and I've borrowed a few bipods to test. This adds a good chunk of change to the final bill, but after testing both the Hatch Outwest Gen 2 and the Gunwerks Elevate 2.0, I'm leaning toward the Hatch. There is a case to be made for each, and they cost about the same, but the extended height of the Hatch is a big plus for me. The carbon Gunwerks is lighter and slightly faster to deploy, but Coues deer hunting often involves tall grass, making prone shots difficult or impossible.
I've added an Arca-Swiss+Picatinny Rail from Outdoorsmans so I can easily mount/dismount the bipod and shoot from a tripod with it still attached.
In Practice
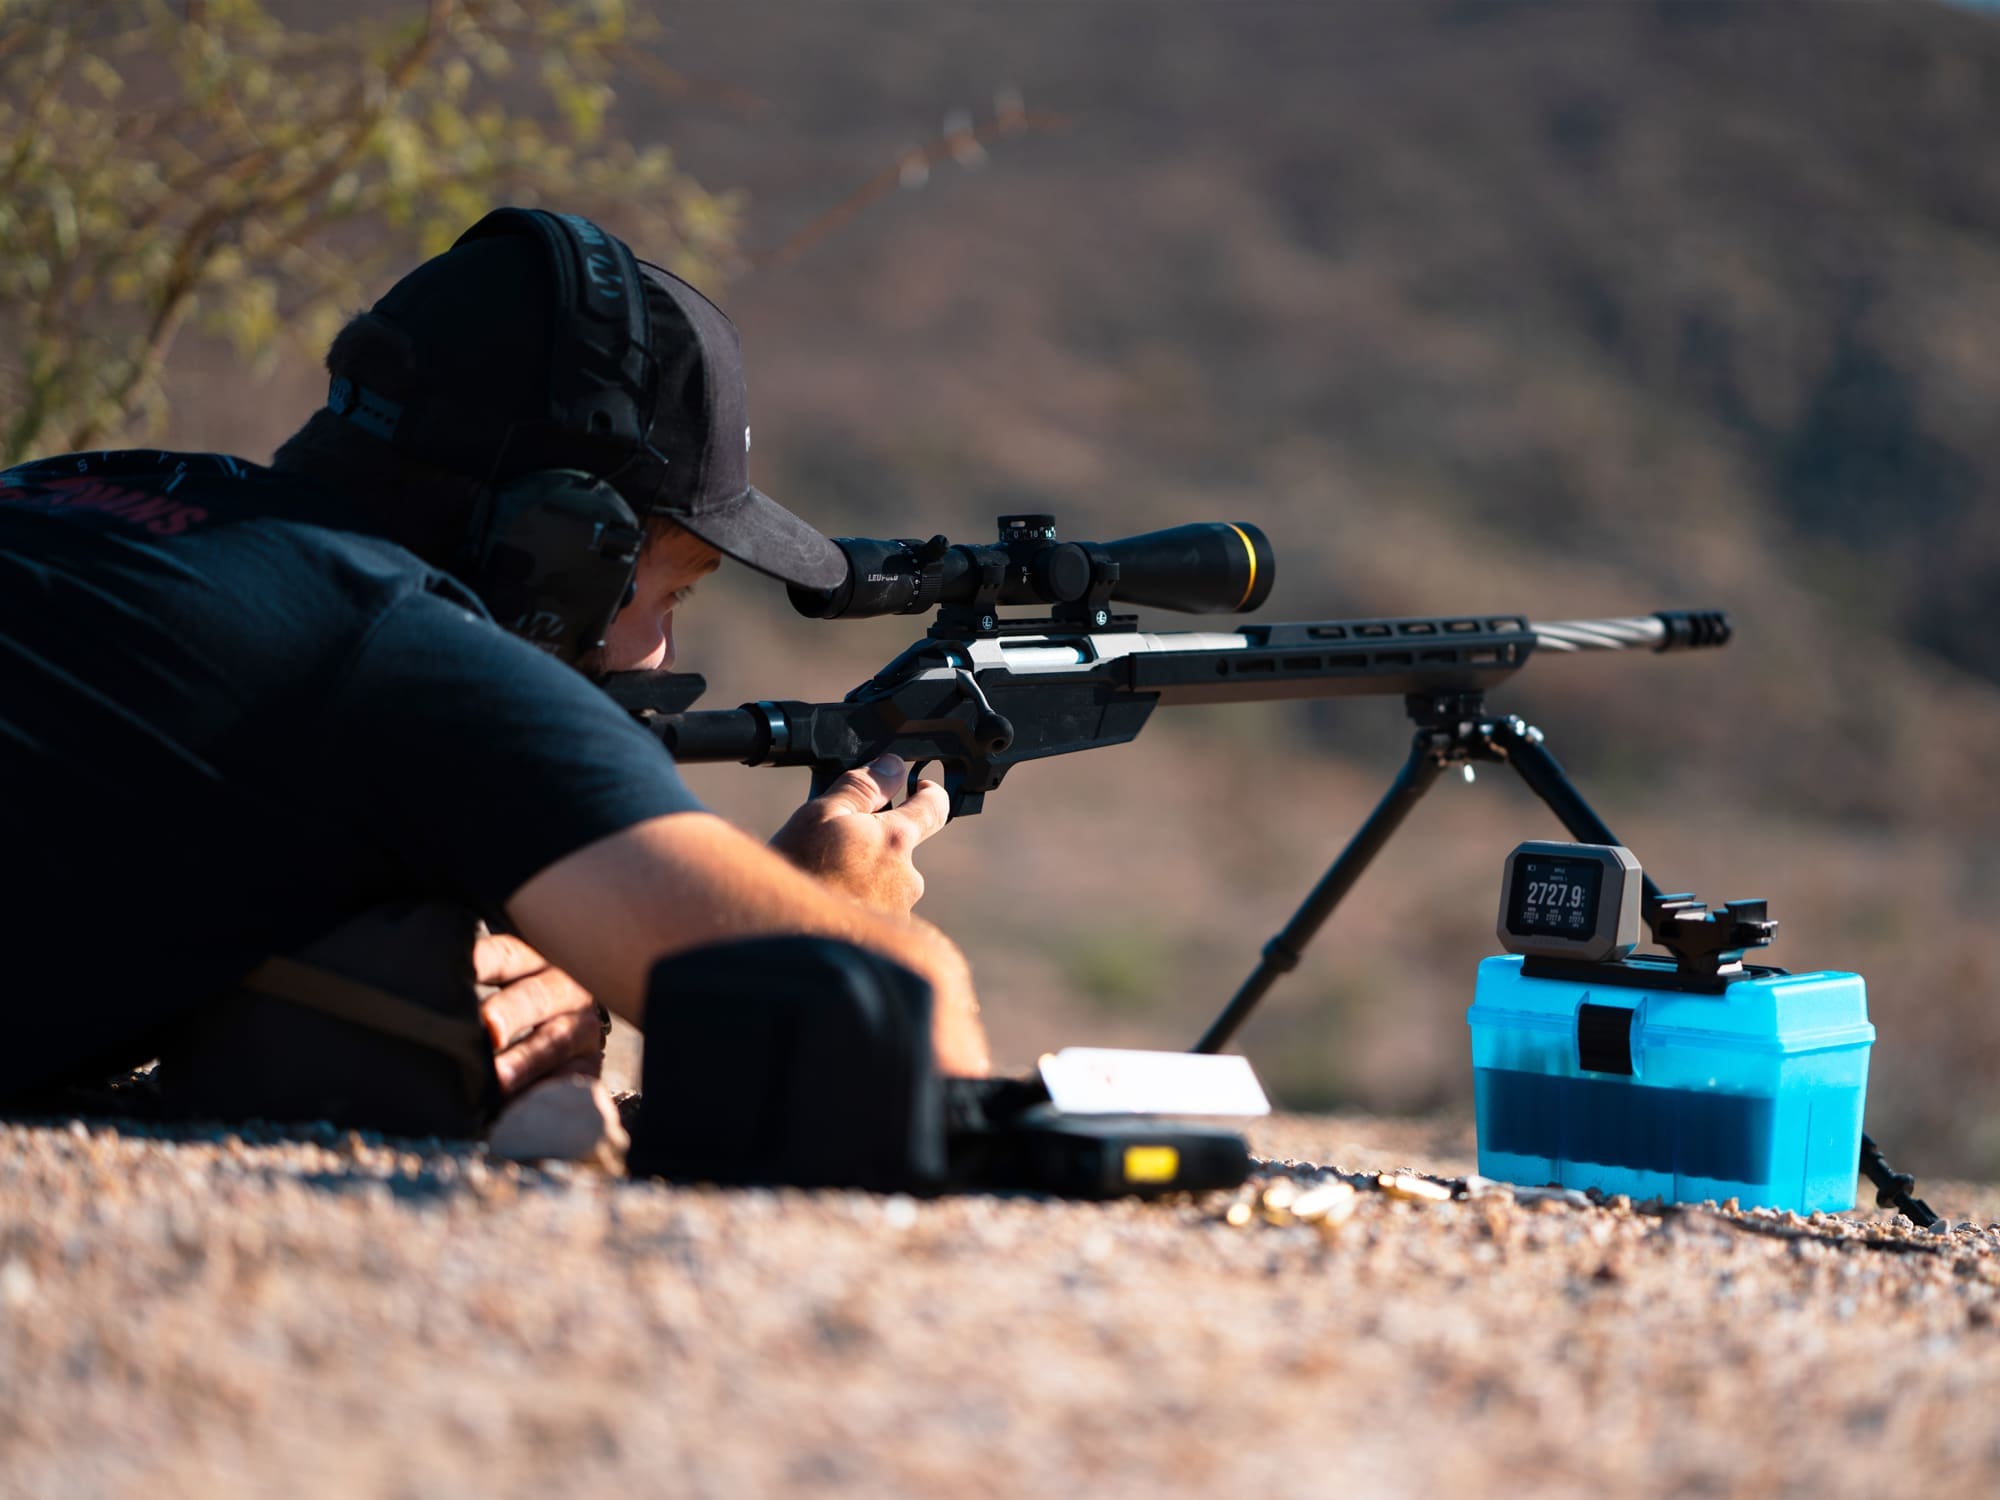
So, I now have an all-new, mean-looking little deer gun, but what's it like to shoot? The short answer is that it's sublime. The long answer is that it was already so good that it's hard to compare. The main difference is how it feels like it fits me perfectly. Out of the box, as I mentioned in part one, the Ruger felt great, but it also felt a little small. It felt a little like a NERF gun for someone my size (6'3, 225). Now, with a little more length of pull, a nice, big grip, and a perfect trigger, it's right in the Goldilocks zone.
Is it more accurate? It's difficult to say. It was very accurate before, and it still is. A few mornings ago, we were shooting some steel targets at 650 and 800 yards, and everyone who shot it had a first-round impact on both. When I shot, it sounded like Bang! …Ding! "Shoot it again!" Bang! …Ding! Brody got so excited that he made me do it five times in a row. I watched each bullet leave the muzzle, fly true, and impact the plate. It was the most fun I've ever had with a gun in my hands.
I believe this project was a complete success. I am so thrilled with this little Ruger that I would invite you all to come shoot it if I could afford it. There's a lot of value and a lot less time involved in purchasing a pre-built custom rifle, but for those of us who have to think long and hard about spending $2000, it's nice to know that it can be paid for in research and elbow grease. Thank you to all the great people who helped with this project. It has been one of the most fun things I've done in my tenure here at Western Hunter.
The Total
The original budget target was $2,500, and the total cost of the rifle with a few hand-me-down premium components was $2,951. That number doesn't sound "cheap," but I was not willing to compromise on an excellent optic. Also, considering the idea that the modifications could be done over time, it's downright reasonable.
If you start with a great platform like the American Gen 2, you have a great gun to shoot while you gather and add components as you need. The cost could also easily be dropped by a few hundred bucks with some similar, lower-cost furniture and the absence of a folder or upgraded brake if those are not priorities for you.
Total Cost: $2,951
These prices were accurate at the time of writing, but several have since increased.
VX-5HD Gen 2 3-15x44: $1,099
Sharps Bros Heatseeker Chassis: $499
MDT Composite Carbine Stock: $140
Matador Arms Sidewinder Folder: $120
Timney Trigger: $129
Outdoorsmans/Salmon River Solutions Self-Timing Muzzle Brake: $225