NOTICE: Certain links on this post may earn a commission for Western Hunter Magazine from Amazon or our other affiliate partners when you make a purchase. Thank you for your support.
Tips for Picking a Hunting Spot
Simply showing up for the hunt rarely works out in your favor
I often struggle to come up with ideas for topics to write about. But every once in a while, the light bulb comes on when I hunt with other people who aren’t doing some things I dismissed as common sense. This article is about an oversight I have observed others making and one that I feel like is the foundation of a hunt out West.
I enjoy hunting with other people. Normally, this means I’m filming them. Being a confident hunter, sometimes it’s hard for me to “go with the flow” on someone else’s hunt, as I’m constantly feeling the urge to share my ideas on how to “help”. But, I’ll never learn anything with that mindset and I’m sure it’s annoying to the hunter, so I do my best to go with the flow and try and pick up on tactics they use to add to my arsenal.
I’ve learned that there are a lot of different ways to go about any given hunt and find success. However, the #1 mistake I’ve witnessed other hunters making is spending too much time hunting for a “good spot” instead of actually hunting for an animal.
Everyone seems to have good mapping software on their phone and purchased the current Forest Service or BLM Ranger District map. This is all good; I wouldn’t go on a hunt without these kinds of maps. Still, this isn’t enough in my opinion.
Usually, everyone has a general idea of where they want to begin their hunt based off of the maps they’ve looked at. Day one, we might go out to the spot and find that there isn’t as good of a view as they had hoped. Long story short, we spend a good portion of their hunt locating some prime areas and are then left with only the last portion of the hunt to focus on actually trying to kill an animal. This makes it a lot harder than it needs to be. I like to hit the ground running on hunts. It isn’t hard to do, even when hunting in a completely new area.
When I show up to a new area, I already know many of the best vantage points in the unit before I ever set foot there. This starts at home, well prior to the hunt. Here are the steps I take in order to locate what I would deem as the “best spots”.
Step 1
Since I mostly hunt on public land, my first consideration is other hunters that I want to avoid. Knowing that deer and elk will also be trying to avoid them, I look for the places I feel that the game will likely be hiding out during the season.
My first task is locating the roads and trails that are open to motor vehicle traffic during my hunt dates. Anyone who has spent much time looking at map software or forest maps is aware that in many areas, it shows roads all over the place, but many of them are old logging roads that are now closed.
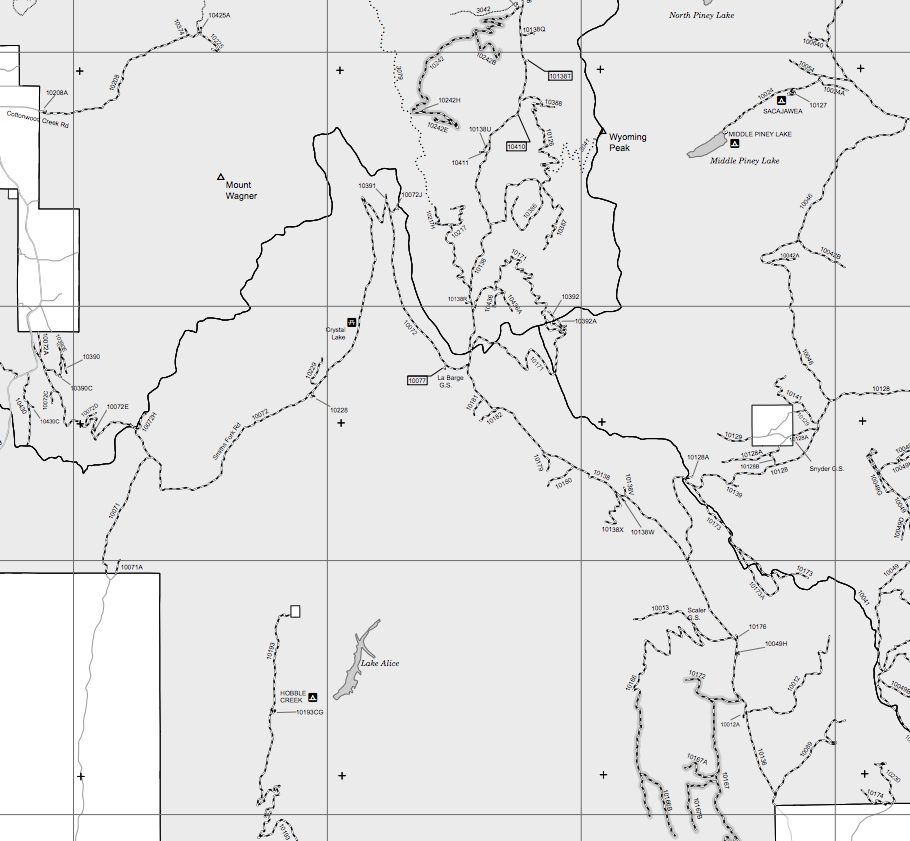
The best way to figure out what’s open and what’s closed is by downloading the current Motor Vehicle Use Map (MVUM). At first glance, this map appears less useful than others because they usually don’t have any topo lines. These maps are very basic, only showing major landmarks such as prominent peaks, campgrounds, trailheads, and roads/trails that are open to motor vehicles. Some mapping software has overlay features for these MVUMs, but I’ve found that they aren’t very accurate compared to maps I download directly off the USFS website.
So, that’s where I start - with the current MVUM for the district I’ll be hunting and then locating areas that either have no roads, or no roads that will be open to motor vehicles during my hunt. This helps put distance between me and other hunters.
Step 2
Once I identify areas that you can’t drive a motor vehicle to, I then locate these areas on mapping software that shows high-resolution aerial images to determine what the vegetation and topography is like. I’ve been using a product called Basemap and have been really happy with it. You can install the Basemap app on your phone and login online to view it on your desktop computer. The reason I like to use Basemap for this step is because it allows me to toggle between topo and aerial, all while viewing land ownership.

For me, it’s really beneficial to do this phase of locating a new area on my desktop, as I can get a much better “lay-of-the-land” visual with the bigger screen size. I’ll use the app on my phone later on, but when I’m at home, it’s a no-brainer to use it on my computer.
First, I look at the topo layer with contour lines to identify potential areas offering vantage points. Obviously, if the country is fairly mild or flat, it’s going to be less efficient to glass than steeper terrain that offers angles conducive to glassing.
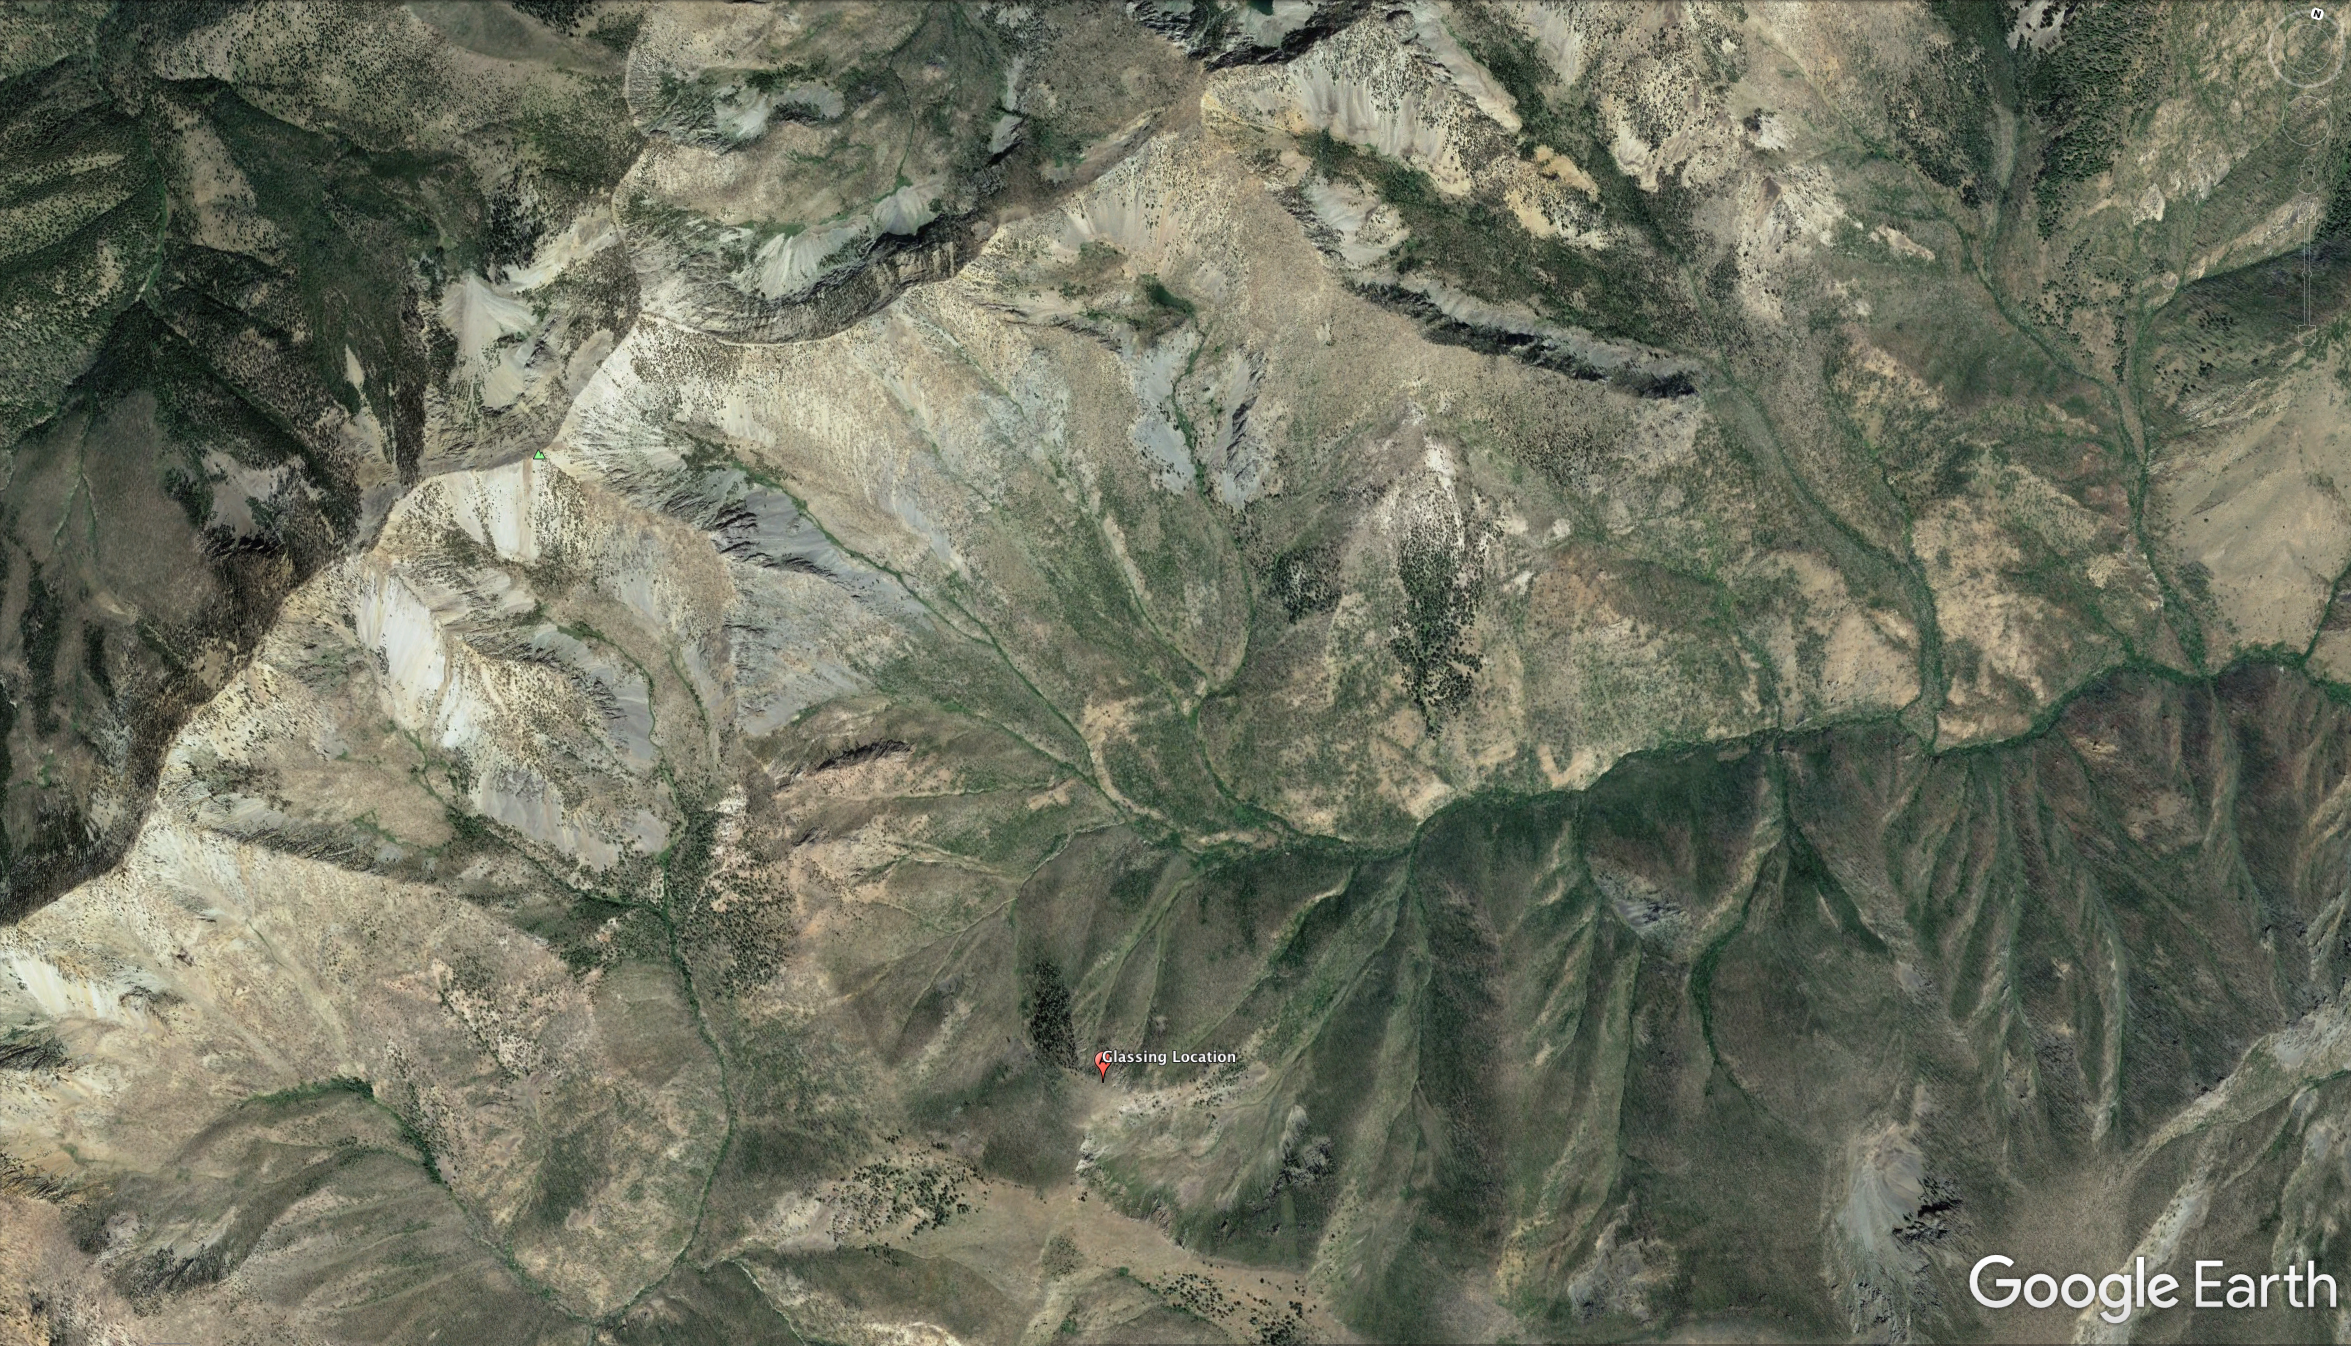
Second, once I determine some areas with enough contours for glassing, I’ll toggle from topo to aerial maps to look at the vegetation. This is as important as the topography with regard to glassing. The best vantage point in an area that is heavily timbered is not very effective, so I look for areas that have enough openings to spot game.
The type of openings in the timber are important to consider. Some areas will have lots of openings made of rock outcroppings and cliffs with very little forage for deer and elk. So, unless you’re looking for goats, you want to be looking for open areas that appear to be grassy with good forage to attract the animals you’re hoping to find.
Clearcuts and burns are also great areas for glassing. Make sure and verify that the area you’re honing in on is public, which is easy inside Basemap.
Other things to consider include whether or not the terrain lends itself to stalking in close, and if you can access other good vantage points in the same area. Ideally, I like areas that I can hike into and move from one glassing point to another, if needed. I usually don’t like to commit to hiking into a spot if it only offers a single good vantage point. It’s nice to have an accessible plan B in case you don’t see much in the way of game or if there are other hunters, domestic sheep, etc. in your plan A spot.
Step 3
This is the step that I feel gets overlooked by a lot of hunters. After I locate areas with my unit that offer enough topography and suitable terrain for glassing, I then seek out specific glassing points. I want to have a long list of vantage points so that I have plan B, C, D, etc. Up until this point, I’ve viewed everything two-dimensionally, looking straight down on the area. Now I’m ready for a three-dimensional view to really hone in on specific vantage points.
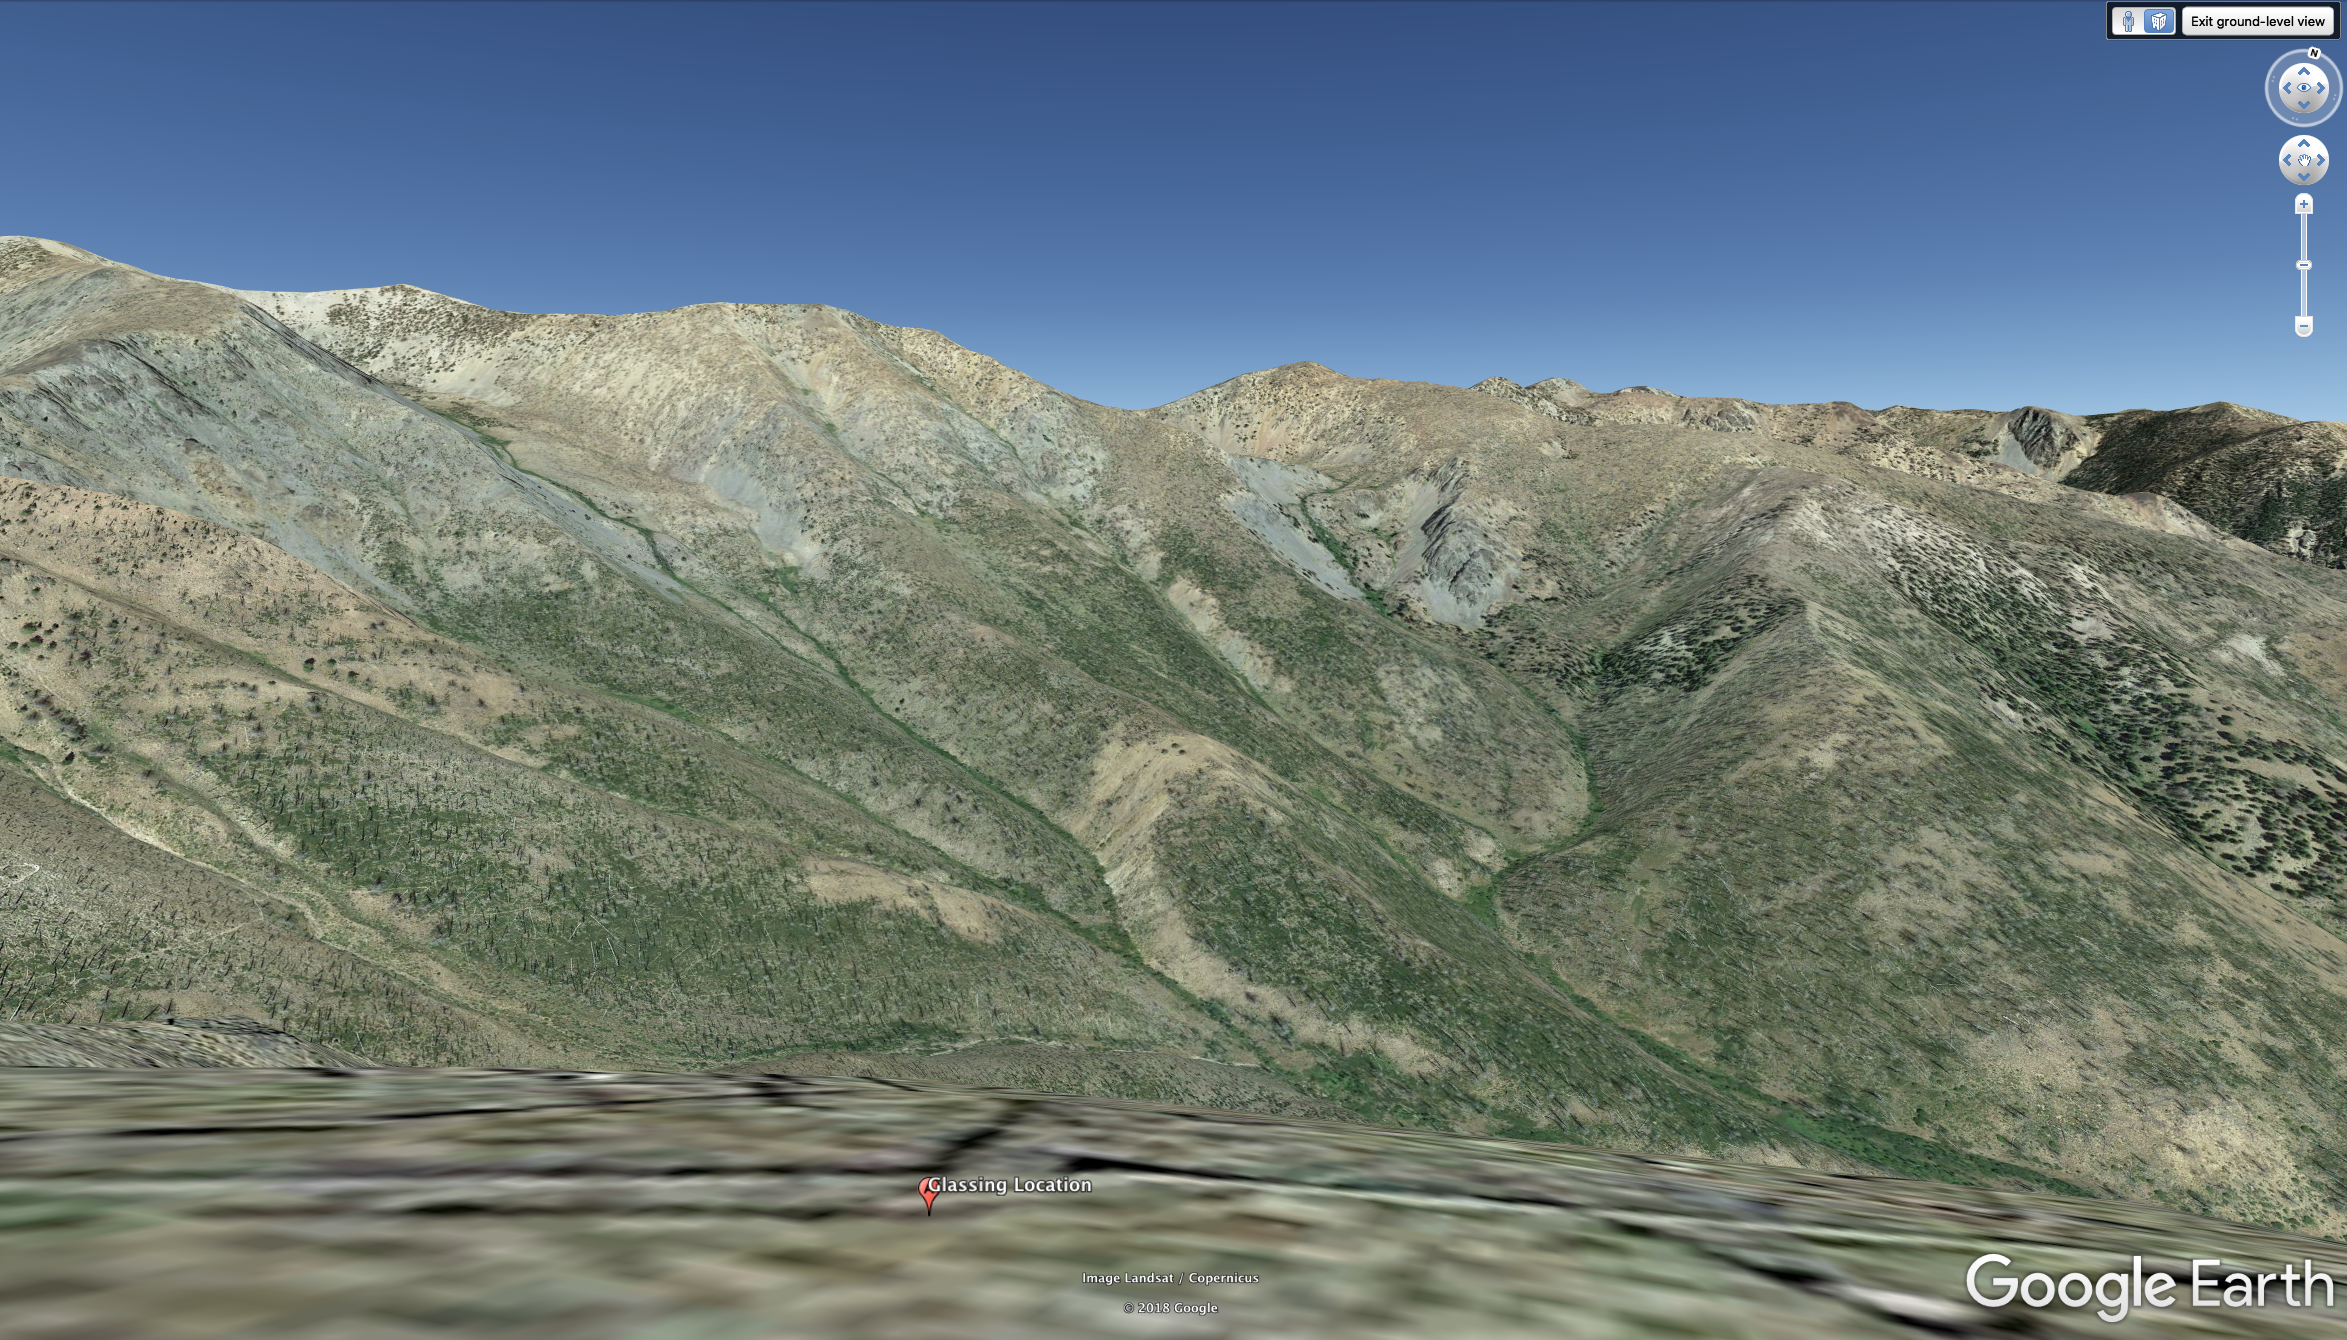
For this step, I turn to Google Earth. Within Google Earth, I’ll zoom in to areas I’ve flagged in previous steps and then toggle the globe to get a 3D view to get a much more accurate idea of what it will look like once I’m actually there on the hunt.
I’ll begin landing my view on ground level and then rotating 360 degrees to see how it looks from an efficiency perspective. I want to locate the peaks and ridges that offer me the largest views of the best-looking type of glassable terrain.
There are lots of great-looking spots that simply don’t have a great place to view it from on the ground, and there are some places that offer insanely large views of terrain that aren’t all that glassable. Finding spots that offer enough contour with the right balance of cover and openings and with a point to view it from takes time.
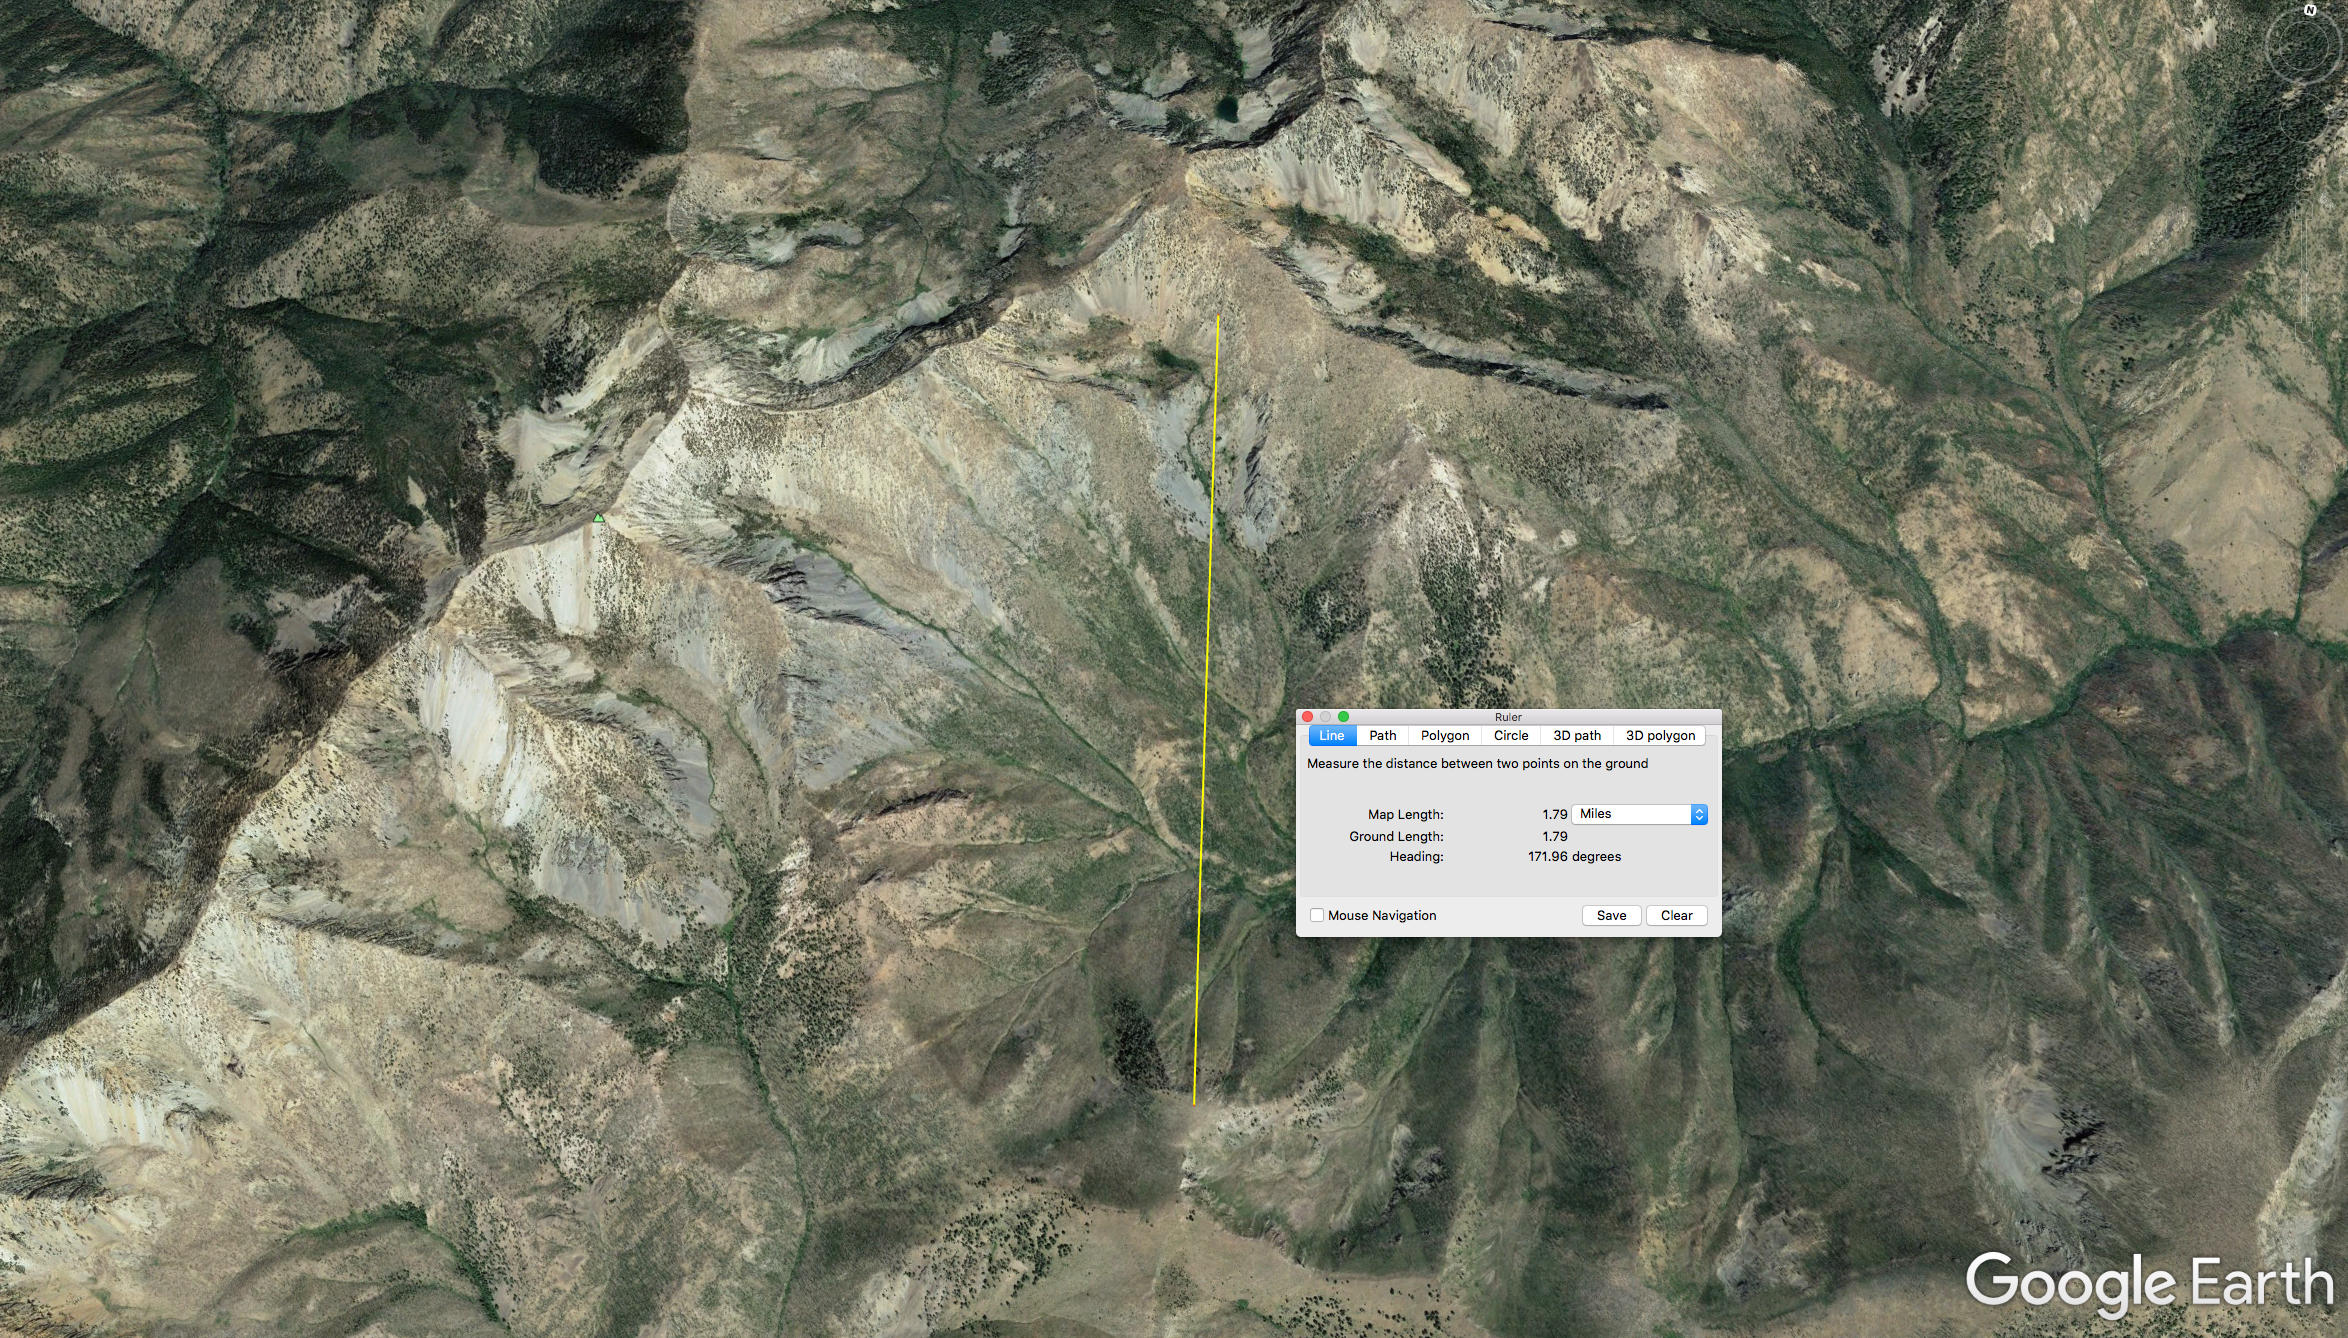
A tool I use a lot when determining premium vantage points is the ruler tool inside Google Earth. This tool allows me to verify the distance from a prospective glassing spot to the opposing hillside I intend on glassing. I’ve learned that generally speaking, two miles is about the max I can effectively spot deer with my 10x42 binos. Ideally, I like to be much closer - in the range of a quarter mile to one mile. I’ve made the mistake of finding spots with huge views only to arrive there on my hunt and realize that much of what I was looking at was outside my effective glassing distance.
Generally, it’s easier to see elk at greater distances than deer, but keep in mind how long it will take you to reach them if you do spot one at three miles or more in rugged terrain. The key is finding that sweet spot that puts you at a safe distance from the animals so they won’t detect you, yet close enough that you can make a stalk that doesn’t take four hours.
Once I do finally start finding these vantage points, I start grading them: 1, 2, 3, 4 and so on. I then plan a possible route to the glassing spot, guess at a possible camp location, and transfer this info onto a map that I’ll take with me on my hunt. By the time my hunt arrives, I have a plan for the closest place I can drive to the vantage point and how to hike onto it.
This way I spend very little time spinning my wheels trying to find “good spots” to hunt. I know that I’m going to be on a great lookout right away. If there are other hunters already there or if I don’t see any animals, I already have plan B and C in the wings, so I can hike from lookout to lookout without wasting valuable hunting time. Ideally, it would be wise to then scout these areas pre-hunt to verify what you have interpreted from maps, but that’s in a perfect world.
You may have picked up by now that I place a lot of value in finding an efficient place from which to glass. This mentality is one I embrace regardless of whether I’m hunting deer or elk. It’s also important to both bow and rifle hunters alike.
I know a lot of archery elk hunters that place little value on vantage points because they can hunt during the rut. I understand the lure of chasing bugles and have had some great days elk hunting the rut when I used my ears way more than my binoculars, but I don’t like to plan elk hunts where my success is at the mercy of the rut. It’s not every day the bulls are talking.
If you have ever watched any episodes of The Western Hunter, you may have noticed that I spend a lot of time glassing on my archery elk hunts during the rut. If you want to see what it looks like when I don’t follow the steps outlined above, tune in this July and check out my Colorado elk hunt. I don’t think my binoculars ever touched my face and I paid the price for not sticking to a proven recipe for much of my elk hunting success.
Final Note
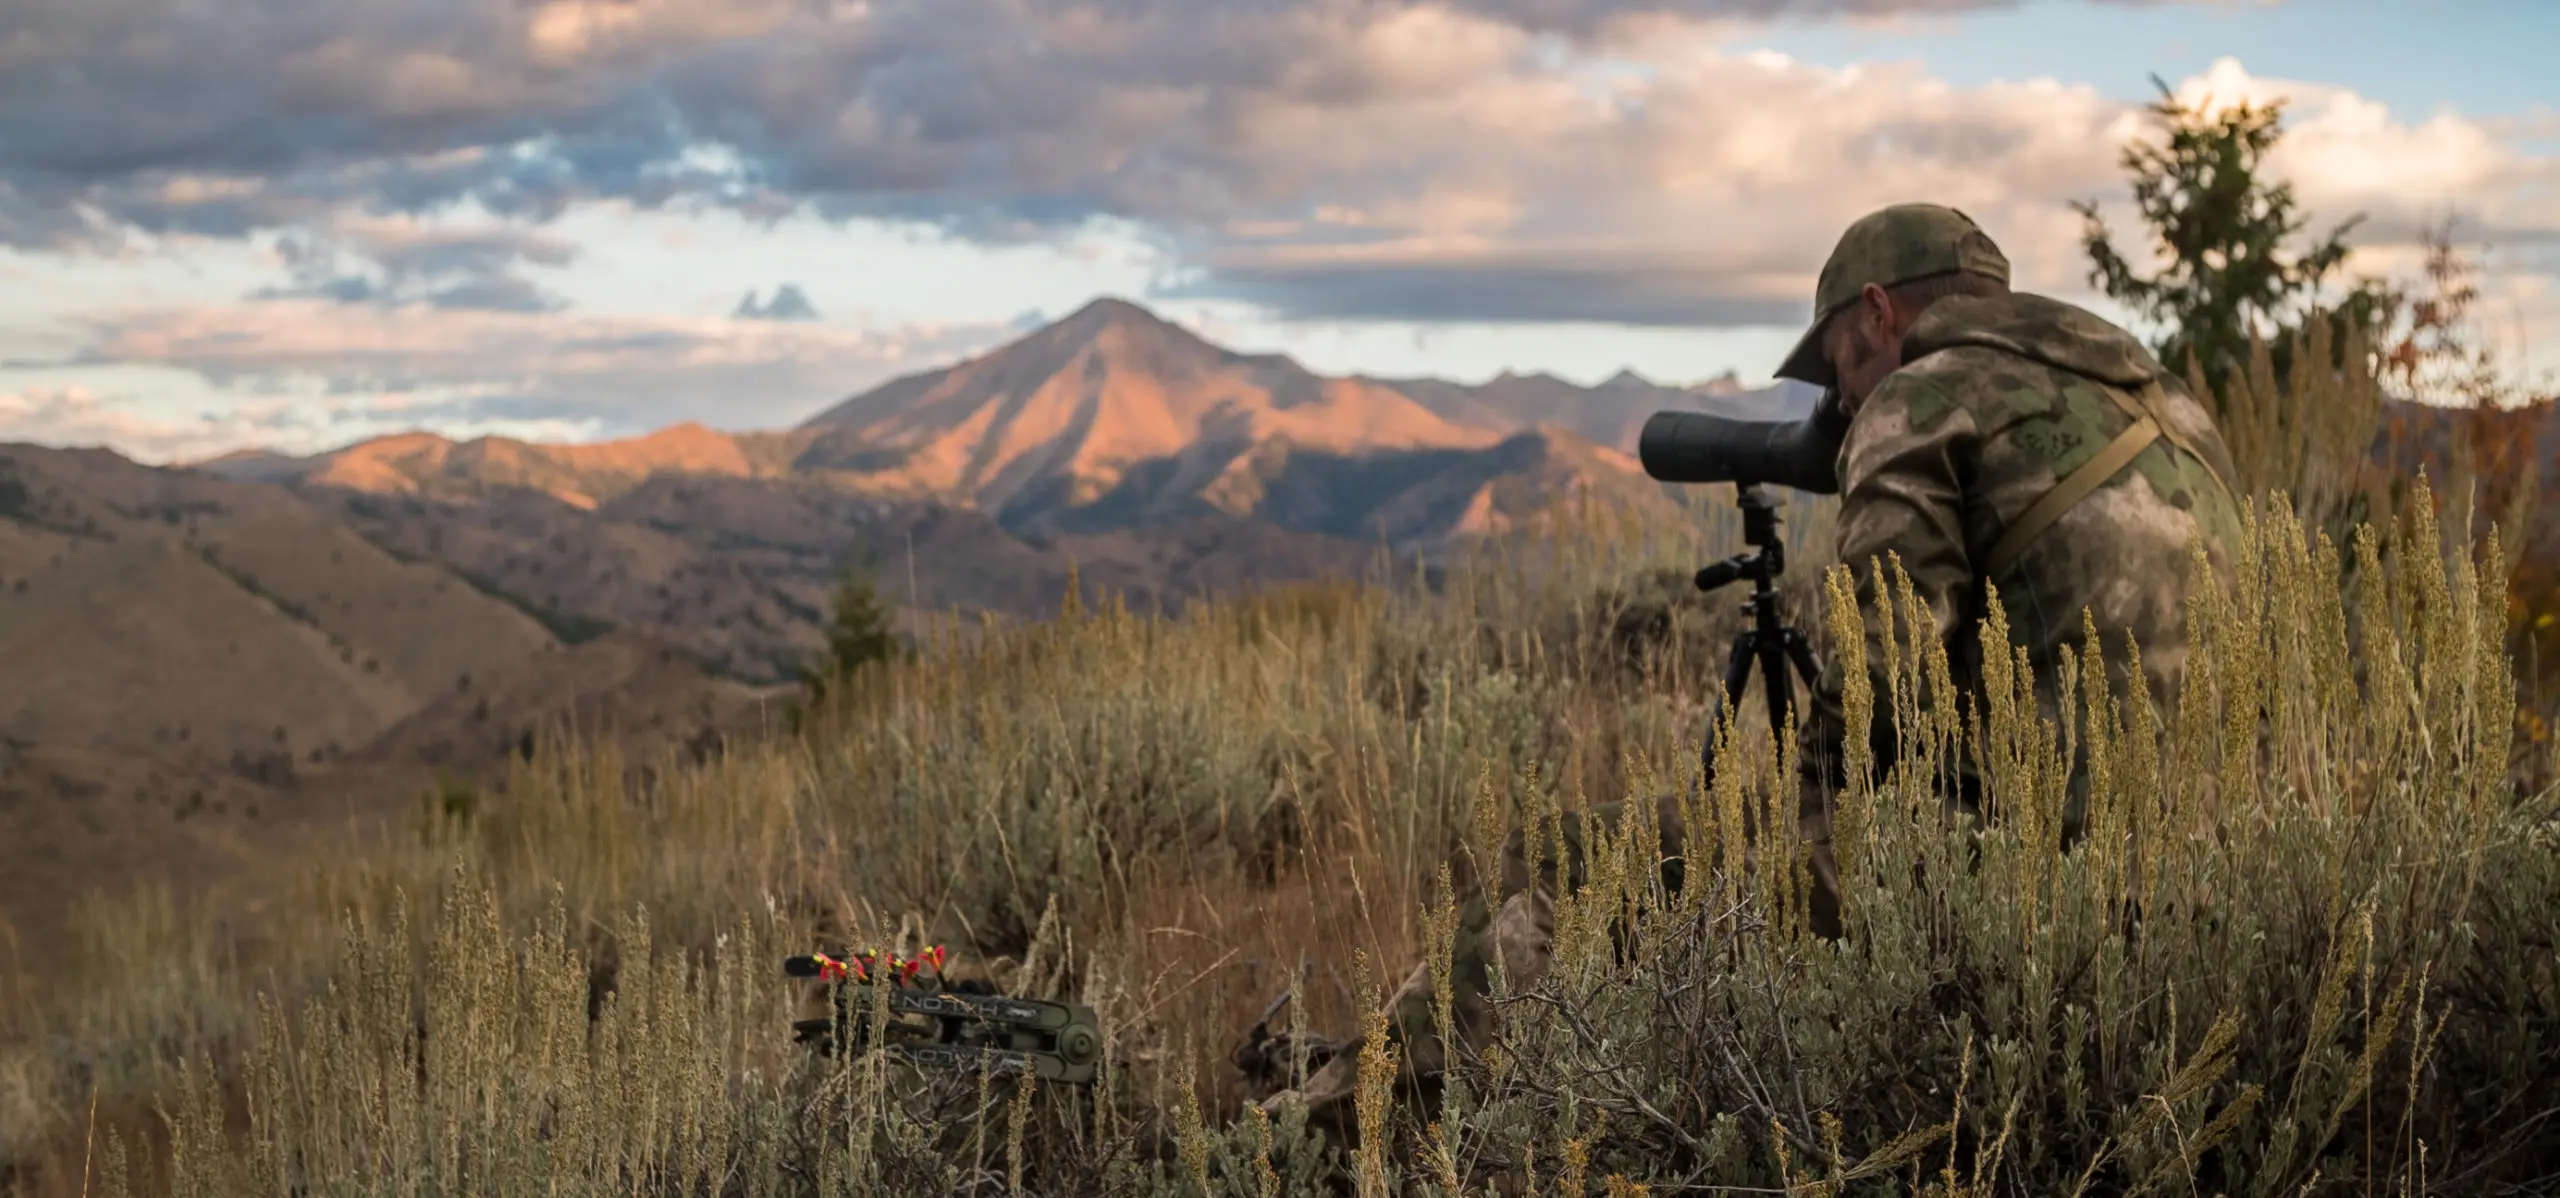
Another factor I place high on the priority list is being on a selected glassing spot by the first hints of light. This is critical. I don’t know how many animals I’ve spotted within the first minutes of glassable light that I would have missed if I had arrived even a few minutes later in the morning.
This comes down to being realistic in how fast you can travel from your camp to your glassing point day in and day out - often in the dark. I enjoy backpacking, but I don’t like hiking in the dark if I can avoid it. Besides, in archery season, the days are long and nights are short, so I want to spend the night sleeping.
So, I usually plan on packing a lightweight camp in as close to my glassing location as possible. The biggest challenge is usually the fact that great vantage points are usually up high and far from water. Coming up with a plan for where to camp, where to get water, and a short route to safely get on your vantage point at first light will require some effort but it’s essential to maximize your odds of success.