NOTICE: Certain links on this post may earn a commission for Western Hunter Magazine from Amazon or our other affiliate partners when you make a purchase. Thank you for your support.
A Practical Guide to Hunting Rangefinders
Most bowhunters spend a lot of time deciding on what bow is going to be the best for them, as well as other equipment such as arrows, sights, and broadheads. Bowhunting gear is important and exciting, but tools that I feel often get put on the back burner are hunting rangefinders. It’s never been something I put near as much thought into as I do other archery equipment, yet I’ve found that rangefinder malfunctions (some of which are operator error) have caused me more lost opportunities than any other piece of gear I’ve used.
After going three consecutive seasons where a rangefinder was the main cause of having a hard-earned shot opportunity go awry, I decided to put more thought into the problem. The first issue I needed to deal with was figuring out if I was even using an adequate rangefinder in the first place, hence this review.

You should understand upfront that what I’m looking for in a rangefinder is specifically for western spot-and-stalk bowhunting. There are a lot of aspects I consider, and there isn’t a rangefinder I’m aware of that has everything I want. There’s going to compromise, and what’s important to me may not be important to every western hunter, but the following is a list of what I’m after.
Angle Compensation
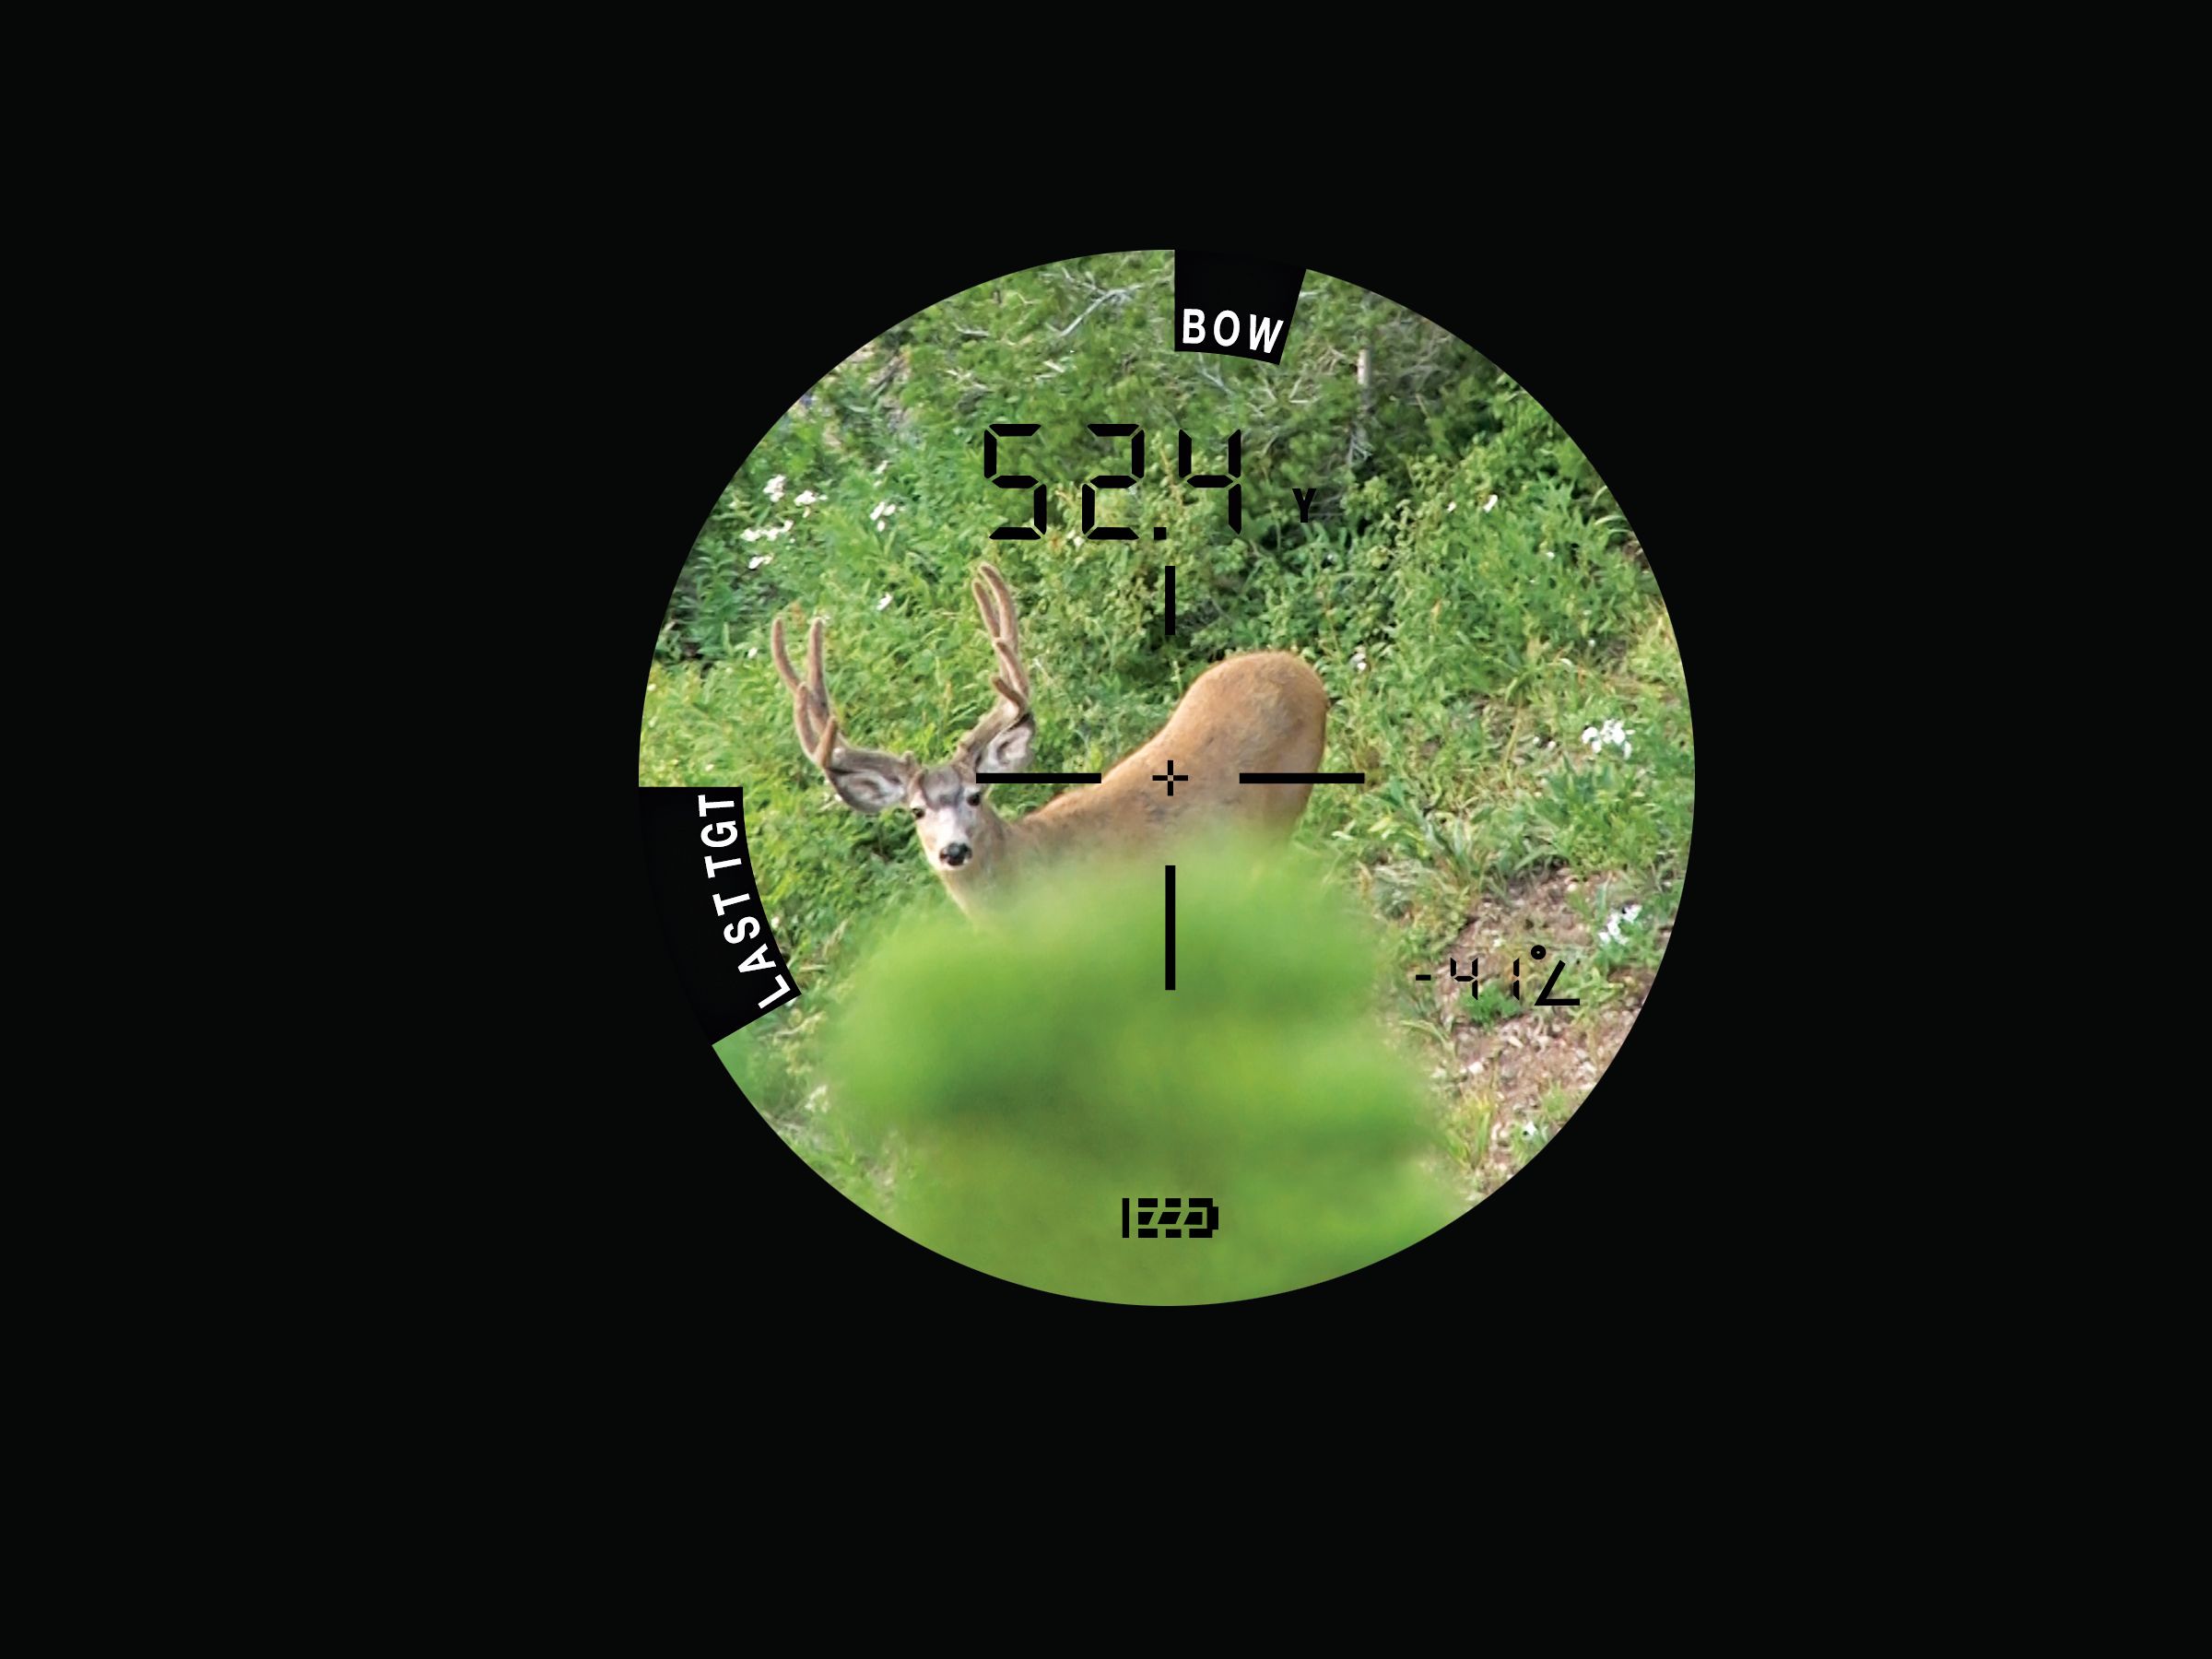
This goes without saying, but angle compensation for bowhunting mountainous terrain is a must. Most hunting rangefinders have this, but I like things to be foolproof because there’s so much to pay attention to (wind, staying hidden, staying quiet, keeping your mind focused on the situation) that I don’t want to have to do the math right before my shot. Hunting rangefinders that prominently display anything but the angle-compensated “shoot-for” distance (horizontal distance) seems crazy to me.
I’m a fan of also knowing both so I know what distance to shoot for as well as the actual line-of-sight distance, so I don’t get a false sense of my effective range. However, some models make the prominent displayed number the line-of-sight, with the horizontal distance small and off to the side. Other models give you the line-of-sight number first and then, after a delay, swap out that distance with the horizontal distance. I don’t like either of these in critical situations.
Accuracy and Precision
This is comprised of a lot more factors than I once thought. Obviously, a rangefinder that gives consistent and accurate readouts is paramount, but knowing where your rangefinder is “sighted in” to is critical for precise measurements.
Crosshair Alignment
To check this, I take a square piece of cardboard (about 3’x3’) and staple it to the cut end of a 2x4, then nail the 2x4 to the top of a fence post or something of similar height. Then I step back to a typical shot distance of 40 yards and face the cardboard.
At this point, you should be able to see the cardboard, but not the 2x4. To test the laser/crosshair alignment, I first range the center of the square, so I know the distance, and then move the crosshairs to one side and see where the laser starts reading what’s beyond the square.
Next, do this top to bottom, as well. If you have to move the crosshairs several inches above the square before it reads beyond it, then you know your laser is actually reading several inches below your crosshairs at that range.
Some hunting rangefinders seem to be perfectly aligned, but the majority I tested were slightly off. This didn’t mean they were inaccurate; you just need to know where to aim if you don’t have a large target.
Beam Precision
After figuring out the alignment of each model in this review, I performed another test where I cut a 4” hole in a piece of cardboard and then figured out how far away I could get with each rangefinder and still get a consistent reading through the hole. This helps me determine what models would give me the best chance of getting an accurate reading off a small target like the head of a deer or through a narrow lane through brush.
Fine accuracy over distance
I also did a test that included tape measuring distances of 50, 51, and 52 yards from the side of a building at a right angle and taking measurements with the hunting rangefinders. From here I checked a couple of things: 1) I took multiple measurements with each rangefinder from the same point to make sure I was getting consistency in each measurement; 2) I took a measurement at all three distances one after another to see if they recorded the one-yard differences.
This may seem like overkill, but last summer I purchased new archery software called Archers Advantage Online and noticed a section that allowed me to enter my exact bow and arrow specs and print out my ballistics.
What I found was that my arrow is dropping nearly 3”/yard at 60 yards. Everyone knows their arrows drop more and more the farther they shoot but considering I shoot a fairly average hunting setup in terms of speed and trajectory (my setup is shooting at 278 fps), what I printed out really made me think. A mature mule deer buck has an average kill zone of roughly 10” vertically, so if I’m aiming for the center of the kill zone at 60 yards, that means my margin for error on shot distance is +/- 1.7 yards! That’s why I like hunting rangefinders that give accurate measurement readouts down to 1/10 of a yard.
Speed
This is an important variable to me and isn’t something I’ll compromise on. I won’t hunt with a rangefinder that isn’t blazing fast with the initial readout and also time between measurements, as well as when scanning.
Very rarely do I range an animal only once and then shoot. Normally, I use the scanning feature to assure I’m getting an accurate reading on my target. Scanning isn’t a mode you have to enter into through the menu; you simply hold down the measure button and it gives you continuous measurements of different objects as you scan over them. This is great for hunting - you can scan back and forth/up and down over the animal and it gives you a much better chance of getting an accurate reading. Having a rangefinder that will quickly and continuously display one reading after another is important when you’re within bow range of a mature wild animal.
Some hunting rangefinders give a quick line-of-sight reading but have a delay in showing the angle-compensated horizontal distance, which is all that matters on angled shots. Make sure you factor in the time it takes you to get the number you need and not just how long it takes to get the first measurement.
Modes & Settings
Bush mode/target priority

There are some invaluable modes available in many hunting rangefinders today, such as “last target priority” mode, sometimes called “brush mode” and “first target priority” mode. After missing a nice Idaho bull because of some blades of grass between the bull and me that gave an inaccurate reading that caused me to miss low, I’ve started using hunting rangefinders that offer these modes a lot more depending on terrain and conditions. Being able to quickly toggle through these modes and be confident in knowing what mode you’re in is critical. Some models are quick and easy; others take too much time.
Brightness settings
Another variable to consider is the red LED or OLED displays and how quickly you can toggle through brightness levels (not all models have different brightness settings). This adjustment is important to be able to see your display depending on the lighting conditions (sun vs. dark timber).
Versatility
While I use my rangefinder to tell me the distance to an animal, I also want it to be able to help me plan out a successful stalk by ranging distant landmarks. I don’t know how many times I’ve hiked and crawled to what appeared to be a location that would put me well within shooting range, only to find out I was still too far away. Having the ability to range from afar and tell if certain landmarks will get me within shooting range is a big deal to me. Basically, the farther my rangefinder will give me readings the better.
Another bonus of having more ranging power is for hunters that hunt with both bow and rifle. Having one rangefinder that can do both jobs well is practical and smart.
Another aspect of positive versatility is having a display that works equally well in bright light and low light. For the most part, black LCD displays work best in bright conditions and red LED or OLED displays work best in low light. It would be great to have a rangefinder that could automatically or manually switch from black to red depending on conditions.
Conclusion
The way a rangefinder processes info and calculates measurements isn't foolproof; it can fail due to electronics, battery, and very often in rain, snow, and fog. If you have no idea how to judge yardage yourself, you'll have no way of knowing if something looks "off".
Practice to become an expert in times of emergency. There have been plenty of times when I couldn't get a consistent reading for one reason or another and had to use my own judgment on what distance was actually the correct one. As with anything, the more you practice the better you will become and increase your chances of preventing a disaster.
What to Purchase Today
There are several great options available on the market today. More companies are realizing the importance of quality hunting rangefinders with several of these features. Make sure you do your research and get what is best for your individual needs. If you have questions regarding different brands and models, please contact Outdoorsmans.


