NOTICE: Certain links on this post may earn a commission for Western Hunter Magazine from Amazon or our other affiliate partners when you make a purchase. Thank you for your support.
Outfitting Your Hunting UTV: Part 2
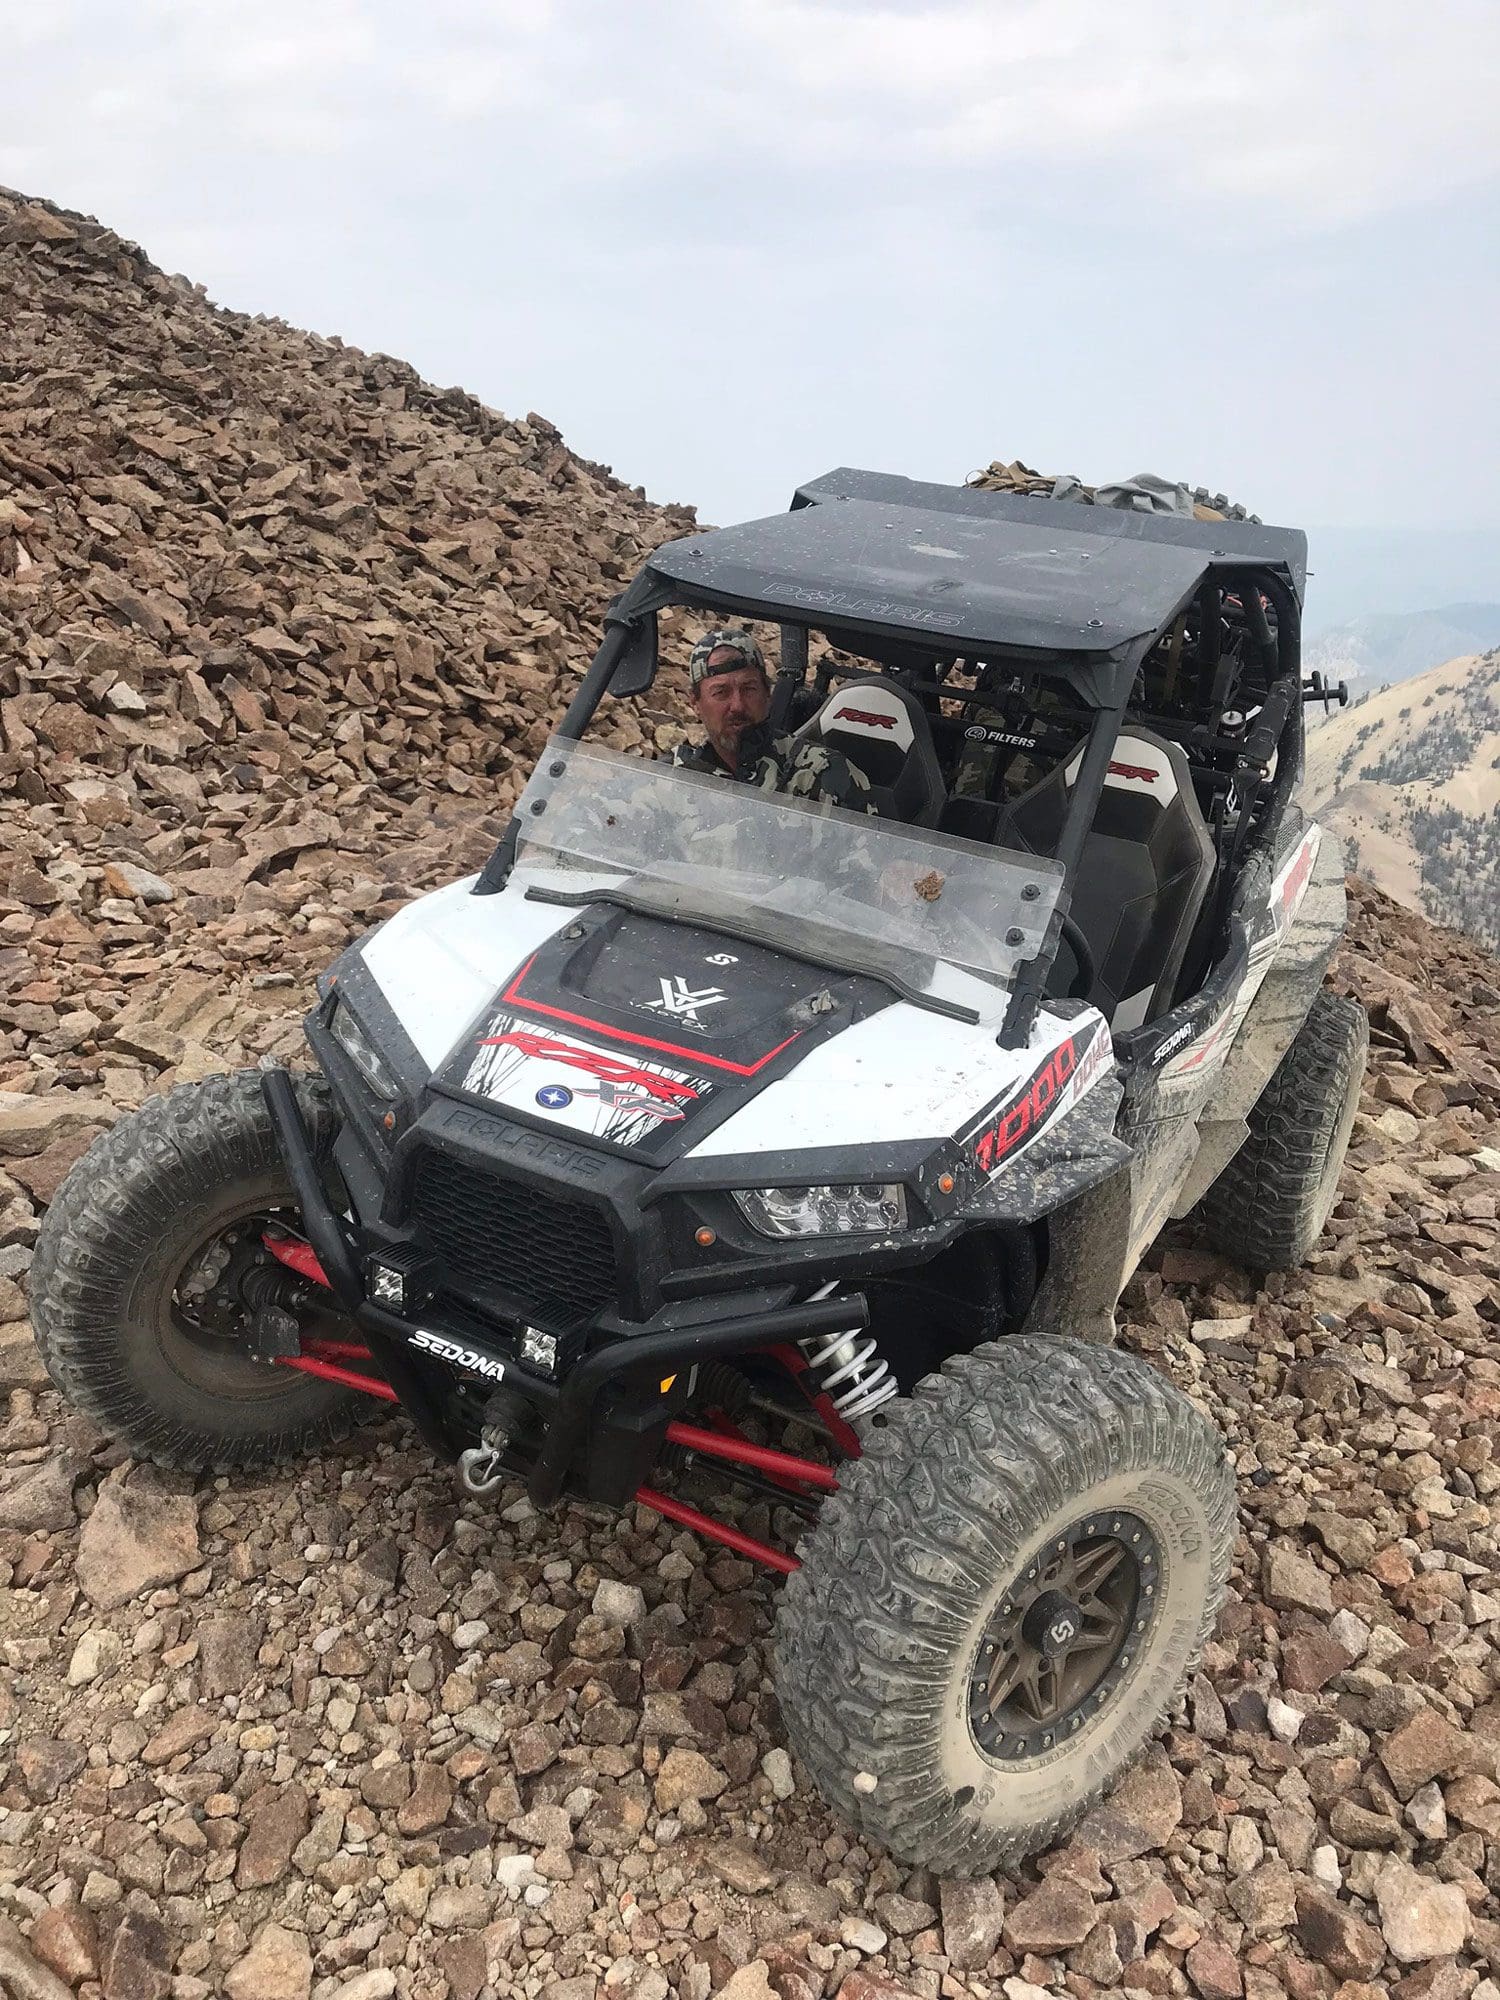
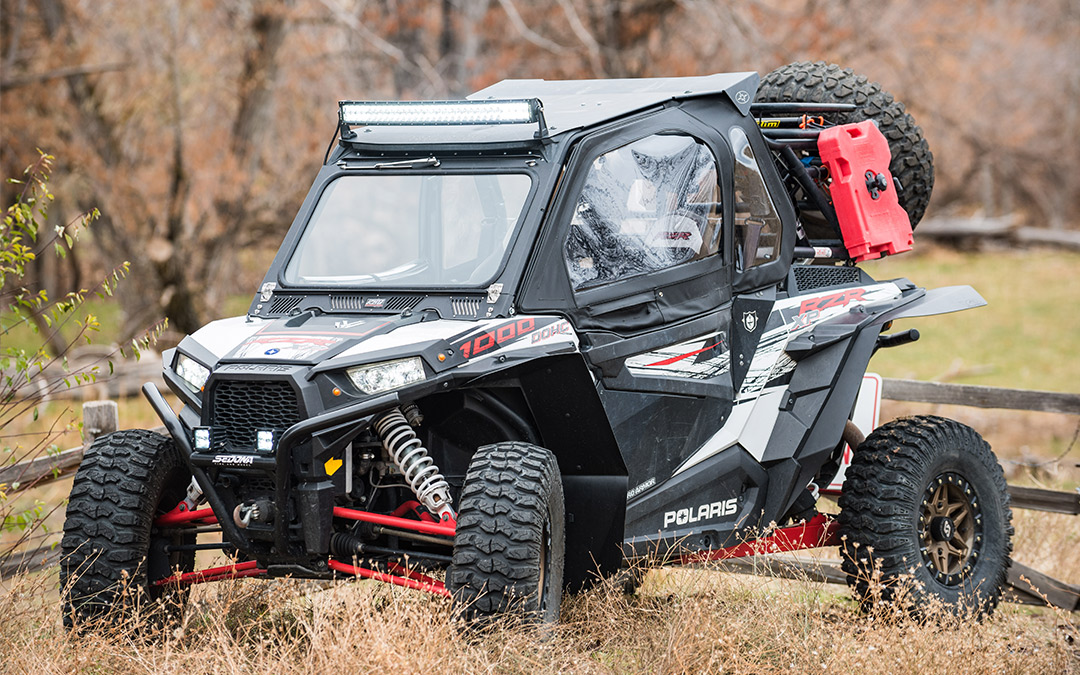
The project RZR at 10,300’ on the edge of the wilderness during sheep season.
Winterizing
Even though I was extremely happy, when rain and snow started flying later in the season, it became obvious that it needed comfort and protection in cold, foul weather. Thus, Part 2 of this setup guide focuses on accessories and modifications that will maximize the comfort and utility of a hunting UTV in cold and inclement weather.Fender Flares
One of the first projects to tackle was adding fender flares to reduce mud and splatter that entered the cab whenever I drove through water, mud, or snow. I found myself slamming on the brakes to putter through harmless wet patches and puddles in the road to avoid the imminent shower. The body of my RZR XP 1000 is essentially the same as the 50-inch trail models that tuck their wheels neatly inside the fenders. The problem is that my machine is 64 inches wide, leaving at least 7” of exposed tire on each side to shower passengers and machine with whatever that cow ate last night. “Sorry, buddy, I didn’t see that cow pie, but you needed some face paint anyway!”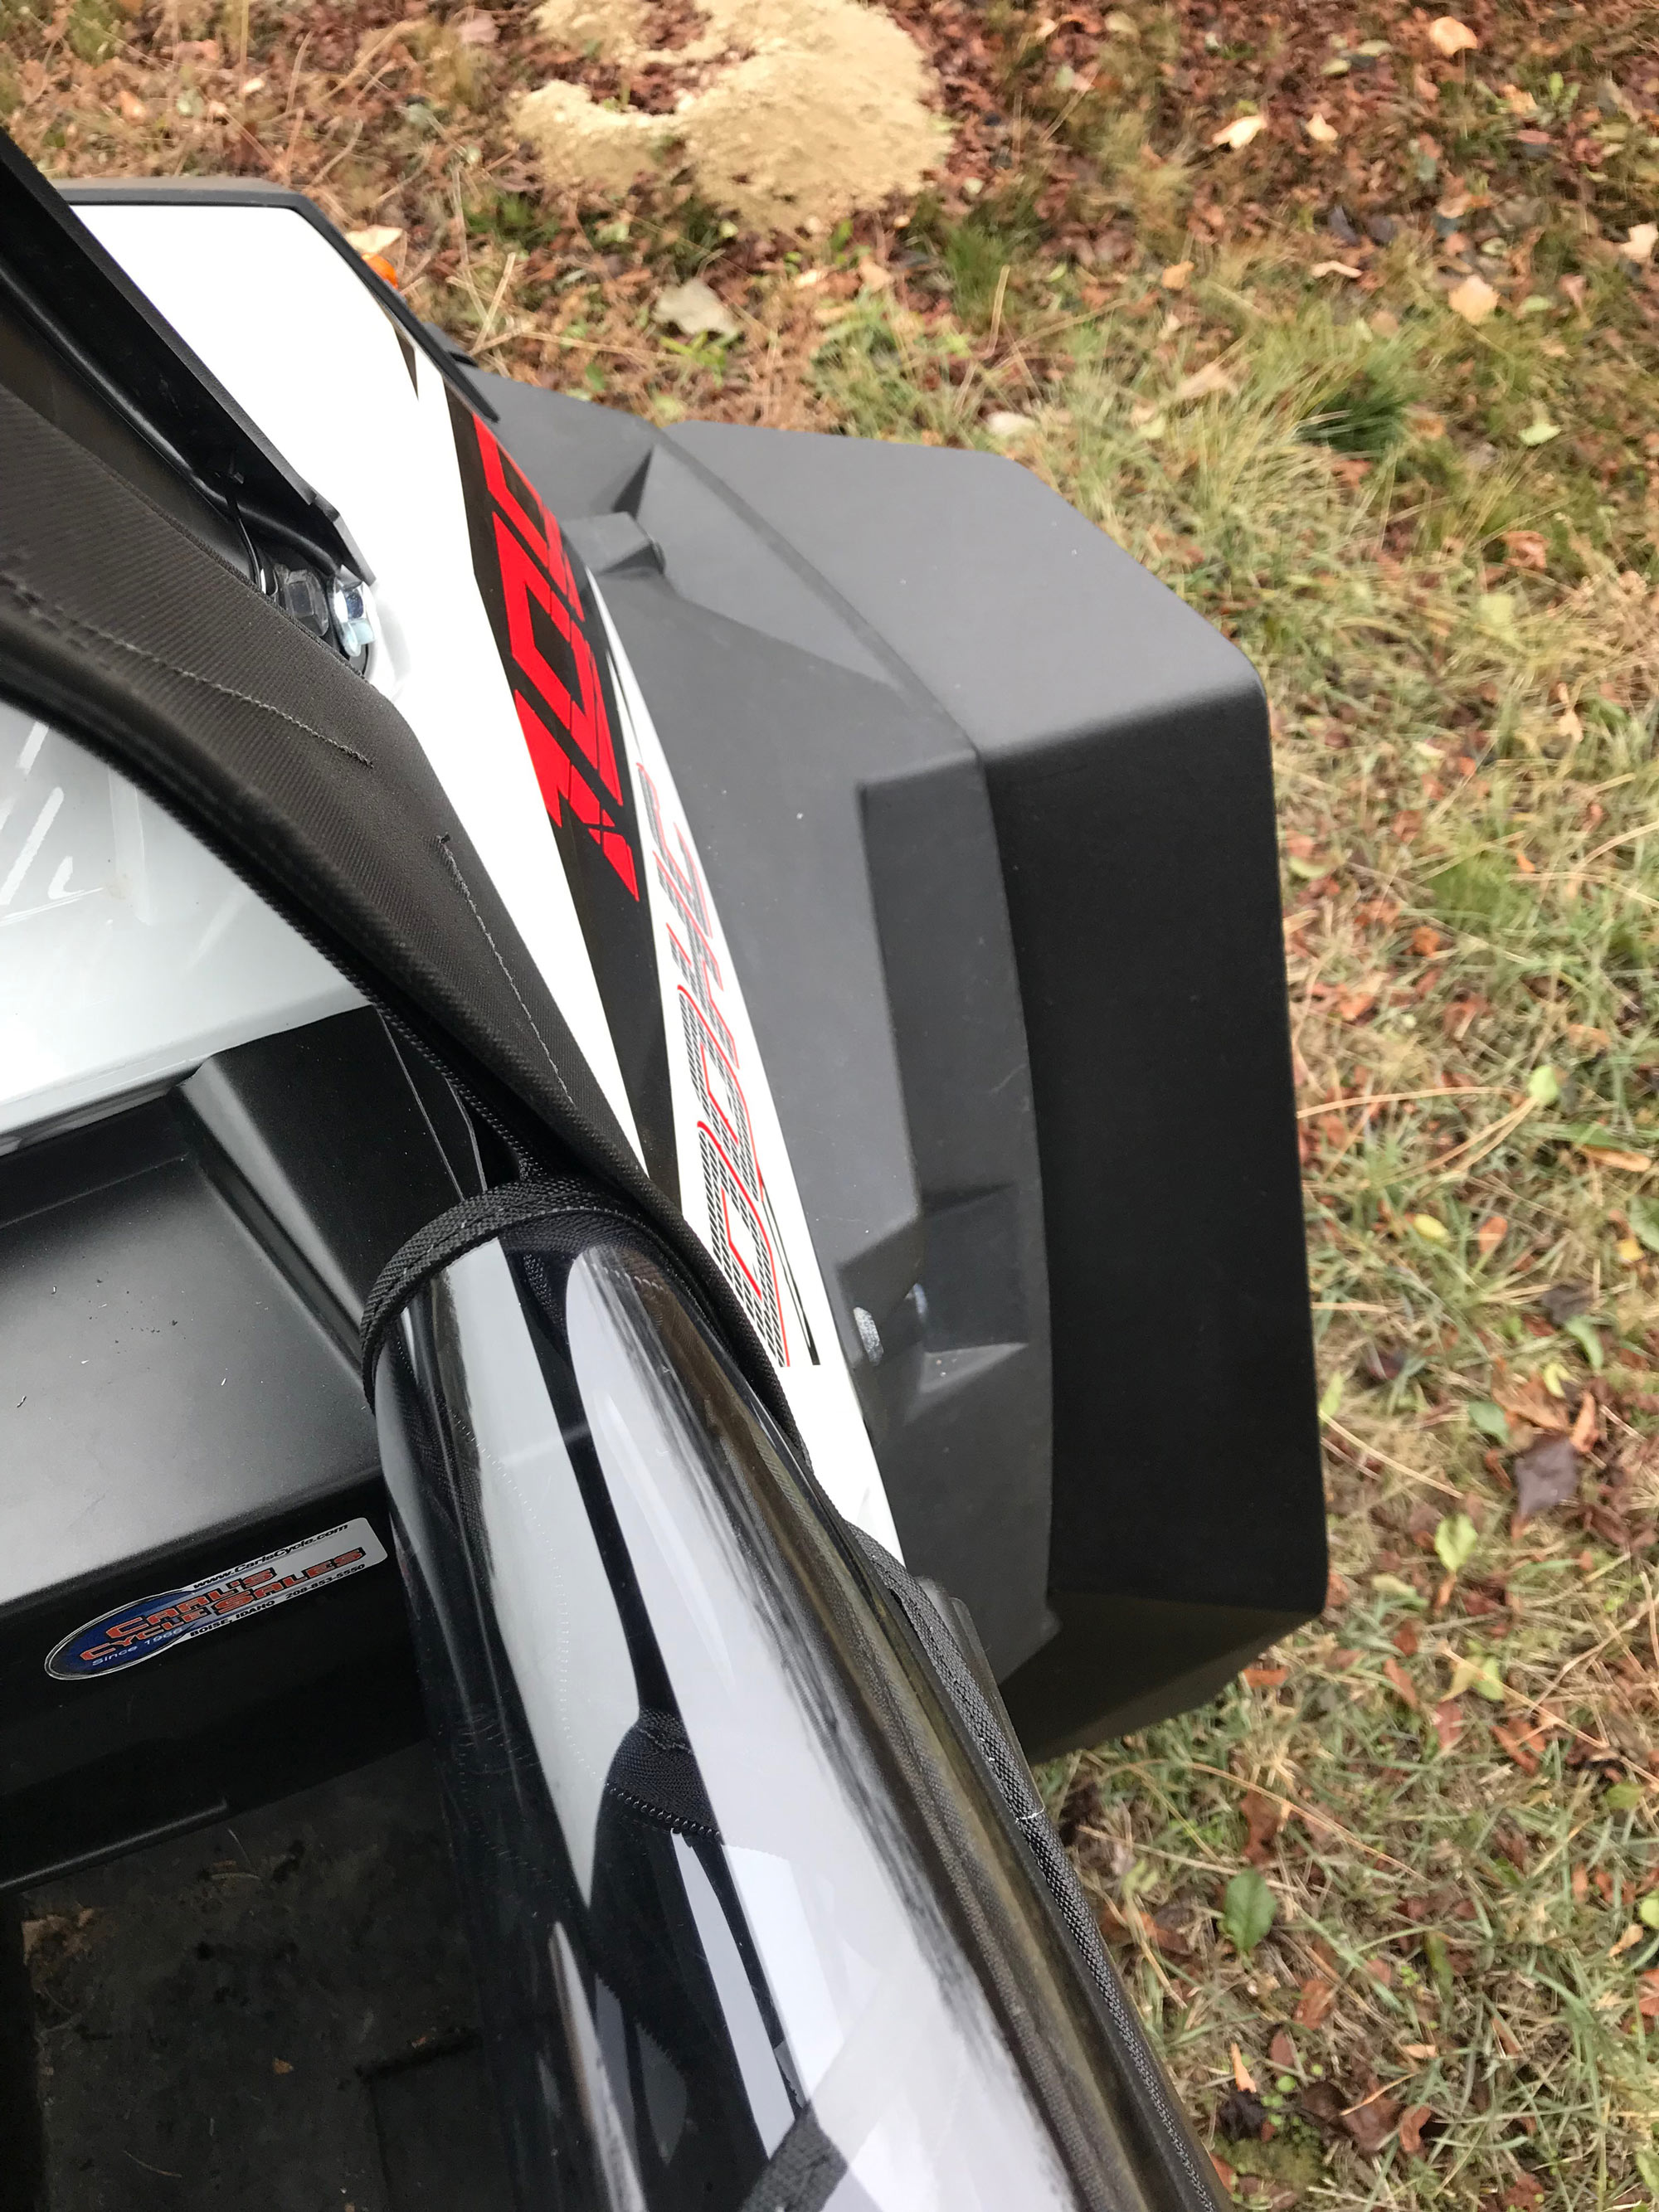
From the passenger’s view, the Mud Buster fender flares clearly block the path for mud from the aggressive 30x10 Sedona Rock-a-Billy tires.
Full Windshield
Before I did the fender flares, I installed a full windshield. In hindsight, I can’t believe I went so long without one. If I spent more time hunting in rainier regions, a full windshield would have been one of my first projects. I underestimated how much it would improve rider comfort. Based on my experience with their well-designed cargo rack system, I decided to install Razorback Offroad’s folding windshield with the optional hand wiper. Although it’s optional, I think you would surely regret going without. I also opted for the louvers in the bottom frame section that you can use to regulate or shut off air flow. I was surprised how lightweight the aluminum frame was and how easily the windshield installed. It required drilling into the factory Polaris visor, but the plastic had dimples molded in that lined up perfectly for each drill hole needed. I didn’t install the included hood/fender-mounted bumpers with rubber latches used to secure the windshield when folded down, because I’ll need to relocate my blinkers. It’s on my to-do list, since having the option to fold the windshield down on warm-weather hunts next season will be nice.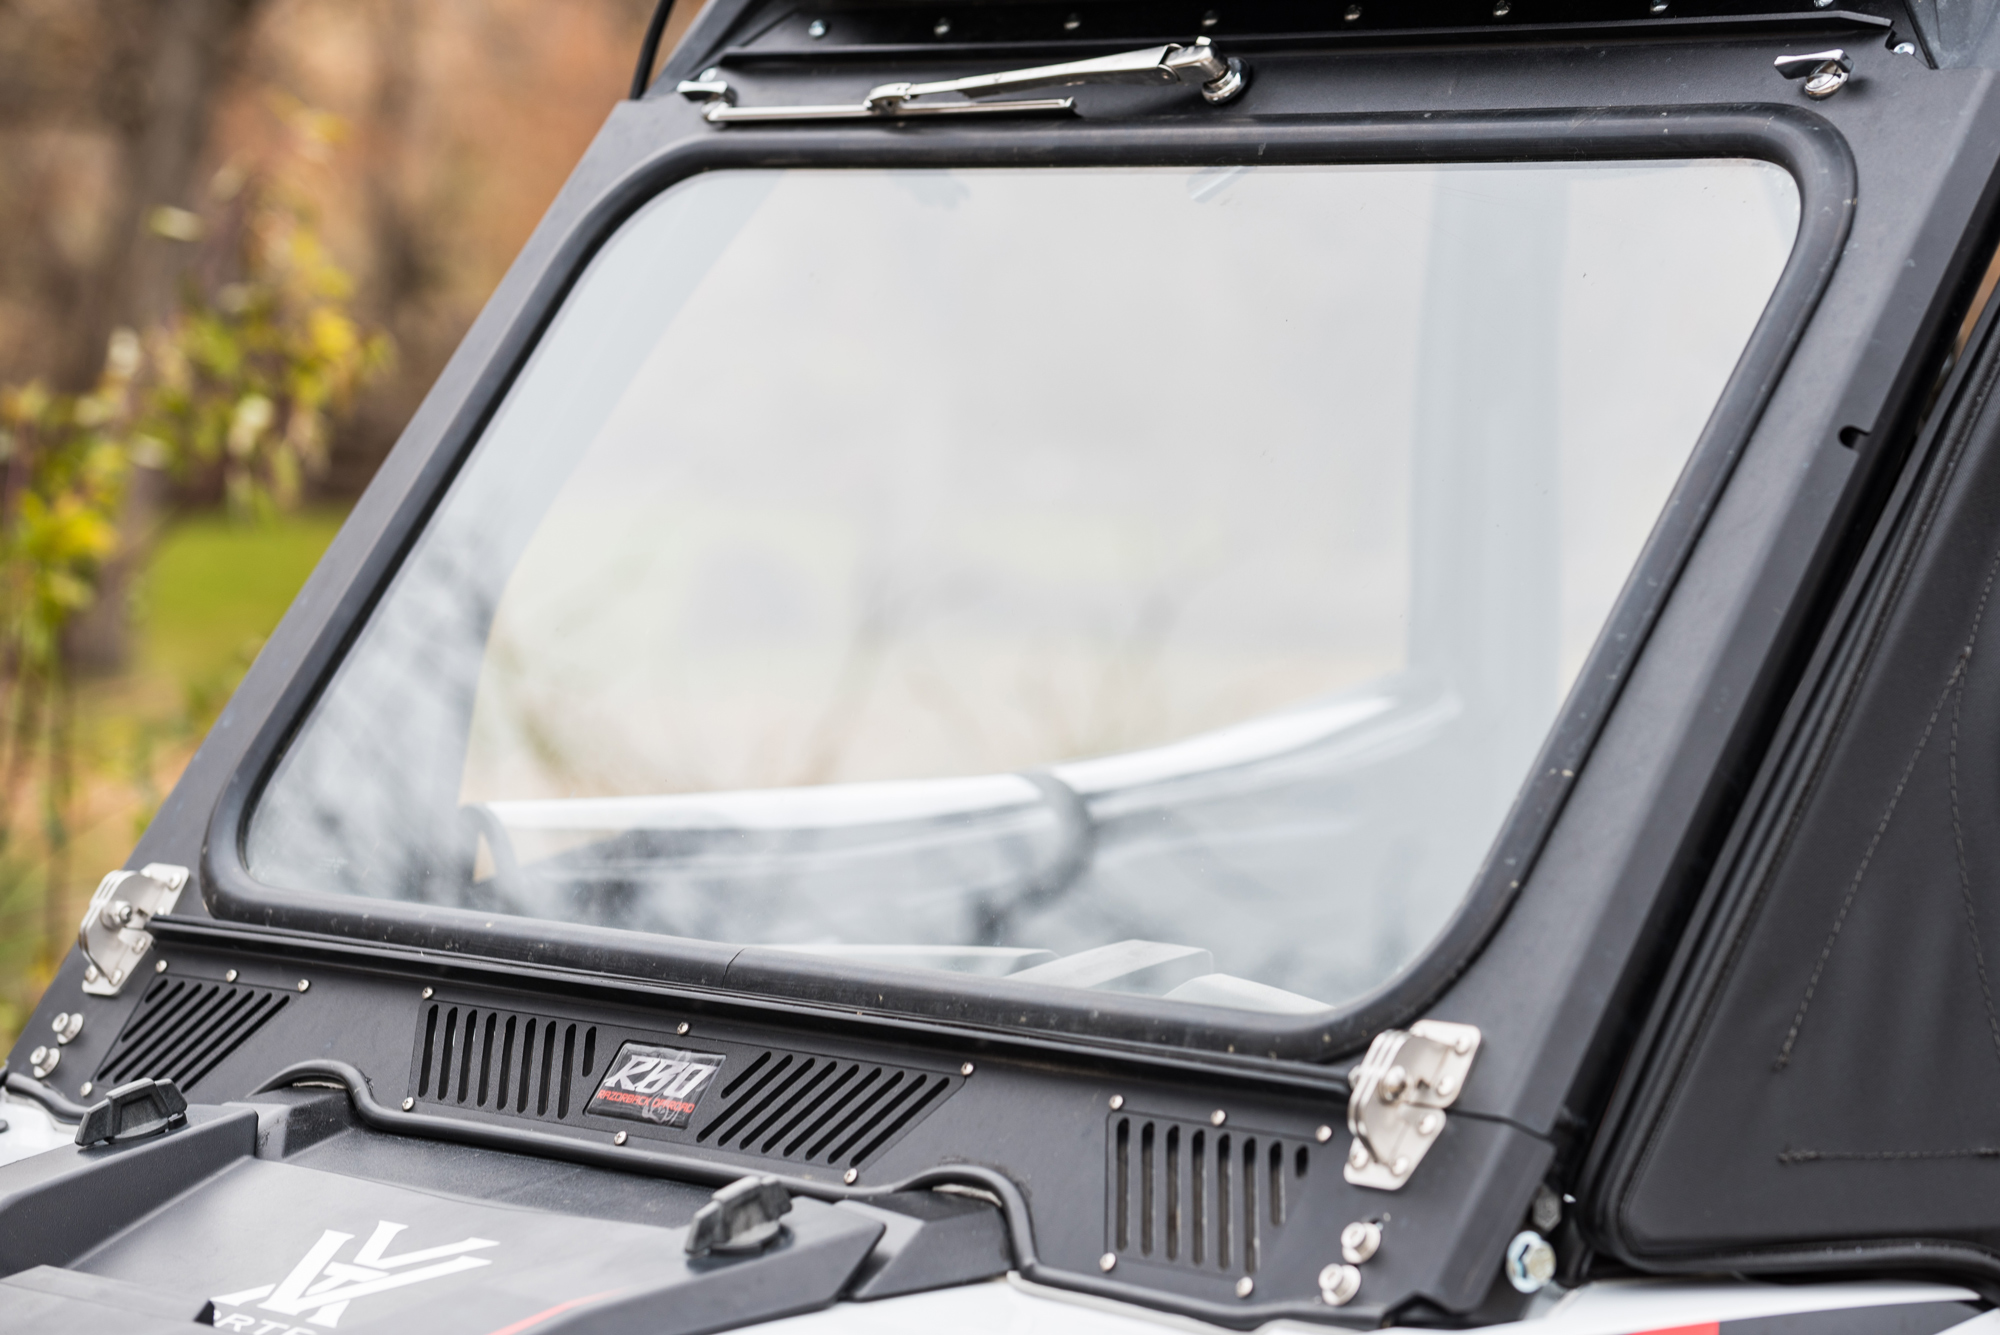
The Razorback windshield with wiper and vent louvers was a welcome addition to the RZR.
Heater/Defroster
After returning home, I ordered a Polaris cab heater/defrost kit from Rocky Mountain ATV/MC to address the fogging issue and to add some welcome heat on cold days. There are several aftermarket heater options available, but online reviews steered me to the factory Polaris unit made specifically for my machine. The installation was fairly involved, as the kit features a sizeable heater core with integrated fan and ducting that mounts up under the dash. I removed the windshield and dash panels, labeling wires as I disconnected each switch. I rerouted and organized the accessory wiring to make room for the heater core install. I spent 10-12 hours over a weekend on the job, but I did the work solo and took care to not make any mistakes drilling the firewall, cutting into radiator hoses, cutting the dash out for the defrost vent, and installing the new thermostat and purging the system of air.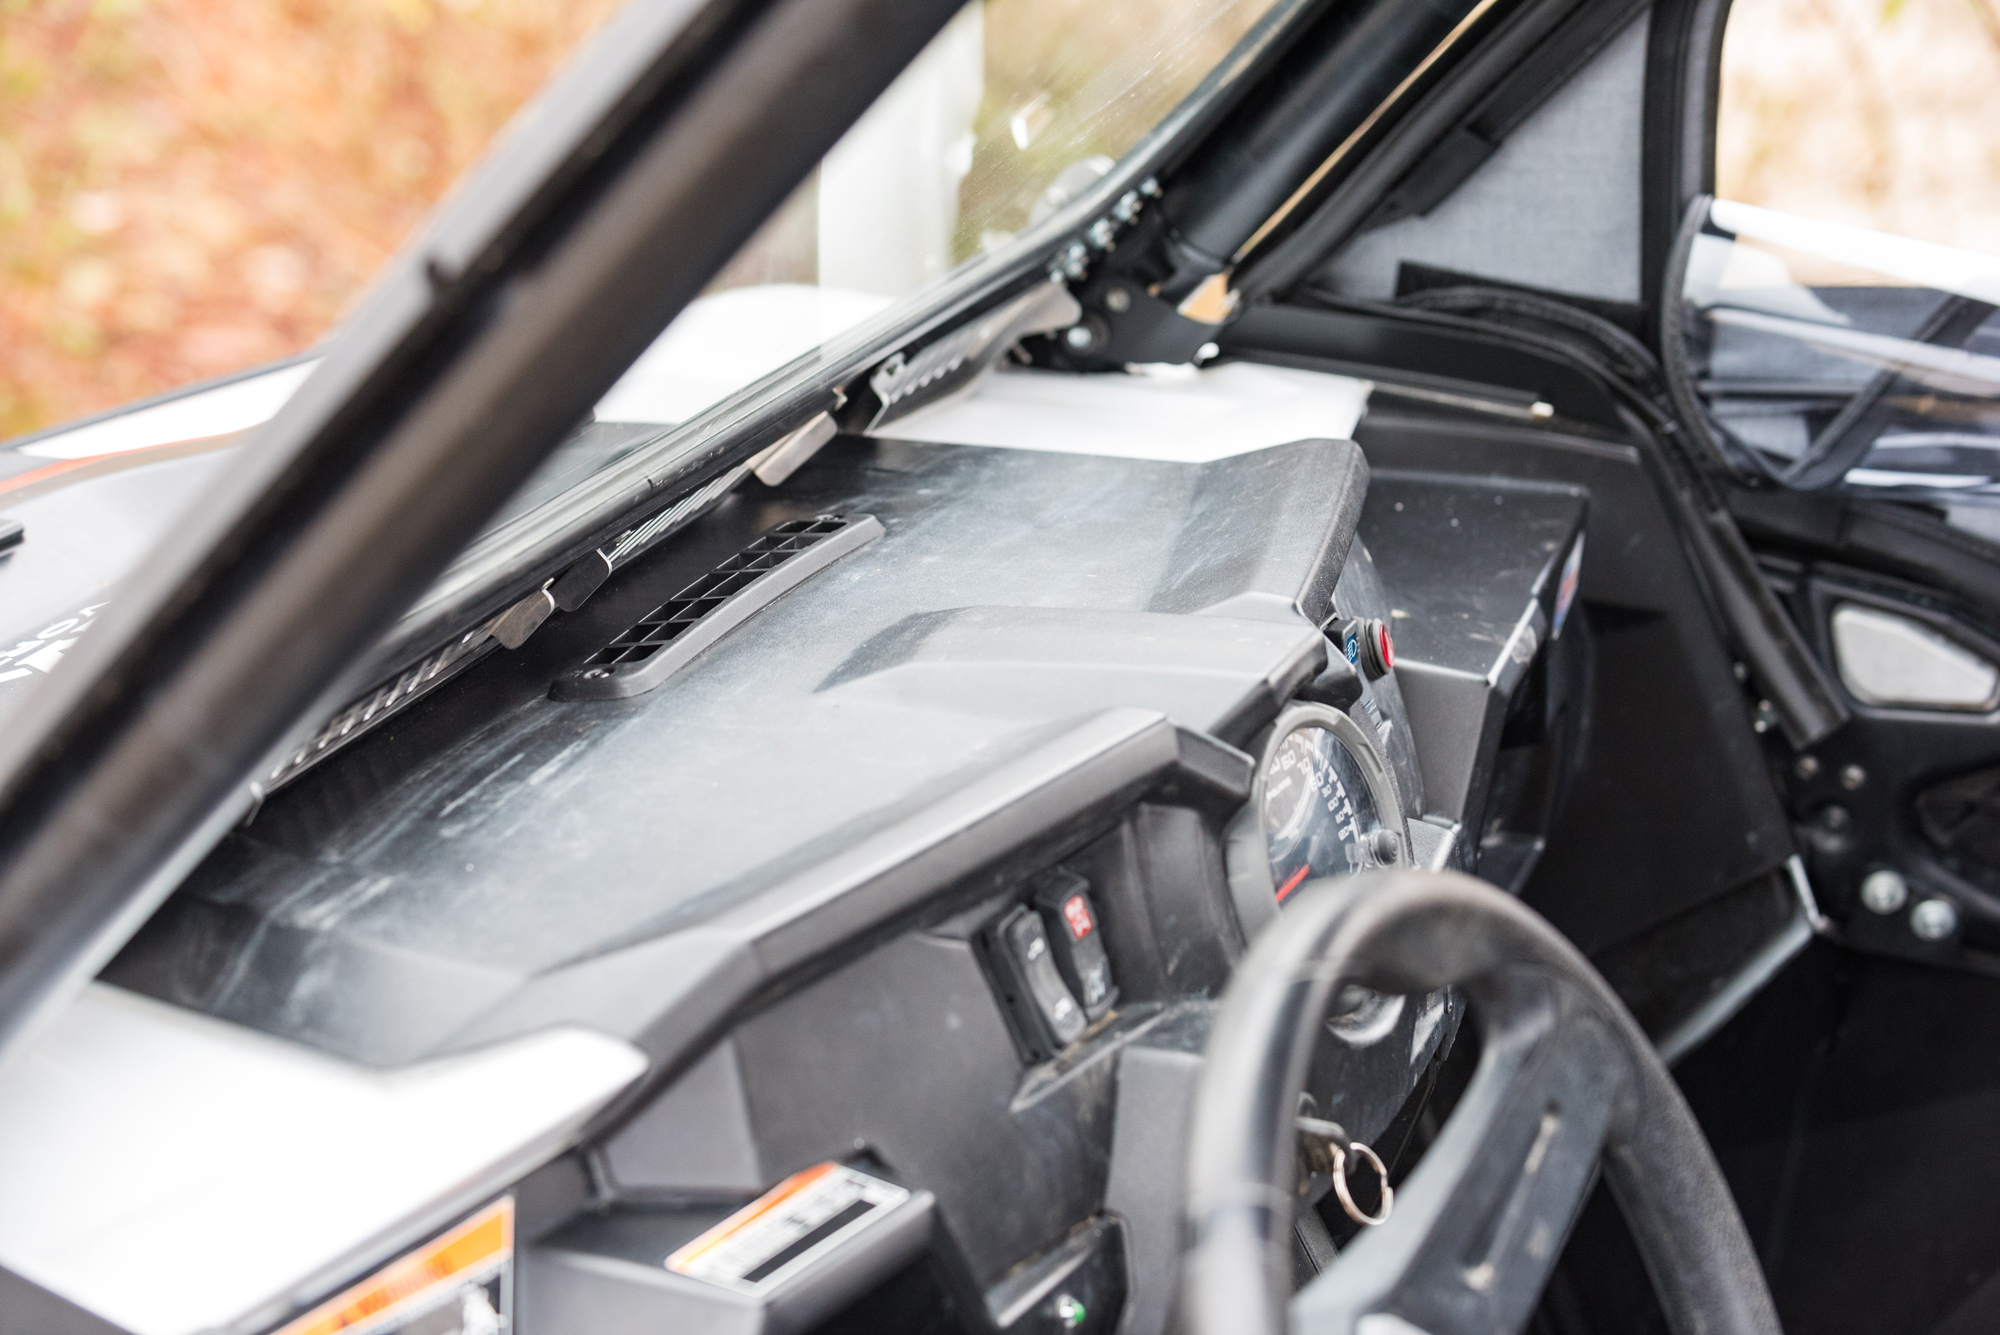
The new defrost vent is visible on the dash.
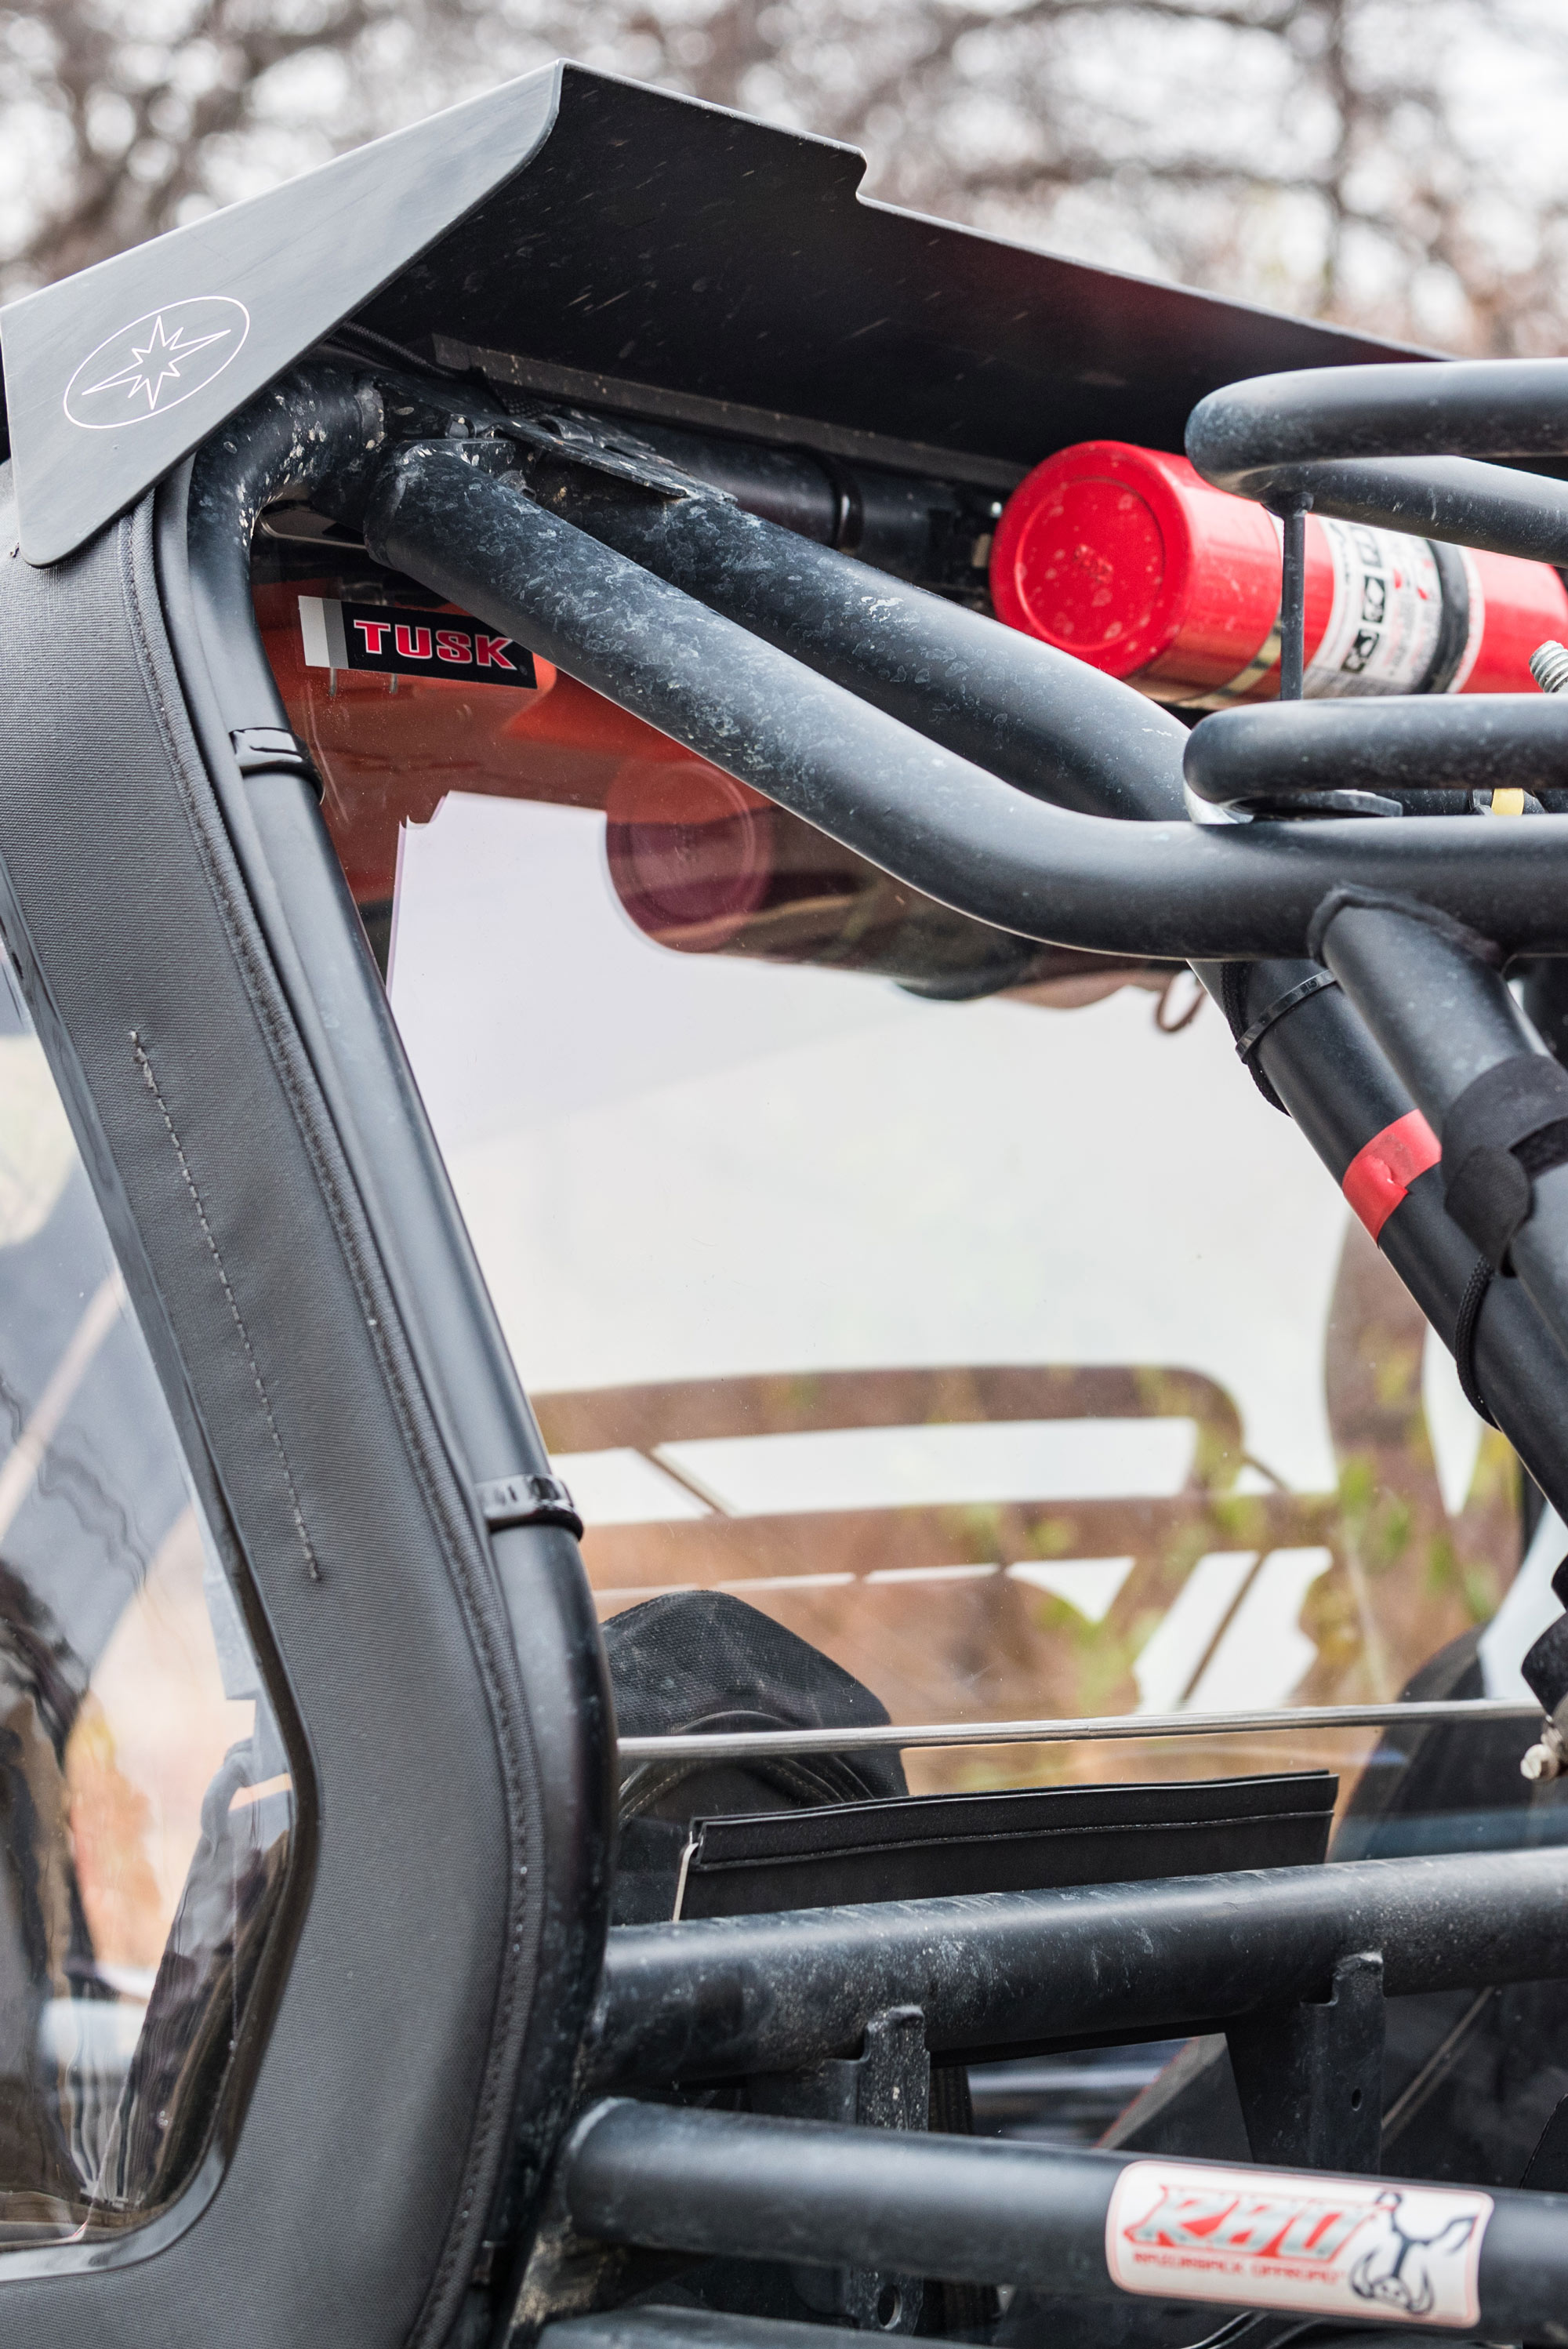
The Tusk UTV rear window made the biggest difference in my fight against dust.
Rear Window
I picked up a Tusk polycarbonate scratch-resistant rear window kit from Rocky Mountain ATV/MC for $179. The rear window mounted up easily with the included hardware and it fit the contour of the roll cage well. Installing the rear window took an hour and I was able to complete it without removing the hard top. I did recruit my wife to help position the window to reduce the chance of scratching it up while installing the cumbersome roll cage “P” clamps used to secure the window.Weather Stripping
I also picked up some D-shaped high-profile weather stripping with adhesive backing from Grainger Supply. I used the flexible rubber to seal gaps between my lower doors and the cab to block dust and air. I used acetone to prep the door and sealing surfaces where I applied the weather stripping because the adhesive bonds better to a clean, degreased surface. The combination of the rear window and sealing the doors virtually eliminated dust in the cab on my test ride through powdery dust.
Weather stripping added as seen on the open door and the mating surface helps seal out cold air, dust, and noise.
Upper Doors
To keep all that warm air inside, the next logical step is fully enclosing the cab with upper doors that close off the sides of the hunting UTV. Again, I went to Rocky Mountain ATV/MC and purchased the Polaris Canvas Upper Half Door kit made for my machine. There are several other options available, but I liked the full metal frame around the vinyl window that swings with the door that the Polaris units have. The windows zip down with dual zippers and can be rolled and secured out of the way with a strap. The heavy-duty zippers should still function well with dust and road grit present. There is a zippered slot with a rain flap that allows the door latch to be accessed from outside the hunting UTV while the windows are up.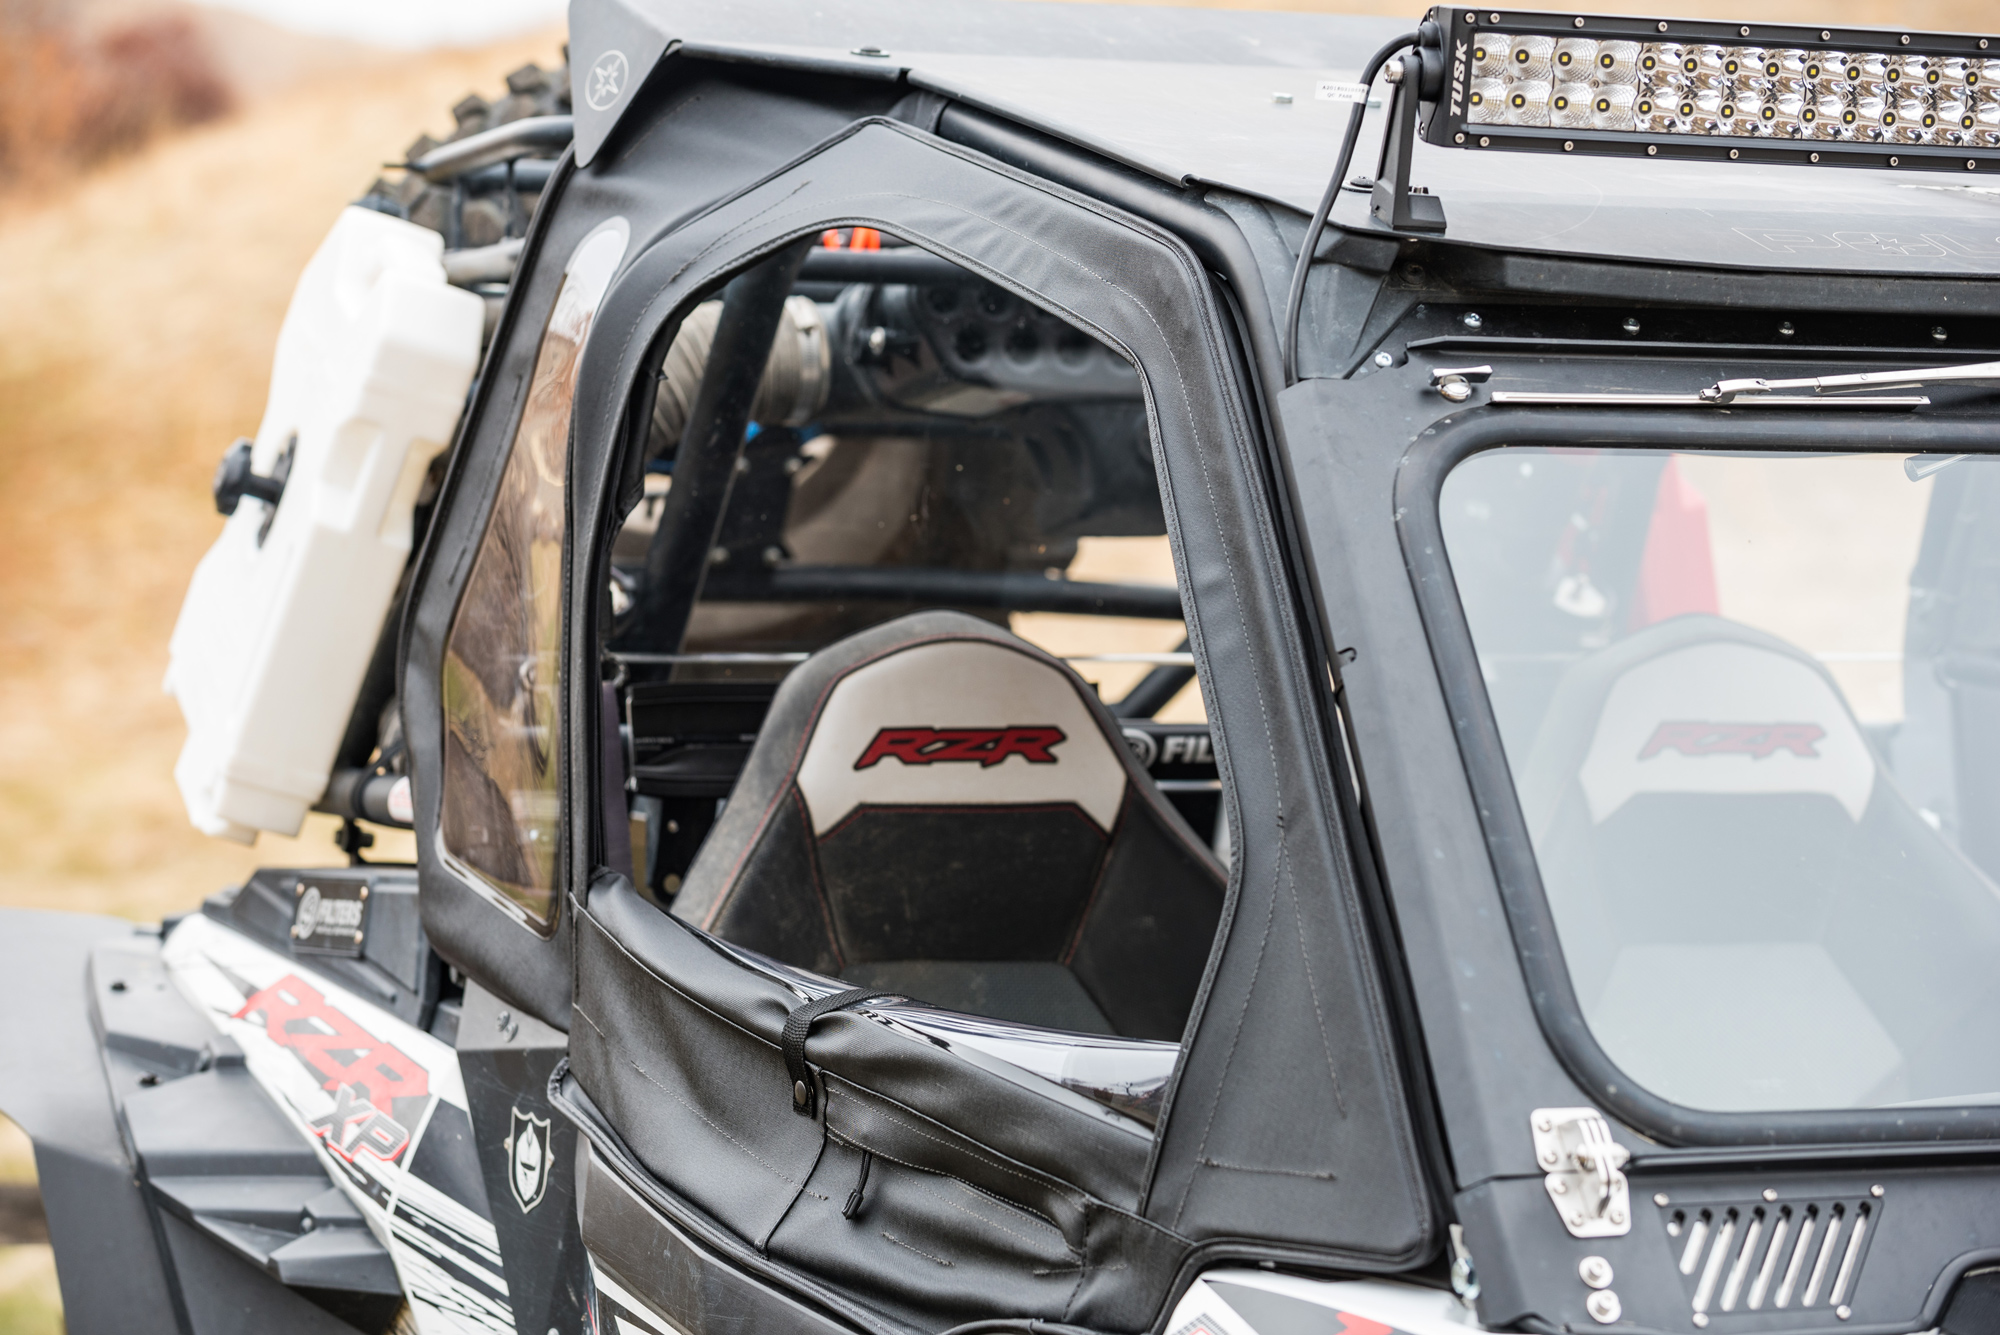
Heavy-duty zippers allow you to roll down the windows. They are secured with a snap and strap as shown.
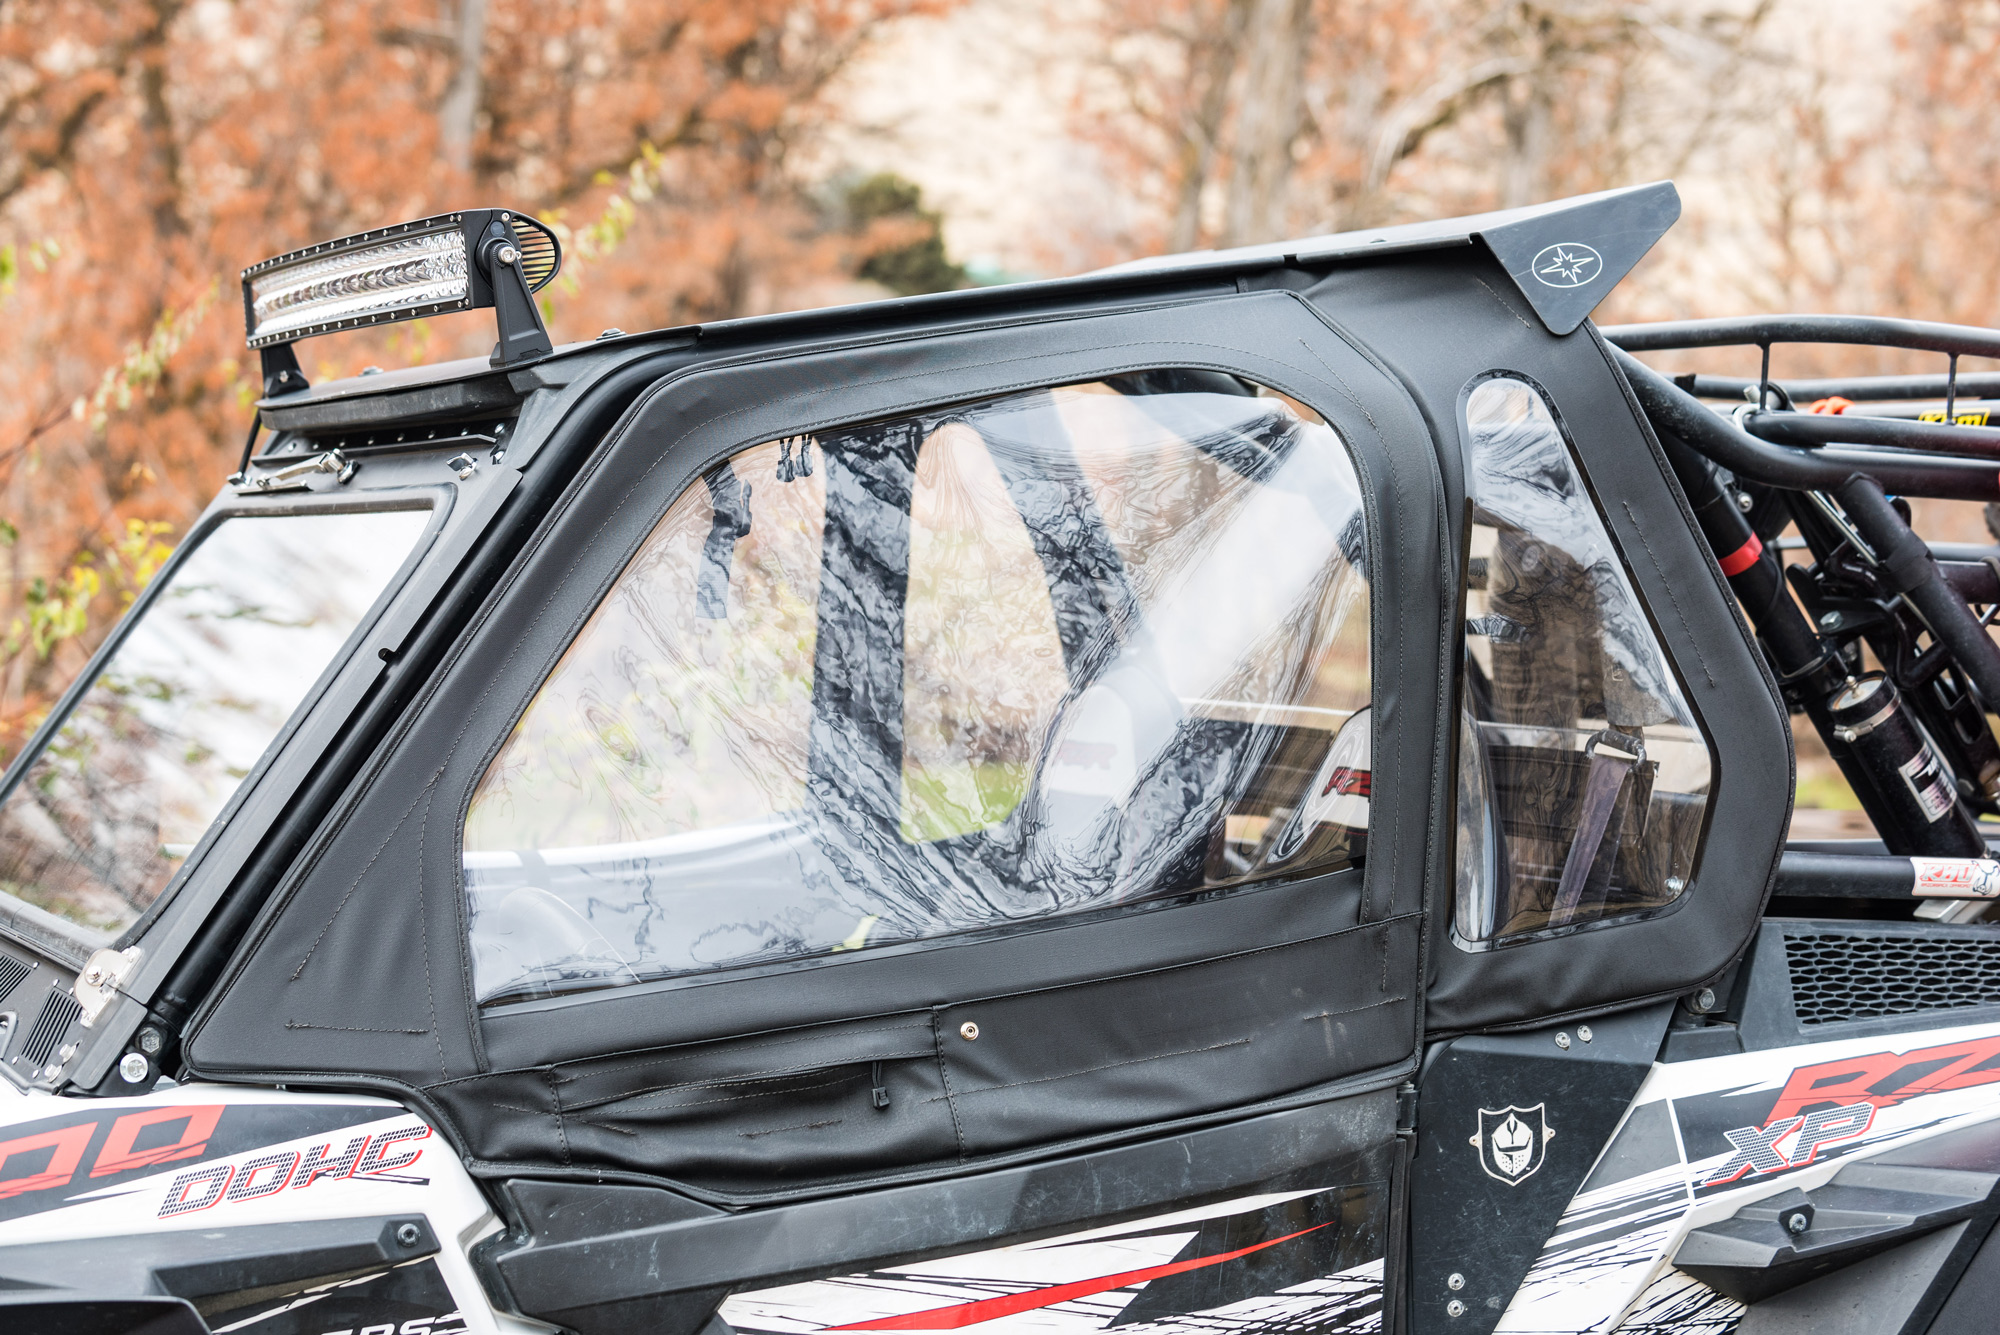
The upper doors keep heat in and the elements out. Getting them to line up and seal well is the challenge.
Seat Heaters?
With a heater installed and a fully enclosed cab, our project hunting UTV should be almost as comfortable in cold weather as a pickup (minus the seat heaters), right? Wrong! Once again, Rocky Mountain ATV/MC came to the rescue with a pair of Tusk UTV Seat Heater kits! Yeah, it might seem like overkill, but for only $39.99 per seat, I had to give it a try. The included switch and wiring harness made the wiring simple. I mounted the switches on the center shift console just in front of the gear selector and routed the harness forward through the driveshaft tunnel up to the buss bar under the hood of the RZR. I mounted relays for each seat under the switches inside the tunnel. Dual connectors run out to each seat for the backrest and seat sections from the tunnel near the lap belt anchor. The quick connectors are easy to remove so you can still pull the seats out of your machine to hose out the interior. Rather than trying my hand at amateur upholstery, I took my seats to a local shop that charged me $130 to install the heating pads and re-staple the seat covers.Cargo Box
During my sheep hunt, we had to stash extra gear, clothing, and food in the unattended hunting UTV at the trailhead before a few of our backpacking trips. It’s never fun exposing your valuables to theft, rodents, and weather. After the season, I considered secure storage options, and ultimately settled on the Tusk aluminum hunting UTV cargo box. The box is 22x22x14.5” deep and fits neatly in the cargo area inside my Razorback Rack. The lockable box mounts securely to the bed with fasteners hidden on the interior. The box has a padded liner and the lid is supported in the open position by gas struts. The dual-gasketed lid ensures that moisture and dust-sensitive items can be stored or transported without worry.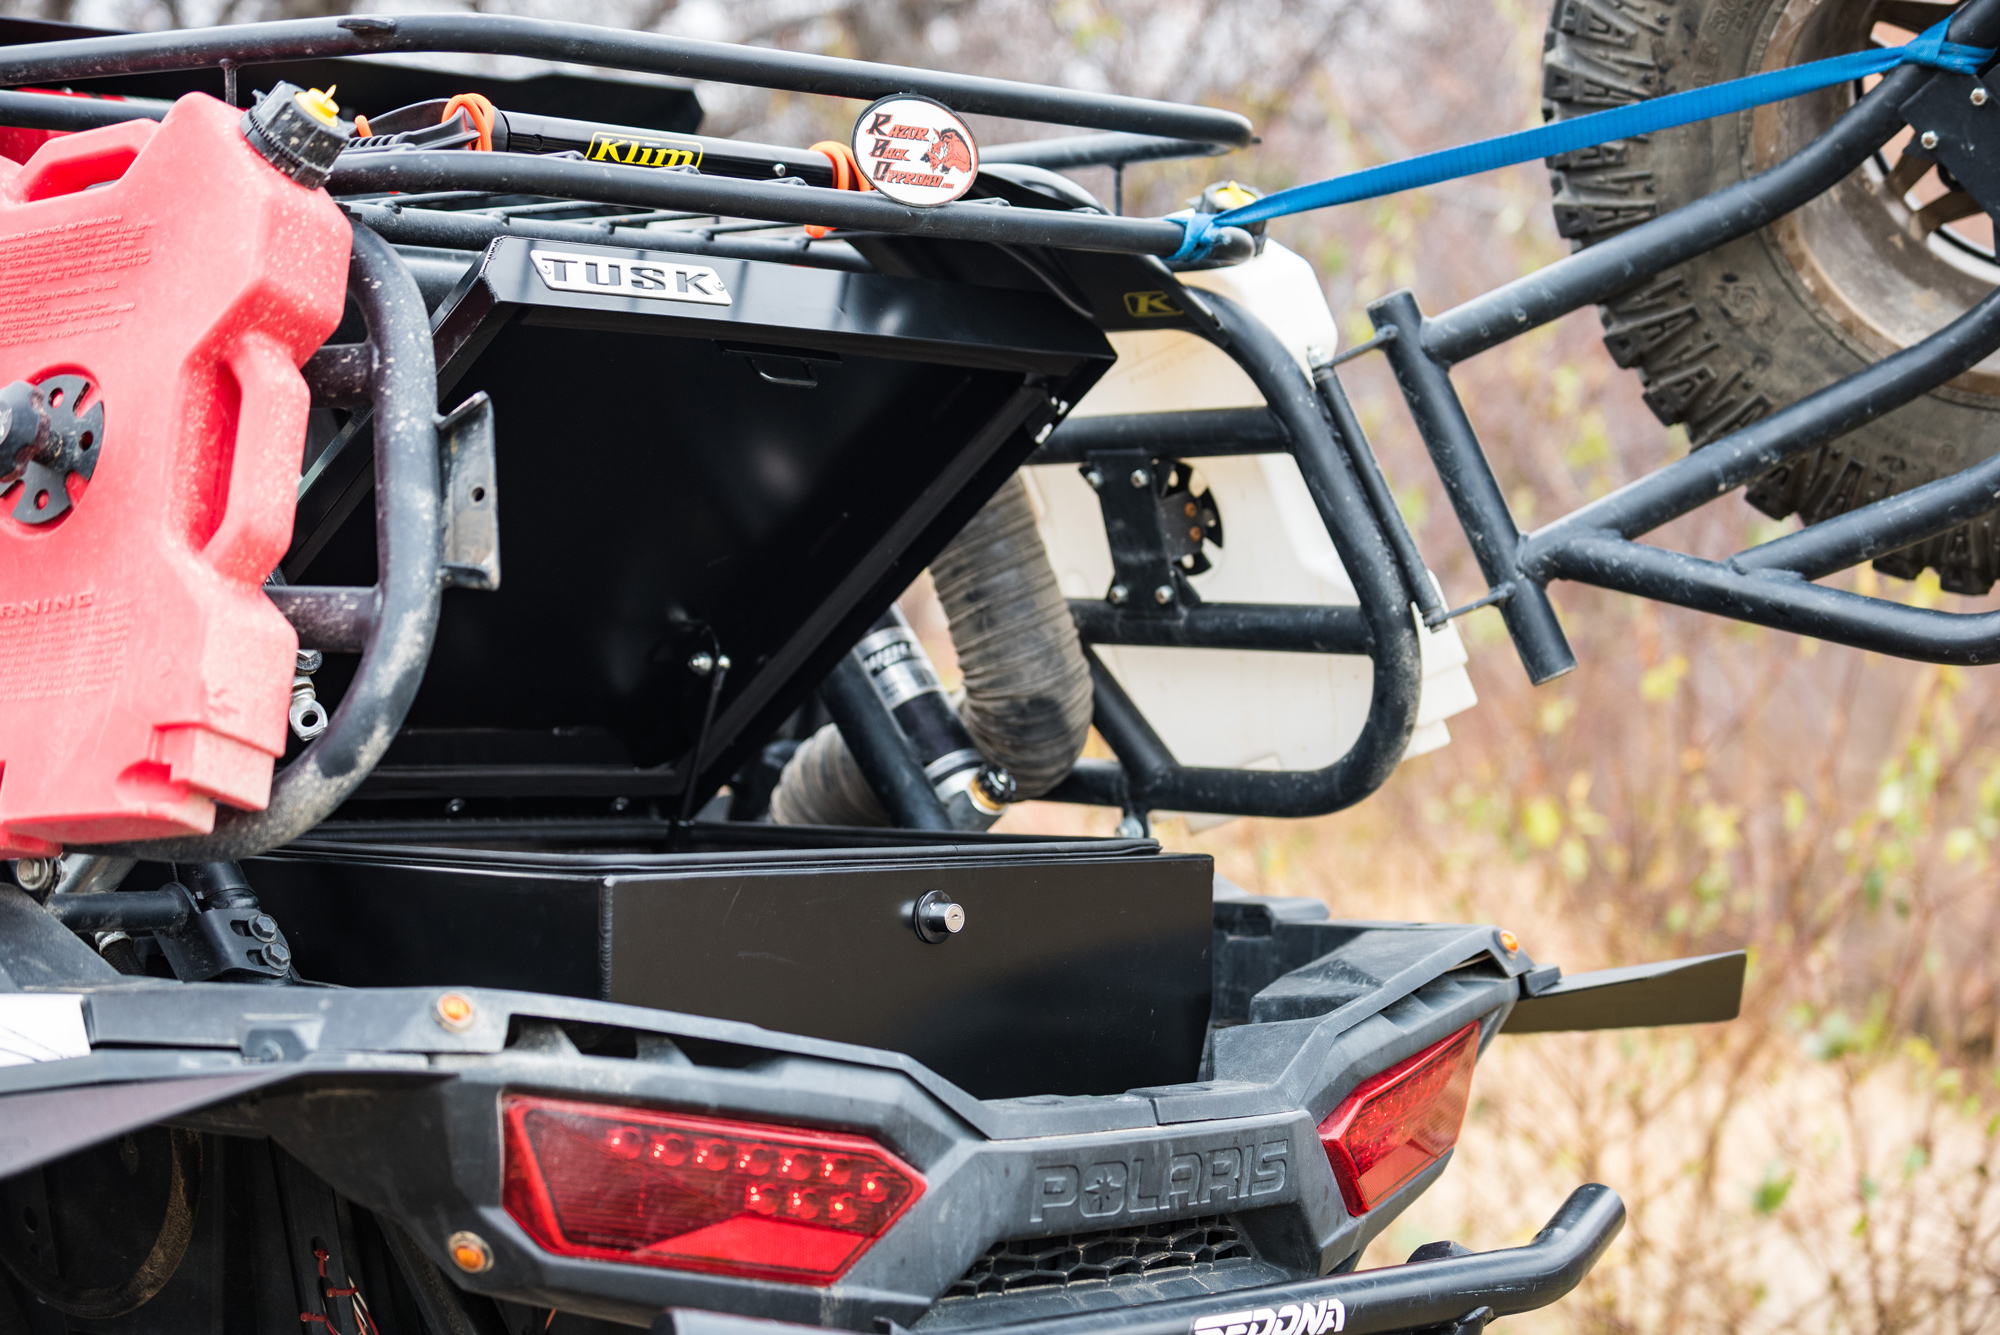
The Tusk UTV storage box keeps valuables locked safely away from thieves, dust ,and moisture.
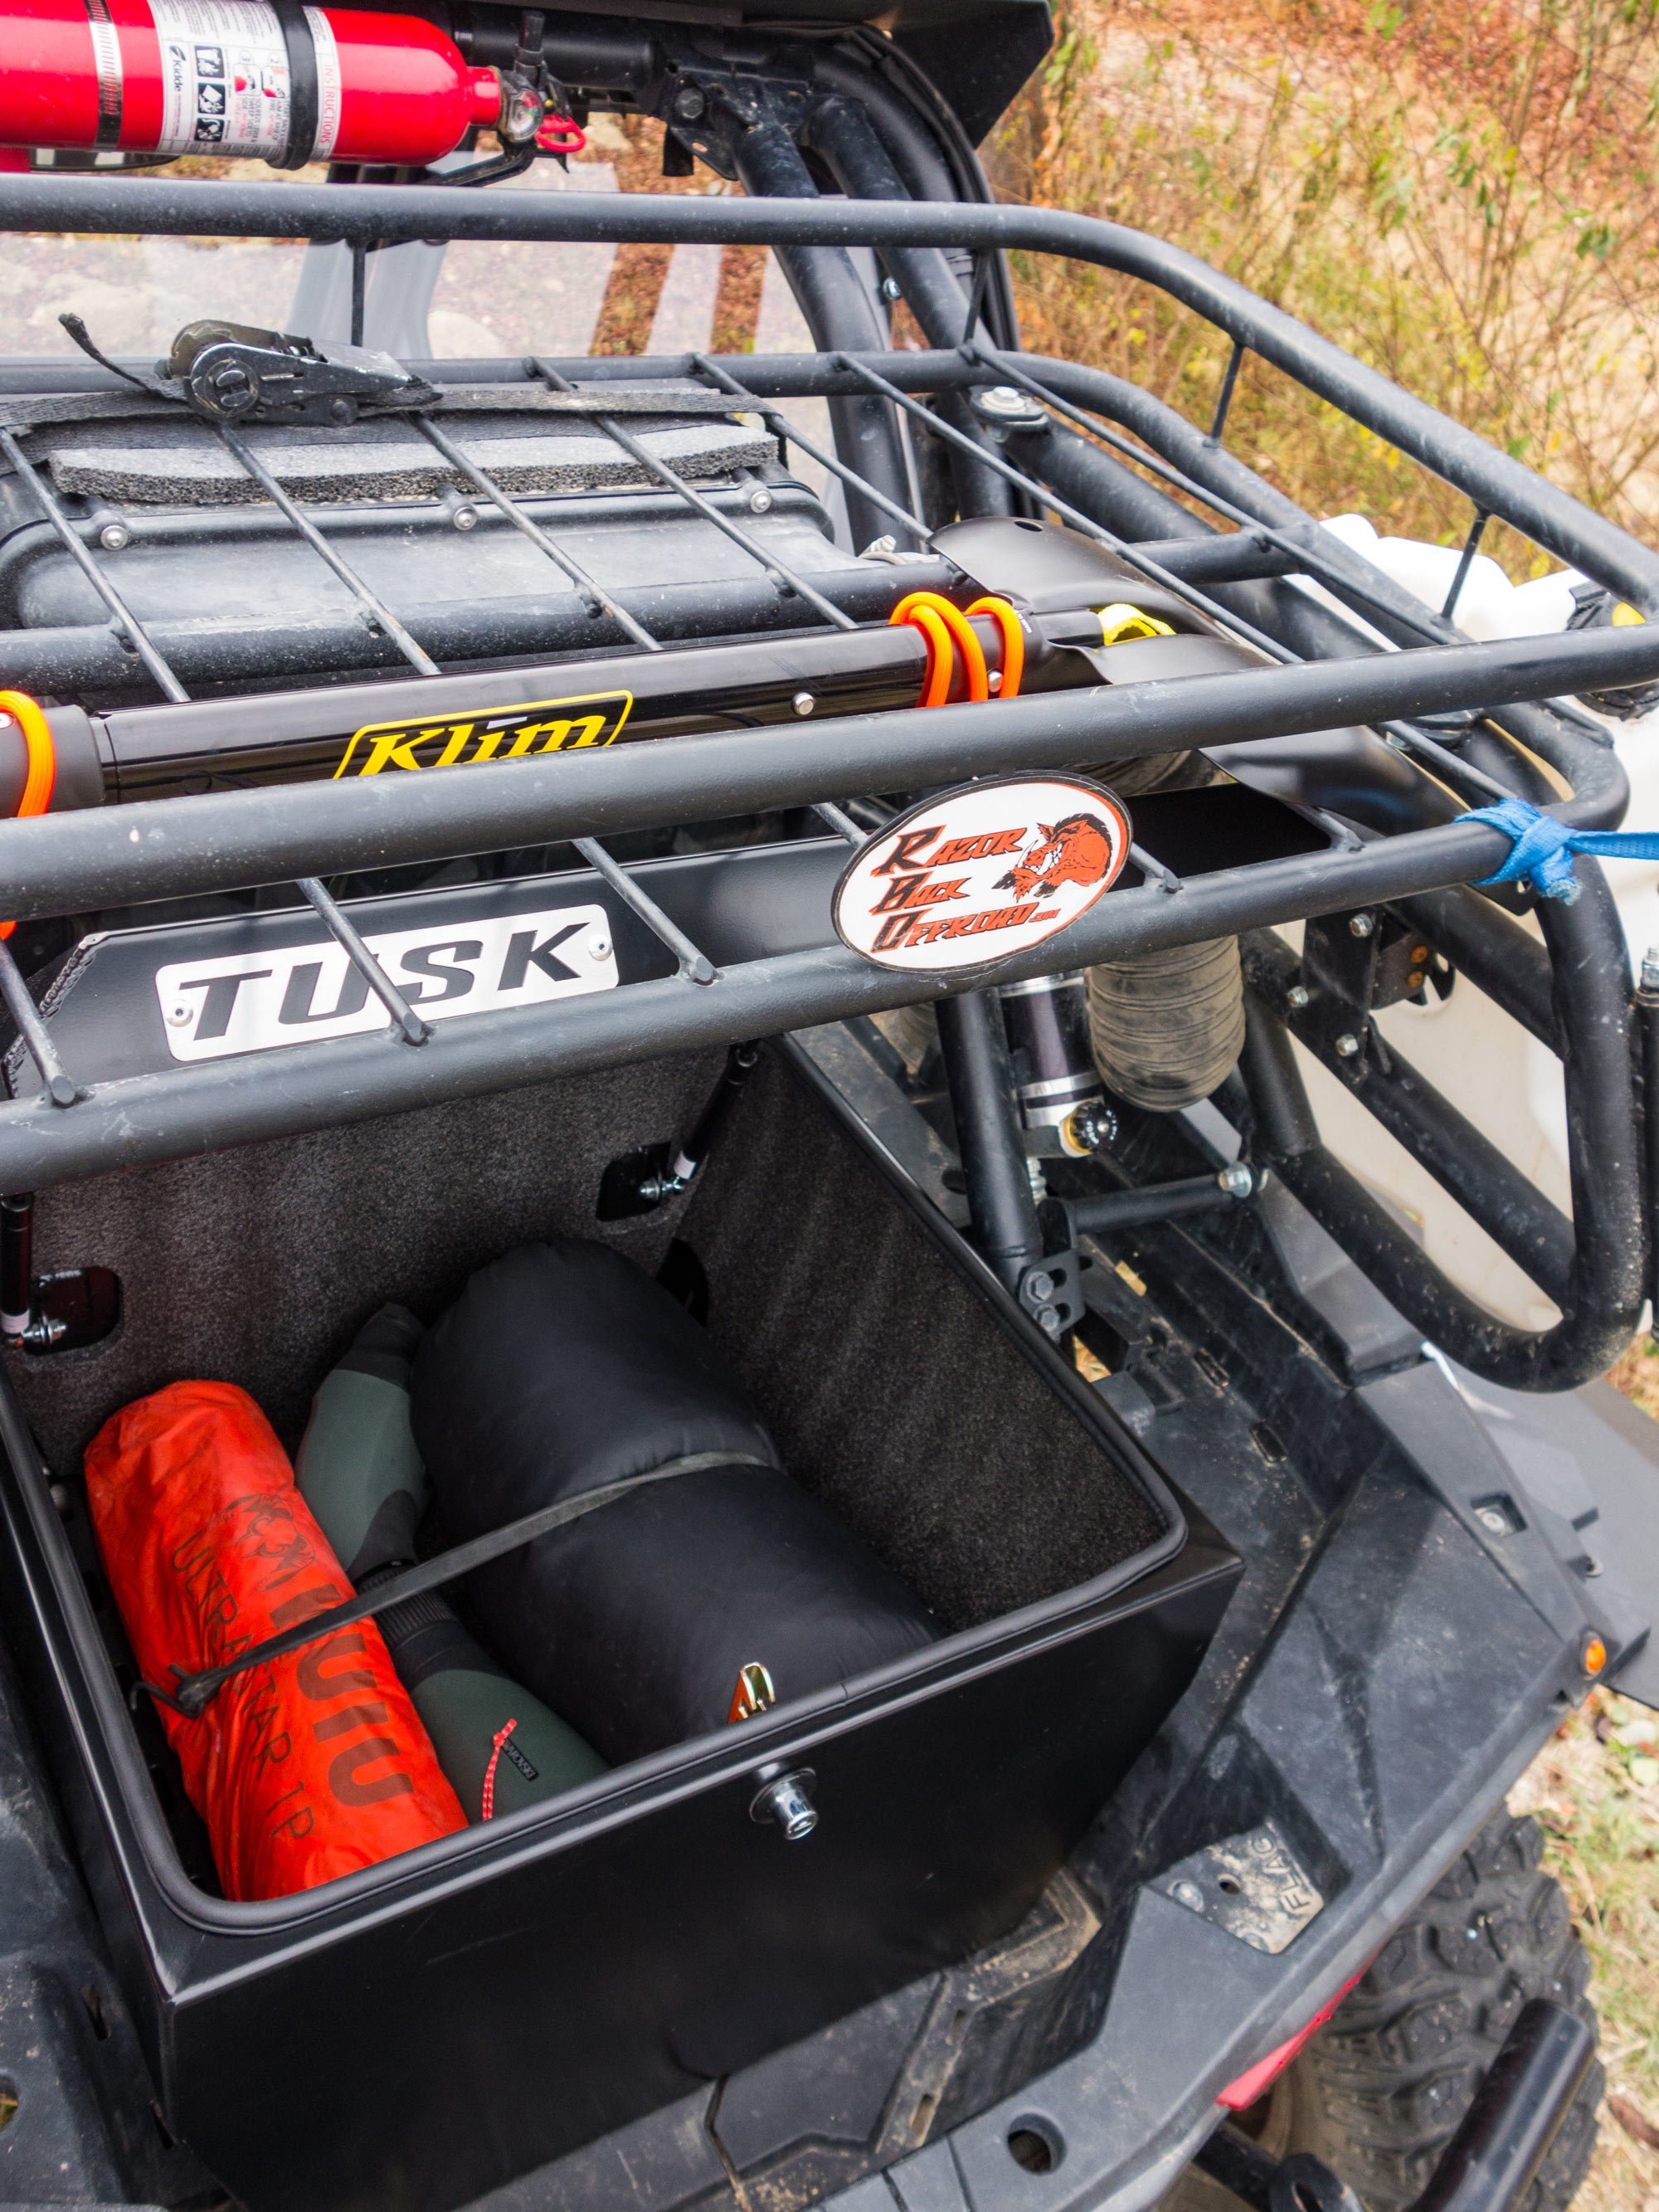 The interior also features slotted rails that can be used to hook bungee cords to prevent cargo from bouncing around inside the box as you ride. Accessory rails for the top of the box provide tie down points to secure additional gear on top of the box.
The cargo box occupies most of the bed’s floor space, but many smaller items can be packed around the box and there’s plenty of room above the box and in the upper rack for larger items.
There are dozens of other cargo boxes available for various hunting UTV makes and models made from molded plastic or metal in many shapes and sizes. Many of the options can be compared at RM ATV/MC. The Tusk UTV Cargo Box sells for $385 with top rack kit.
The interior also features slotted rails that can be used to hook bungee cords to prevent cargo from bouncing around inside the box as you ride. Accessory rails for the top of the box provide tie down points to secure additional gear on top of the box.
The cargo box occupies most of the bed’s floor space, but many smaller items can be packed around the box and there’s plenty of room above the box and in the upper rack for larger items.
There are dozens of other cargo boxes available for various hunting UTV makes and models made from molded plastic or metal in many shapes and sizes. Many of the options can be compared at RM ATV/MC. The Tusk UTV Cargo Box sells for $385 with top rack kit.
LED Light Bar
The last item I added in this build was a Tusk 30” curved LED light bar kit that I mounted to my roof with the supplied brackets. Wiring the light bar was quick and easy with the supplied wiring harness and switch. The combination spot and flood beams strategically placed across the bar do an outstanding job of extending your vision for night driving and filling in the edges with the flood beams angled to the outside. The universal wiring harness allows mounting the light bar virtually anywhere on your machine, but if you mount it in the typical locations closer to your fuse box or bus bar under the hood, you’ll have a bunch of extra harness to coil up and zip-tie to the frame. You can cut out unnecessary sections of the harness to shorten it if you have some basic electrical pliers and crimp connectors to clean up the install. Cost is $269 at RM ATV/MC.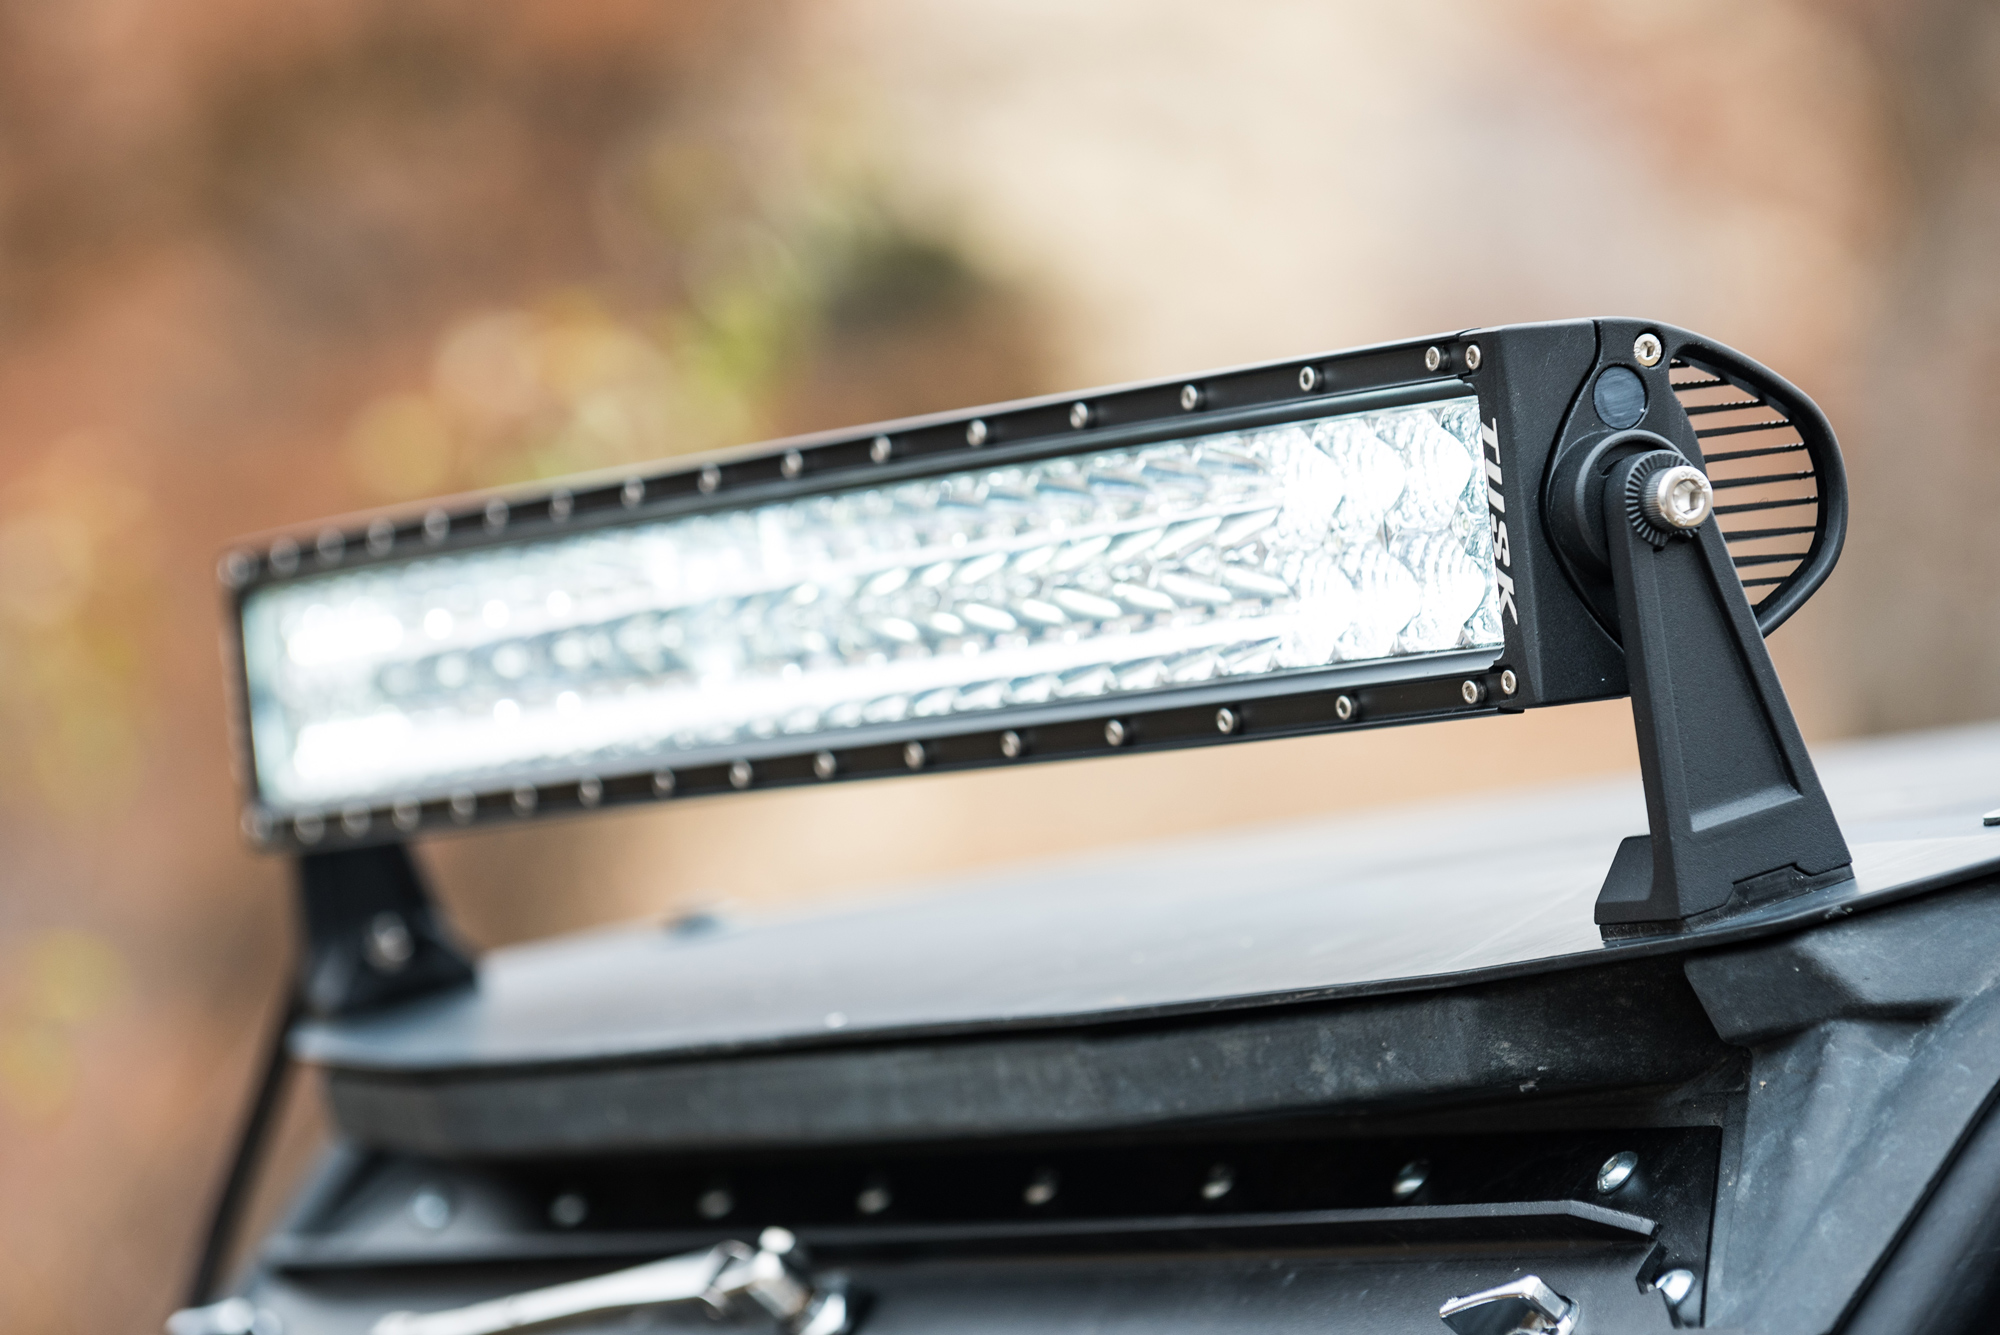
The Tusk 30” curved LED light bar lights up the night and is easy to install with included mounts and wiring harness. The curved aluminum housing and cooling fins add to the cool factor.
Parting Thoughts
I relied heavily on Rocky Mountain ATV/MC for this phase of my hunting UTV build. They stock almost anything and everything you could want to accessorize your hunting UTV, ATV, or dirt bike. Their huge distribution center in central Utah is strategically located for western hunters. Their online installation videos were helpful for many of the projects I took on, and their prices are always tough to beat. I recommend checking out their website for all your off-road projects. www.rockymountainatvmc.com. The only thing I have left to do now is install a set of tracks. I’ll then load up the winter camping gear so I can enjoy some backcountry wolf hunting this winter in the luxury of a heated cab. For a sneak peek at what I’m working on next, give us a follow on Instagram, @westernhuntermag and @darin_cooper.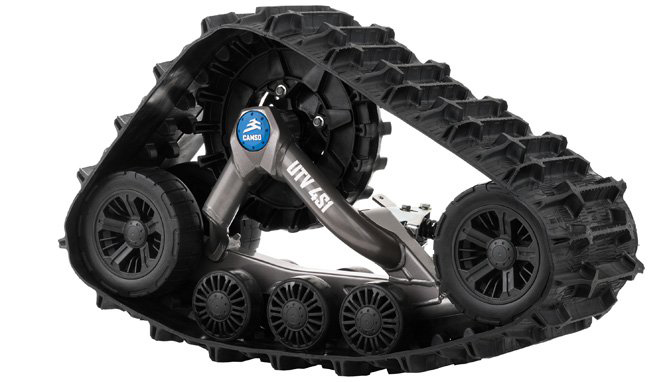
A set of tracks may be the final chapter for this hunting rig.