NOTICE: Certain links on this post may earn a commission for Western Hunter Magazine from Amazon or our other affiliate partners when you make a purchase. Thank you for your support.
Next Level Reloading Techniques
Consistent precision is the foundation for accurately putting rounds on target. Basic reloading practices help you get there by custom tailoring your ammunition to your particular firearm. Over the past few installments, we’ve covered the fundamentals of reloading, from equipment basics to fine-tuning a load for your rifle. Now I’d like to go beyond the basics and introduce some advanced techniques employed by top competitive shooters to eek every ounce of potential from their rifles.
One could argue that competition preparation is unnecessary for a hunting rifle. However, imagine seeing the best buck of your life standing at the outer limit of your ability. It’s the last minute of legal shooting hours, on the last day of the season. You may never draw this tag or see this buck again. Given the choice, would you invest the time and money to take your reloading to the next level?
Powder, primer, and bullet are just the accessories to the most critical part of your cartridge. The brass casing is like the block in your high-performance engine. Engine builders spend far more time honing cylinders, line boring, squaring surfaces, and “blueprinting” the block of a race motor than any other component. Brass is the foundation of your accuracy build when reloading. Beyond the accessories, the bulk of what you can control comes down to brass preparation. Until now we’ve more or less accepted the quality of the brass as is. Sure, you’re going to chamfer the neck, trim the cases to length, and deburr the flash hole, but what else is there?
The key to reloading extremely accurate ammunition is concentricity. Concentricity is a term that describes keeping multiple round objects aligned so their respective centers are the same. More specifically, we need to keep the case body lined up with the inside diameter of the case neck that holds a perfectly seated bullet. As long as the rifle’s chamber is concentric with the bore, your bullet will, in turn, be perfectly concentric with the bore. When all those cylinders line up perfectly, you have the best possible foundation for accuracy. Sounds pretty simple, and it actually is once you understand how, why, and where things can go wrong.
Classy Brass
All brass isn’t created equal. I recommend buying the best brass available since you’ll be using it for as many firings as it will safely handle. Good brass typically requires less prep time and often lasts longer. Quality brass can help offset the higher initial cost by saving you prep time and by lasting for more firings.
Various foundries produce brass using slightly different alloy formulas. The manufacturers likely use similar processes, but there are probably almost as many differences as there are similarities. These factors yield casings with slightly different properties. Some brass is harder and more brittle, and some are softer and more prone to rapid expansion. Brass made by certain manufacturers seems to be held to tighter dimensional tolerances or standards. Tighter tolerances mean better consistency in the case wall thickness, most importantly, the case neck walls. When the walls and web thicknesses are more consistent, the internal volume tends to follow the trend. Consistent case volume helps yield steady pressures when things go boom. Consistency in the case is the cornerstone to better precision downrange.
European-made brass made by Lapua and Norma is widely considered to be the best for reloading. Winchester, Hornady, Nosler, Weatherby, Federal, Remington, and others fall somewhere loosely in the remaining order of quality depending on who you ask and how passionate they are about a particular brand. With enough effort and know-how, you can make a set of Remington cases dimensionally superior to off-the-shelf Lapua brass, but most folks come to realize if you’re seeking perfection, it’s a lot easier to start closer to the goal.
Put Your Best Neck Forward
The case neck is where most of the attention is focused on advanced brass prep. The majority of precision reloading dies use interchangeable neck bushings that size the neck down just enough based on the neck outside diameter (OD) to hold the bullet with 0.001” to 0.003” of neck tension. This style of die is often used without an expanding button that pulls back through the case neck that you find in a standard full-length sizing die.
The expander ball is often blamed as the cause of excess run out in the case neck. Runout describes the amount that the neck is off-center compared to the cartridge body when measured with a dial indicator. Runout is usually even worse when a non-bushing die is used. Standard (non-bushing) sizing dies have to function with all brass, so they build the neck portion tighter than needed for 99% of cases. Therefore, necks get squeezed down more than likely needed. Then, the expander ball is pulled back through the neck on the floating decapping rod to expand the unsupported neck back up to provide the correct “grip” on the bullet.
If the neck gets pulled out of alignment with the case body, neither it nor the bullet will be concentric with the barrel’s bore. One-thousandth of an inch misalignment will cause the bullet to deform slightly as it enters off to one side of the bore at a high rate of speed - not optimum for accuracy.
Neck bushing dies require consistent neck wall thickness to produce consistent I.D. and neck tension. If your brass doesn’t have consistent walls, a neck bushing die without the expander will cause inconsistent neck tension in your loaded cartridges.
For example, if you’re shooting a hypothetical .280 caliber and your cases have .010” thick neck walls, your loaded rounds would measure .300” across the neck. You might use a .298” bushing to size the neck down and produce a .001-.002” interference fit with the bullet. The interference measurement is often referred to as neck tension on the bullet. If some of your cases have .011” walls, the same neck die will produce .003- 004” of tension.
That’s enough variation to make accuracy go to heck and cause significant velocity variations. In most instances, you’ll find that instead of the neck walls being uniformly thicker and thinner, they actually will be thick on one side and thin on the other. Your perfect case may have neck walls that measure .010” all the way around, but the next one will measure .011” on one side and .009” on the opposite (+/- .001”). When you run the neck bushing over this case, the inside diameter gets repositioned based on the OD. This means the ID and bullet are forced off-center by .001”.
In the exaggerated diagram, you can see the perfect case at left has uniform neck walls with the OD and ID concentric. In the center, you see significant neck wall thickness variation around the case neck, but the ID and bullet are concentric with the case body. At right, the ID has been forced off-center when the die sizes the OD of the neck and forces it to be concentric with the case body. Even if you use an expanding button, it won’t bring the ID all the way back into alignment for the case on the right.
To combat concentricity issues while reloading, many competition shooters use a handheld neck turning tool that shaves a small amount of brass from the OD of the case wall so that the walls are nearly perfect thickness all the way around the diameter. When turning the neck, the ID rides on a steel or carbide mandrel. This ensures that the re-cut neck OD is concentric with the ID.
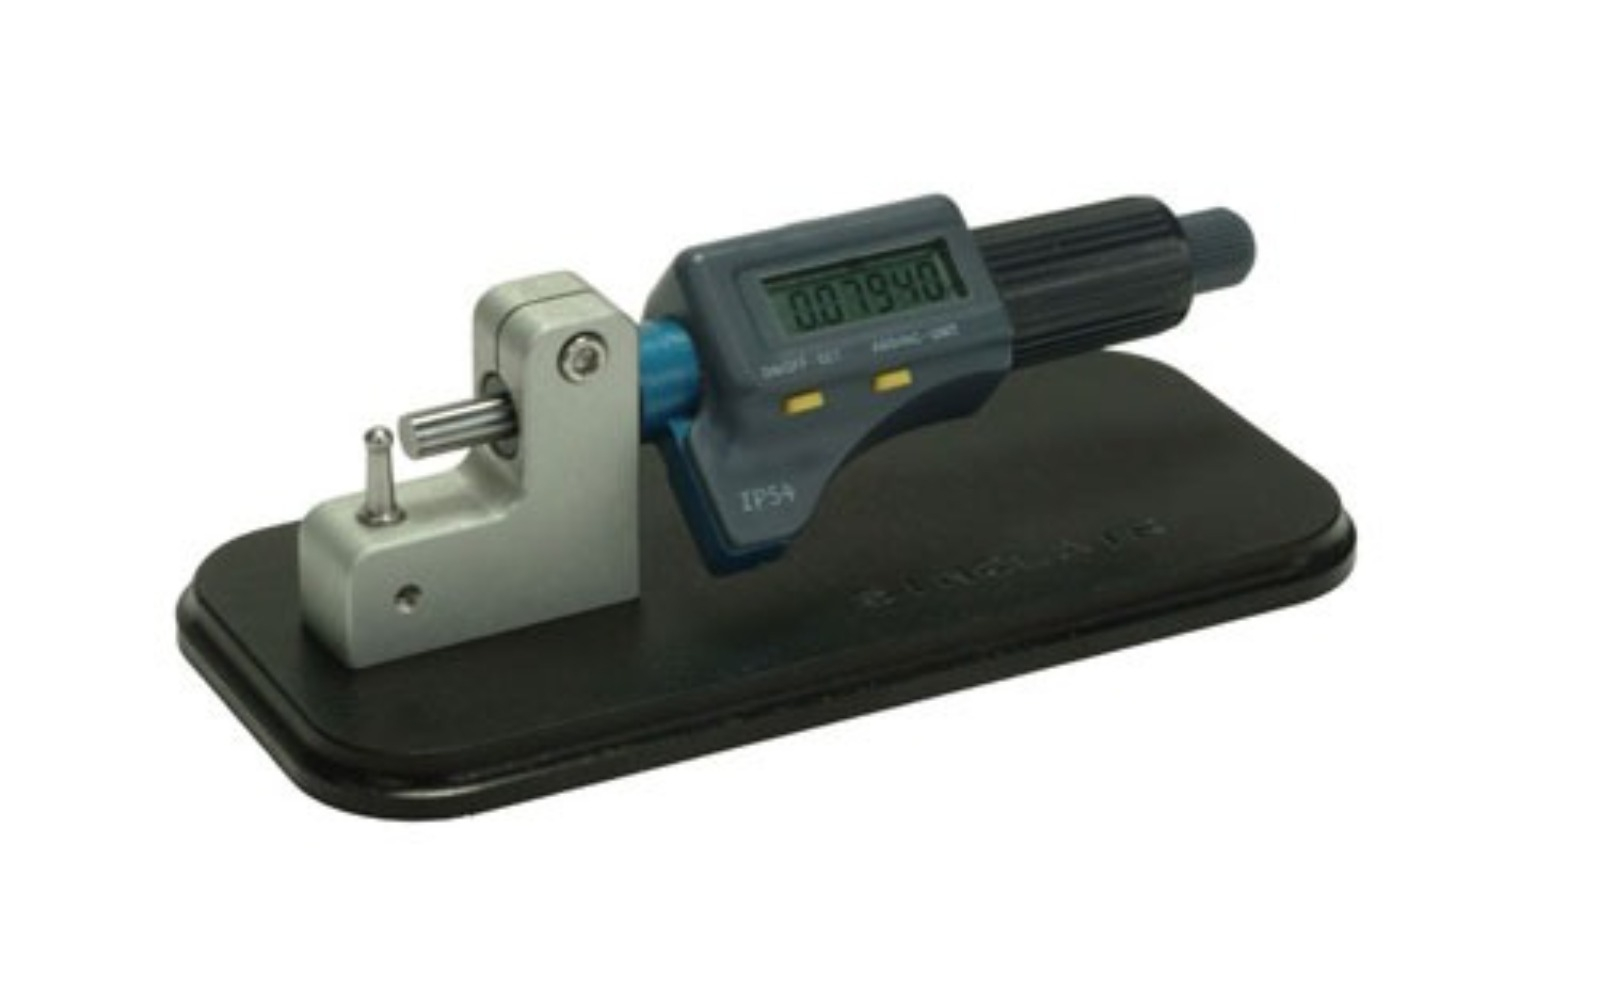
A case neck micrometer that can read to one ten-thousandth (.0001”) of an inch is the recommended tool to measure your neck wall thickness. A caliper doesn’t provide enough resolution to get the walls consistent enough to minimize neck tension variations batch to batch.
When I start reloading for a new rifle, I start with 100 new cases and prep all of them at the same time. You’ll usually need to size the necks to remove any dents and to properly fit the turning mandrel. Once sized, measure and sort by case neck thickness on a large sampling of cases. Good cases will typically show neck thickness variation of +/- 0.001” or less. Hopefully, 80% of your cases will fall into this category. If you see a lot of cases with neck wall variations greater than +/- 0.001” or more, you probably bought cheap brass. I warned you!
I keep cases that show up to .0015” variance to use as fouling rounds and sighters during reloading development unless they consistently perform the same as my best cases. Even then, you may want to mark and keep them separate so you can monitor them for problems that sometimes arise after many firings. The quality of your brass and your personal goals will determine what is a good or bad case.
Set the cutter to remove as little brass as possible while still cutting the entire circumference of the worst of your good cases. If the neck turning tool only cuts half of the case neck, you haven’t yet made the OD concentric with the ID. Keep adjusting the cutter deeper until it just cuts the full circumference, then set it to cut about two ten-thousandths deeper (.0002”). Write down the exact wall thickness of the finished cases, because that’s what you’ll want to shoot for on future brass, assuming you can get similar quality starting stock.
Keep in mind, your “bad” cases may not get cut all the way around the circumference, but they’re mainly going to be sighters and fouling rounds. I remove as little brass as needed to cut the full circumference on the worst of my keeper cases so that the case neck doesn’t have to expand too far upon firing to seal a standard hunting chamber. This is a little gentler on the brass and keeps the subsequent resizing step to a minimum.
Neck turning one time is usually good for the life of the case unless you want to mix some new brass with the old (not recommended). Case necks thicken over time, so even though you have uniformed the neck by turning, after ten firings, you may find they have thickened up. You may need to get a larger bushing if neck tension seems too high. You can often detect a neck that is tighter or looser than the others through the press handle when seating bullets. If you start feeling inconsistent seating pressure, you can either resize the neck or pitch the case. But before you pitch the case, consider…
Getting in Touch with Your Softer Side
Brass work hardens every time it is sized and shot. Over several firings, case necks especially will become much harder and lose some malleability. When a case is sized with a standard die, it’s first way undersized, and then sized way back up with the expander. This is another reason most competition shooters rely on bushing dies to work the neck only once, and only just enough on each reloading batch to minimize work hardening and maximize case life.
This is also why it’s considered best practice to maintain your entire fleet of brass at roughly the same number of firings. Brass with five firings on it will have a much harder neck than once-fired brass. The harder brass will spring back more when sized, resulting in more or less neck tension depending on whether you size from the outside with a bushing or from the inside with an expander button.
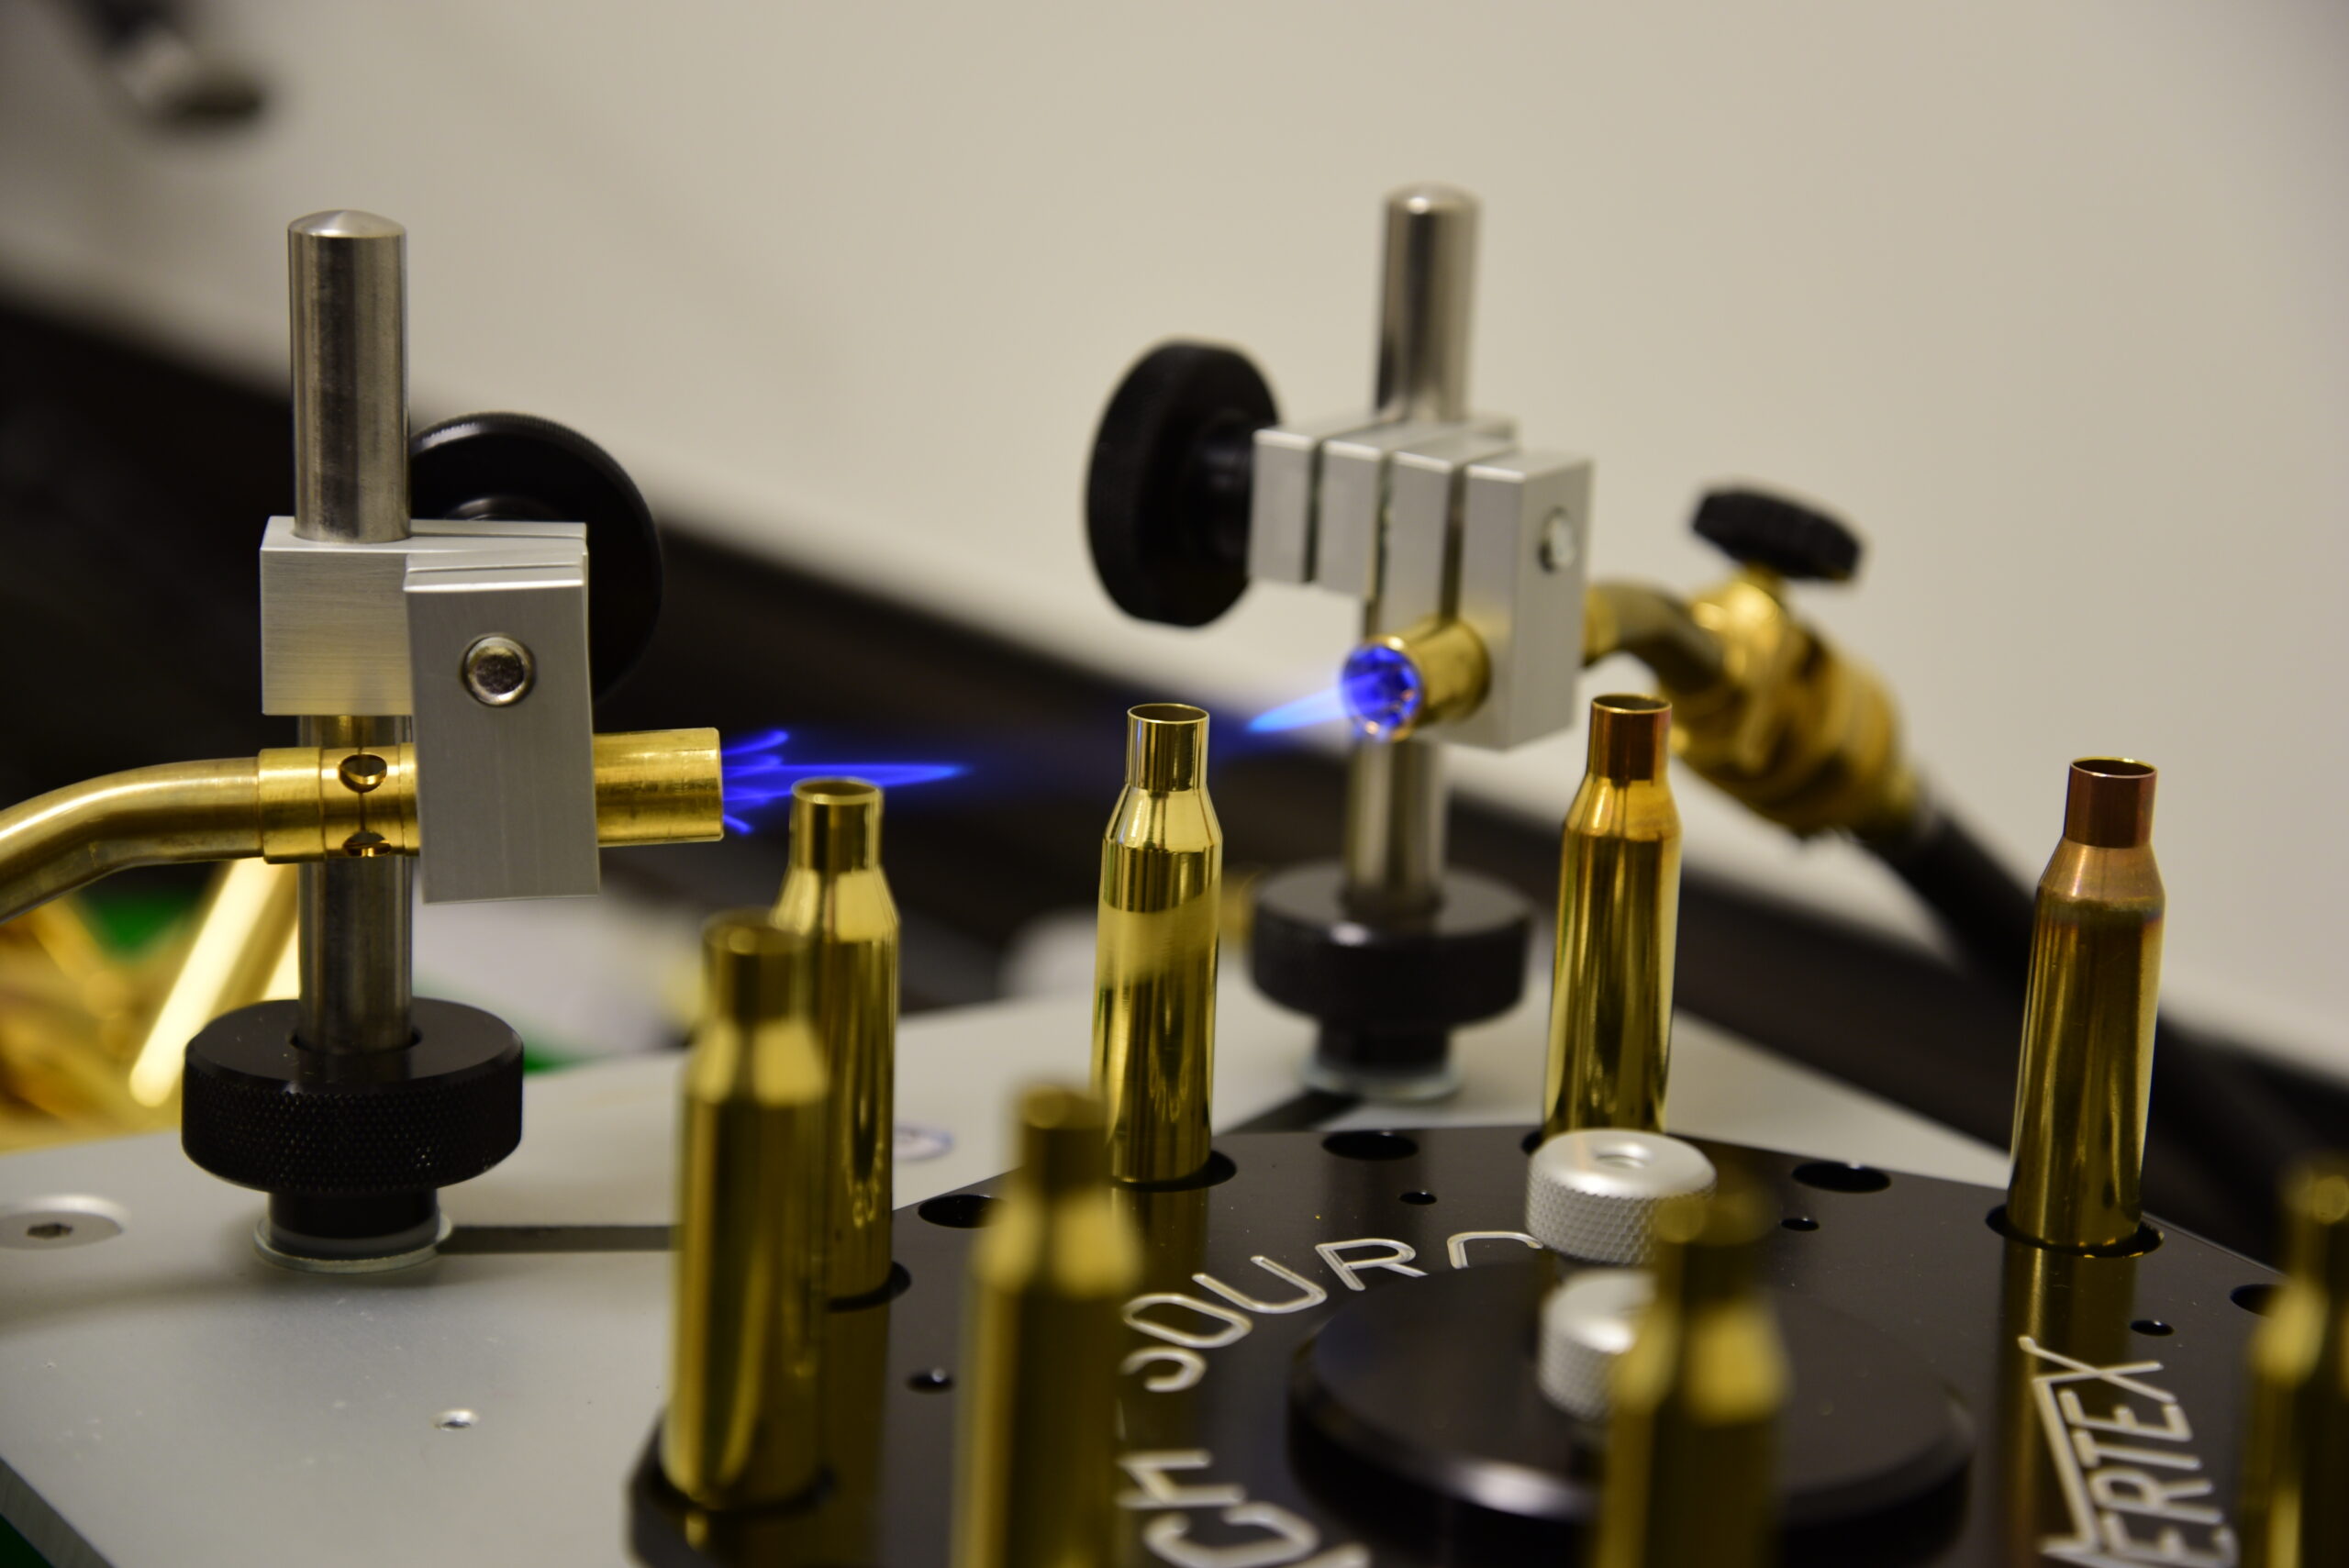
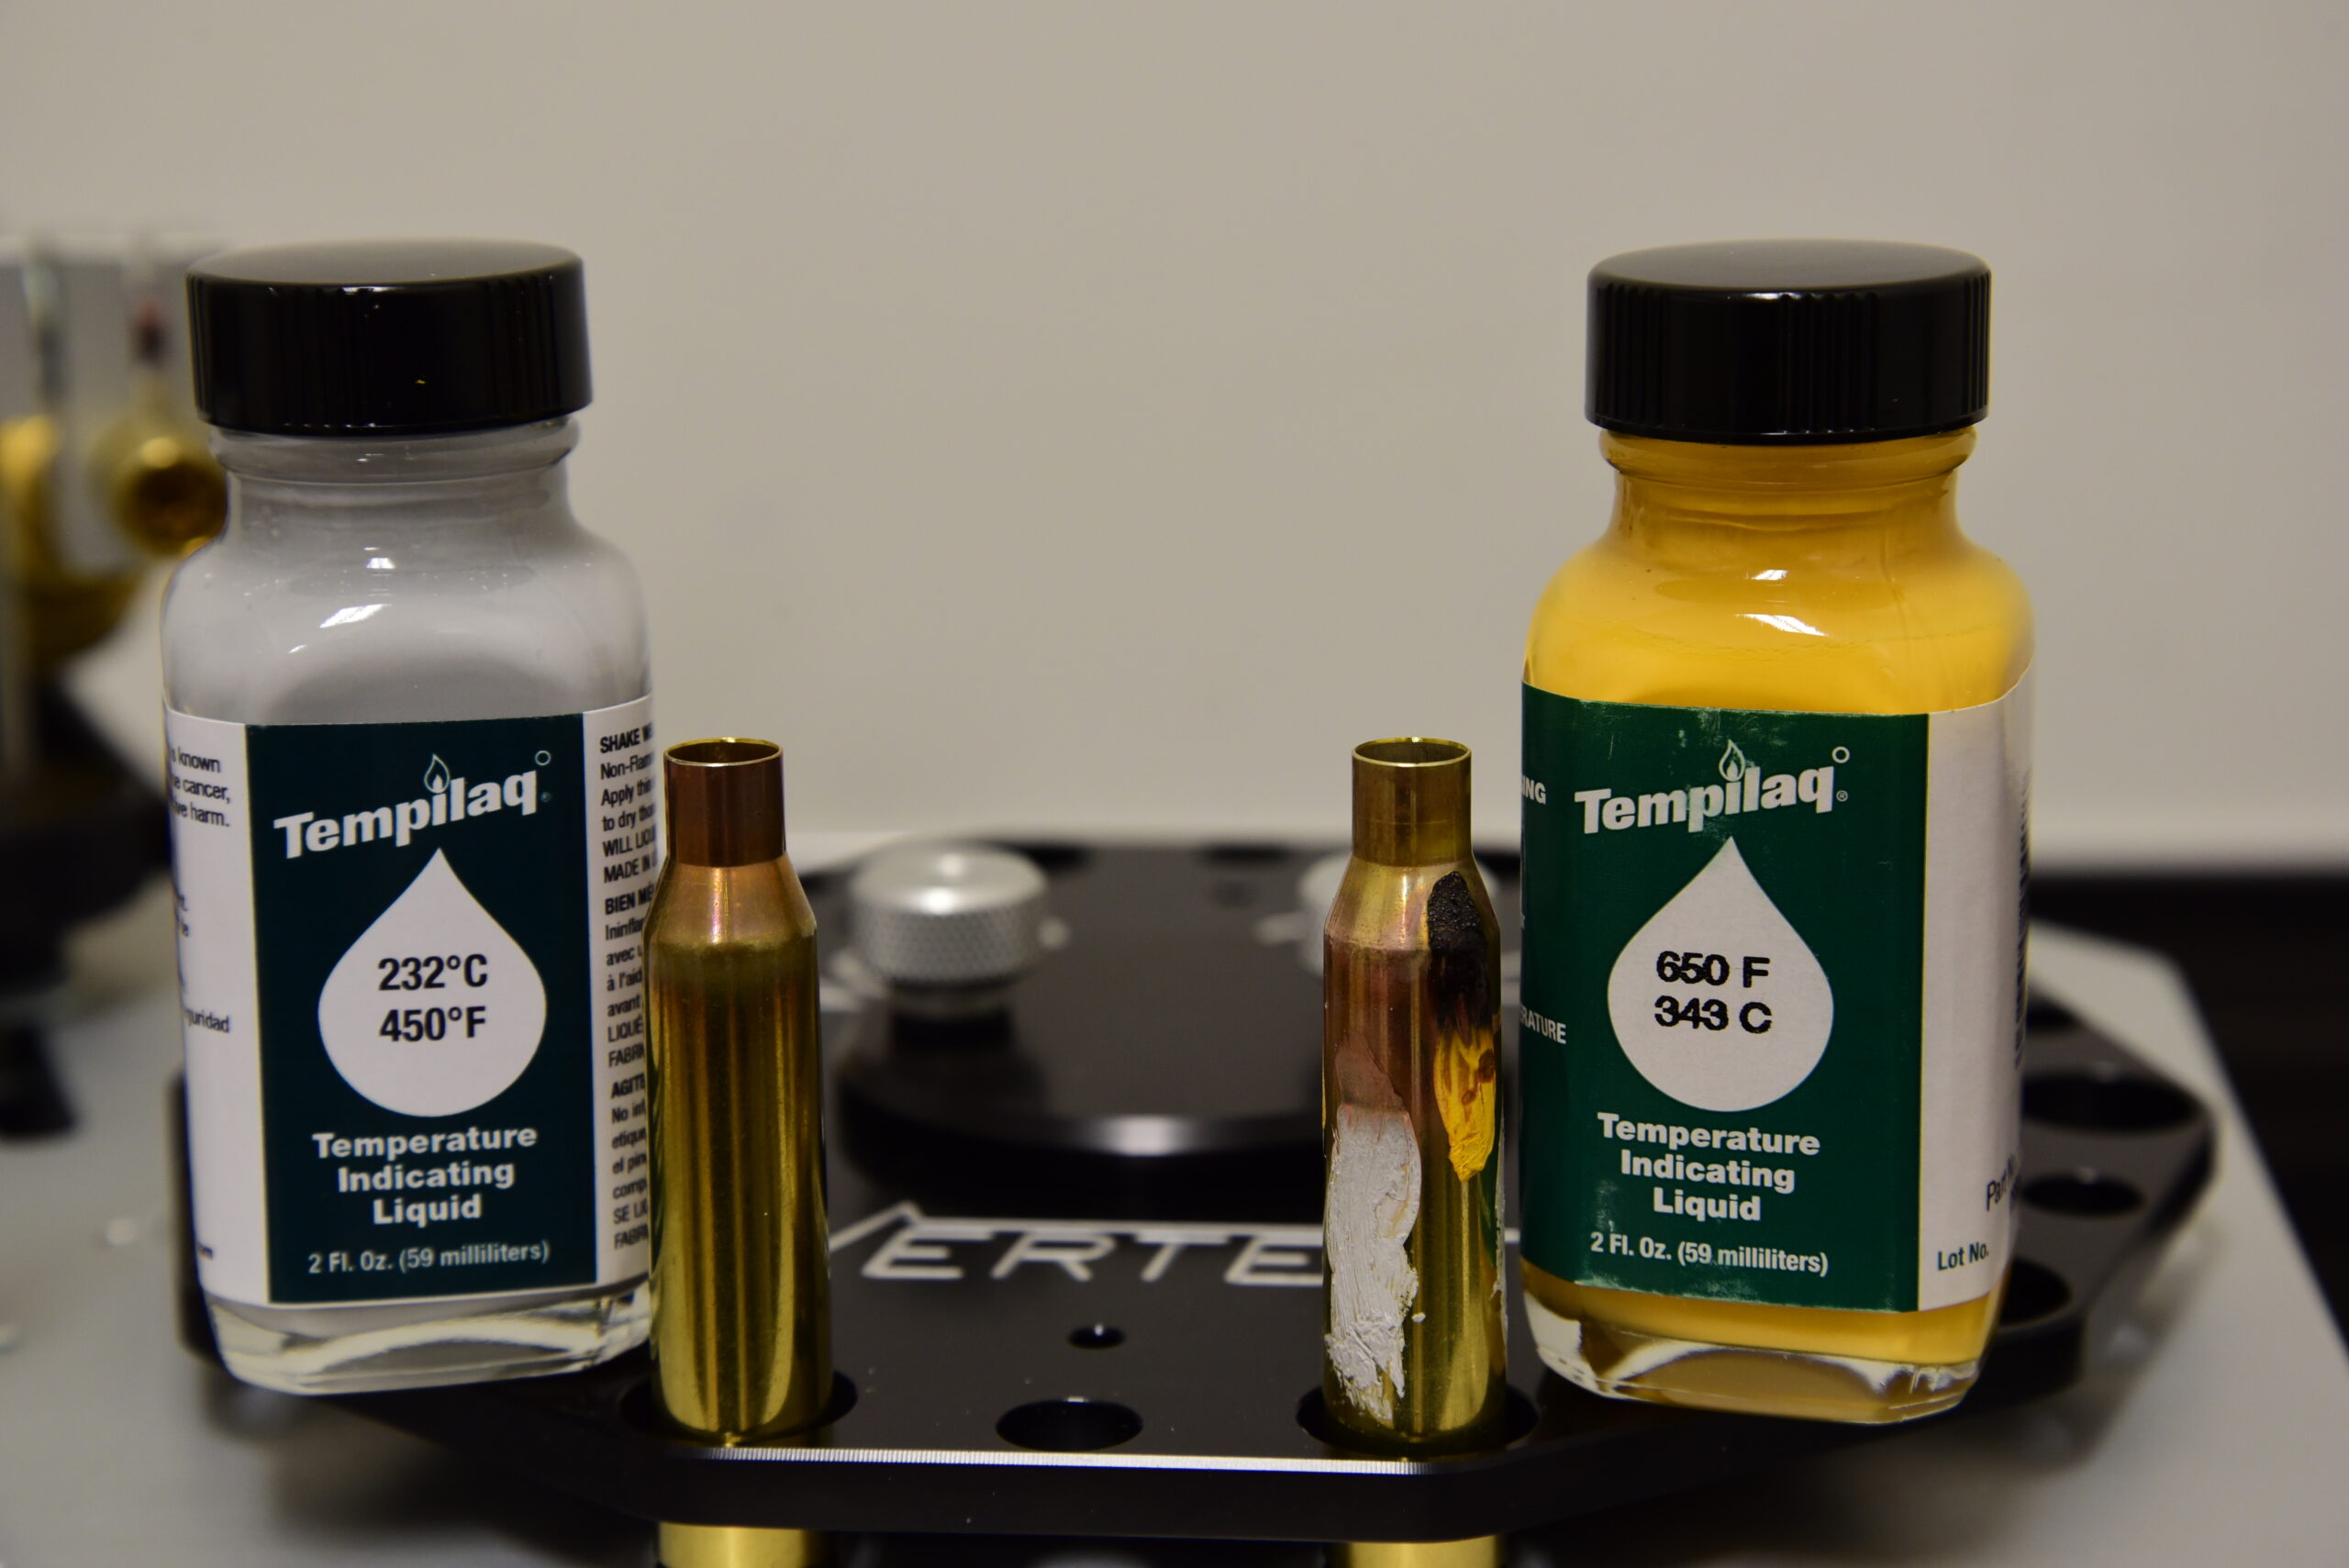
To combat this work hardening, you can heat the case neck evenly with a torch while rotating to about 750ºF for several seconds, then allow it to cool. This process softens the case neck and shoulder slightly by disrupting the grain structure. Softer cases respond better to sizing and cracking better. The process is called annealing. It is essentially the opposite of heat-treating. It sounds complicated, but you can use temperature-sensitive paint from Tempilaq that loses its color at a certain temperature to help you gauge the time required to heat the neck to the proper temperature.
If you’d like to try your hand at annealing before blindly drinking the Kool-Aid, you can heat your case necks in the flame of a propane torch in a very dark room. Hold the case in your bare hand and turn it by its base with the flame hitting the neck just above the shoulder. At the first hint of the neck starting to glow orange, pull the case away from the flame and gently drop it in a metal pan to air cool. If the cartridge base gets too hot to hold, you’re probably going too slow, and potentially overheating the case head.
According to Cal Zant of the precision rifle blog, annealing was the most common advanced reloading operation performed by the top 100 shooters in the Precision Rifle Series in 2015. Approximately 65% of the top 100 competitors were annealing their brass compared to only 53% that were turning case necks. Coincidentally, 46% of the top PRS shooters were using Lapua brass.
Some clever machines have been developed to automate the annealing process and can process 100 pieces of brass in under ten minutes. The most common designs use propane torches with a timing circuit and some means to rotate the case neck exposed to the flame. Newer developments use induction heating (electromagnetic) to heat only the neck and shoulder to very specific settings based on the brass alloy and case size.
Annealing heat should never be applied near the base – only to the neck and shoulder junction. Annealing machines are pretty spendy, but if you split the cost with a couple of buddies like I did, in exchange for annealing their cases, you might be able to justify the expense.
I use the Bench Source Vertex annealing machine after every firing to maximize case life and ensure consistent sizing and neck tension. The machine cycles cases through dual torches aimed at the neck. Cases pause in the flame while rotating for a specified time to ensure consistent results before dropping through a chute into a metal bin to cool.
Splitting Hairs…or Kernels
High-precision laboratory scales can weigh charges with better resolution than beam scales or even the automated powder dispensing machines like the RCBS Chargemaster that I use. The Sartorius analytical balance and the vaunted Prometheus powder dispensers are a couple of options popular with competitive shooters that are capable of weighing down to a single kernel of powder.
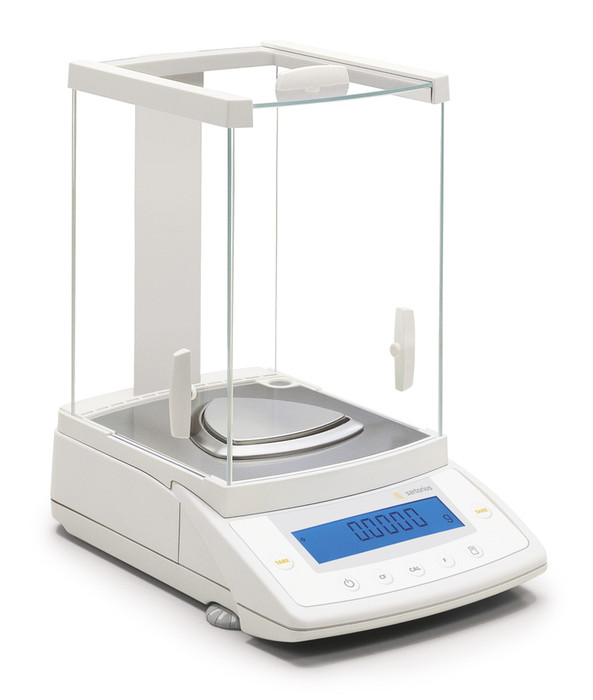
Bryan Litz tested charges measured on an RCBS Chargemaster versus a high-end Sartorius scale capable of resolving weights within .02 grains in his latest book Modern Advancements In Long Range Shooting, Volume II. The results showed that the precision-weighed charges consistently produced a lower standard deviation of velocities measured across ten-shot strings for multiple calibers and powders. The analytical scale produced reduced velocity Standard Deviation (SD) on average by 1 to 3 fps. Probably not enough to justify the cost of the scale for most hunters, but consistently enough to prove that it does indeed matter. Surprisingly Cal Zant reported that about half of the top 100 PRS competitors are weighing charges on high-end, $500-plus scales! Must be some good prize money in those competitions!
Analytical grade balances are capable of much finer resolution than typical powder scales down to +/- .01 grain. A powder dispenser like the RCBS Chargemaster can weigh charges within 0.1 grain. Some use them in tandem to speed up the process of precisely weighing charges.
Square Bottom in a Round Hole –Primer Pocket Uniforming
Primer pockets have a small radius in the corners at the bottom of the cup that can make primer seating inconsistent. In some cases, the bottom of the primer pocket isn’t even flat.
If you don’t get a positive feel through the plunger handle when the primer bottoms out in the cup and your primer depth varies, you may want to consider using a carbide primer pocket uniforming tool like the one pictured from Sinclair. Improper seating can cause ignition problems that affect accuracy and velocity. The uniformer cuts the bottom of the primer pocket square and won’t affect diameter, so primers still fit snugly. Uniformed primer pockets have a perfectly flat bottom and consistent depth. Uniforming is easy and the tools are reasonably priced.
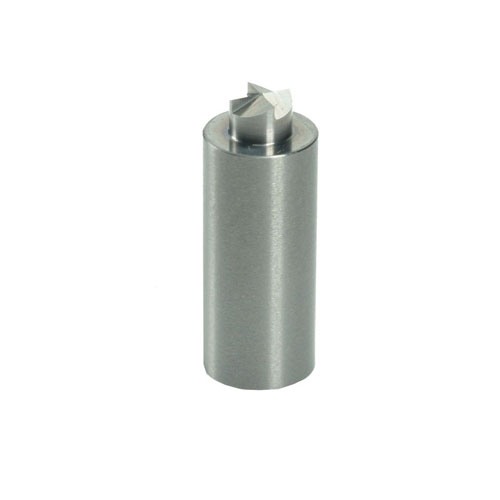
A uniforming tool will square up the floor of the pocket, clean the corner radius out, and uniform the depth.
Drawing the Line
Like any enthusiast hobby, you can easily get carried away with high-end reloading gadgets and equipment. Without a great deal of tedious and expensive testing, it’s hard to prove the benefits or justify the costs.
I tend to lean on the competitive crowd quite a bit for sorting out what matters and I greatly appreciate the research and data collection efforts of Bryan Litz’s Applied Ballistics team and Cal Zant’s keep-no-secrets approach at the Precision Rifle Blog. These guys delve into the details and aren’t afraid to test conventional wisdom against real-world results. For competitive shooters that routinely shoot 2000–5000 shots a year, it’s easier to justify the expense…losing sucks!
There’s little question that it all leads to tighter groups and more consistent shooting. How far do you need to go to make the shot count on your once-in-a-lifetime buck?
Neck Turning Tips
If you stop the neck turning cut before the shoulder, the sizing die will push the resulting step to the ID of the case neck. These constrictions, affectionately known as “doughnuts” amongst seasoned reloading, can lead to problems like increased pressure and erratic velocities. Turn the neck down into the shoulder slightly and leave the sticky, fried breakfast treats for the men in blue.
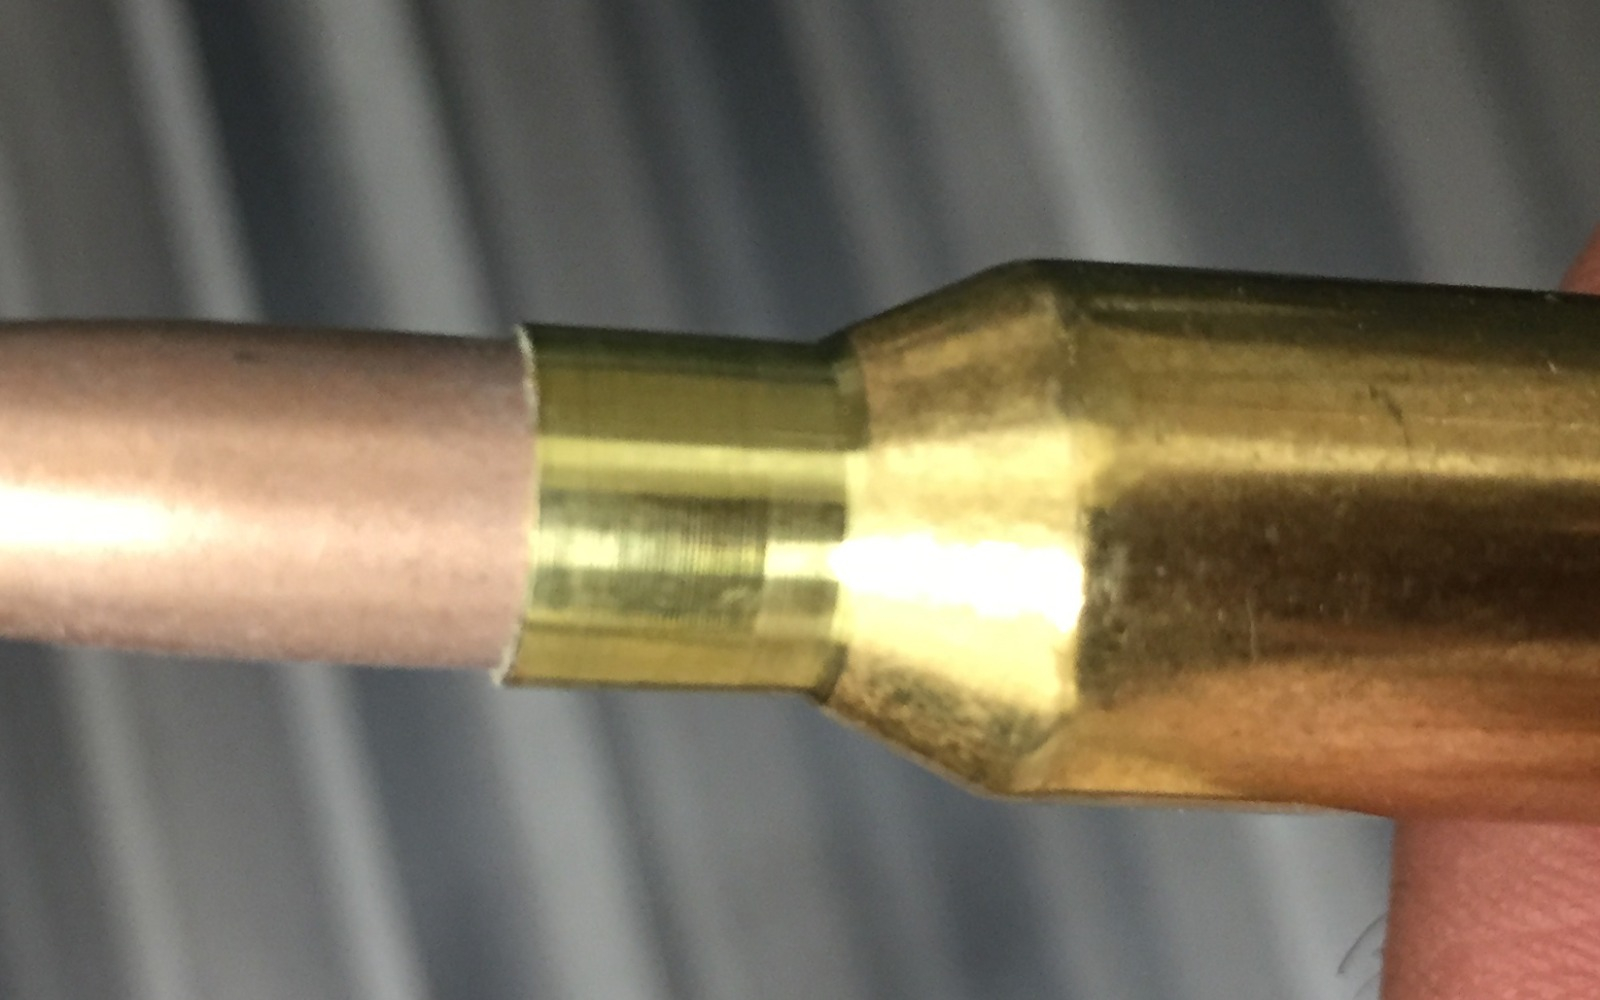
Drink the coffee but skip the doughnuts by turning into the shoulder. The cutter on the neck-turning tool should have an angle ground into it to blend your cut into the shoulder angle seamlessly.
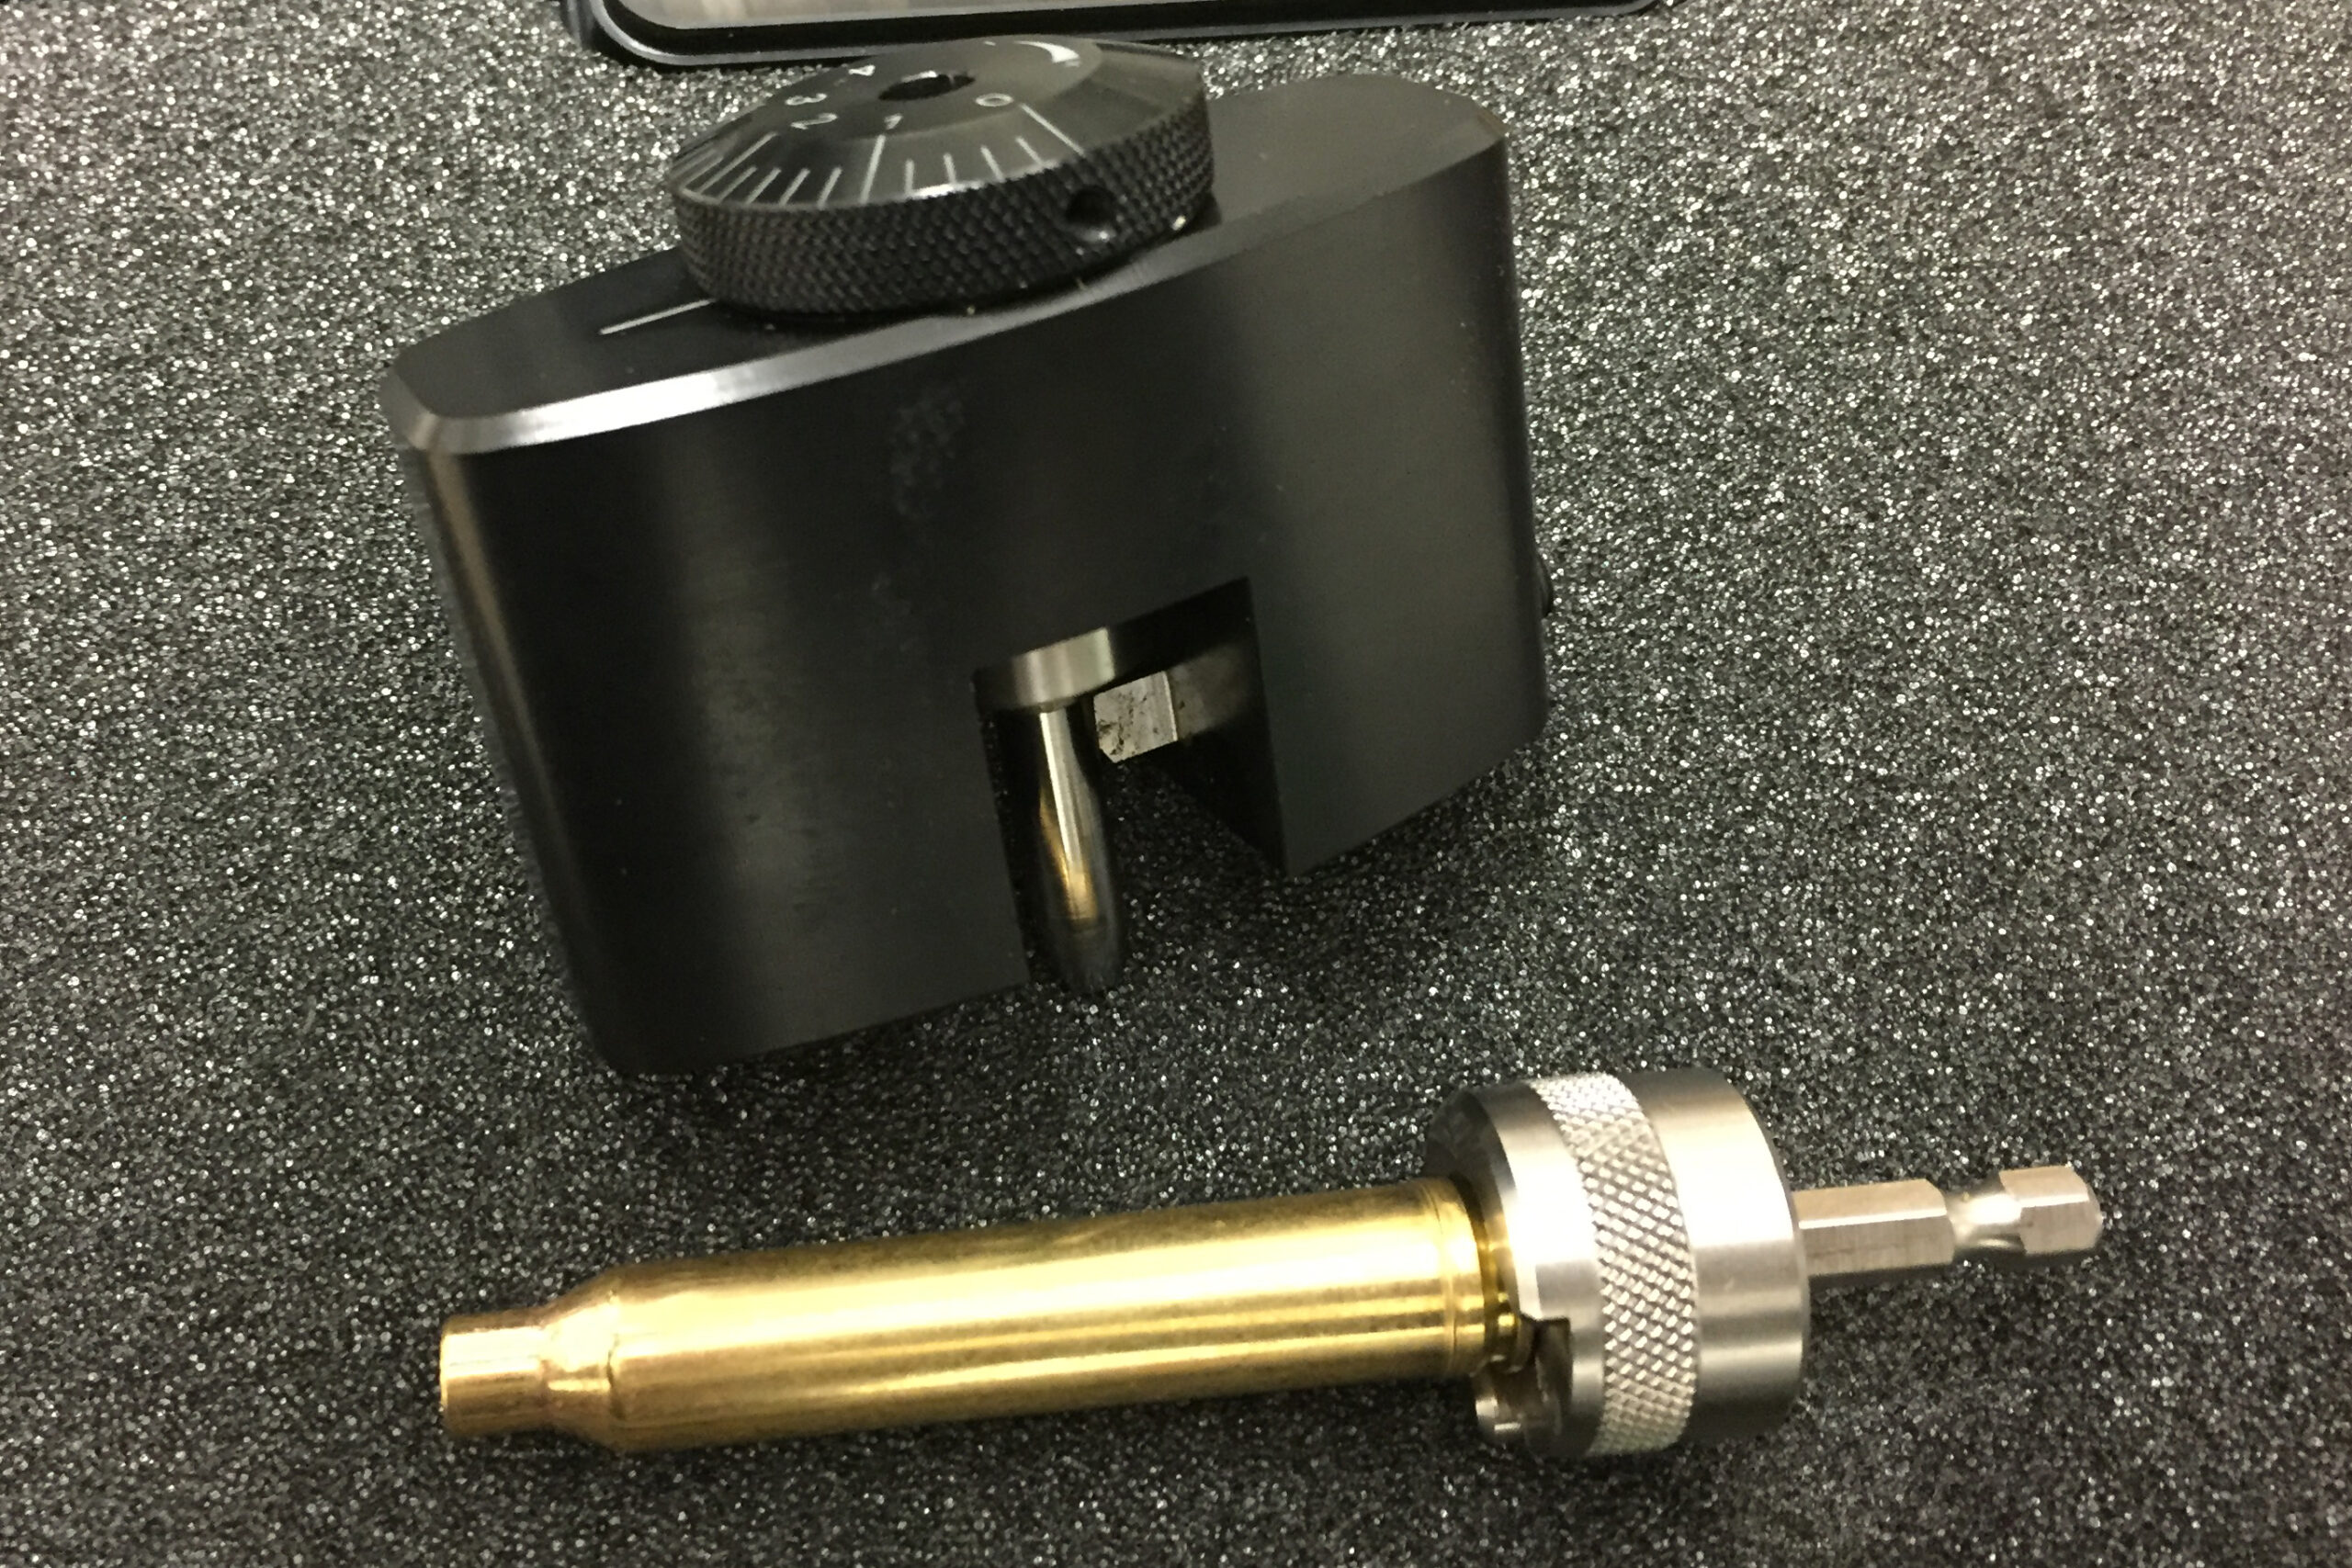
Reduce the pain of neck turning by getting a powered case-turning adapter from Sinclair or K&M Reloading. The adapter fits in your drill or power screwdriver and the case can be secured in a matter of seconds with the threaded collar. With a power adapter, it’s easy to obtain a smooth finish and consistent neck walls with any high-quality neck-turning tool. I secure my turning tool in padded vice jaws while I run the drill to spin the case. Slow and steady on and off the mandrel will produce the best finish and most consistent neck wall measurements.
I use the Sinclair neck-turning tool. It features a micro-adjustable dial that allows wall thickness to be cut in .0002” increments by rotating the dial. The carbide turning mandrel helps eliminate any galling on the ID of the case neck while spinning the case.
The mandrels and sizing die provided with the Sinclair neck-turning kits are designed to size the case neck to fit the turning mandrel precisely. They can also be used to expand case necks after sizing them down with a bushing die. Some precision reloading experts claim this method maintains far better concentricity than an expander button and may produce more consistent neck tension that bushing sizing the neck OD alone. My experience supports both theories. In other words, that’s how I do it.