NOTICE: Certain links on this post may earn a commission for Western Hunter Magazine from Amazon or our other affiliate partners when you make a purchase. Thank you for your support.
Building a Modern Hunting Journal
A notebook or hunting journal handed down from previous generations can tell us a lot about our forefathers’ outdoor pursuits. Tucked inside and around the edges of the stories and notes are the details, such as what the bitterbrush looked like that year, how tall the grass was, where to camp, new road closures, and how much water was present at the spring in September. This kind of info can teach you a lot about the places your dad, uncles, etc. went and what they saw along the way. But what if there were photos with coordinates and a map that showed exactly where they were taken?
I’m always looking for new and simpler ways to tell stories with my photographs. Sometimes I capture images purely for the joy and beauty of the landscape or the look of a particular animal, but sometimes I record photos so that I can recall something very specific. With the ease of access to satellite technology, we can now add geotagging to our images.
A couple of weeks ago, I pulled an old landscape photo out from an old hunting journal. It was taken during a backpack hunt in Wyoming about ten years ago. As I looked at it, I thought, “Where and when exactly was I there?” It’s hard to recall from memory, the exact date, and it’s even harder to know what I was looking at without doing some additional map work and going back over my notes. I can't remember everything; in fact, I can't even come up with all the possible questions for which I might want answers a decade later.
Fortunately, I can refer back to images in my hunting journal that show more detail than I could remember by writing them down. So, while photos offer perspective, photographs coupled with new technology offer amazing possibilities for building a modern hunting journal.
Most of us already gather an enormous amount of digital information. By taking some simple notes and capturing photographs of places and things you see, you can build a relatively robust history and learn a lot about a particular place in a relatively short amount of time. By adding geotagging, we open new opportunities to preserve our own hunting adventures.
Geotagging Your Photos
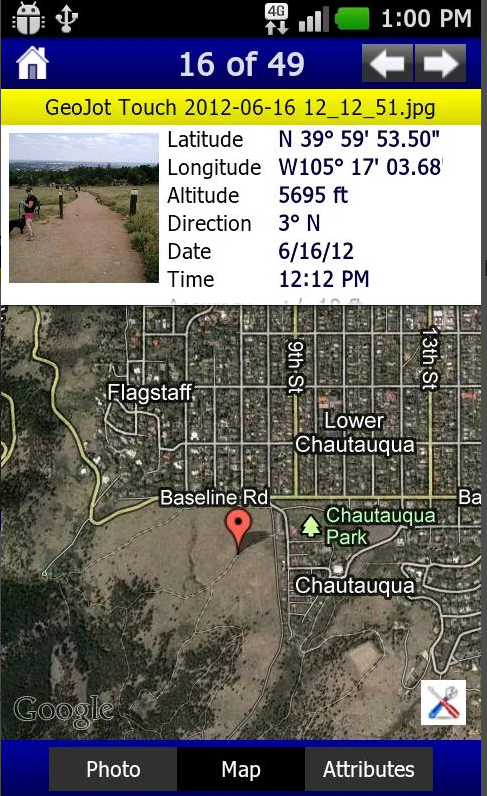
Many of today’s cameras have a built-in GPS that may include altitude, direction, an electronic compass, and even a horizontal level, like the ones you see in the cockpit of a Super Cub. Talk about powerful tools right in your camera! So how do you use GPS and Geotagging to create a modern-day hunting journal? There are several ways. The simplest way is to first turn on your camera's internal GPS if it has one. If it doesn't, I’ll explain a workaround later. Make sure the date and time are correct (this is critical), and that you’ve properly initialized or calibrated your device. Now, take a photo.
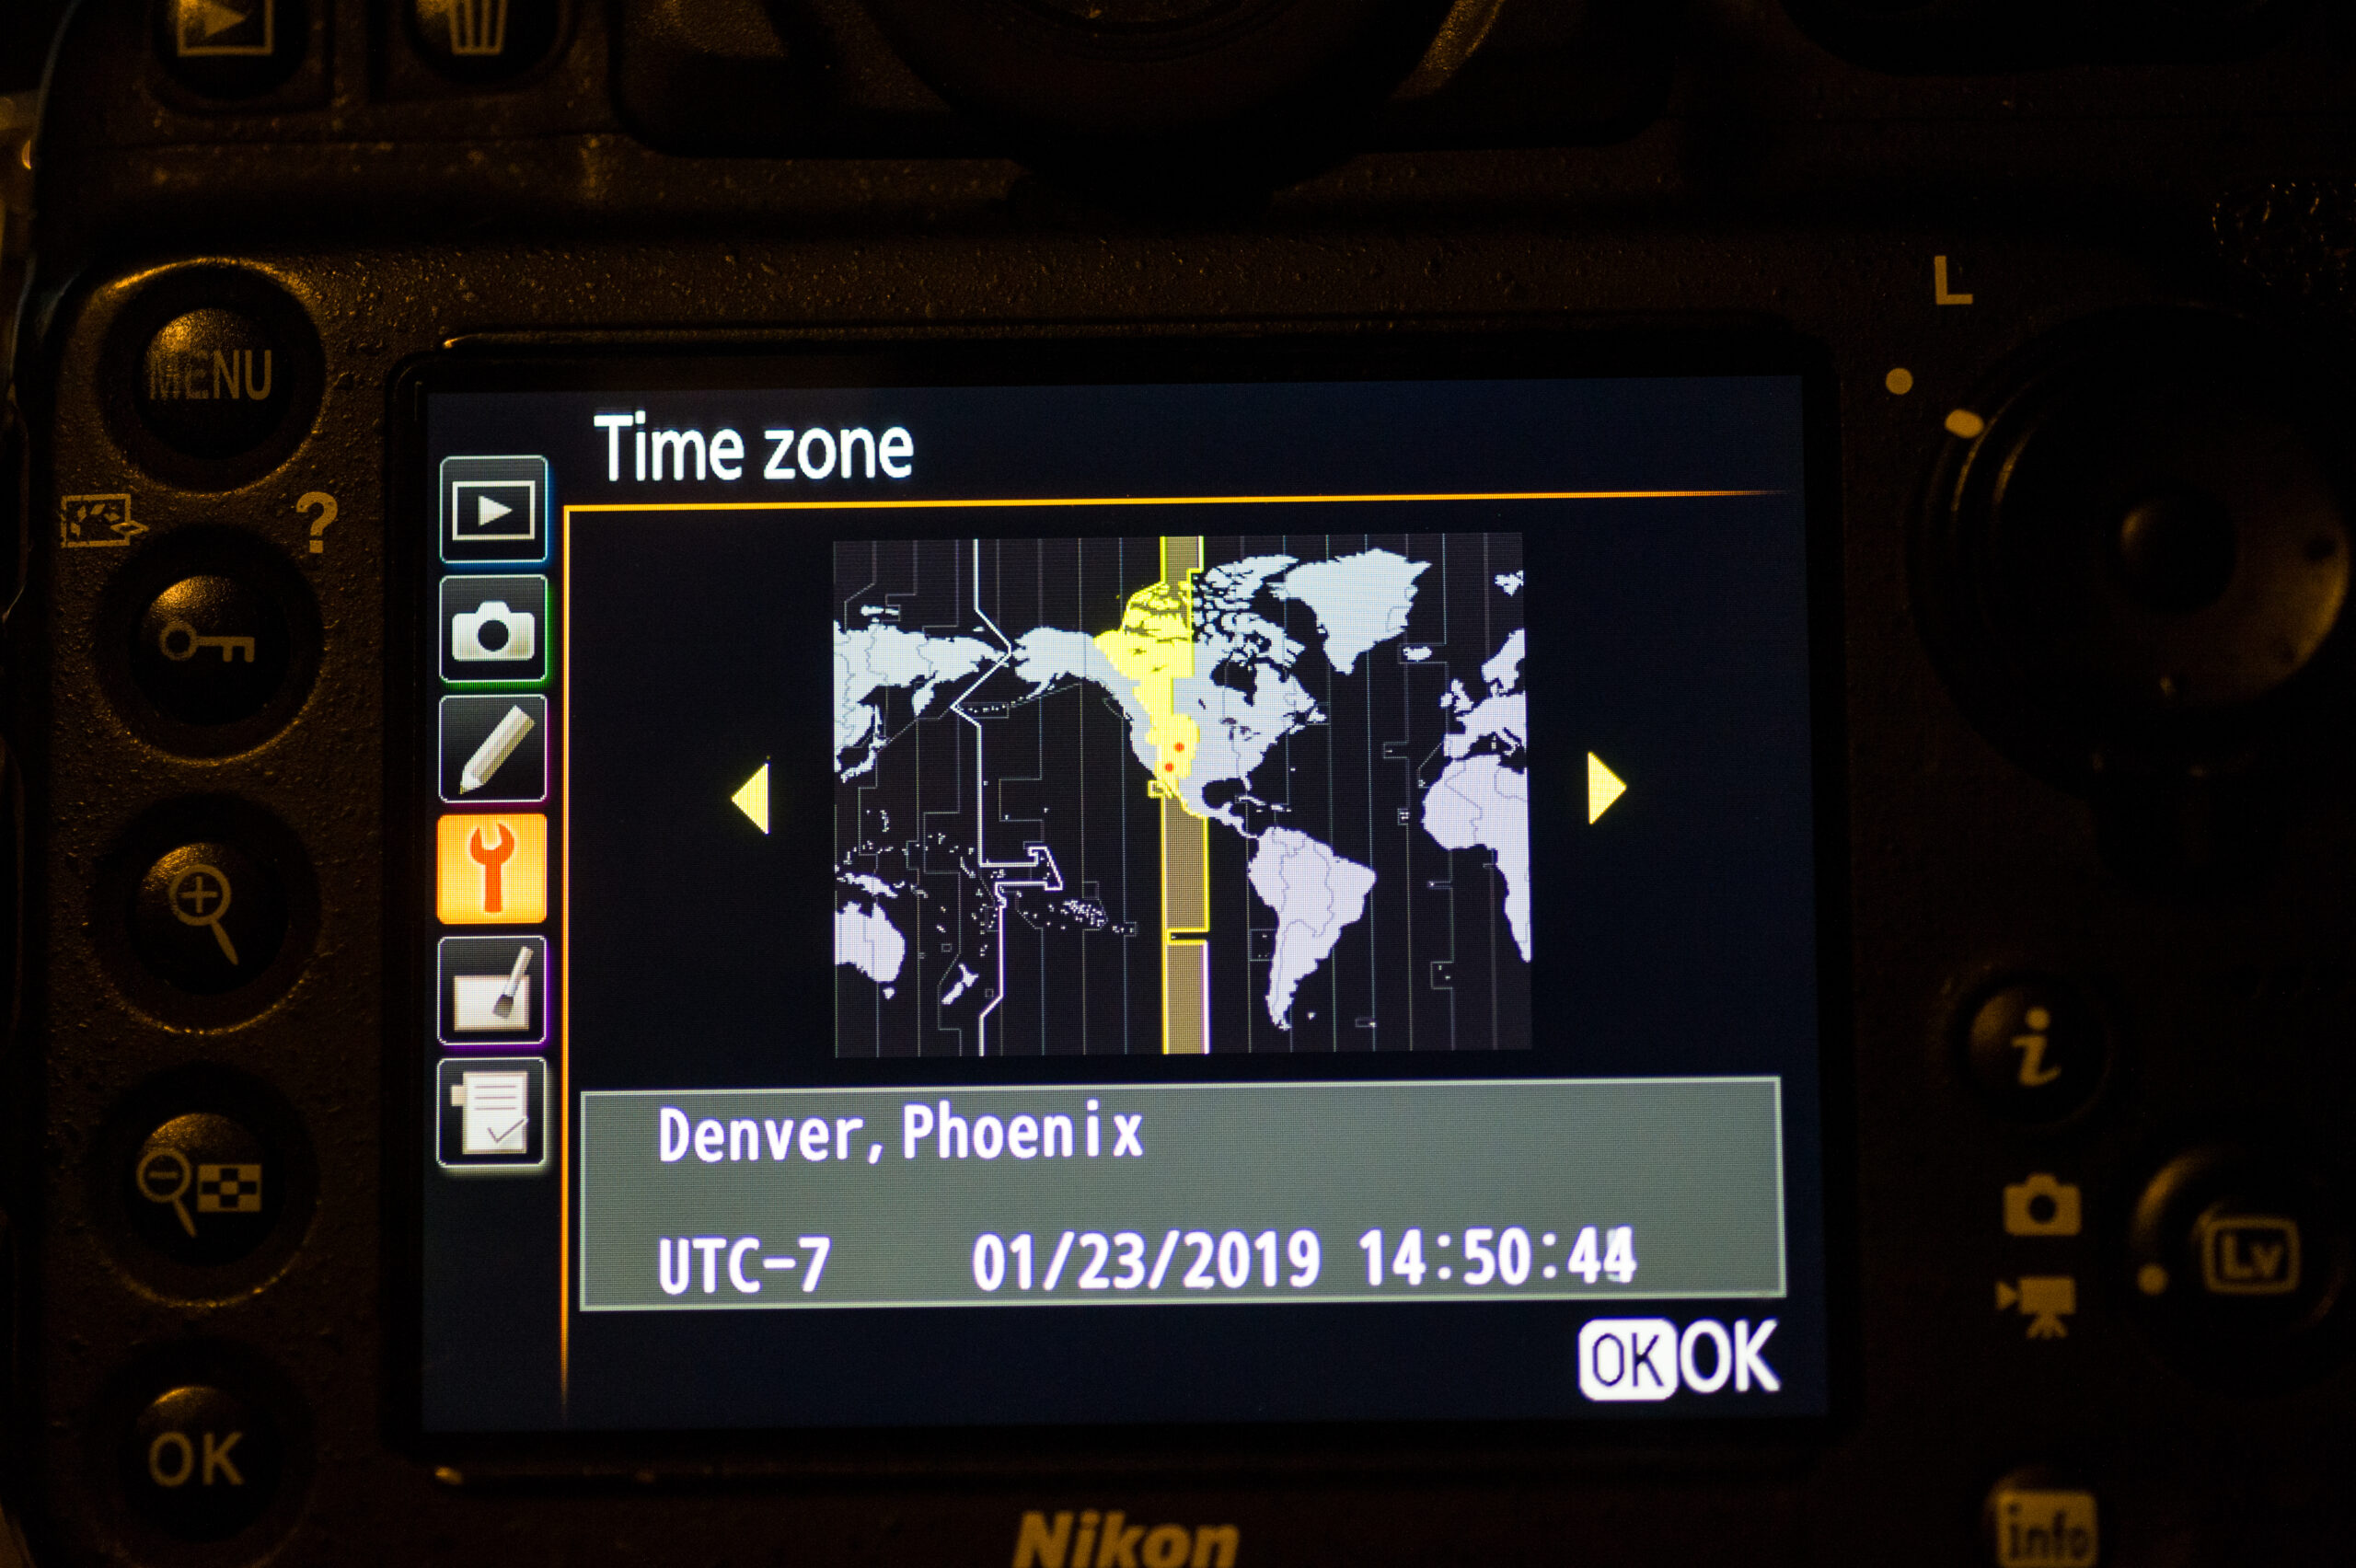
The location data, time, and in some cases, even the direction will be embedded into the jpg file created by your camera. I carry the Nikon’s all-weather, underwater, interchangeable-lens camera, the AW-1. It’s one powerful camera!
To repeat, turn on the camera, wait until the GPS is tracking properly, then take a few shots. After you have the shots, you can turn off the GPS to save the battery. I carry four fully charged batteries and a spare SanDisk card (after I remove all my images from a card, I always use the camera to reformat it). Not all your photos need the same geotag as long as you have a good selection of important images that are tagged. You can always refer to other images in that collection and get a good idea of where you were.
Lightroom
Once I get home, I import (download) the images to a program called Lightroom. It’s an Adobe product and I recommend it to anyone taking photos these days.
Once the photographs are in Lightroom, I make sure I’m viewing the correct photos in the “grid view,” then I add keywords (words that describe the location) and add important details that I might want to call upon later. For example, I might add words like “Montana, Salt Springs, waterhole, bitterbrush, Bear Creek, wallow, kill site, etc., to each photograph, then I add titles, so I don't ever lose track of what I was looking at. Later, I can type in a search, and the photos tagged with a particular word, say “Montana”, will show up.
Next, simply click the word “Map” in the upper right side of the window (still in Lightroom), and the program automatically launches the mapping module and locates my photos using Google Maps (must be connected to the internet). How awesome is that?!
Alternate GPS Options
Camera mount GPS
If your camera doesn’t have a GPS, or you're using a DSLR (most don't have GPS) you can buy a GPS unit for your camera. I use one made by Solmeta and it attaches to the hot shoe (the place where a larger flash would be attached). Other units plug into the camera via a micro-USB connection.
Once the GPS unit is on, you need to calibrate it by twisting it around and in circles until it knows where it’s at. After it establishes enough satellites, it’s ready to go. Every time you shoot a photo, it’s tagged with the GPS data, including direction. Just make sure to turn the unit on and let it get a signal before you start shooting.
GPS Linking Software
If that doesn’t work for you, there’s still another way to get your images geotagged, but it requires a couple of extra steps. It’s a method I used in the past, and it works great if you just have a camera and a dedicated GPS unit, and you follow a few basic rules.
First, make sure you adjust the time stamp on the camera to the same time that’s on your GPS unit. While capturing photos, you just need to make sure your GPS is creating a track while you’re out hiking or hunting. Later, you can use the time code from the camera and the GPS data file to link the photos. Basically, the time the photo was taken is compared with the GPS’s track showing where you were at that particular time, and the software combines the two.
A program called RoboGeo can link the two files together and place the GPS location in the photo’s databank. From there, Lightroom will recognize that the file has GPS coordinates, and every time you use the Map module, you’ll be able to see exactly where you took the photos. RoboGeo can be downloaded from the Internet. You can search YouTube for some good tutorials.
Once the photos are geotagged, you then can import them into Lightroom, and when you open the Map module, all your photos will show up on the map in the exact location you were when you captured the photo. By clicking on the location shown on the map, it will bring up the photo from that location. Or, if you have the photo selected, you can click the Map module and it will show you exactly where the photo was taken!
Picasa Web Albums
One other option is to use the Picasa Web Albums app (free Google product). So long as your images are already geotagged (either by the camera or by using the RoboGeo method), you can upload them to Picasa and go from there. Open Google Earth and it will automatically geo-reference your photos.
GeoJot
For those who want a little more data, and like the idea of geotagging, try the program GeoJot. It has very well built apps for Android and iPhone that allow you to turn that handheld device into a real handheld computer! GeoJot is the “Cadillac” of geotagging software.
While a traditional, handwritten hunting journal - and the personal nature of pencil drawings and writing - will always occupy a special place in my heart, gathering digital data with your camera and coupling it with powerful tools like Google Maps and Google Earth will help you create your own lasting memories, not to mention help you build a great resource for the future.
Tony's Tip: Give your Photos Depth
Set your camera on the “landscape” function or select a smaller aperture (larger number f-stop) and include some foreground, middle ground, and background. Focus about one-third of the way into the framed photo and take the photo.
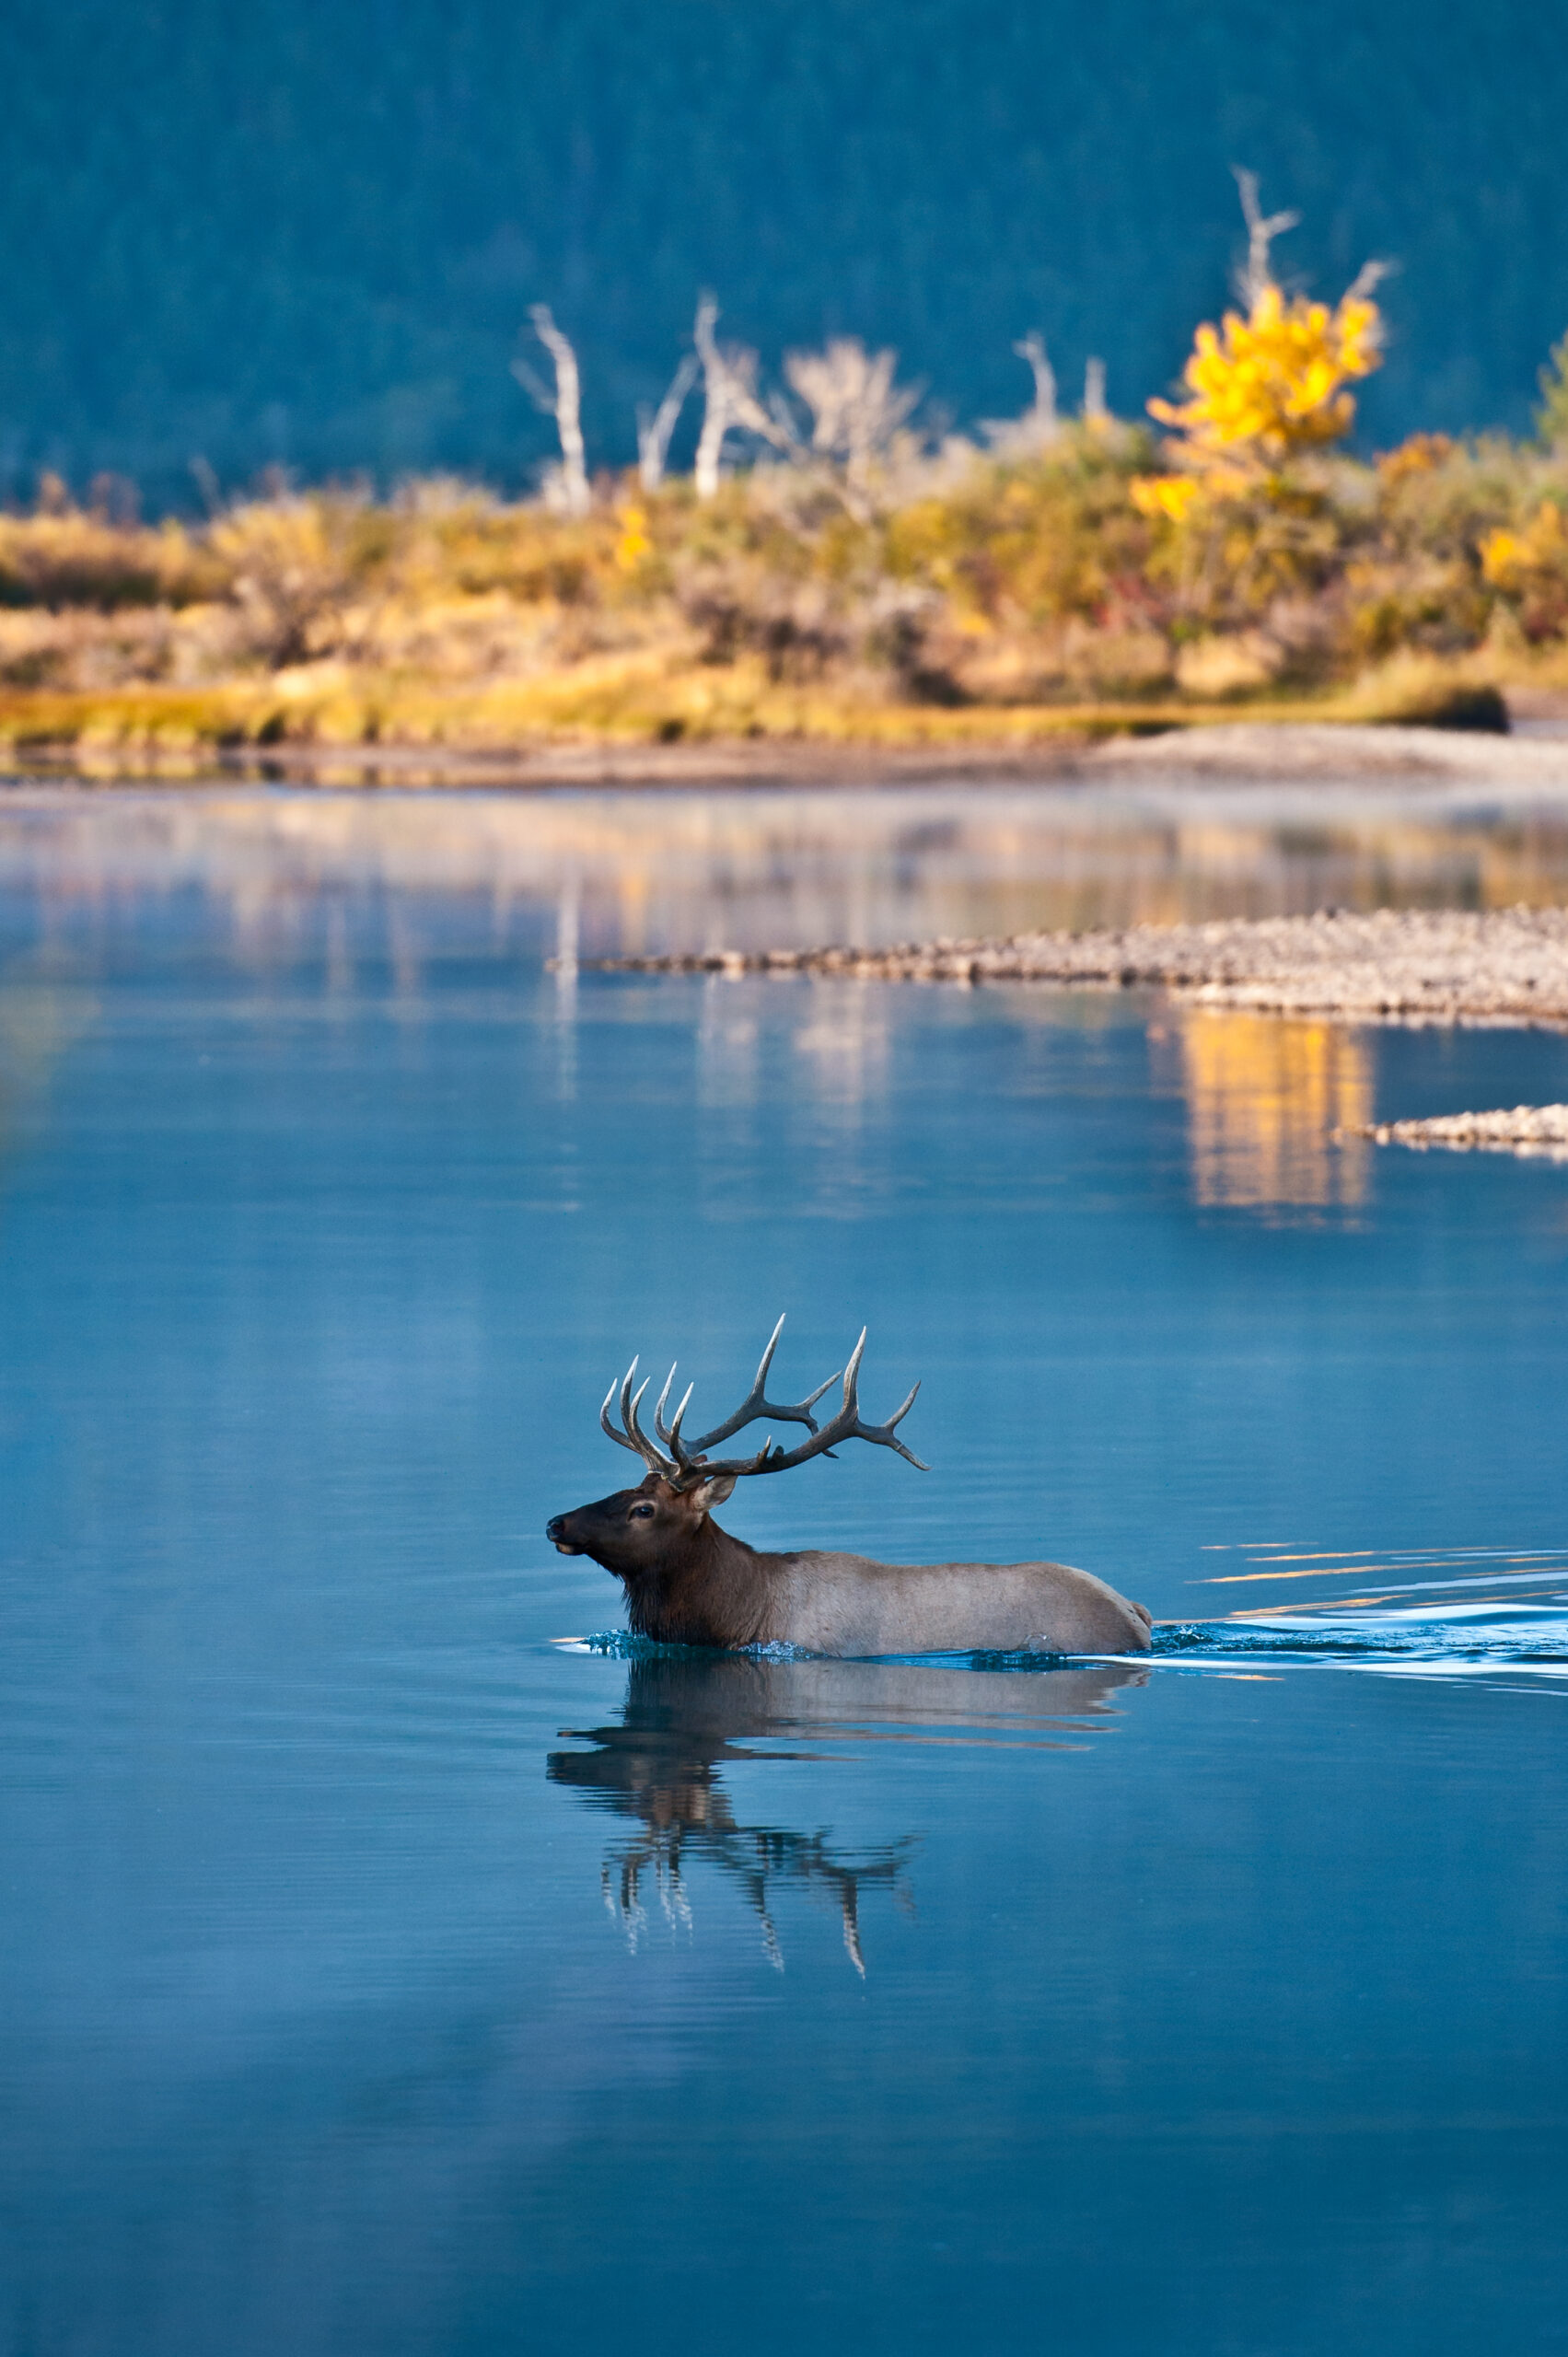
The advantage of having two cameras-one set up with a long prime, the other set up with my favorite all-purpose lens, the Nikon 224-120mm f4-is that I got this photo. I noticed the cow beginning to cross the river. After a few minutes, the bull appeared, bugling from out of the trees, and followed her across. I carried the second body attached to the 24-120mm lens, attached to the Cotton Carrier, another tool I never go into the field without. Notice the rule of thirds-1/3 background, 1/3 middle ground, 1/3 foreground.
Specs: Nikon D700; 24-120mm f4; f8; 1/125 sec.; ISO 400; handheld. Post-processed in Lightroom.
Tony's Tip: Keep your Horizons Level!
Remember, even slight angles to horizons and lakeshores will make people feel like the water in the lake is pouring out of the frame - not good! A lot of cameras have “levels” built into them. Use them or make sure you fix the level in post-production before you print it or put it online.

Early morning mid-August sun rising over a prairie pothole lake in eastern Montana. I was up early in anticipation of capturing a lake/sunrise shot. While I was waiting, a small buck walked to the edge and drank from the lake. I composed the image using the rule of thirds, 1/3 sky for a background, 1/3 deer/lake/island for middle ground, and 1/3 lake reflection for the foreground.
Specs: Nikon D700; 24-120mm f4 lens; f6.3; 1/60 sec; ISO 400; handheld; post-processed in Lightroom.
For more information on how to get more organized for your hunting journal, take a look at the article I wrote titled Tips for Hunting Photo Organization.