NOTICE: Certain links on this post may earn a commission for Western Hunter Magazine from Amazon or our other affiliate partners when you make a purchase. Thank you for your support.
Archery Tip - 10 Steps to Better Accuracy on Quick Shots
We’ve all heard somebody say something like, “This new bow is so fast you probably only need one pin out to 50 yards!” In response, experienced bowhunters collectively snicker because you all know better - that is...until I let you all in on my best-kept archery tip. Furthermore, if you use a single-pin, movable sight – this is THE WAY to set your sight for almost every hunting situation.
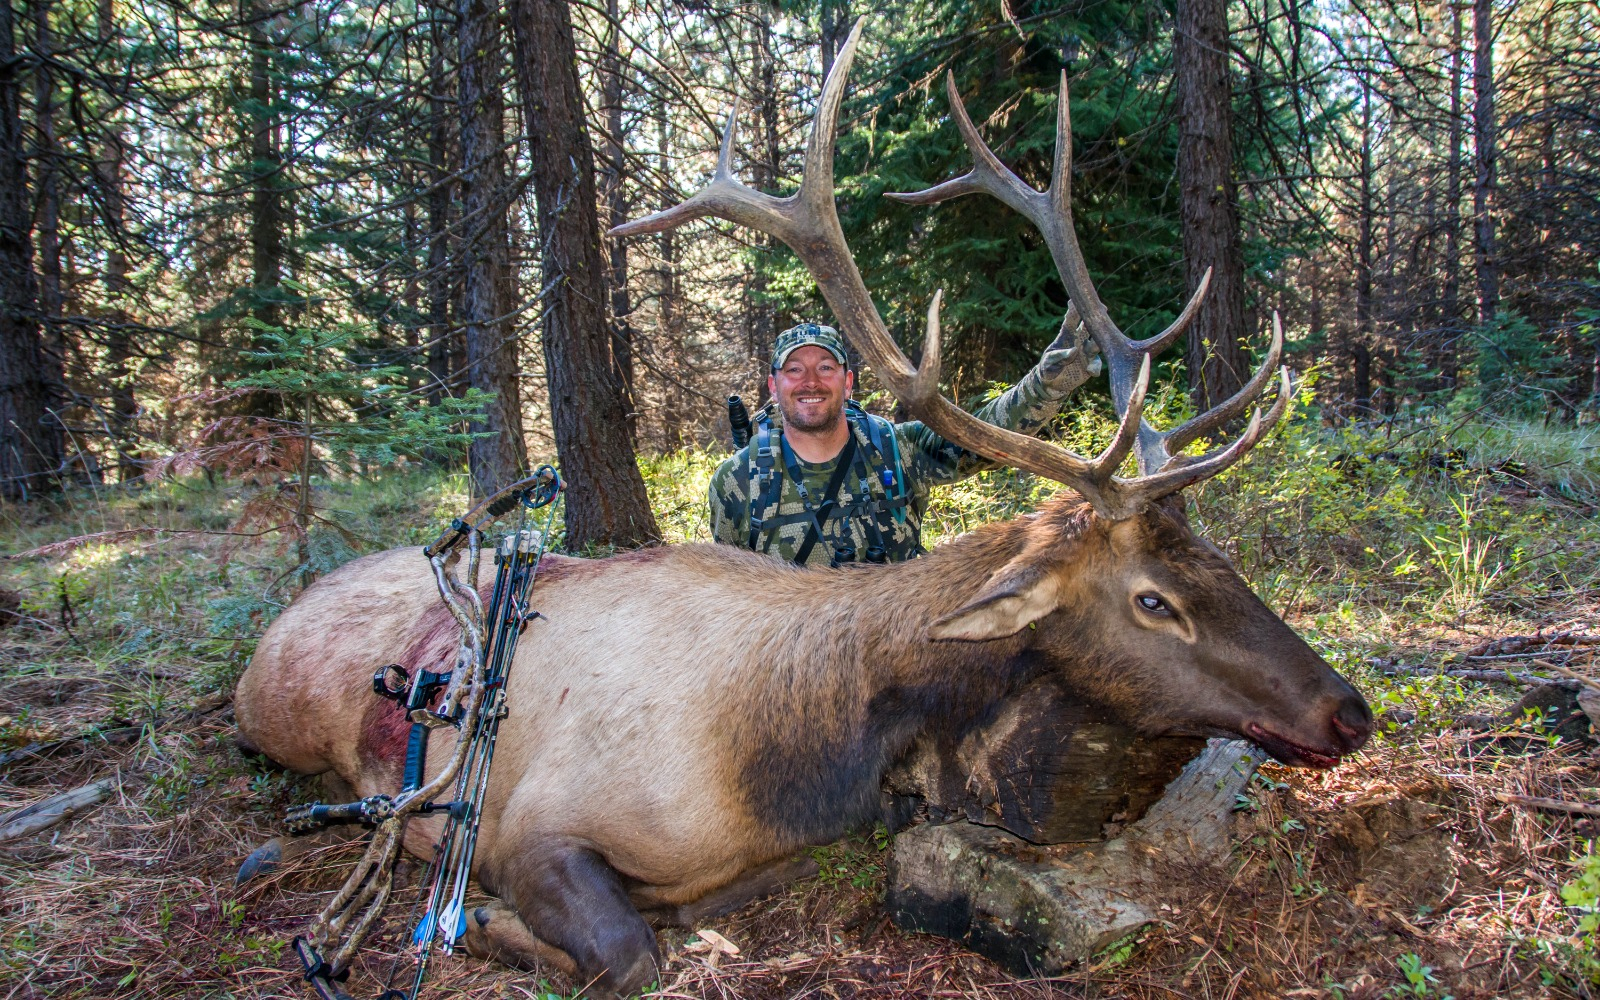
I used this trick pin on this Oregon bull. Being able to draw back as the bull approached, without having to worry about ranging, was key to getting the shot.
To illustrate the point in my intro, let’s assume I wanted to shoot a super-fast bow that spits a hunting arrow out at 330 fps. I’d still completely miss the vitals on a broadside mule deer at 30 and 46 yards if I aimed dead-on with my 40-yard pin (based on calculations from Archer’s Advantage software). That’s assuming a huge, ten-inch (+/- 5”) vital zone. In other words, this fast bow example is still a long way from effectively using one pin out to 50 yards.
Now, just imagine if you actually could hit an even smaller, 6” vital-zone every time with a single pin at distances between 15 and 40+ yards. No rangefinder and no speed bow required. Just use one sight pin and you always aim at the same place. There is a secret that’s been handed down through the annals of professional archery and I’m going to share it with you guys so you can punch more elk tags. Remember, this is top secret stuff, and if you share it with your hunting partner, don’t blame me for your sore back...You’re going to be packing more elk quarters in future seasons.
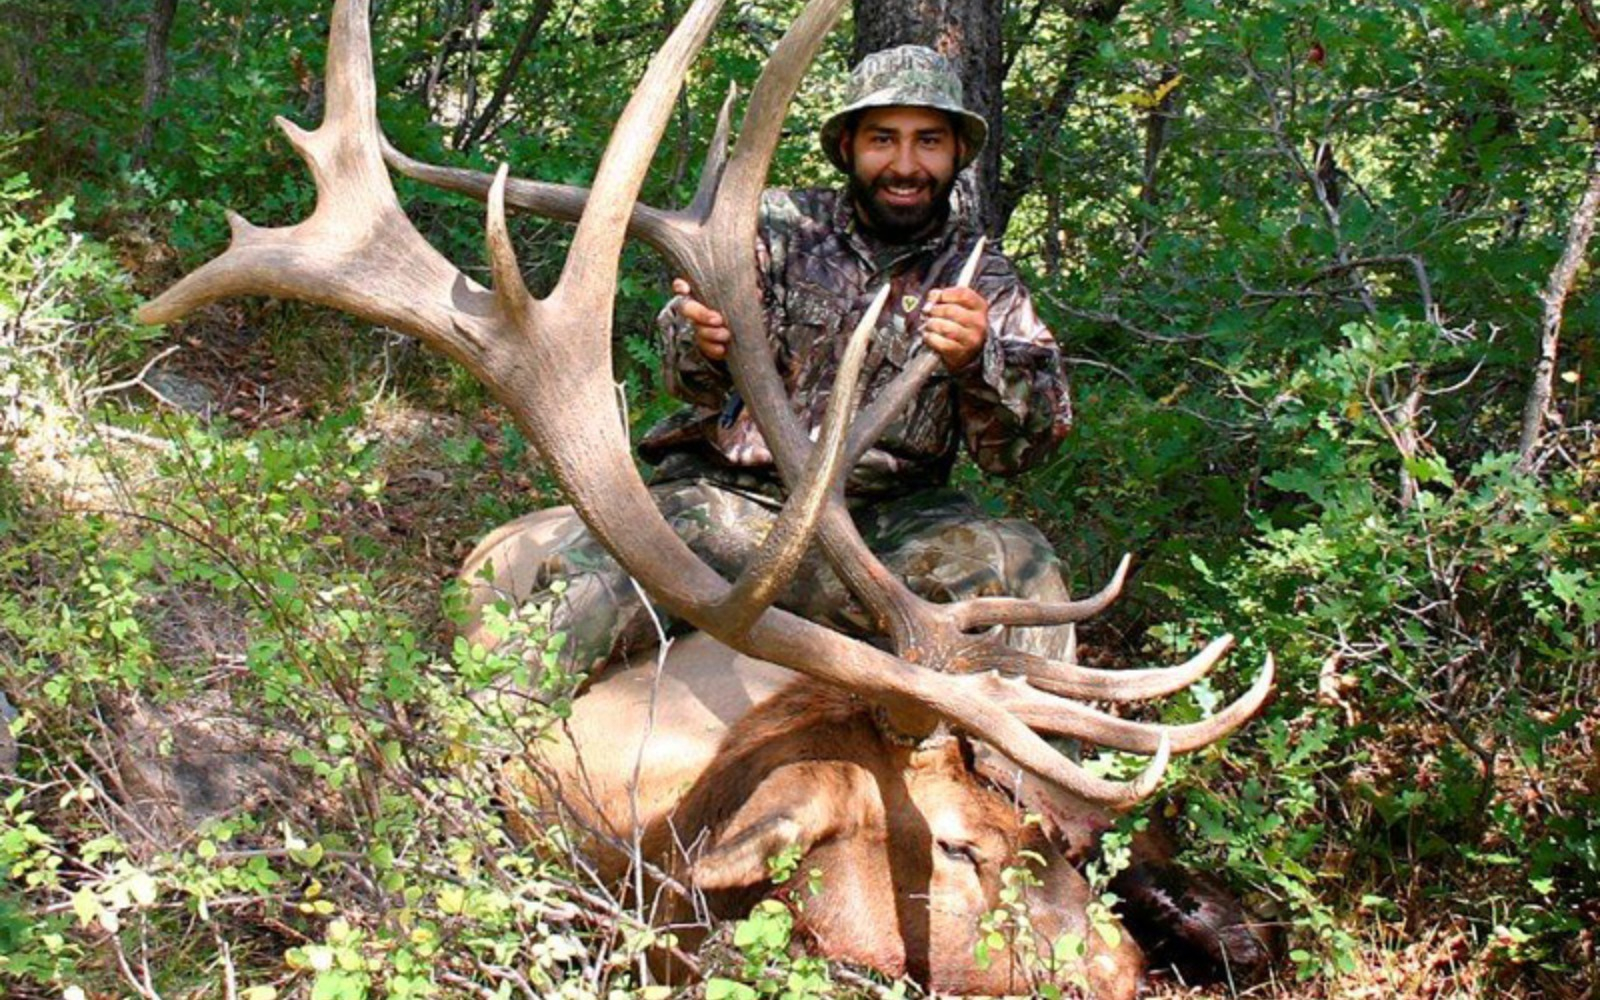
I shared the secret with my good friend Dan’l Anselmo and he used the trick-pin system to harvest this outstanding archery bull in Utah.
This sighting method takes advantage of the flattest part of the arrow’s trajectory. This occurs in the middle of the arrow's flight path near its peak, not at the sight-in distance where the arrow is only dropping (see the portion of the arrow’s trajectory between the blue lines in the illustration).

Archer's Advantage can be used to model your trajectory. The program accurately predicts the limit of the “Trick Pin” for my test bow at the point where the trajectory line crosses the lower blue line on the right at 42.5 yards. The yellow area represents the size of a McKenzie 3D mule deer target 10-ring. Note –it’s approximately the same size as the 6-inch window shown in blue.
In order to utilize this flat-shooting part of the trajectory, we have to aim about a foot low using a longer range sight pin. In this example, you can see that the down-range zero occurs at 52 yards, where the red dotted line crosses 0" in height on the right side of the graph centered in the yellow stripe. That’s the pin’s sight-in distance. The trajectory of the arrow shot from this setup with the 52-yard pin peaks at 15-inches high at about 26 yards.
The arrow stays inside the six-inch window bounded by the blue lines - between 9 and 15 inches high - for any shot taken between about 10 and 42.5 yards away from the target. The orange dot is positioned at the center of the “window” at 12 inches above the aim point. The dot is there to represent the center of the vitals we’re trying to hit.
This seems a little complex at first glance, but in reality, the hardest part about using this technique is that you have to be able to judge 12 inches low. In my opinion, that’s a lot easier than judging 33 or 41 yards with the bull of a lifetime cranked up and tearing the forest a new one as you try not to crap yourself.
Ten Steps
If the explanation is a little hard to follow, don’t worry! You don’t need Archer’s Advantage, a trajectory model, or a Master’s Degree in Physics to figure out and use the trick-pin. It’s actually much easier to make a test target and set up a trick pin than it is to explain how it works. Here’s how:
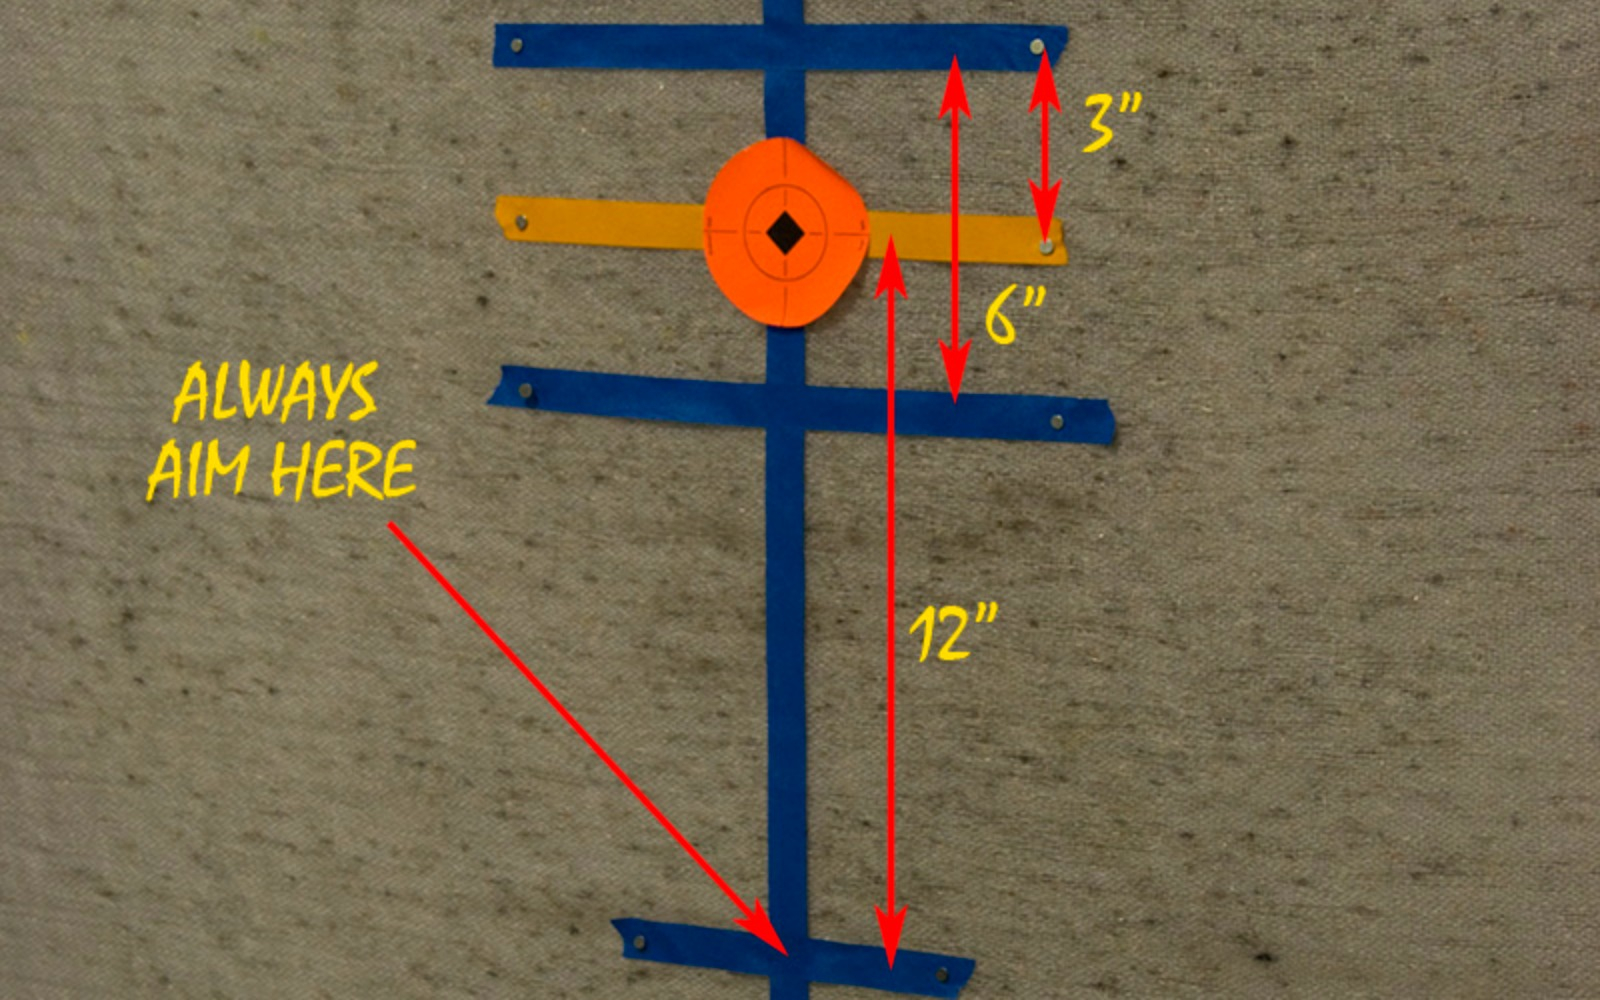
1. Get a piece of cardboard or white poster board about 24” tall x 12” wide.
2. Lay down a perfectly vertical strip of colored masking tape or electrical tape from top to bottom down the center of the cardboard. Use a tape color that contrasts with your poster board so it will be easy to see from a distance.
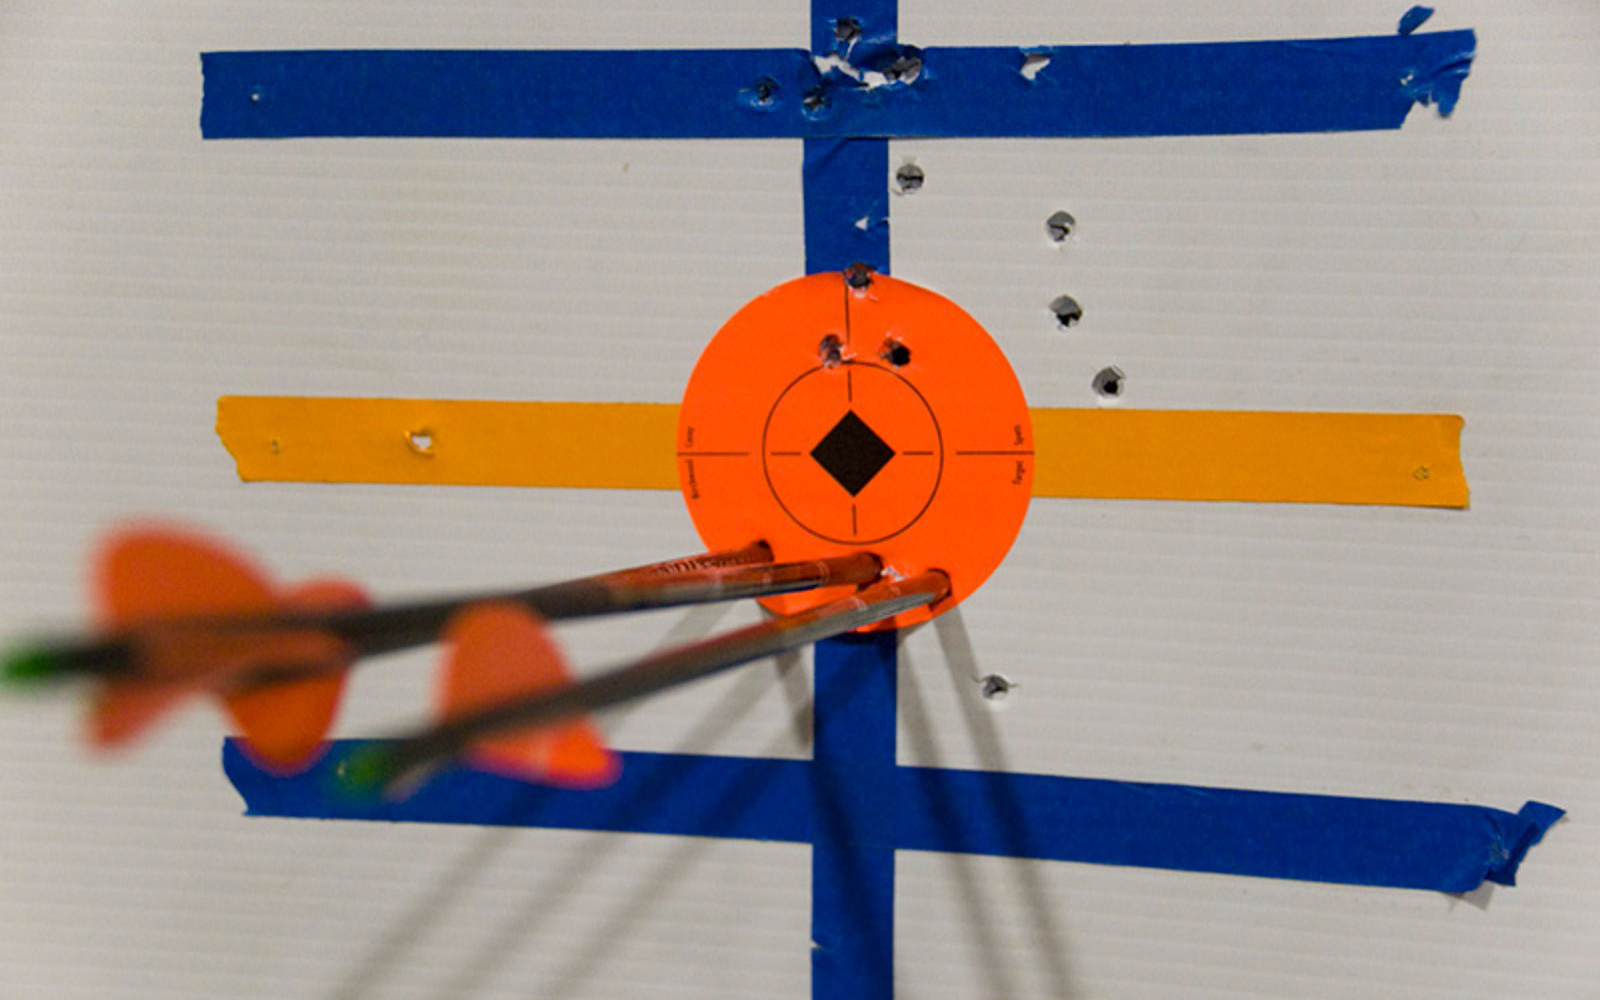
3. Next, place an 8” horizontal strip of tape to make a crosshair eight inches below the top of the cardboard (shown in orange). Then, use a tape measure and place two more horizontal strips so the centerlines are exactly 3” above and 3” below the first strip.
4. Now paint or stick on a bull’s-eye over the center crosshair.
5. Finally, place the last horizontal strip exactly 12” below the bull’s-eye. When you’re finished, your target should look like the example provided.
I laid out this test target directly on a target bale. Set yours up on a cardboard sheet to make it portable, reusable, and more durable as shown in later photos.
Next, you will shoot at the test target to help you determine where to set your “Trick Pin” so all your arrows stay between the upper blue lines. Start by using the trick-pin sight-in distance recommended for your arrow's velocity range in Step 6. This is a good starting point, but will most likely require one or two adjustments to get it set perfectly.
6. Decide where to set your “Trick Pin” based on the appropriate velocity range below:
- If your arrow velocity is in the 250-290 fps range, use your 50-yard pin as your trick pin.
- If your arrow velocity is 290-320+ fps, aim with your 55 yard pin gap or set a pin at 55 yards for the trick pin.
- If you're shooting 200-250 fps, you should start by aiming with your 45 yard pin gap or set a pin at 45 yards for your trick pin.
- If you're shooting slower than 200 fps, aim with your 40 yard pin.
7. Next, back up from the target to half the distance of the pin you’re using. For example, shoot from 25 yards if you’re using your 50-yard pin. This halfway point should coincide with the top of your arrow's trajectory. Therefore, shooting from this distance will reveal the highest point your arrow can hit on its way to the target. *Remember, you always aim with the trick pin at the bottom strip of tape (12” below the bull’s-eye).
8. Shoot a few arrows aiming at the bottom strip of tape using the trick pin. Concentrate to make sure your elevation is good when making these shots. Left and right errors aren’t important.
9. If you’ve done everything correctly, your arrows should be impacting pretty close to the top horizontal strip of tape, three inches above the bull’s-eye. If you’re off, adjust the trick pin in the same direction you missed the upper tape line.
- Important: When you move the sight pin to adjust your group height, you also need to change your shooting position so that you stay approximately half the distance of the pin’s new sight-in distance. If you’ve moved the pin to about 46 yards, you need to shoot the next shots from 23 yards. If you moved the pin to 53 yards, test shoot from 26.5 yards. Keep adjusting, moving, and testing until your groups are centered on the upper line.
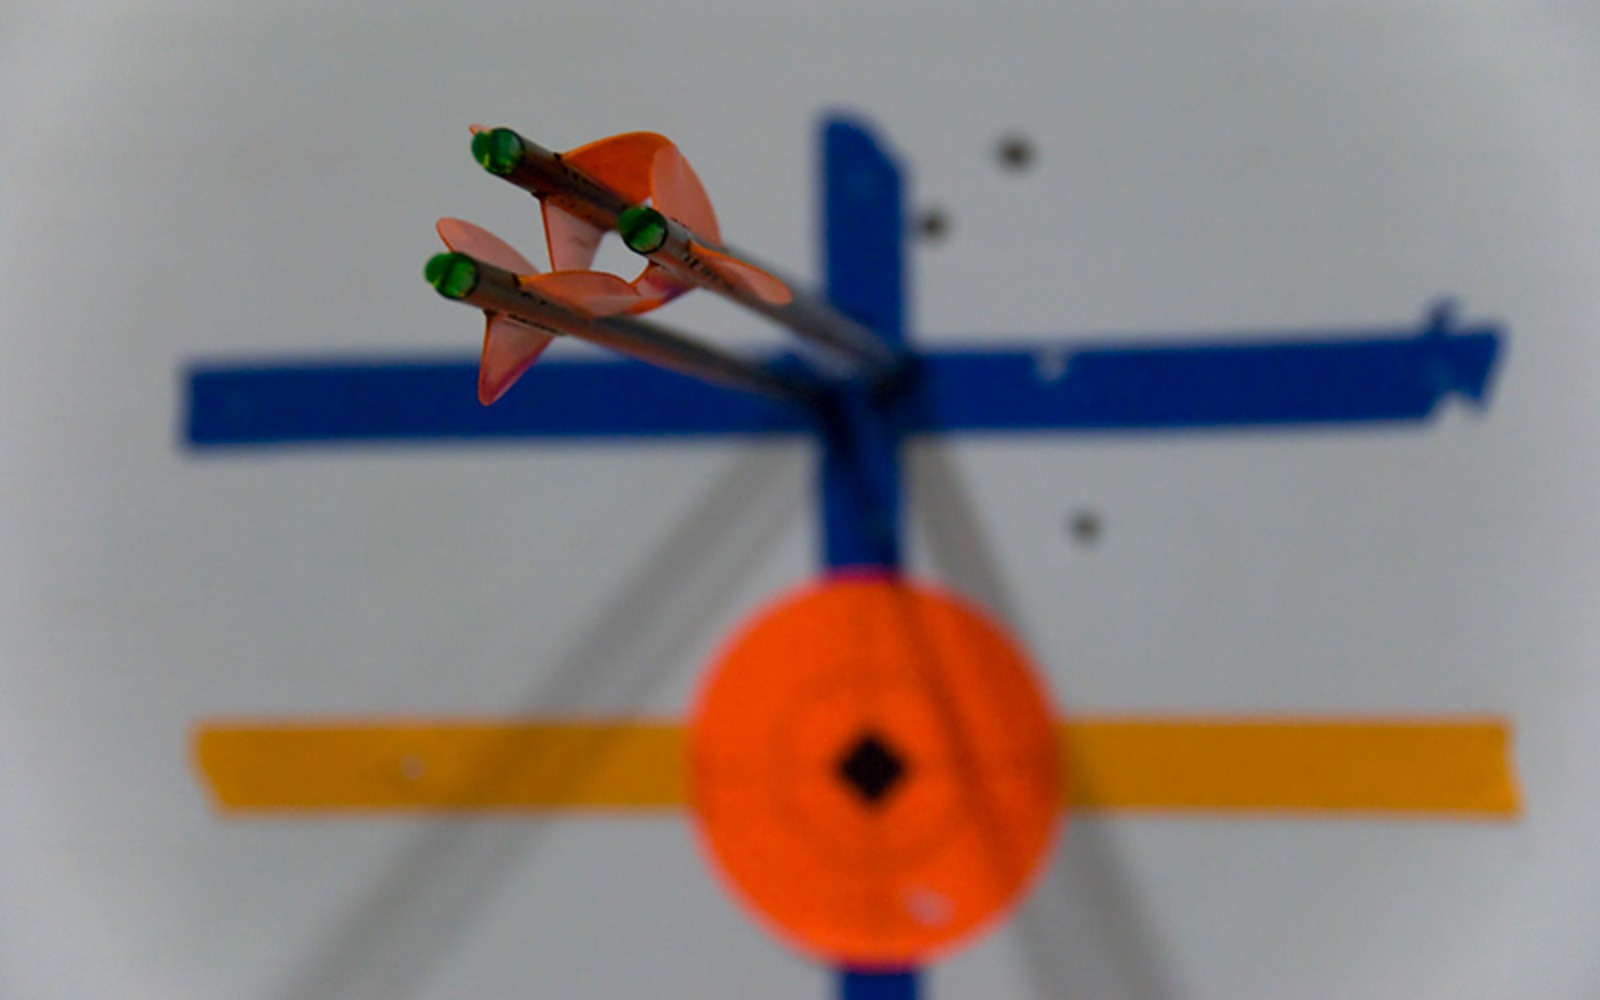
This group was shot at 26 yards while aiming at the bottom line with my trick-pin sighted in at 52 yards. The trajectory graph shows that for distances farther AND shorter than 26 yards, the arrows will always hit lower than this group. That means this is the worst I can miss the target high using the trick pin.
10. Once you get your trick-pin set, shoot groups closer and farther back, between about 10 and 45+ yards, to show where the limits of your setup are. The goal is to figure out how far away you can shoot and still keep all of your arrows between the upper and lower strips of tape surrounding the bull’s-eye. That six-inch window is your miss tolerance and represents the vital area of the animal you’re going to hunt.
Application
For deer hunting, I like to limit my “misses” to a maximum of +/- three inches. This is why I set the tape strips 3” above and below the bull’s-eye. After testing the limits, I found that I have to compensate for elevation when I’m beyond about 42.5 yards with this hunting setup.
Another trick-pin group shot from 35 yards
40-yard group
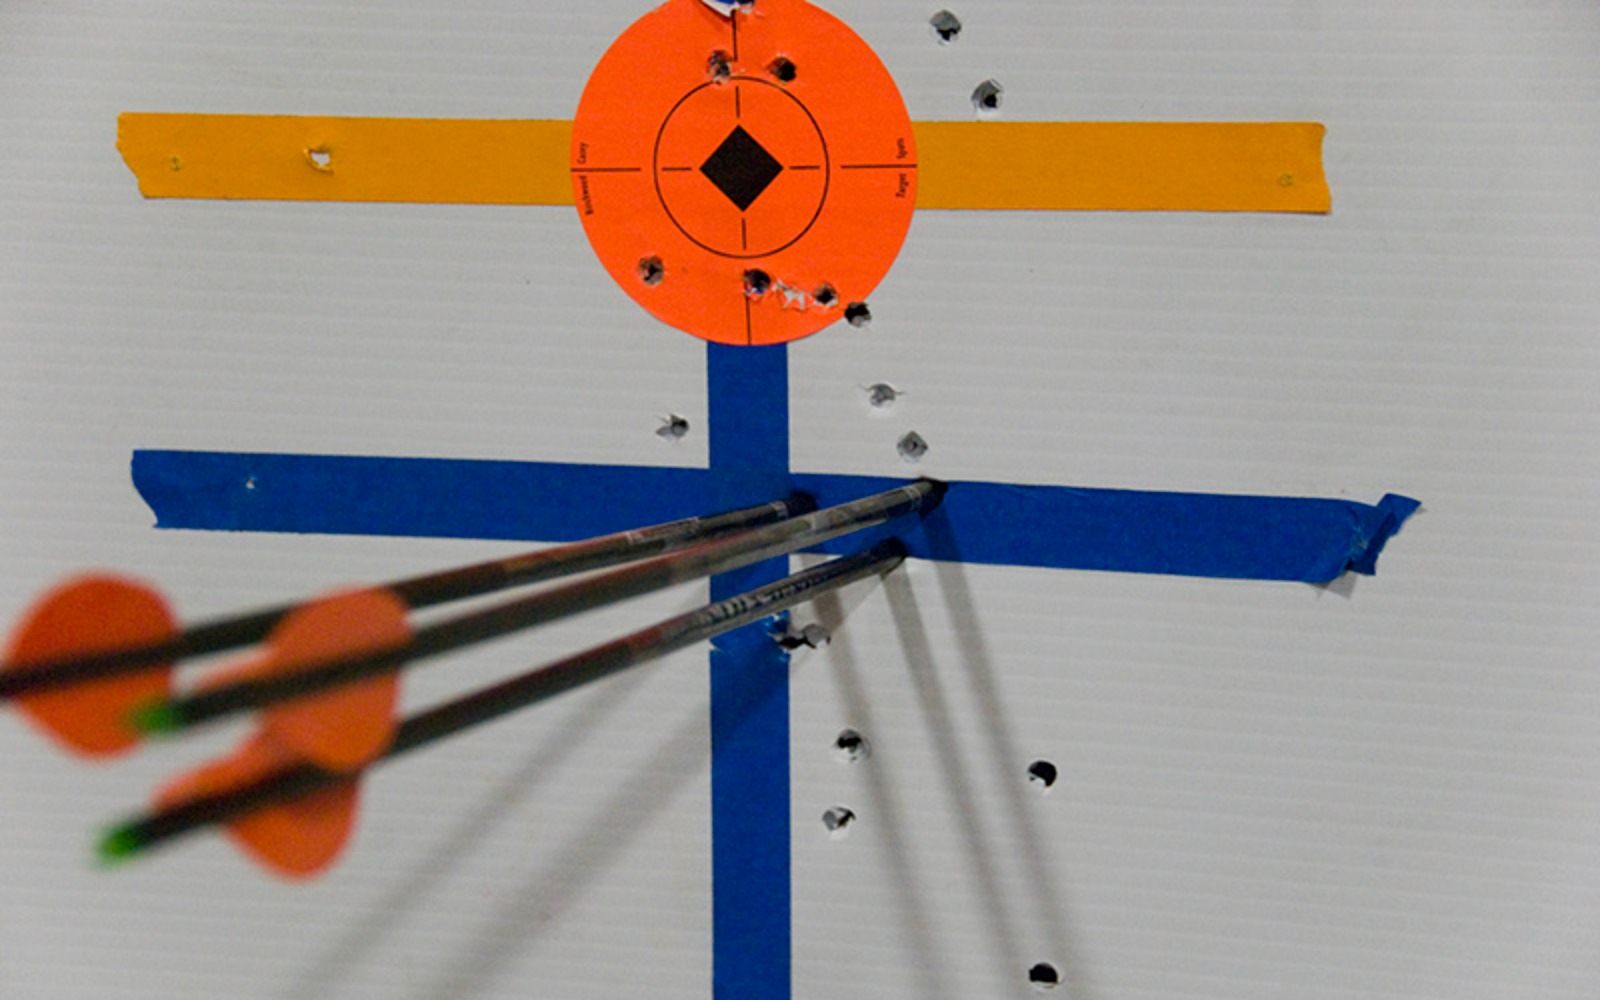
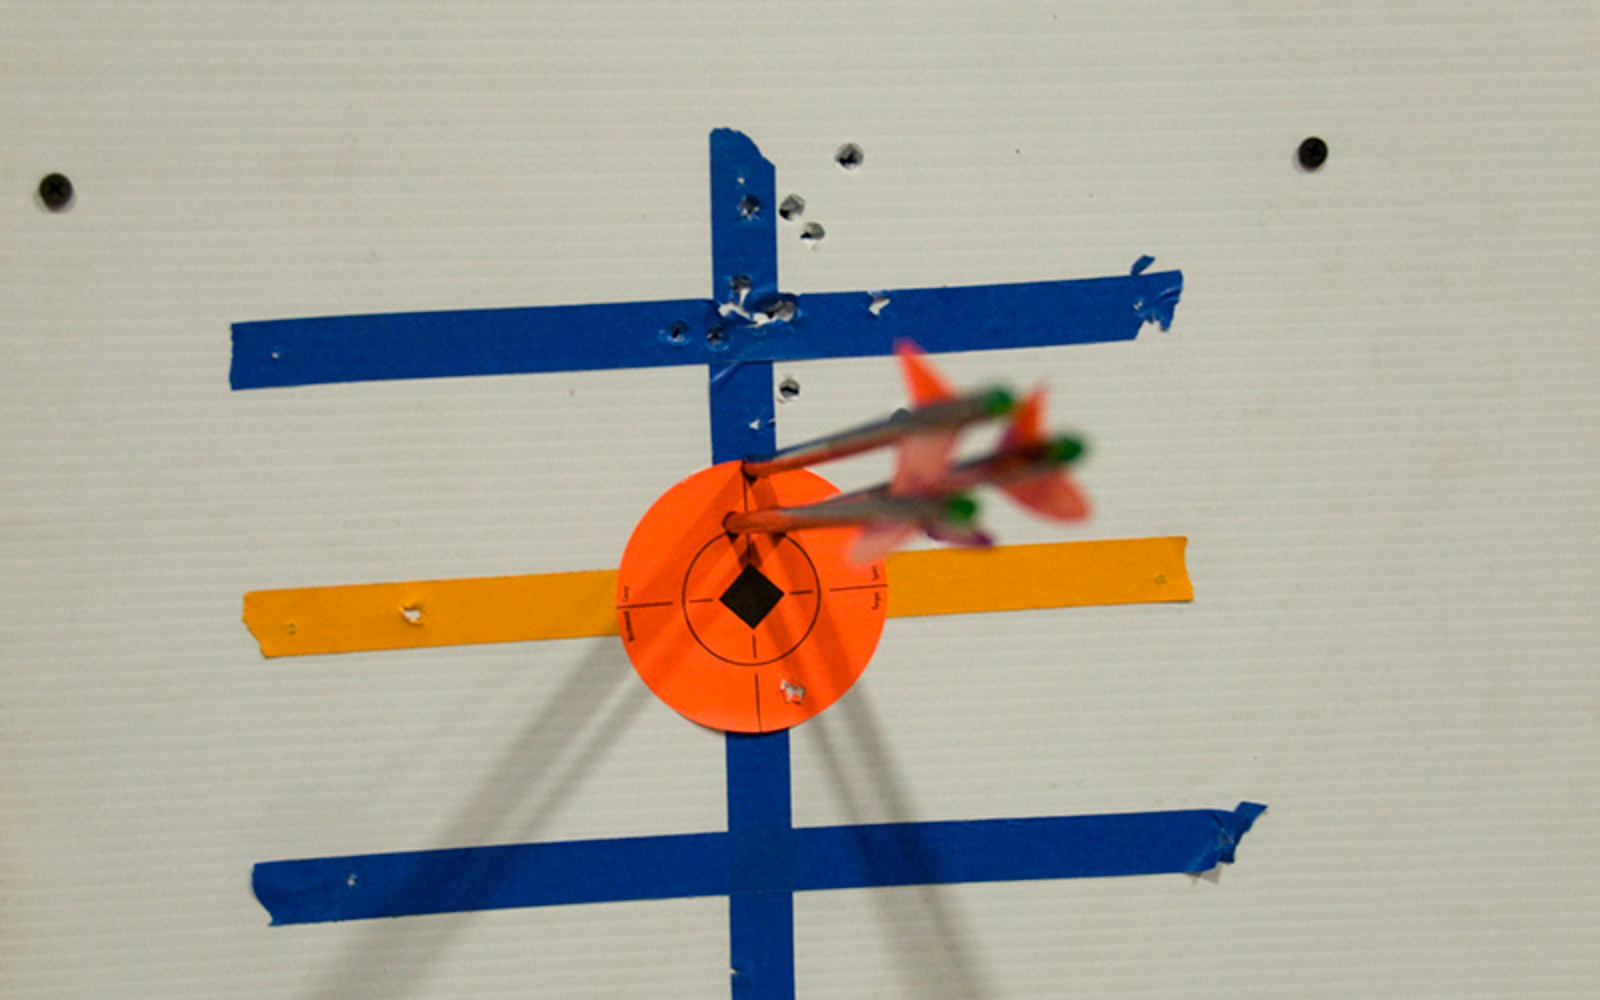
A group from 43 yards illustrates the outer limit for this setup with a six inch "vital" window or miss tolerance.
Your results will vary depending on the speed you’re shooting. A hunting speed of 320 fps may allow you to use the trick pin all the way out to 47 yards, while a 200 fps bow may only work to 35 yards.
If you’re hunting antelope, your error tolerance may need to be smaller since an antelope’s vitals are going to be smaller. No problem; just make the tape window 2” above and below the bull’s-eye and re-test. This will reduce the range you can use the trick pin, but it still works the same way. Your trick pin will bet set a touch higher in your sight window (shorter distance) to keep your shots in the smaller window.
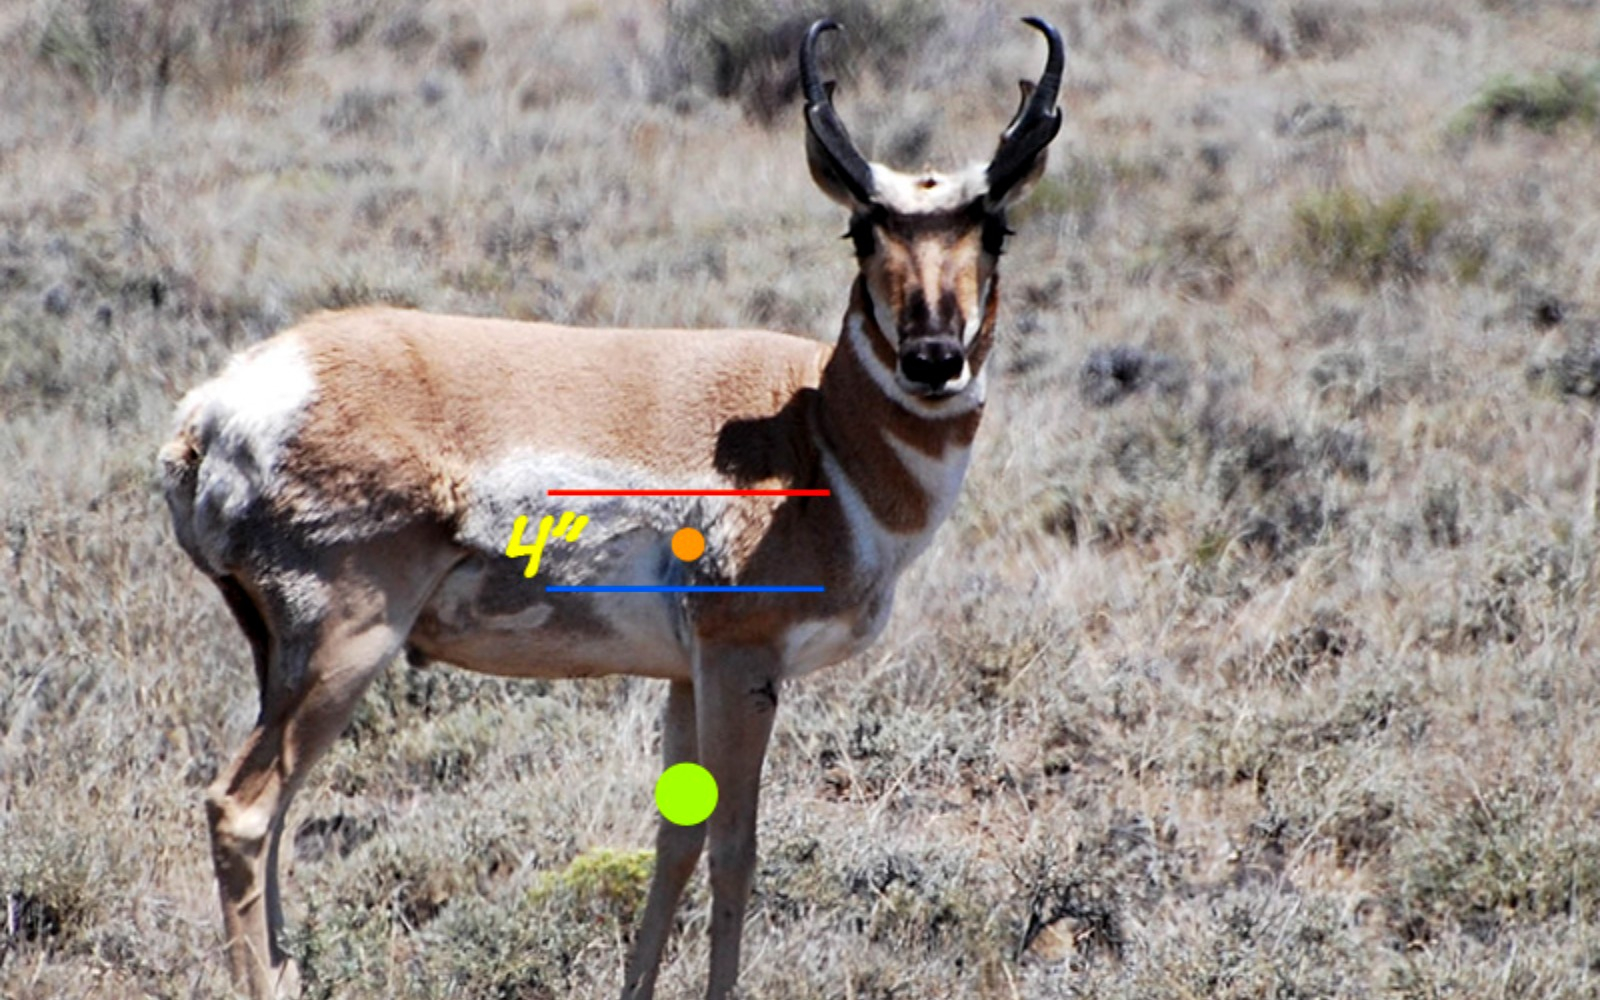
Antelope bucks will typically have a chest cavity that measures 12-14 inches.
Conversely, if you’re comfortable with a vital window of +/- 4” on elk, just make the tape window larger and all the same setup principles apply. With a speed bow and trick-pin set up properly for elk hunting, you may be able to stretch the effective window to 50 yards. Opening the window to +/- 4" extends the maximum trick pin range to 45.5 yards for my test setup. If you want to be sure you don't shoot too high, you can also make the window asymmetric and set the upper limit at +3" and the lower at -4". The system is flexible, so get custom with it.
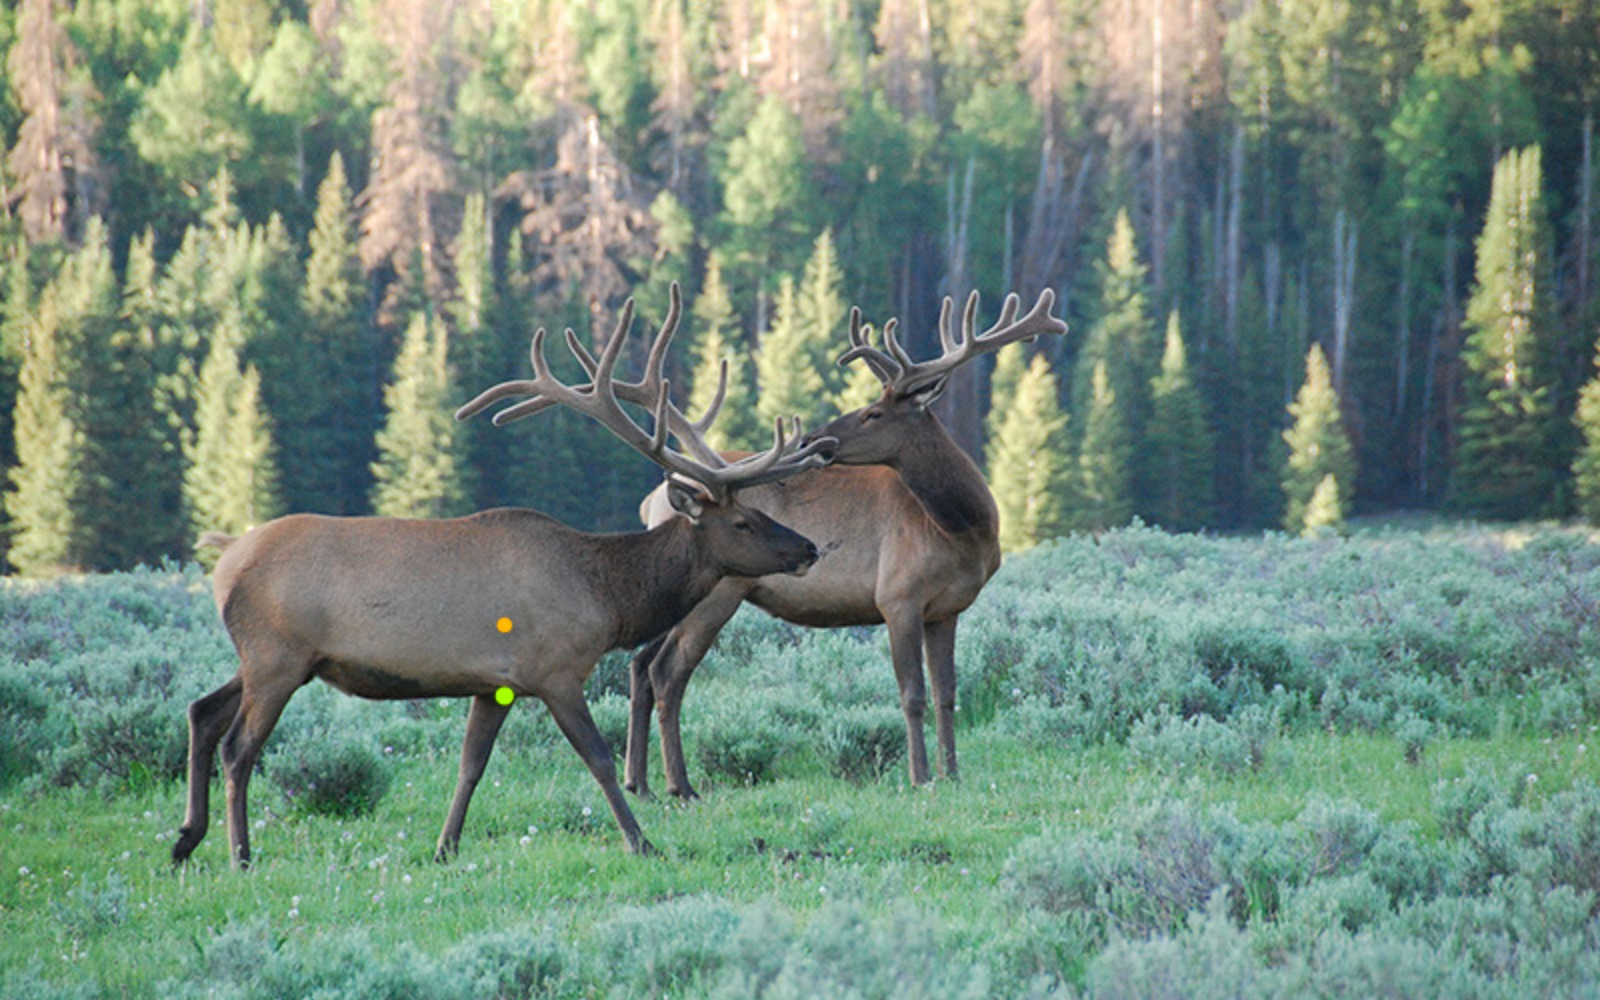
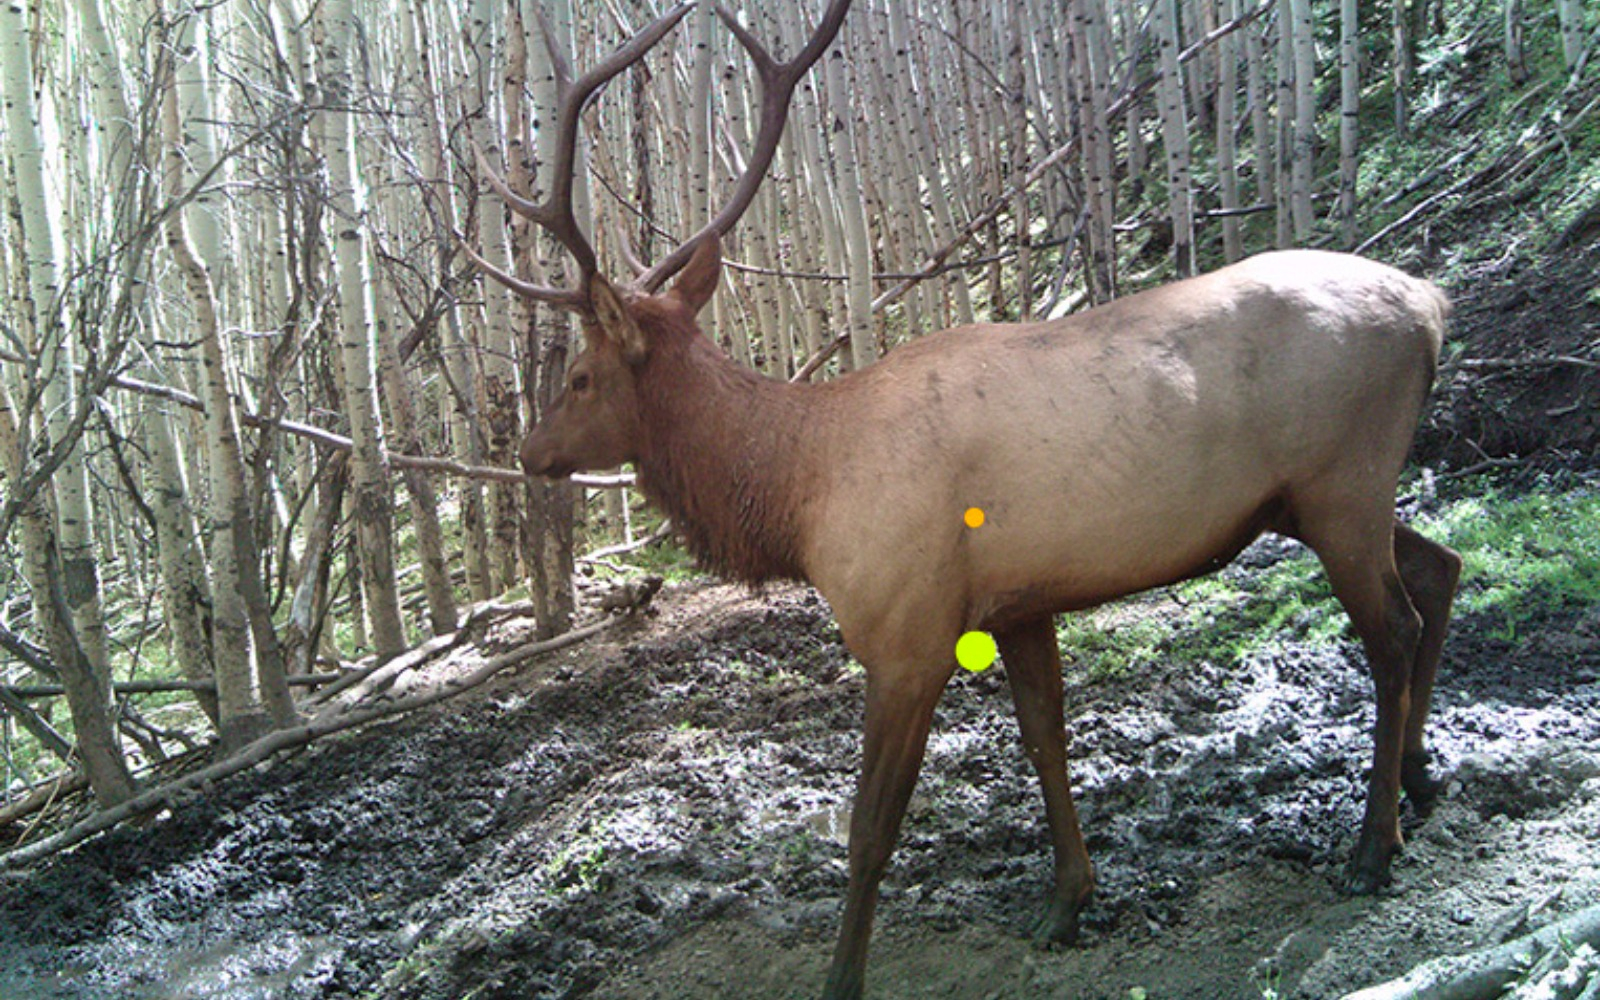
The chest of a mature bull typically measures 28-30 inches.
The obvious limitation to using this system in a hunting situation is that you have to figure out how to aim 12” below the center of the vitals so you can make a fatal shot. With that in mind, you have to realize we’re not trying to thread the needle –we’re merely trying to hit the center of the lungs.
The best way I’ve found to train my mind is to use a tennis ball on a string with 3D targets. Cut a slit in the tennis ball with a utility knife and tie a knot on the end of a piece of parachute cord. Shove the knot into the tennis ball and then hang the string from a nail 12” below the spot you want to hit. Do this from multiple angles and use the same type of 3D animal that you plan to hunt. Pretty soon, you’ll get a really good feel for where to aim and it will become second nature. Elk are really the ideal species for the trick pin. You’ll aim just under the chest and they’ve got a generous vital zone.
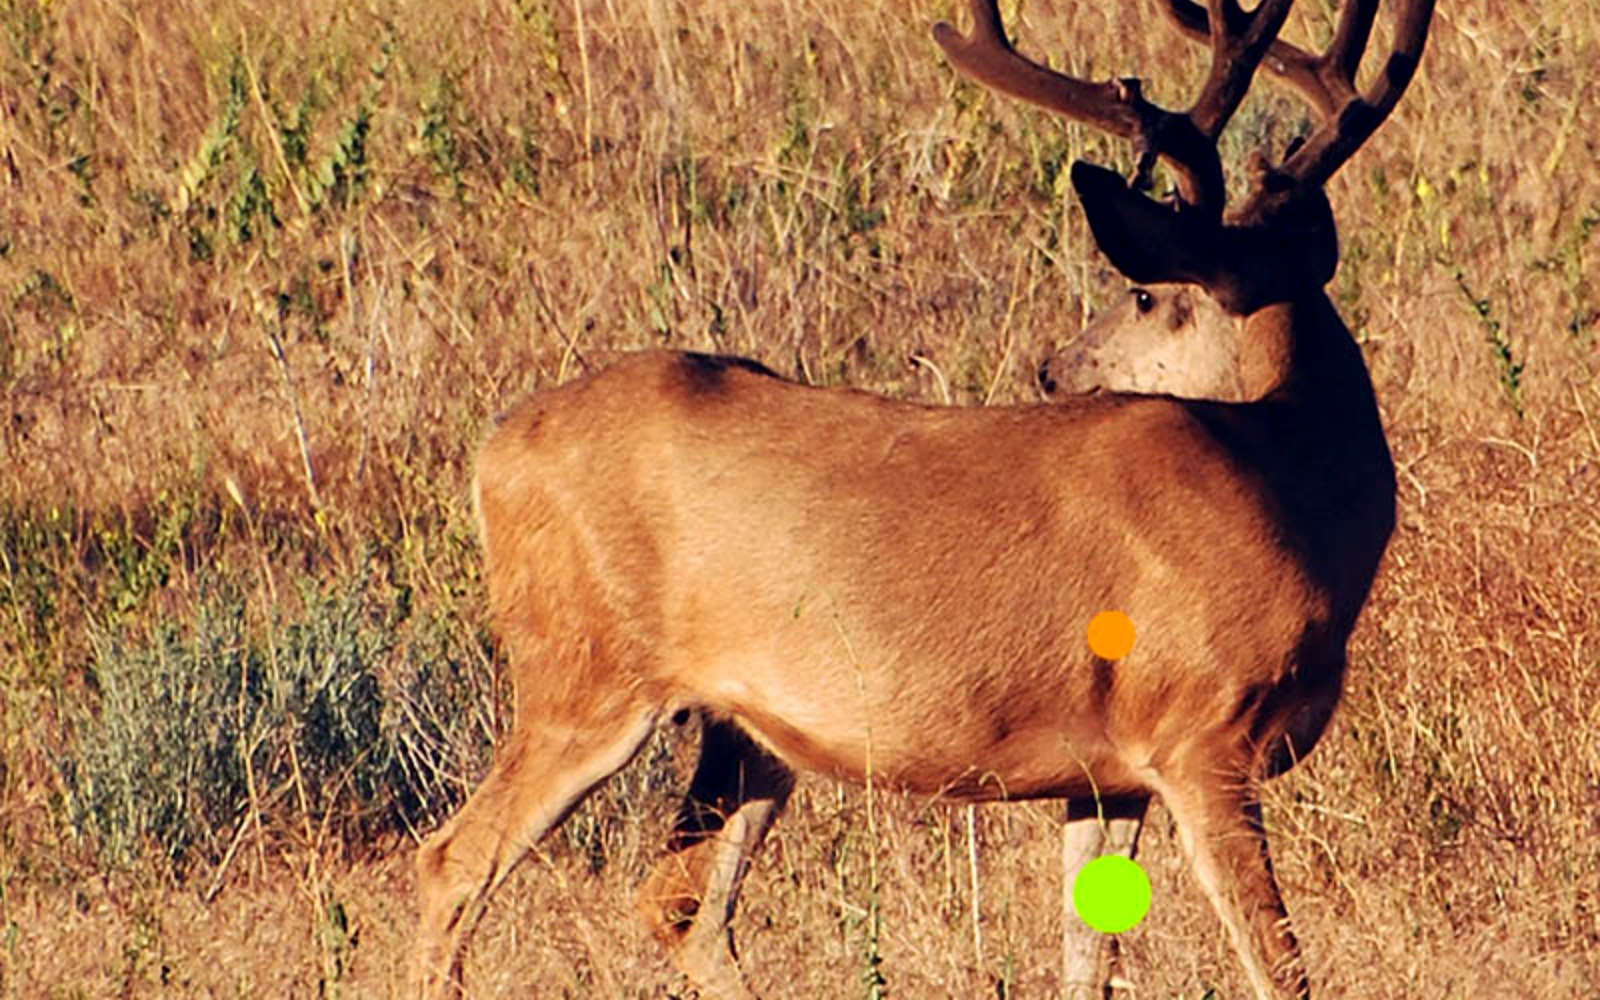
A mature mule buck has a chest cavity that measures about 18" high.
This is an effective way to improve your chance of a fatal shot on animals that are relatively close because it allows you to speed up the shot process and eliminate all of the extra movement that using a rangefinder would require. On a mature bull elk, it’s pretty easy to pick a spot – aim at the bottom edge of the chest directly below the vitals and you’ll impact 9”-15” up if you’re within your trick-pin range. That should put your arrow right in the boiler room and antlers on the wall of your trophy room.
For cows and smaller bulls, hold a couple of inches under the hairline.
Elk hunting in particular really lends itself well to using the technique because of their built-in aiming point and the fact that the majority of elk shots occur within range of the trick-pin system. Elk can be pretty unpredictable – sometimes they come in silently and in a totally different spot than you expect them, and other times they’re blowing your hat off and stampeding over the top of you. In close range situations like this, you’ll have a big advantage if you can forget about the range, focus on getting to full draw undetected, and executing the shot.
One thing that’s nice about the trick-pin system is that you can customize it however works best for you. I use a 12-inch hold under because a foot is pretty easy to judge and it works out that most of my hunting setups have about 15” of trajectory at 50 yards. This allows me to use my 50-yard pin and fits my +/- 3” window.
Now, if 12” doesn’t work for you, then experiment and aim 8, 10, or 14 inches low with your trick-pin until you find a combination of sight-in distance and hold-under that works best for your setup and the species you're after. Don’t be afraid to experiment with the marks on the test target to help you dial in the necessary hold-under and vital window. Just be sure to test the full range for your setup when you finish so you can verify the limits for your configuration.
Here's a shot that doesn't lend itself well to the trick pin.
Most mule deer shots for me happen at longer distances, but with a trick pin, you’ve got the short-range shots covered and you could theoretically shoot 15–90 yards with a 5-pin sight by setting a trick pin at “50-ish”, and pins at 60, 70, 80, and 90 yards.
More Info
It’s not a cure-all, never-miss tactic, and it does require practice and a little time to set up, but for archers using single-pin bow sights and for elk hunters, it can really simplify things at the moment of truth. With the trick-pin up your sleeve, you’ll be prepared to tackle the unexpected and you’ll be more efficient in pressure-packed, close-range encounters. Be sure to let us know if this trick helps you punch your tag next season!
A Word on Sights
I prefer multi-pin bow sights because they offer the most versatility for western hunting. I also really like moveable sights that can be set to the exact distance for longer shots. Trophy Taker’s new Option 6 sight is the best of both worlds. You have a full rack of fixed pins and a moveable pin for precise longer-range work. The two things that are unique about the Option sights is that the moveable pin can be isolated by swinging the fixed pins out of the way, which makes it easy to focus on the sight pin and there’s no chance of confusing it for a different pin. The other great feature is that the rest of the pins don’t move when you adjust the moveable pin. If you forget to return the pin to its spot, the other pins stay put, making it obvious the moveable pin is in the wrong place. No more missed shots when you forget to reset the sight (been there, done that). It’s precise and built to take a beating. It’s the best sight I’ve ever used,